Do you want to understand how does Wix work? To know about Wix editor and its customization using Wix ADI is very important when you are designing a website for your business. One smart sheep Welcome you to all-in-one guide to mastering the many facets of Wix.
This blog will kick off with a tutorial on the utilization of the Wix Editor. Following that, we'll delve into the procedure for uploading PDFs to Wix.
We'll also cover the process of integrating custom fonts into your Wix platform. Furthermore, we'll examine the method for implementing Google Analytics into your Wix site for efficient monitoring and tracking.
Afterwards, we'll walk you through integrating HTML into your Wix site. Additionally, my blog offers a guide on the application of Wix ADI.
In the event that your business is experiencing a downturn and the need to modify your website name arises, we'll also tackle the process of altering your website name.
Towards the end, our focus will shift to the registration of a domain and the procedure to link Google domains with Wix.
In essence, this blog offers a comprehensive, all-in-one solution to any challenges you may encounter during your customization journey.
How Does Wix Work: A Guide to Building and Customizing Your Website
Explore the potential of Wix to create engaging websites. Our guide covers essentials, from using the Wix Editor, adding fonts and Google Analytics, to employing the Wix ADI.
Learn how to incorporate PDFs, HTML, and columns into your design, change your template, register your domain name, and even rename your site.
We also demonstrate connecting a Google domain and generating a QR code for your Wix site. Let's master Wix together.
How to Use the Wix Editor
The Wix Editor is a key component in building a Wix Website. It's a powerful, user-friendly tool that allows complete design freedom.
You can drag and drop elements anywhere, customize layouts, and change styling to create unique, professional websites.
It's where you can add fonts, integrate Google Analytics, HTML code, or PDFs, enhancing your site's functionality.
The Wix Editor lets you alter templates or switch to Wix ADI for a different design experience. It's your one-stop solution for crafting a customized Wix Website.
What Things You Can Do Using Wix Editor
- Template Selection: You can choose from hundreds of designer-made templates for various industries, from e-commerce and restaurants to photography and more.

- Customization: Wix provides you with total design freedom. You can move things around, adjust the size of items, and change fonts, colors, and other design elements to suit your needs.
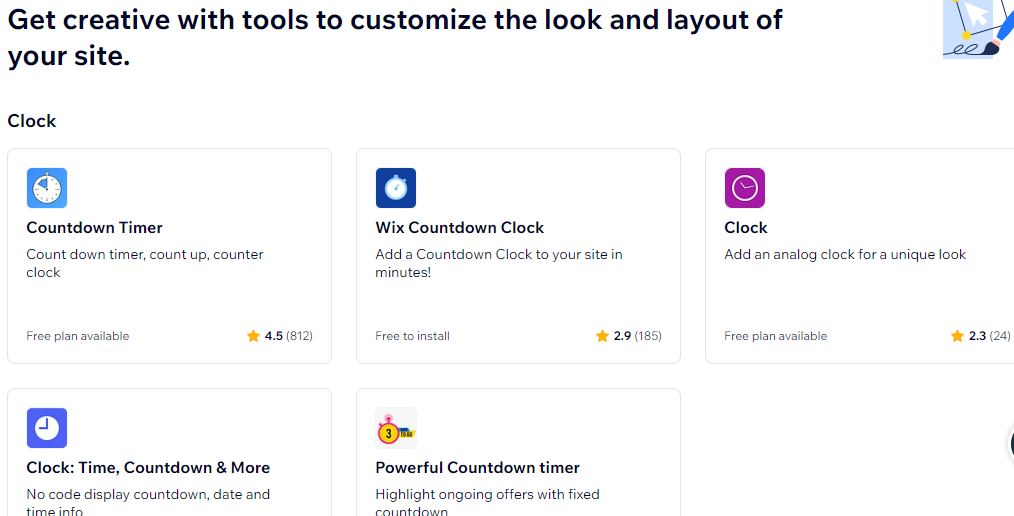
- Add Features: With Wix, you can add many functionalities to your website. You can add a blog, e-commerce capabilities, a booking system, photo galleries, social media buttons, forms, and many other features.
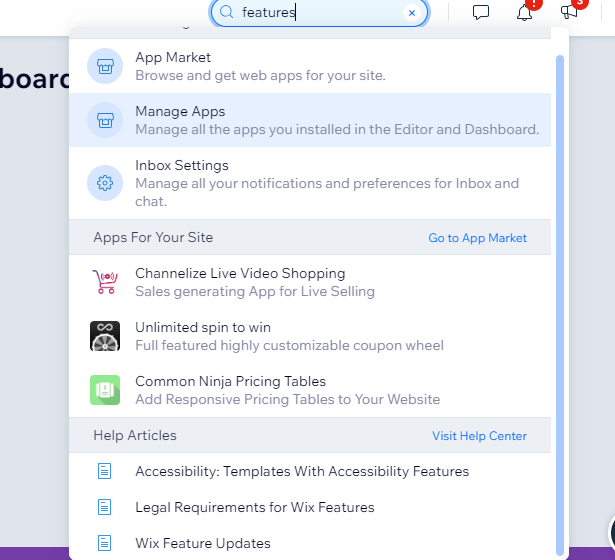
- SEO and Marketing Tools: Wix offers SEO tools to improve your website's search engine rankings. You can also set up email marketing campaigns and add social media feeds directly to your site.

- Wix App Market: You can integrate numerous third-party applications from the Wix App Market to extend the functionality of your website, like adding live chat, events calendar, and more.
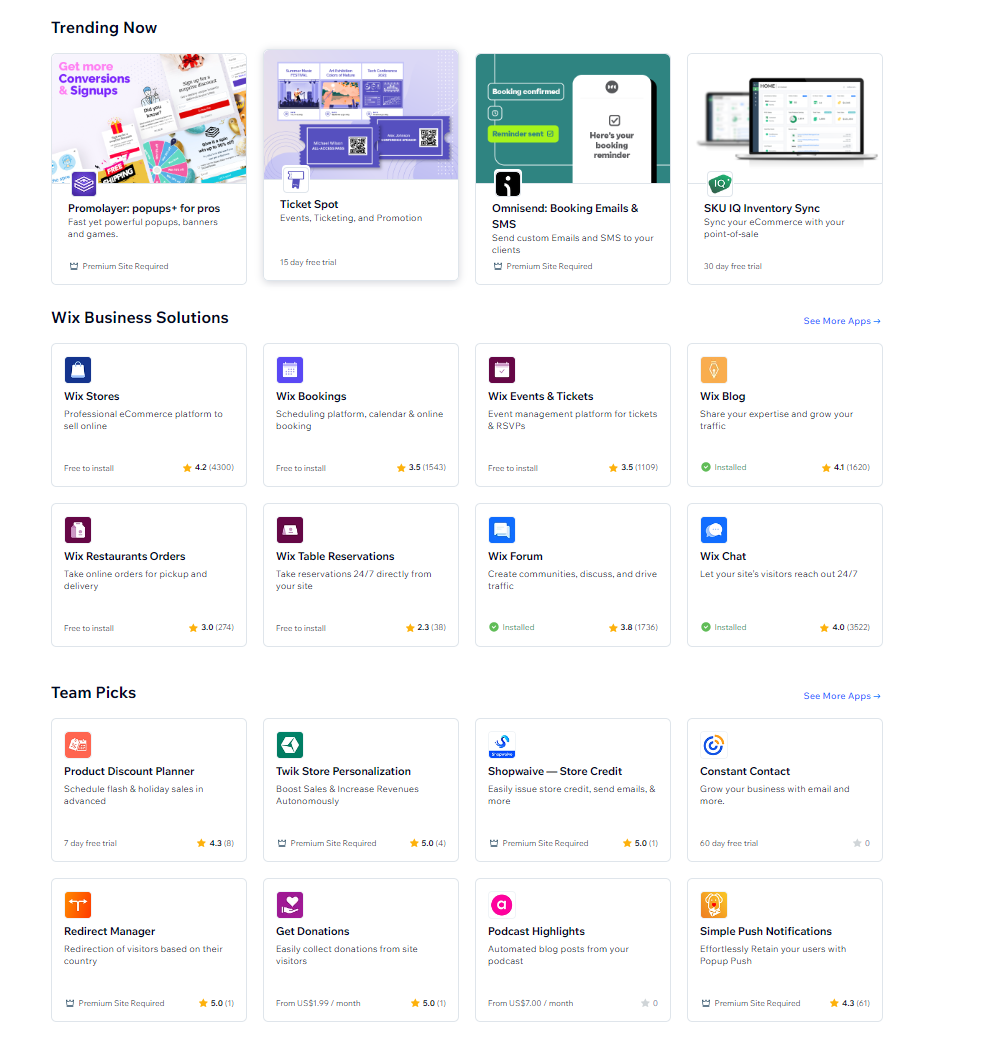
- Responsive Design: Wix allows you to optimize your website for mobile viewing, ensuring that your site looks good on all devices.
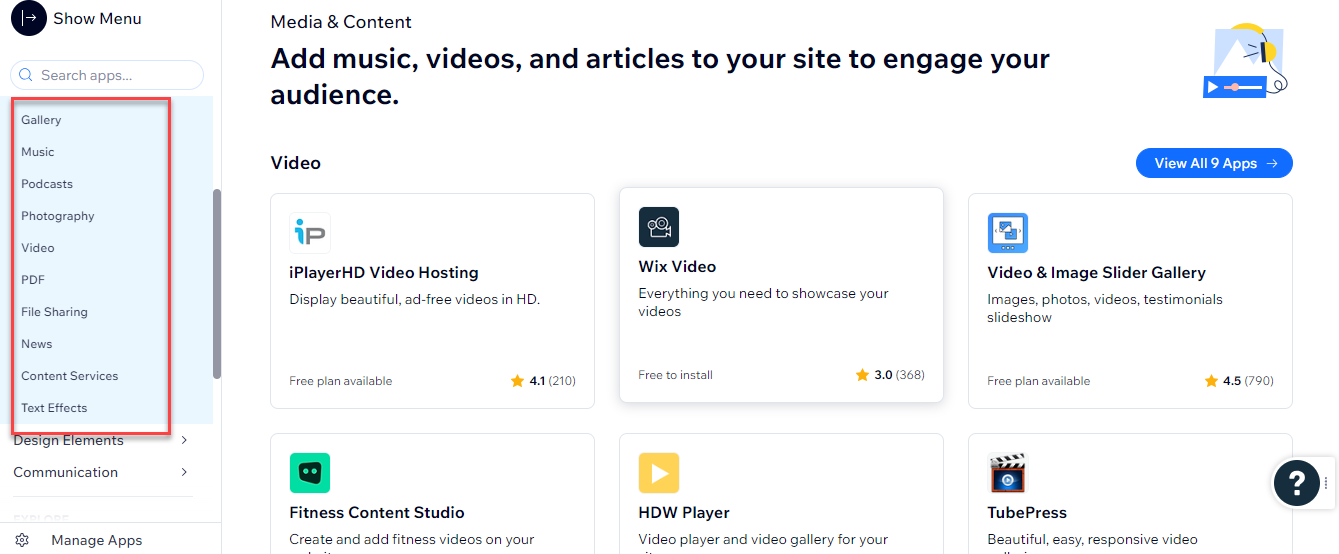
- Multimedia Content: Your website can include multimedia content such as images, videos, and audio. Wix also provides a large library of free images and videos for you to use.
- Drag-and-drop Interface: You can easily build your site using the drag-and-drop interface. You can add, remove, or reposition elements on your website with ease.
- Wix Code: If you have some coding knowledge, you can use Wix Code to create more complex, interactive sites.
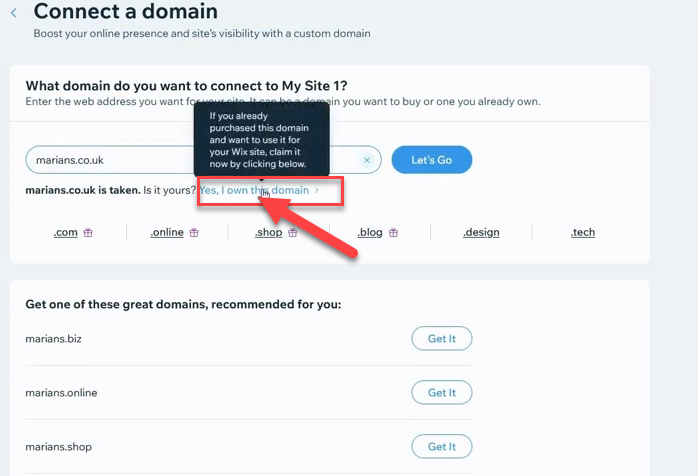
- Connect a Custom Domain: For a more professional appearance, you can connect it to a custom domain name.
- Online Store: Manage inventory, add payment methods, and handle shipping and taxes with Wix's ecommerce platform.

Adding a Unique Touch to Your Background with Images Using Wix Editor
Adding images to your website's background in Wix can enhance its visual appeal, provide a more engaging user experience, and make your website more memorable for visitors. Here's a simple guide on how you can do it:
- Select Page: In the Wix Editor, click on the 'Page' drop-down menu and select the page where you want to add a background image.
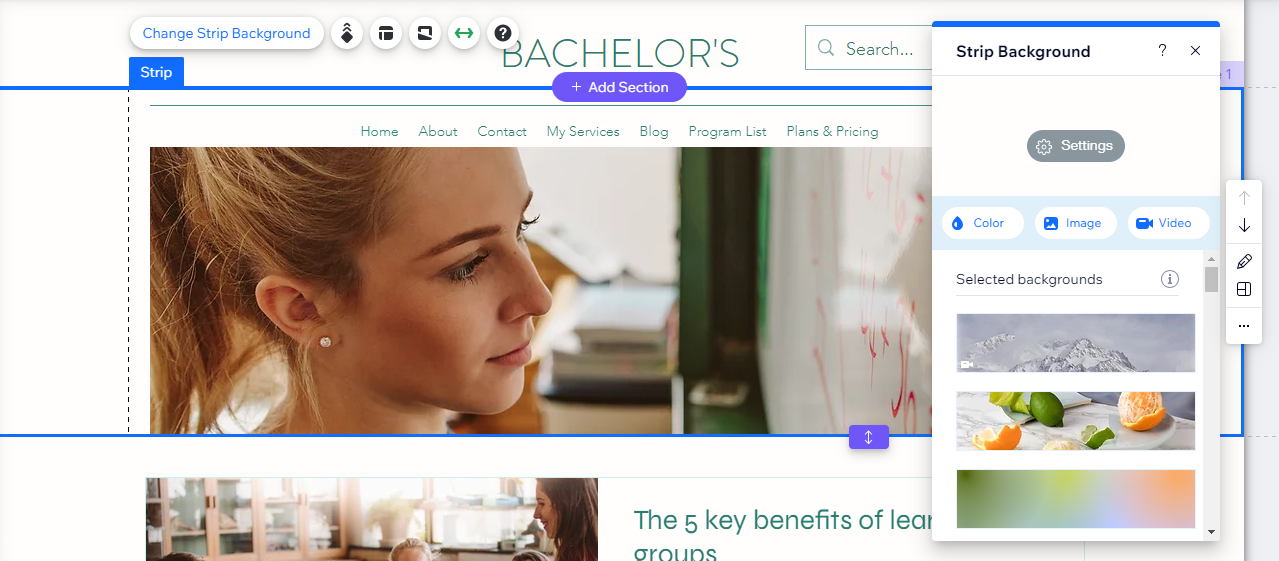
- Choose Background: Click on 'Background' on the left side of the editor.

- Add Image: A new panel will open. Click on the 'Image' option. Here you can choose to upload your own image or select from Wix's extensive image library.
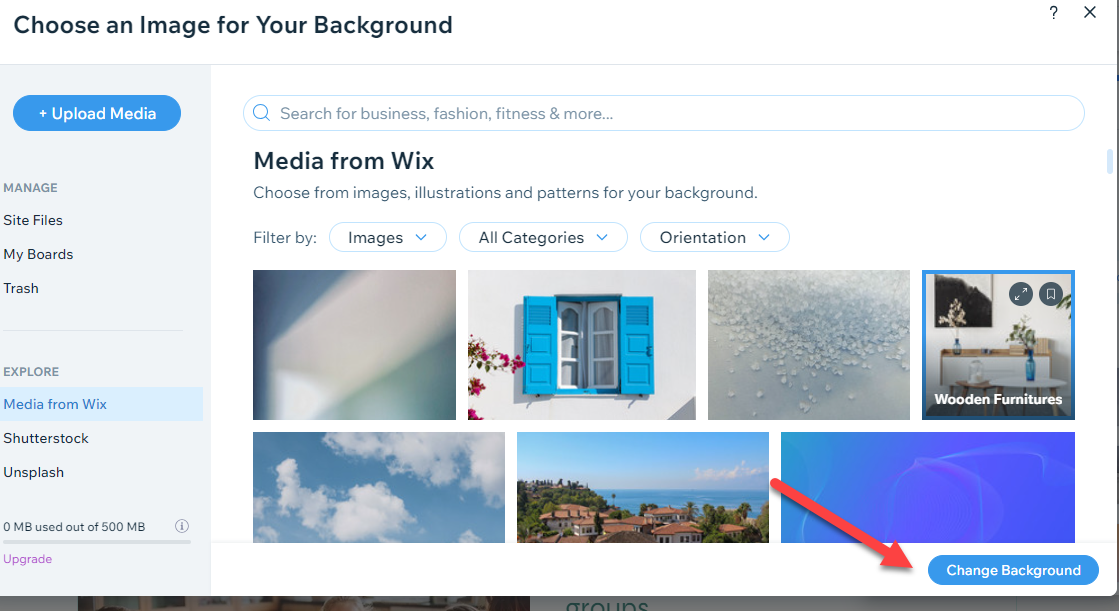
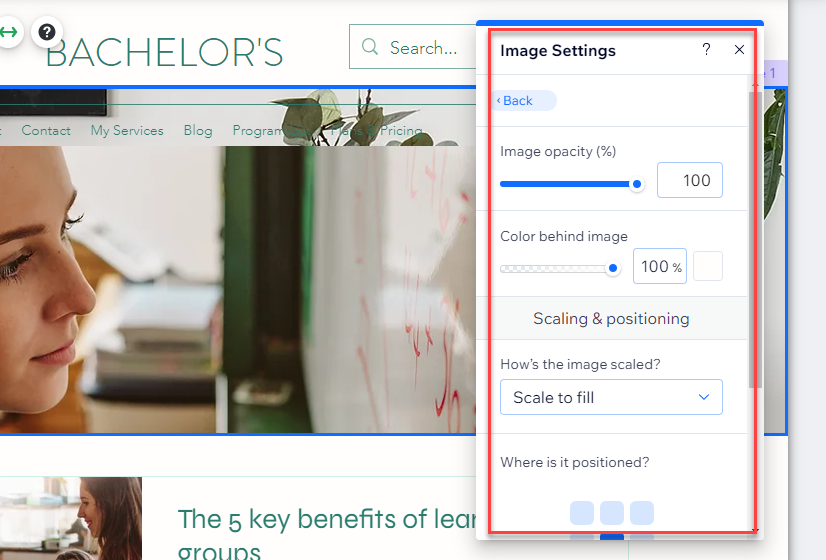
- Adjust Settings: Once you've chosen your image, you can adjust its settings. You can control the image's opacity, choose how it scales and aligns, and decide whether or not it scrolls with the page.
- Save: Once you're satisfied with how your background image looks, don't forget to click 'Save' to ensure your changes are applied.
Do you Want to Learn More?
If you're eager to delve into the functionality of the Wix Editor, we've got you covered. Our devoted team has put together a comprehensive blog filled with visual step-by-step instructions to help you master the Wix Editor.
Within this detailed guide, we discuss how to incorporate videos, utilize Wix apps, and even how add a blog using the Wix Editor. In essence, this blog can serve as your ultimate handbook if you aspire to become a Wix expert.
You can find all this valuable information in our blog titled "How Does Wix Work? Learn the Use of Wix Editor."
How to Add Fonts to Wix

Uploading a desired font to Wix can help maintain your brand consistency and enhance visual appeal. It allows you to match your website's typography with your brand's style, ensuring a unique, personalized user experience that aligns with your identity.
Steps to Follow For Uploading Fonts to Wix
- Step 1. Sign In to Wix Account
- Step 2. Click on the the ‘My Sites’
- Step 3. Click on the ‘Edit Site’
- Step 4. Click on the ‘Text Box’
- Step 5. Click on the ‘Edit Text’
- Step 6. Click on the ‘Fonts’
- Step 7. Click on the ‘Upload Fonts’
- Step 8. Upload File From the Computer
- Step 9. Confirmation of Uploading Font
For a visual guide on the process, you can follow the link "How to Upload Customize Font to Wix | (Visual Step by Step Guide)." It offers an illustrative learning experience for your convenience.
How to Add Google Analytics to Wix

Your website's performance can be monitored using Google Analytics. This data is crucial for understanding your audience better, tracking website traffic, user behavior, and the effectiveness of your marketing strategies.
It's an indispensable resource for businesses looking to scale and boost their online presence. Wix, a popular website builder, allows you to integrate Google Analytics seamlessly.
Steps to Follow for Adding Google Analytics
- Step 1. Create a Google Analytics Account
- Step 2. Add Google Analytics to Wix
- Step 3. How to Confirm the Google Analytics Connection to Wix
The steps mentioned above come with additional visual aids for a more comprehensive understanding. To delve deeper into each of these three stages, you're invited to refer to our guide.
Follow this link to access "Learn How to Add Google Analytics to Wix: Visual Step-By-Step Guide" for a more thorough exploration.
How to Use the Wix ADI
Wix ADI (Artificial Design Intelligence) is vital for website customization. It uses AI to create unique, professional-looking websites tailored to your specific needs, saving time while ensuring a high-quality, personalized user experience.

What Is the Role of Wix ADI
Wix ADI (Artificial Design Intelligence) plays a significant role in the Wix ecosystem. It's an innovative tool that uses artificial intelligence to help users build customized, professional, and visually pleasing websites effortlessly.
When you start creating a website with Wix ADI, it asks a series of questions about your business, preferences, and desired features. Using this information, Wix ADI generates a unique website for you in just a few minutes.
This tool is especially beneficial for those with limited time, technical skills, or design knowledge. Wix ADI ensures everyone, regardless of their experience, can create an aesthetically pleasing and fully functional website.
It automates the design process while still allowing for personalization, making website creation more accessible and convenient.
Learn More
- For those looking for a more visual aid, a comprehensive guide on "How to Make a WiX Website with ADI (Visual Step by Step Guide)" further simplifies the process.
How to Add PDF to Wix

Adding PDFs to your Wix site can greatly enhance user experience. PDFs provide a convenient way to share detailed information, such as product manuals, research papers, or comprehensive guides.
They maintain their formatting across devices, ensuring all users see the document as intended.
Additionally, PDFs can also be downloaded for offline reading, which adds to the convenience for your visitors. The quality of your content and the usefulness of your website will be improved as a result.
Steps to Follow For Adding PDF and Document Button to Wix
- Steps to Add PDF to Wix
- Step 1. Sign In to Wix.com
- Step 2. Click on My Sites
- Step 3. Click on Edit Site
- Step 4. Click on Media
- Step 5. Click the Upload Media icon
- Step 6. Choose your file(s) from your computer
- Steps: How to Add Document Button
- Step 1. Click Add Elements icon on the left side of the Editor
- Step 2. Click the ‘button’
- Step 3. Click a button under Document Buttons, or drag it the relevant location on your page
- Step 4. Select your document or click Upload Docs
- Step 5. Click Add to Page
Do you Want to Follow these Steps Visually?
If you want to go through these steps visually then you can visit this guide Learn How to Add PDF & Document Button to Wix (Step by Step Visual Guide) for a deeper understanding.
How to Add HTML to Wix

Adding HTML code to Wix enhances your website's functionality and personalization. You can embed widgets, videos, forms, or other third-party applications not natively supported by Wix.
It also allows for adding custom elements like animations or interactive features, improving your website's aesthetics and user engagement.
Moreover, it aids in SEO by adding structured data, which can boost your site's visibility in search engine results.
HTML integration thus brings both functional and aesthetic benefits.
Steps to Follow For Adding HTML to Wix
- Step 1: Sign In to Wix.com
- Step 2: Click on the ‘My Sites’
- Step 3: Click on the ‘Edit Site’
- Step 4: Click on ‘+’ Button
- Step 5: Click on ‘Embed Code’
- Step 6: Click on ‘+’ Embed HTML
- Step 7: Paste HTML Code and Click on ‘Apply’
Do You Want to See These Steps Visually?
We are committed to offering comprehensive assistance for any challenges you encounter while using Wix. For in-depth help on adding HTML to Wix, we invite you to follow our visual guide, "Learn How to Add HTML Code on Wix (Visual Step by Step Guide)."
This guide provides step-by-step instructions, complete with screenshots, ensuring a thorough understanding and resolution of any related issues.
How to Add Wix Columns
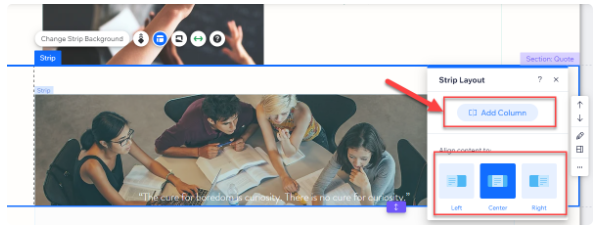
Adding columns to your Wix site improves its organization, readability, and visual appeal. Columns allow for a cleaner presentation of information, making it easier for visitors to navigate and absorb content.
They are especially useful in displaying parallel information, showcasing multiple products or services side by side, or dividing text and images effectively. Implementing columns can enhance the user experience and the overall design of your website.
Steps to Follow for Adding Columns to Wix
- Step 1: Click on the ‘Edit Site’
- Step 2. Click on ‘Add Section’
- Step 3. Click on Strip button
- Step 4. Click on Layout Option in Strip Bar
- Step 5. Click on Add Column option in Pop up
Do You Want to Follow these Steps Visually?
For a more thorough grasp of the process of adding columns to Wix, following the above five steps, complete with illustrative screenshots, can be immensely helpful.
To access this detailed guide, please visit "Elevate Your Wix Design: Learn How to Add Columns & Text in Wix."
How to Get a QR Code for Wix Website
Adding a QR code to your Wix site can offer enhanced interactivity and convenience for users. QR codes can quickly direct visitors to specific content, offer detailed information, or even facilitate transactions.
Through them, offline and online activities can be integrated, making it easy for smartphone users to engage with your site.
QR codes can also track user behavior, providing valuable data for your marketing efforts. Thus, they enrich your website's functionality and user engagement.
Steps to Follow for Adding QR Code to Wix
- Firstly Select Any of the Online QR Generator
- Secondly How to Upload QR Code to Wix
- Step 1. Login to Wix.com
- Step 2. Click on ‘My Sites’ at the Top of the Dashboard
- Step 3. Click on Edit Site
- Step 4. Click on the '+' New Element Button
- Step 5. Select 'Image’ from the Dashboard
- Step 6. Click on the 'Upload Image' Button
- Step 7. Click on the 'Add to Page'
Do You Want to Get Help from these Steps through Screenshot Guide?
We've prepared a guide to make adding a QR code to your Wix site easier. Our guide, "How To Get a QR Code for Wix Website (Visual Step by Step Guide)," uses pictures to show each step. Checking it out should help you understand the process better.
How to Register Domain Name to Wix
Registering a domain name with Wix enhances your online brand presence and professionalism.
A custom domain name is memorable, making it easier for visitors to find and return to your site. It also strengthens your branding, as the domain name often matches the business name.
Additionally, a custom domain can improve your website's SEO, increasing visibility on search engines.
Lastly, with Wix, domain registration is straightforward, and it comes with features like domain protection, improving your site's security.
Steps to Follow for Registering Domain Name
- Step 1: Choose a Reliable Domain Registrar
- Step 2: Check Domain Name Availability
- Step 3: Purchase and Register the Domain Name
- Step 4: Managing and Renewing Your Domain Name
Domain Registration Process with Different Registrars
- With Hostgator
- With Dreamhost
- With Bluehost
- With Siteground
Do You Want to Look Deeper Visually?
Want to learn how to register domain names with pictures showing each step? We've got a guide for that. It's easy to follow, and you'll find it really useful. Just click on "How to Successfully Register Your Domain Name (With Different Domain Registrars)" to get started.
How to Change Wix Website Name
Changing your Wix website name is often necessary for various reasons. As your brand evolves, the website name may need updating to better reflect your identity and enhance customer trust.
Additionally, a more explicit name provides clarity, enhancing the user experience. The website name can also impact your search engine optimization, where relevant keywords can attract more organic traffic.
If you're moving to a custom domain or your business is pivoting, a new name might be necessary to reflect these changes accurately.
Methods to Adopt For Changing Wix Website Name
- Method 1: How to Rename Your Site Through Wix Dashboard
- Method 2: Renaming Your Site Through the Wix Owner App
There are two primary methods to change your Wix website name: through the Wix Dashboard or the Wix Owner App. Both methods are user-friendly and straightforward.
The first method requires you to navigate to your Wix Dashboard. From here, you can locate the relevant settings and rename your website accordingly. This method is typically used when you're working on a computer and have direct access to your Wix account.
Alternatively, you can rename your website using the Wix Owner App. The mobile app lets you manage your site while on the go. To rename your website, find the appropriate settings in the app.
Do you Want to Visit These Methods Visually?
Both methods come with step-by-step guides that will walk you through the process. Decide which method is more suitable for you based on your access and convenience.
Follow the respective steps visually through our guide “How to Change Your Wix Website Name (Step by Step Guide)” to successfully change your Wix website name.
How to Connect Google Domain to Wix
Connecting a Google domain to your Wix site enhances your online branding and professionalism. A custom domain is easier for visitors to remember and find, enhancing the user experience.
It also reinforces your brand identity, as the domain name often aligns with your business name. Moreover, a custom domain can improve your website's SEO, boosting visibility in search engine results.
Lastly, Google Domains offers robust, reliable services, ensuring a stable online presence for your Wix site.
Steps to Follow for Connecting Google Domain to Wix
- Step 1. Sign In to Wix Account
- Step 2. Click on Settings
- Step 3. Click on the Website Settings
- Step 4. Click on the Site to Which You Need to Connect Domain
- Step 5. Click on the “Custom Domain”
- Step 6. Enter Here Purchased Domain and Click on Let’s go Button
- Step 7. Click on “Yes, I Own this Domain”
- Step 8. Click on Start Button
- Step 9. Click on I logged In button
- Step 10. Click on I found Nameserver
- Step 11. Copy Nameservers and Click on Change button on Your Domain Manage Page
- Step 12. Replace Nameservers and Click on Save button
- Step 13. Nameservers Changed Confirmation Message Arrive, Click on Close
- Step 14. Click on I have Replace my Nameservers
- Step 15. Domain is Connected Confirmation Message Arrive
Do You Want to Learn More About These Steps?
If you want a comprehensive guide on connecting Google Domains to Wix, you'll first need to purchase a domain from Google Domains.
Our guide, titled "How to Connect Google Domain to Wix | Visual Step by Step Guide," walks you through the process of buying a domain and then details how to add that domain to Wix. So, for a complete understanding of the process, please refer to this guide.
Wrapping Up
With Wix, users have access to a variety of tools and functionalities to create and customize unique, dynamic websites.
We have demonstrated the versatility of the Wix Editor, the method of integrating various elements such as fonts and PDFs, and the procedure to link your website with Google Analytics to monitor performance.
In addition, we delved into the methods of adding a distinct touch to your site background, connecting a custom domain, and generating a QR code for your Wix website.
Specifically, we have detailed two primary methods for changing the name of your Wix website: via the Wix Dashboard or the Wix Owner App. Both routes are user-friendly, and we provide step-by-step visual guides for further clarity.
To enhance your website's branding, SEO, and user experience, we have also outlined the process of connecting a Google domain to your Wix website.
This involves a sequence of steps, from signing into your Wix account to receiving a confirmation message on the successful connection of your domain.
By utilizing the extensive capabilities of Wix and following our comprehensive guides, you can establish a highly personalized web presence that optimizes user experience, increases visibility, and exudes professionalism.
FAQs
What is the disadvantage of Wix?
The primary disadvantage of Wix is its limited flexibility for advanced customization and functionality. Users who require sophisticated website features may find Wix's drag-and-drop interface restrictive. Another notable drawback is that switching templates after your site goes live is not straightforward, requiring you to re-insert your content. Lastly, Wix websites can suffer from slower loading times compared to those built with optimized custom coding, which might affect user experience and SEO rankings.
What is Wix and how it works?
Wix is a cloud-based web development platform that allows users to create and design websites through a user-friendly drag-and-drop interface. It offers a wide range of templates and customization options, enabling users to design their sites without needing to code. Wix operates on a freemium business model, providing a basic website building service for free, with additional premium features available for a fee. These premium services include domain name registration, removal of Wix ads, extra bandwidth, and storage, as well as e-commerce capabilities. Wix is designed to be accessible to users of all skill levels, from beginners to experienced web designers.
Is Wix actually free?
Yes, Wix offers a free version that allows users to create and publish a website without any cost. The free plan includes access to Wix's website builder, a range of templates, and basic hosting services. However, the free version comes with limitations, such as the inclusion of Wix advertisements on your site, a Wix-branded domain name (e.g., username.wixsite.com/siteaddress), and limited storage and bandwidth. For users seeking a professional web presence without Wix branding and with access to advanced features, Wix offers various premium plans that cater to different needs and budgets.
Is Wix good for beginners?
Absolutely, Wix is an excellent choice for beginners who wish to create a website without delving into the complexities of coding. Its intuitive drag-and-drop interface makes it simple for users to design and customize their websites. Wix provides a wide selection of templates tailored to different industries and purposes, making it easy for anyone to find a design that suits their needs. Additionally, Wix offers a range of tutorials and support options to help users navigate the process of building and managing their websites. Its ease of use, combined with the ability to create a visually appealing and functional website with minimal effort, makes Wix a popular option for beginners.


.svg)