


Are you ready to supercharge your WordPress site's SEO? If so, buckle up because you're about to embark on a journey from beginner to pro in just 19 steps.
This comprehensive guide will navigate you through everything from choosing a reputable WordPress hosting provider to designing an easy-to-navigate menu. Along the way, you'll delve into the nitty-gritty of SEO-optimized permalinks, SSL certificates, and SEO plugin adjustments.
You'll learn to write snappy title tags, meaningful image alt texts, and compelling meta descriptions. Plus, we'll demystify keyword research, content creation, URL optimization, and site layout strategy.
There's a lot to learn, but by the end, you'll be an undeniable master of WordPress SEO. Let's get started.
Step 1: Choose a Reputable WordPress Hosting Provider
Selecting a quality WordPress hosting provider is vital for your website's performance and success. The right provider ensures optimal site speed, high uptime, robust security, and superior customer support.
When picking a hosting provider, it's crucial to consider several factors to ensure it meets your needs. Here are some important aspects to consider:
- Uptime Guarantee: Your website should be accessible to visitors at all times. Therefore, you should look for a hosting provider that offers a high uptime guarantee (99.9% or more).
- Speed: The speed of your website directly affects user experience and SEO. Look for providers that offer good load times and have a solid infrastructure, including the latest technology and hardware.
- Security Features: The hosting provider should offer robust security measures, including firewalls, SSL certificates, DDoS protection, and regular website backups.
- Customer Support: Prompt and effective customer service is essential. Ideally, the hosting provider should offer 24/7 support through various channels like chat, email, and phone.
- Scalability: As your website grows, you'll need more resources. Therefore, it's important that your hosting provider offers plans that are scalable and can accommodate your site's growth.
- Price: While it's tempting to choose the cheapest hosting available, remember that you often get what you pay for. Weigh the cost against the features and services provided.
- Server Location: The physical location of your server can affect your site's speed, especially for visitors in a specific geographical area. If your audience is primarily in a particular location, consider choosing a server in or near that location.
- Control Panel Interface: A user-friendly interface is key for managing your hosting settings. Popular control panels like cPanel or Plesk are generally easy to navigate, even for beginners.
- Reviews and Reputation: Get an idea of the provider's reliability and performance by checking reviews and ratings.
- Extras: Look for any extra features that may benefit you, such as a free domain name, multiple email accounts, marketing credits, or the ability to host multiple domains.
When embarking on your WordPress journey, one of the key decisions you'll make is selecting a hosting provider. WordPress itself highly recommends a few providers, namely Bluehost, SiteGround, and DreamHost.
These three providers have garnered strong reputations within the WordPress community for their outstanding services.
Bluehost, SiteGround, and DreamHost are considered among the top hosting providers for WordPress due to their excellent performance, extensive features, and strong support for WordPress users.

They offer robust hosting solutions that cater to a wide variety of needs, ranging from beginners launching their first blog to established businesses requiring advanced capabilities.
However, the best choice depends on your individual needs and circumstances. Making a decision requires consideration of your website's requirements, your technical knowledge, and your budget.
Step 2: Confirm Your Website's Indexability Status
To start with, sign into your WordPress site's administrative area. Once there, navigate to your dashboard and seek out the "Settings" option.
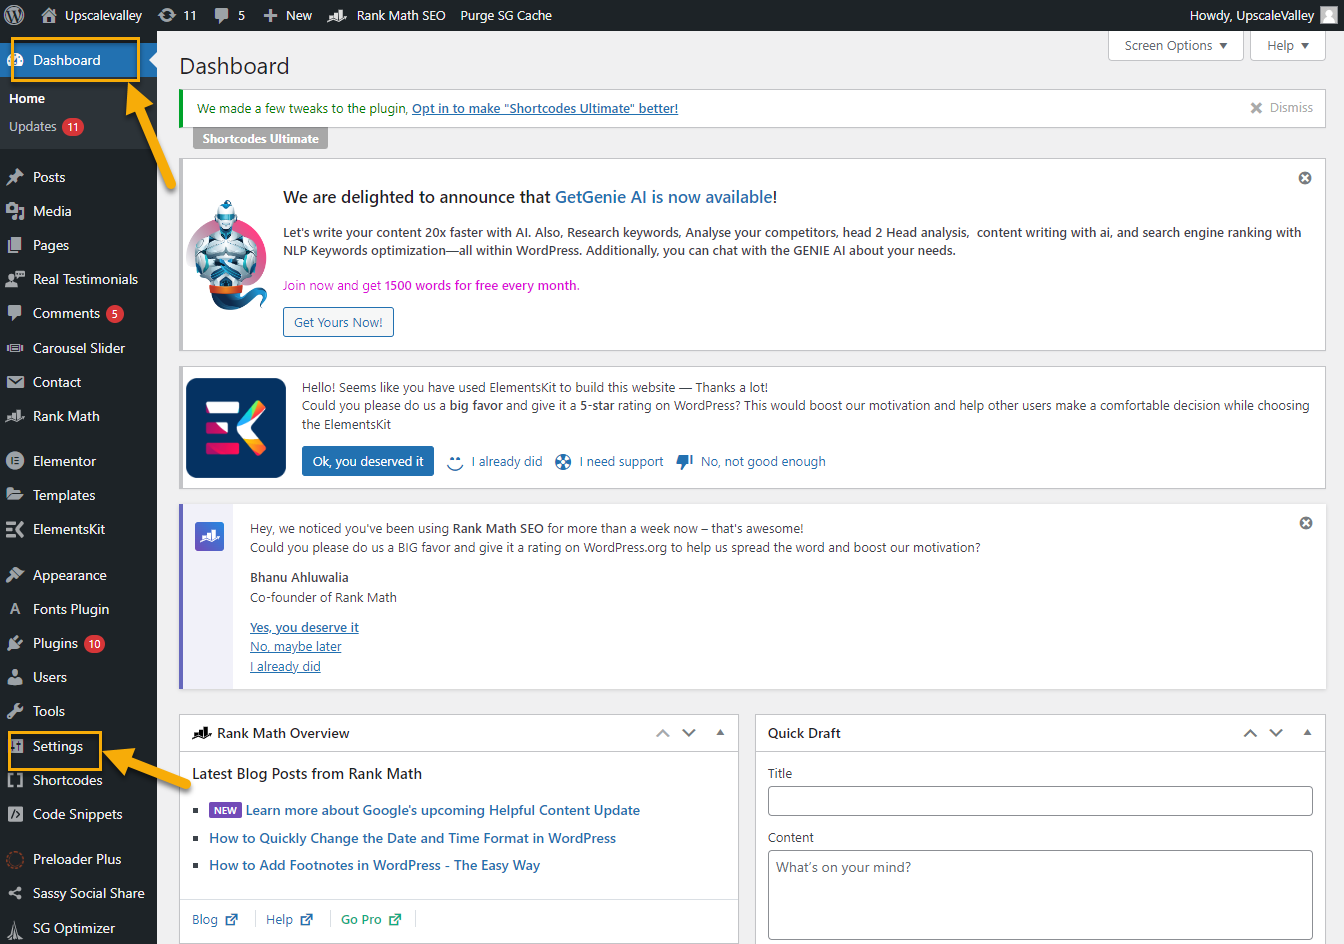
Upon clicking the "Settings" option on your dashboard, a menu will appear with various options such as General, Writing, Discussion, and Reading. To assess your website's indexability, go ahead and select the "Reading" option.

In this section, you'll notice a checkbox labeled "Search engine visibility". Ensure that this box is not checked. For optimal search engine visibility, it should remain unchecked or empty.
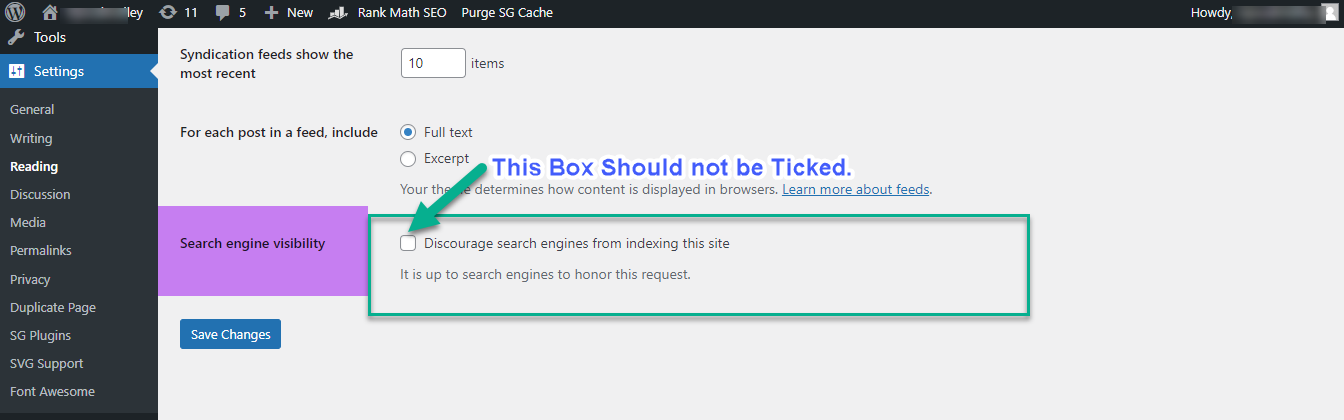
Note: Should your website be undergoing development, you are welcome to tick the appropriate box. However, it's crucial to remember to deselect this option in the subsequent phase.
Step 3: Pick a WordPress Theme That Aligns with SEO Guidelines
When you're ready to dive into theme customization for your site, remember that an ideal theme should be lightweight and quick to load. WordPress's official theme library boasts thousands of options to suit various styles.
If you've opted for a Premium WordPress plan, you'll have access to even more theme choices compared to the standard plan. So, make sure to pick a theme that is not only consistent with your brand but also increases its performance.
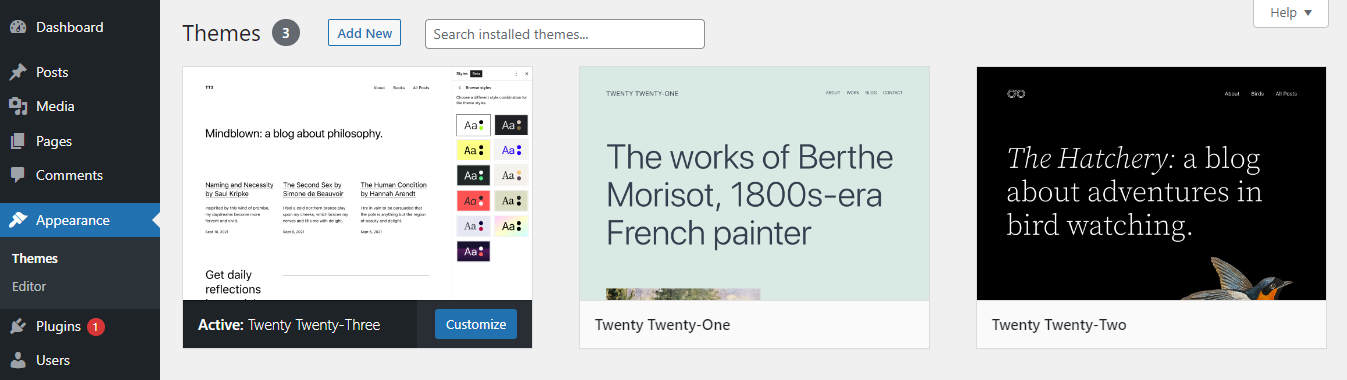
To tailor the theme to your website's needs, head over to your Dashboard and click on the "Appearance" tab. A pop-up menu will appear with various options, such as Theme Customization, Widgets, and Menus. Select the "Themes" option, and you'll be directed to a library filled with different themes.
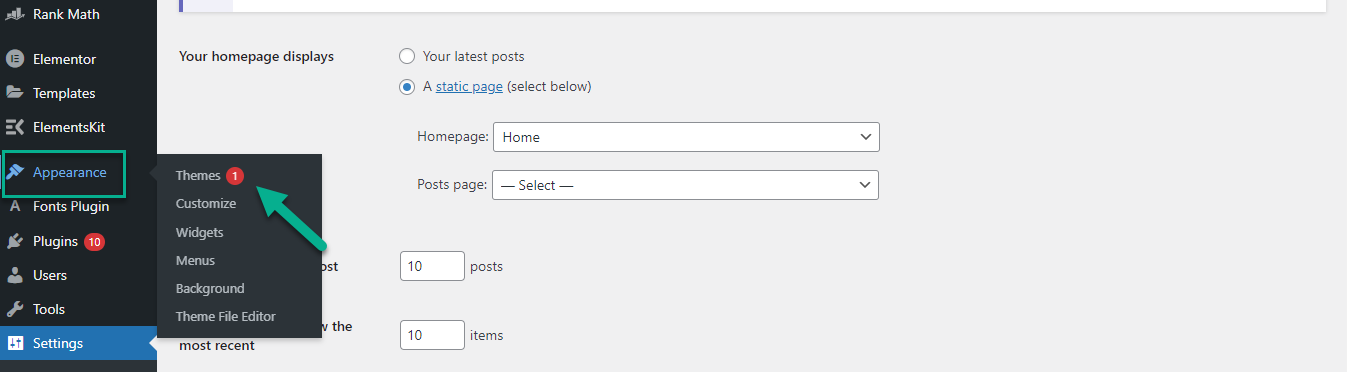
Here, you can choose the one that best theme suits your preferences.
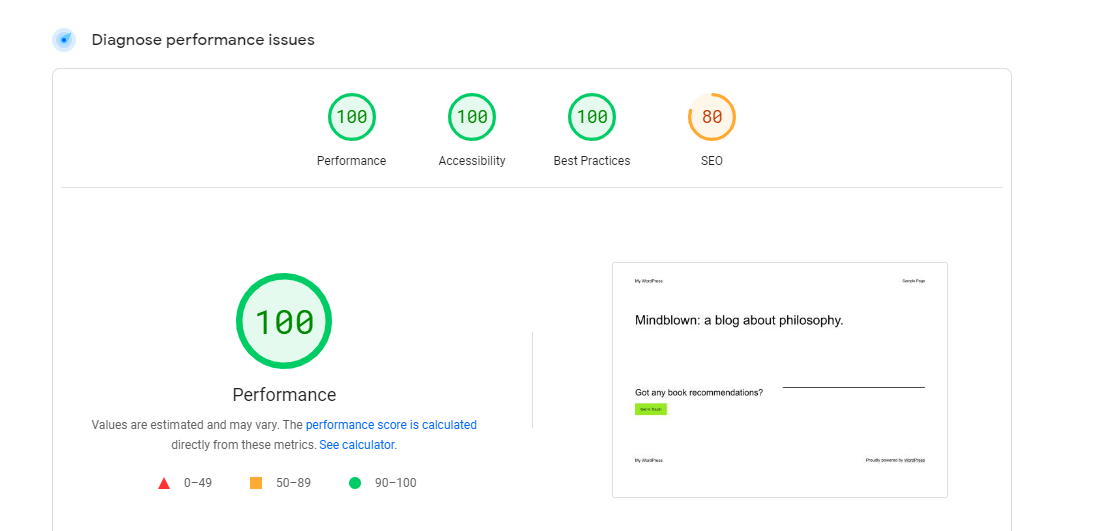
The ideal theme selection relies heavily on performance tests. Begin by exploring the demo websites available on the official WordPress website. To assess the theme's performance, simply copy the URL and paste it into Google PageSpeed Insights.
If the test yields a score of 100 or even above 90, it's safe to say that the theme you've chosen is lightweight and optimized for speed.
Have a look at our site performance results below,
Note: While WordPress provides a native editing tool known as Gutenberg, a significant portion of its user base tends to favor external page constructors such as Elementor, Beaver Builder, and Divi. This preference is driven by the additional functionalities and customization options these third-party platforms offer.

Step 4: Turn on SEO-Optimized Permalinks
Turning on SEO-optimized permalinks on your WordPress site is a crucial step to enhancing your site's SEO. The permalink or the URL structure of your web pages should be easily understandable both by humans and search engines.
The "Post name" structure is widely considered the best permalink format for this purpose. In the "Post name" format, WordPress uses the title of your post to create the URL, making it clean, straightforward, and descriptive.
For instance, if your post title is "From Beginner to Pro: 28 Steps to Mastering WordPress SEO," the URL will be "www.yourwebsite.com/from-beginner-to-Pro-28-steps-to-Mastering-wordpress-seo."
This format is not just user-friendly but also SEO-friendly. To enable this format on your WordPress site, navigate to your WordPress dashboard, go to "Settings," and then "Permalinks."
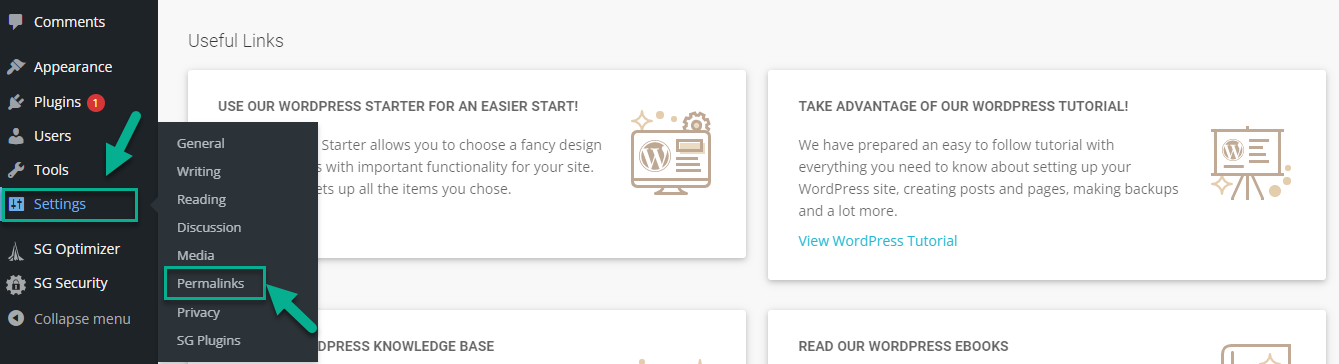
Select "Post name" under the "Common Settings" section, and don't forget to save the changes. This way, you're ensuring that all your website's URLs are optimized for SEO, thereby increasing the visibility of your site in search engine results.

Note: Changing the URL may lead you to 404 Error. To fix this problem you can redirect all old URLs.
Step 5: Set Up a Secure Connection Using an SSL Certificate
Web browsers and servers establish encrypted connections using SSL, or Secure Sockets Layer. Data exchanged online remains confidential and integral because it is kept private and integral between the server and browser.
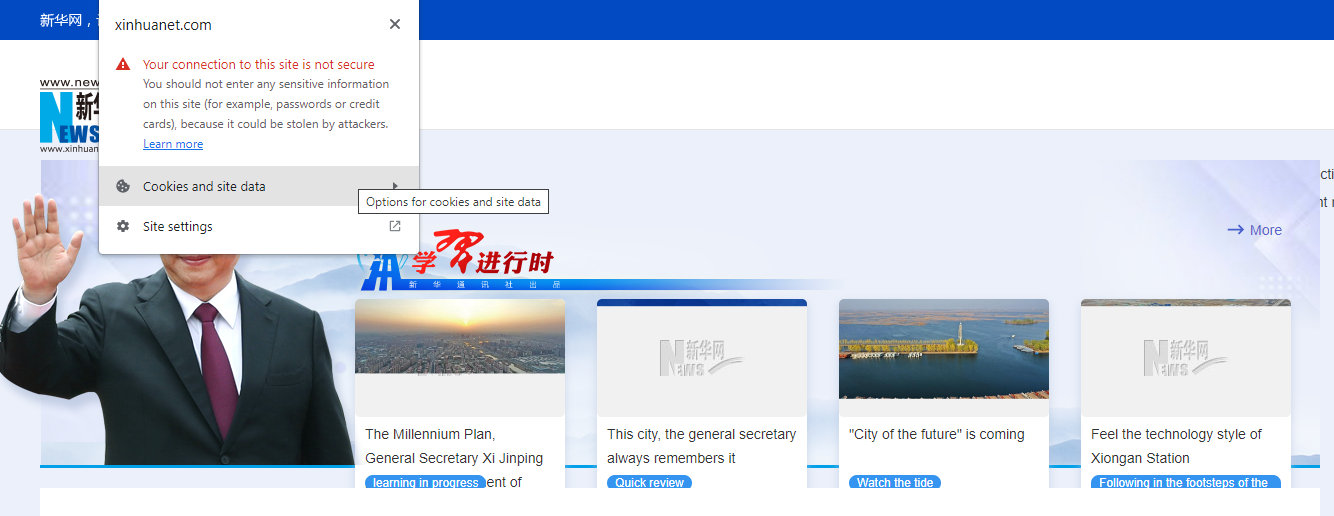
In the digital age, data security is of utmost importance. When a user visits a website and shares information like login credentials, credit card details, or personal data, this information is at risk if the connection is “Not Secure”. SSL encryption prevents hackers from intercepting and misusing this data.
Setting up a secure connection involves obtaining and installing an SSL certificate on your website. Here's a general outline of the steps:
- Login to your Hosting Provider Admin Panel:
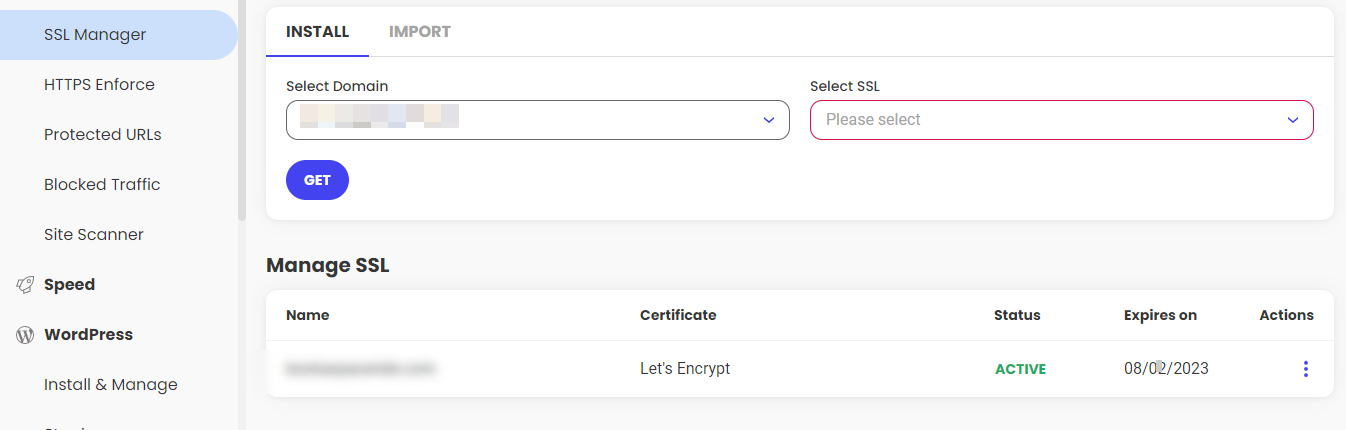
- Click on “Security” Option: Once you login to the hosting admin panel you will find in the dashboard the Security” option. Click on the “SSL Manager”. Mostly this certificate is offered by hosting providers free of cost.
Here is our Site on SitGround web hosting admin panel
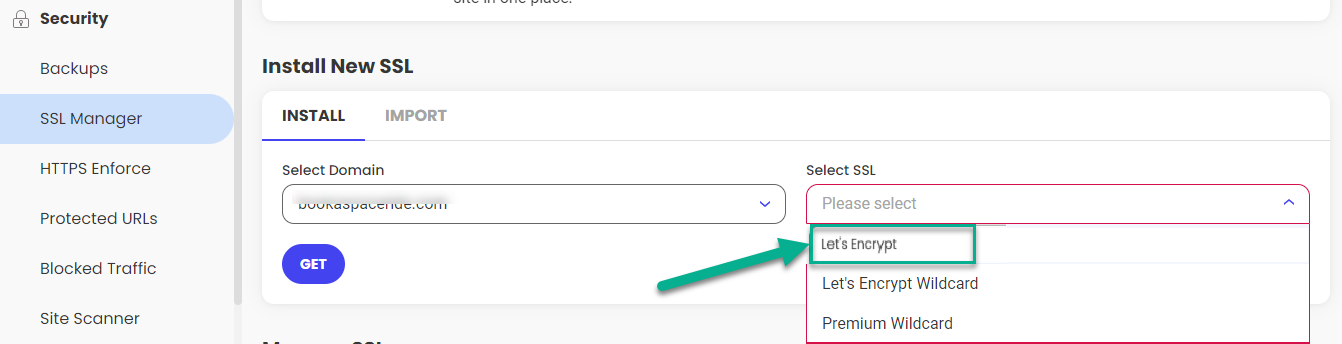
- Install the Certificate: Once the CA has validated your details and issued the SSL certificate, you can install it on your server. The exact process varies depending on the hosting service and server type.
- Update Your Website to Use HTTPS: After installing the SSL certificate, make sure your website uses HTTPS (the secure version of HTTP) by default. You might need to update some settings and links for this.
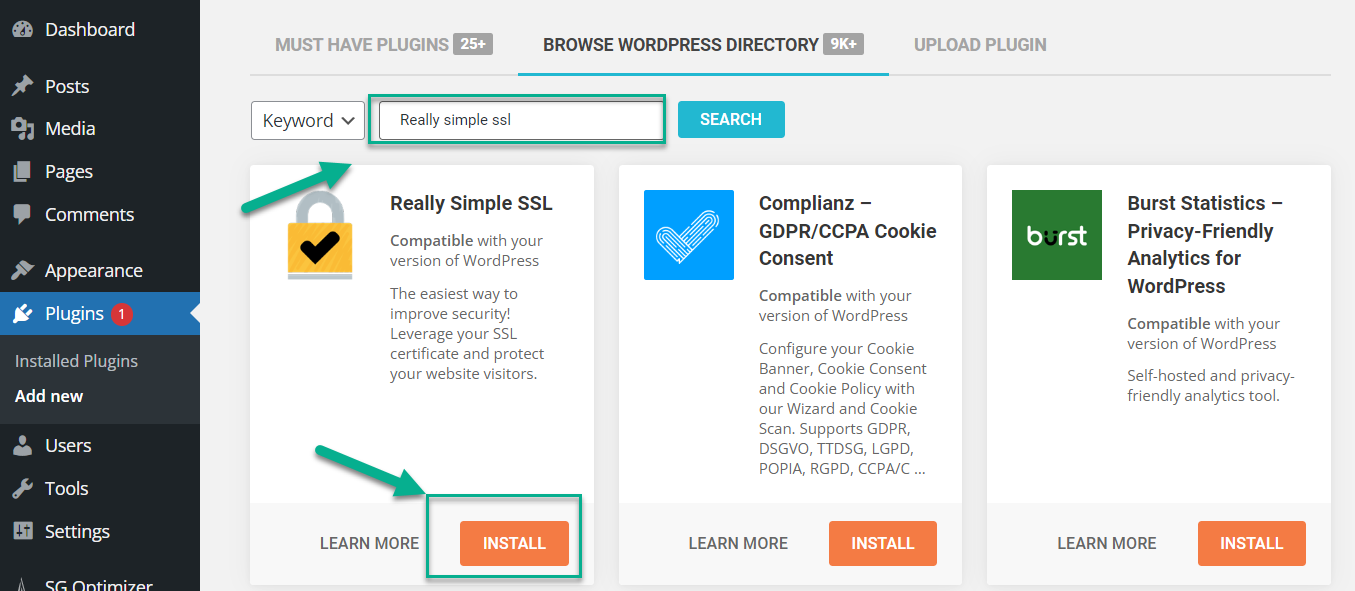
- Check SSL Certificate Reorganization: For this purpose , firstly go to the “Plugins” in the dashboard and then click on “Add New “.
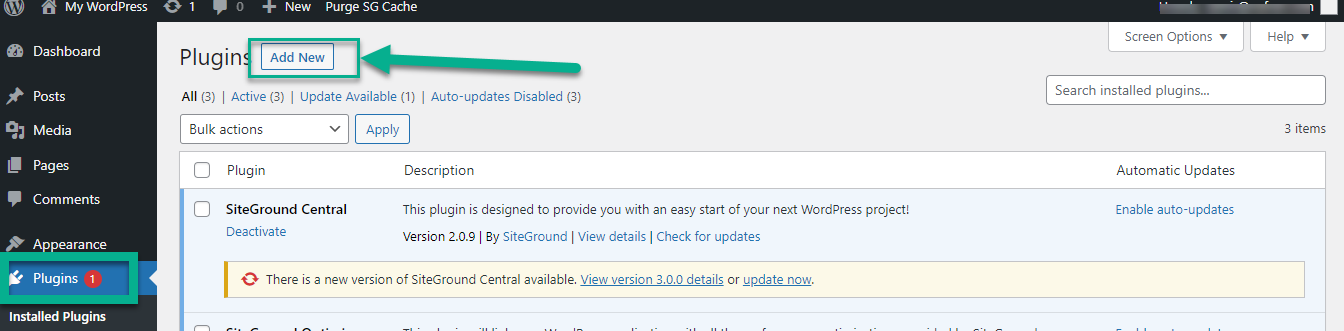
Now search for “Really Simple SSL” plugin. Then you can click on the “INSTALL” and follow the steps to activate it.
Step 6: Select Your Desired Website Address Structure
It's time to pay attention to the structure of your website's address. You see, Google perceives URLs starting with 'www' and those without it as two separate entities. This could potentially lead to a problem of content duplication, which is something you definitely want to avoid.
Now, you might be wondering, "Which one should I choose?" Well, based on what we've learned so far, it appears that 'www' URLs are generally given a higher preference in search rankings.
This doesn't mean that non-www URLs are bad, but if you're looking to give your site the best chance at being noticed, a 'www' format might just be the way to go. Therefore, selecting this format for your site's address could prove to be a beneficial decision.
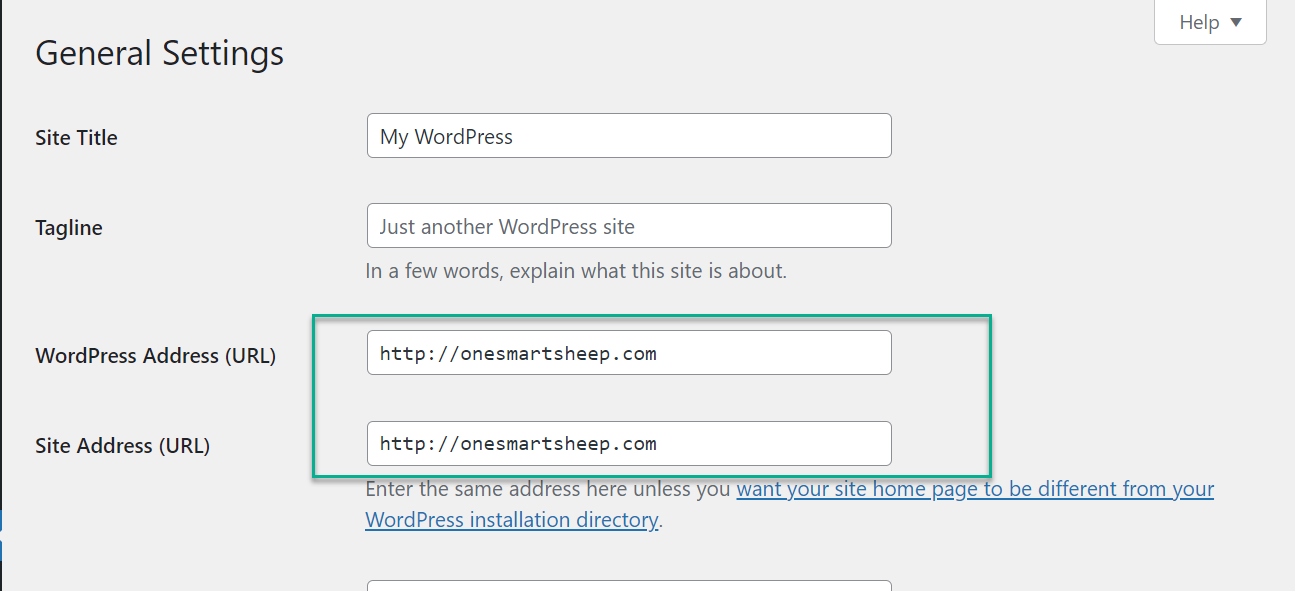
If you want to set up your site address? You have to go to “Setting” and then click on the “General”.

Now, you need to write in your desired format both in “ WordPress Address” and “Site Address.”
Step 7: Install and Adjust a WordPress SEO Plugin
Absolutely, there are several effective SEO plugins for WordPress that are available for free. These plugins can help optimize your website, making it more attractive to search engines and helping to improve your site's ranking. Here are a few of the most popular free SEO plugins:
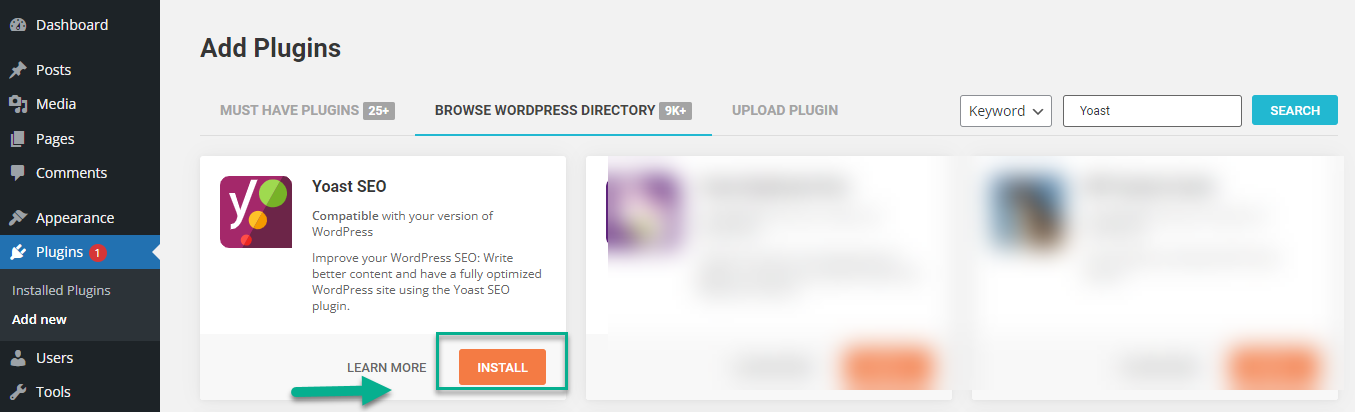
- Yoast SEO: This is arguably the most popular SEO plugin for WordPress and for good reason. Yoast SEO offers a comprehensive solution for SEO, including keyword optimization, XML sitemap creation, readability checks, and more. The free version is packed with features, making it a great choice for small businesses and bloggers.
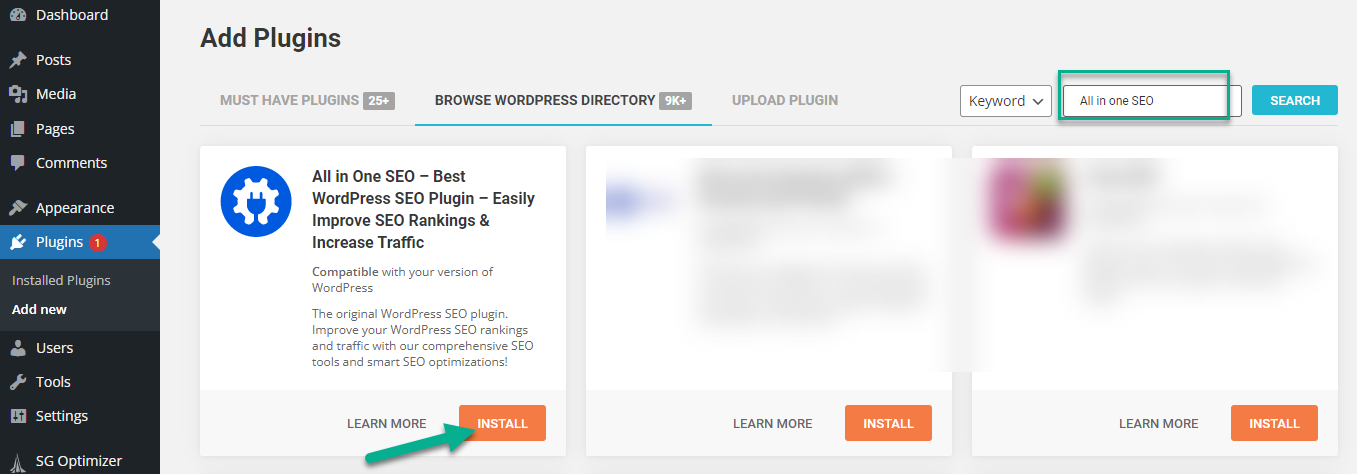
- All-in-One SEO (AIOSEO): As the name suggests, AIOSEO is a comprehensive SEO plugin that covers all your SEO needs. It includes features like smart XML sitemaps, SEO audit checklists, and WooCommerce SEO for eCommerce sites. It's easy to use and beginner-friendly, making it a good choice for those new to SEO.
- Rank Math: Rank Math is another comprehensive SEO plugin that helps you optimize your website for search engines and social media. It comes with a setup wizard that makes it easy to use, even for beginners. It offers features like Google Schema Markup, keyword ranking tracking, and Google Search Console integration.

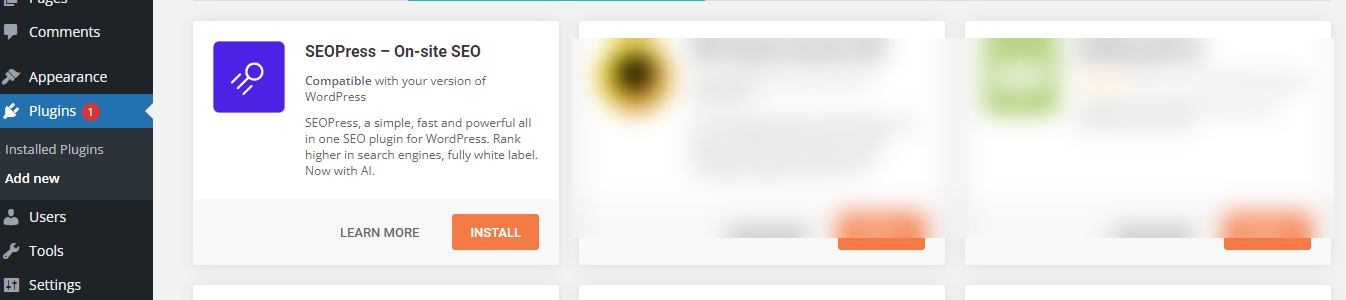
- SEOPress: SEOPress is a simple, fast, and powerful SEO plugin for WordPress. It includes features like title and meta optimization, XML sitemaps, and HTML and XML sitemaps. The free version provides all the basics you need for SEO, with a premium version available for more advanced features.
- The SEO Framework: This is an ideal choice for those who want a lightweight, fast, and reliable SEO plugin. The SEO Framework provides automatic critical SEO enhancements without any advertising, making your SEO efforts more efficient.

Step 8: Avoid Indexing Pages That Lack Importance
Search engines like Google have a finite amount of resources they use to crawl and index the vast amount of content on the internet.
When your site contains a lot of pages that aren't significant or valuable in terms of SEO such as admin pages, test pages, or duplicate content - it can lead to inefficient use of those resources.
This means that your more important pages might not get crawled and indexed as frequently or as quickly as you'd like.
Also, having many low-quality or irrelevant pages indexed could dilute your site's overall relevancy and authority, which can negatively impact your SEO.
How to Avoid Indexing Unimportant Pages?
There are several ways to prevent search engines from indexing pages that lack importance:
- Robots.txt File: You can use the robots.txt file to tell search engines not to crawl certain pages. However, this doesn't always prevent them from being indexed if they're linked to other sites.
- Meta Robots Tag: A more secure way to prevent indexing is to use the meta robots tag with the 'noindex' directive on the pages you don't want to be indexed. This tag tells search engines not to include the page in their index.
- Password Protection: If a page is password protected, search engines won't be able to crawl or index it.
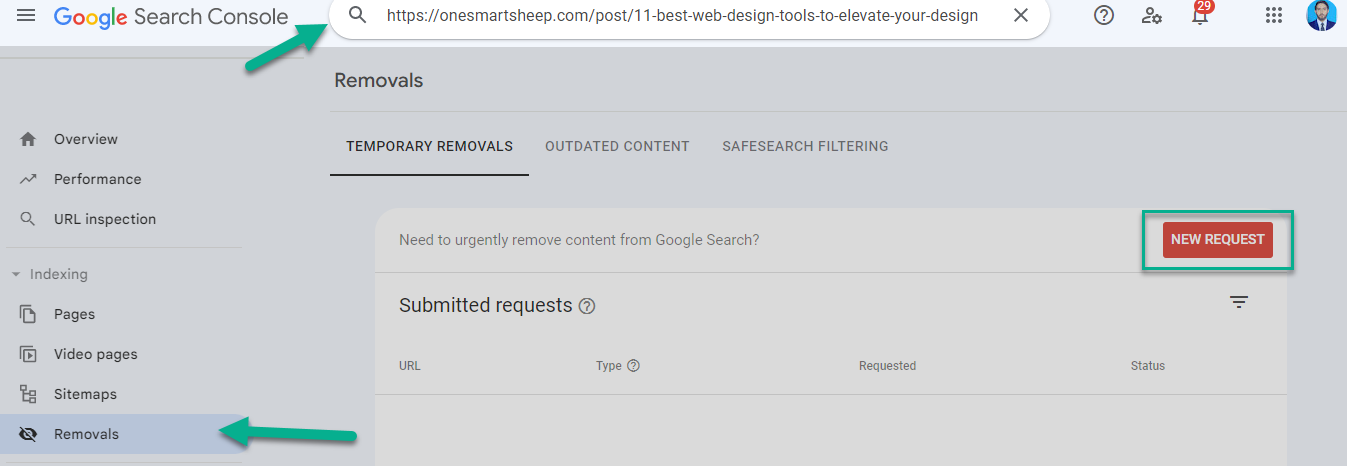
- Google Search Console: You can use the Removals tool in Google Search Console to request removal of a URL from Google's index. This is useful for pages that were indexed, but you now want to be removed.
Step 9: Submit Your Sitemap to Google Search Console
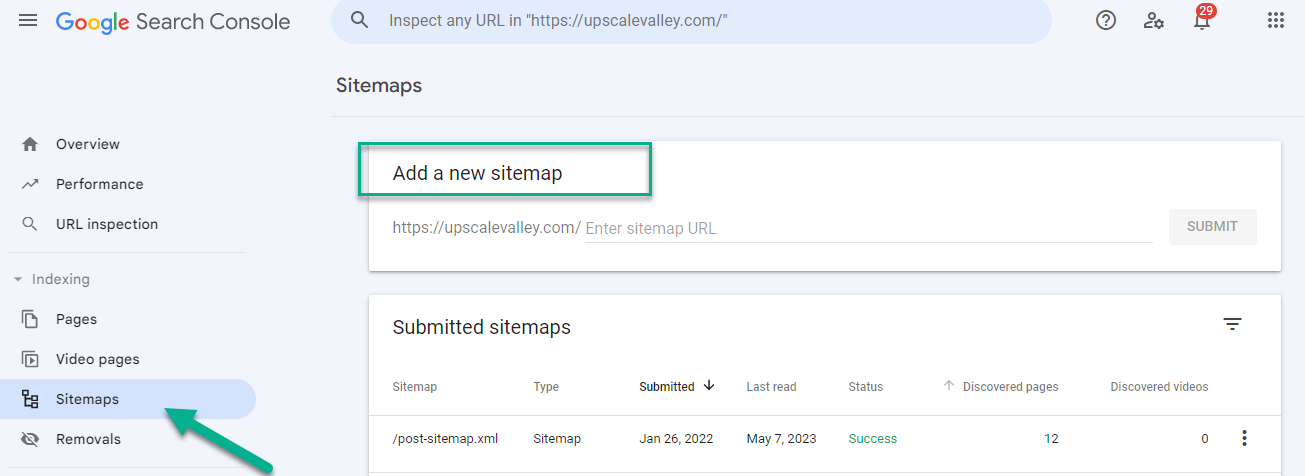
Moving forward, the next step involves accessing Google Search Console. After logging into your account, cast your eyes to the left side of the interface. There, you'll spot an option labeled "Sitemap". Give that a click.
Now, you'll find yourself in a new section, and here's where the magic happens. Spot the button that says "Add a new sitemap"? That's your next destination. Click on it, and you're well on your way to properly submitting your sitemap to Google.
It's a straightforward process, but one that's absolutely essential for your website's visibility on the search engine.
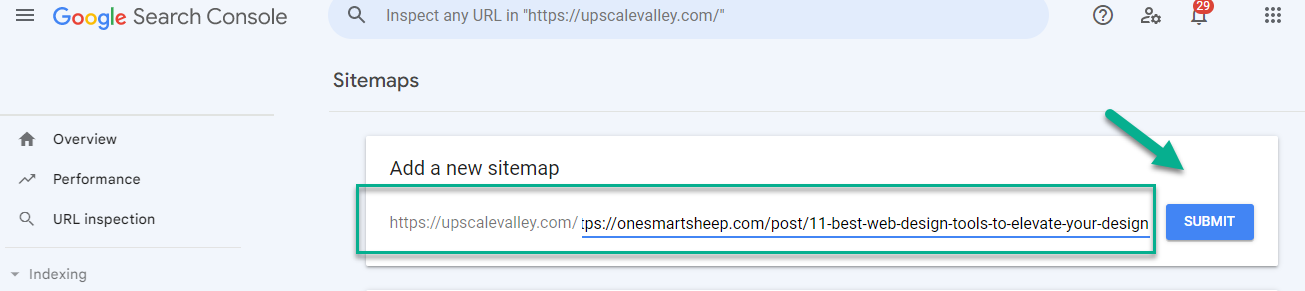
Once you've done that, go ahead and paste this URL into the designated space on the Search Console. All set? Great. Now, all that's left to do is to click the “Submit” button. And just like that, Google is in the loop about your sitemap.
Step 10: Produce Title Tags That Are Optimized
Title tags are essential elements of HTML that specify the title of a web page. They are displayed on search engine results pages (SERPs) as the clickable headline for a given result and are crucial for usability, SEO, and social sharing.
What knowledge do they convey? Title tags tell search engines what the content of a specific page is about.
They're a strong relevancy signal to search engines, meaning they help search engines understand what your page content is and how it should be indexed. The keywords used in your title tag can help your page rank higher for those keywords in search engine results.
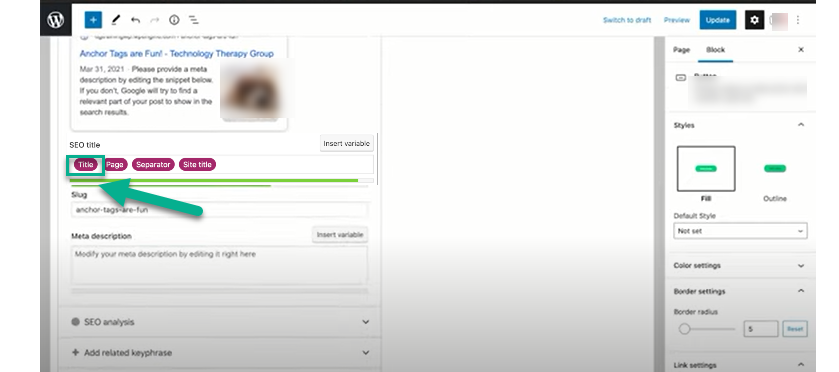
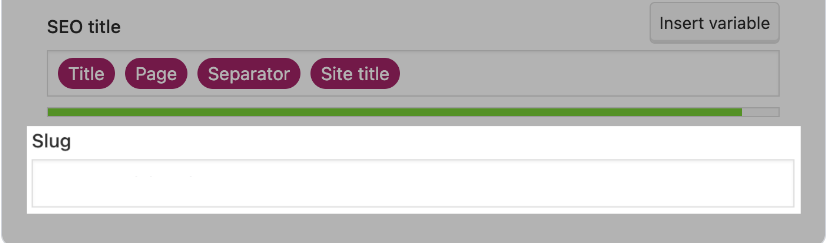
An optimized title is crucial for On-Page SEO, and the Yoast SEO plugin can be of great assistance in achieving this.
Simply navigate to the Yoast SEO section, and the “SEO title” field will be displayed. Next, click on the "Title" to begin optimizing your title in a professional and conversational manner.
Step 11: Write Meaningful Alt Text for All Images
Alt text, short for alternative text, plays a significant role in Search Engine Optimization (SEO). It is an attribute added to an image's HTML tag and provides a text description of the image.
This is incredibly valuable as it allows search engines to better understand the image content, which can boost your website's visibility in image searches.
Additionally, alt text enhances web accessibility. It provides visually impaired users with a description of the image through screen reading technology.
When images fail to load, the alt text is displayed instead, ensuring that users understand the content even without the visual reference. Therefore, adding alt text to all your images is not only good SEO practice but also promotes inclusivity.
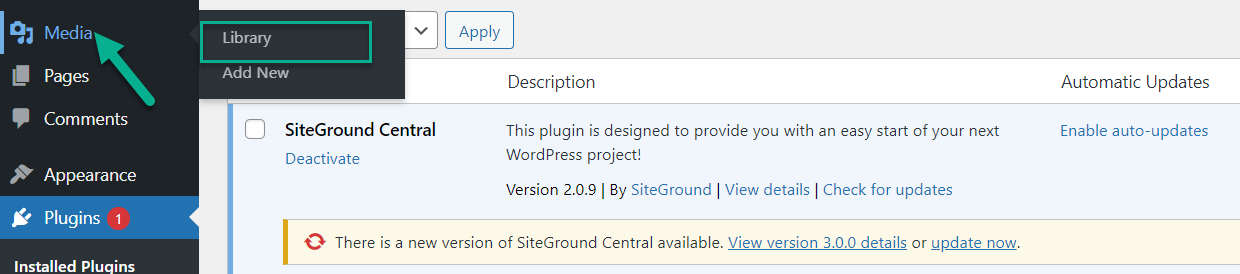
If you want to add alt text for images, go to the “Media” and then click on the “Library”.
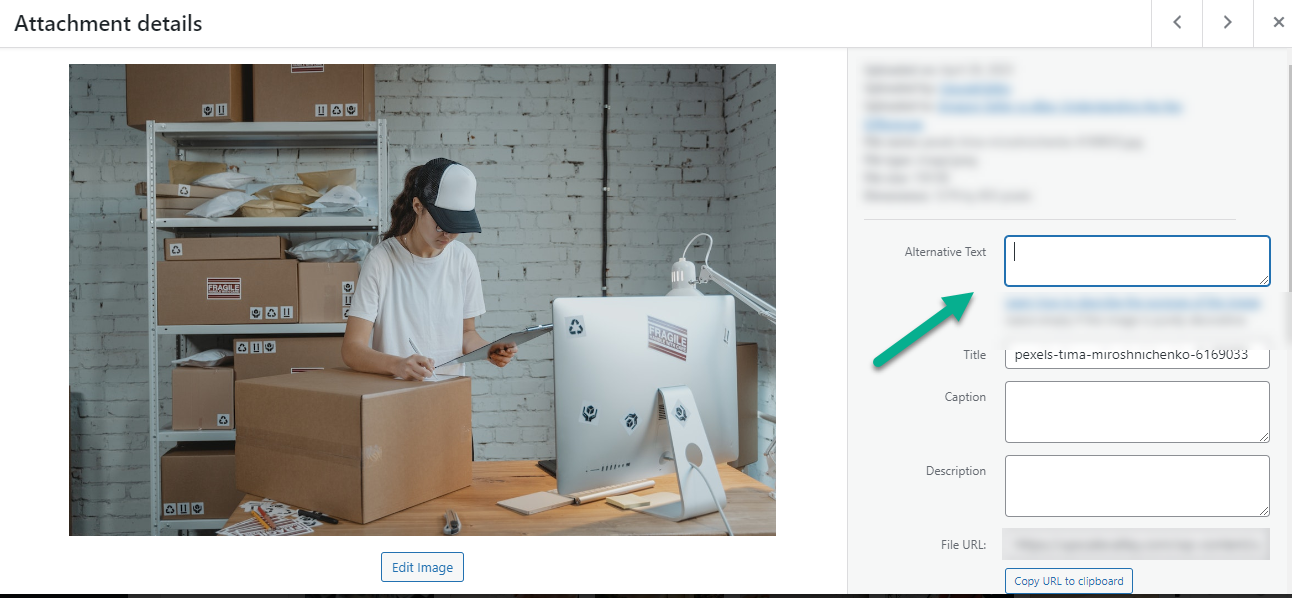
In this section, you'll locate all the images from your site. Simply click on an image and start crafting an SEO-friendly “Alternative text” for it. This step is crucial. Even if sometimes your content doesn't appear in search results, your images may still get ranked, enhancing your site's visibility.
Step 12: Ensure Proper Use of Headers
The header of a WordPress website holds a unique and critical position. It's the first thing that visitors see, which makes it a powerful tool for establishing your brand's identity.
You can customize your header with various elements, such as your logo, navigation menu, search bar, and even a call-to-action, depending on your theme and plugins.
One of the standout features of WordPress headers is their flexibility. With the right theme or page builder, you can create different headers for different pages or even alter the header's appearance as a user scrolls down.
Some WordPress themes also support sticky headers, which remain visible at the top of the page as users scroll, enhancing usability and navigation.
Overall, the customization options and dynamic capabilities make WordPress website headers unique and essential for a great user experience.
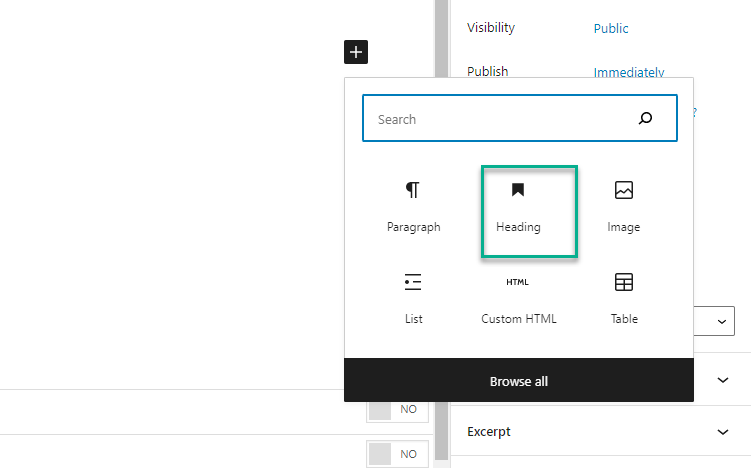
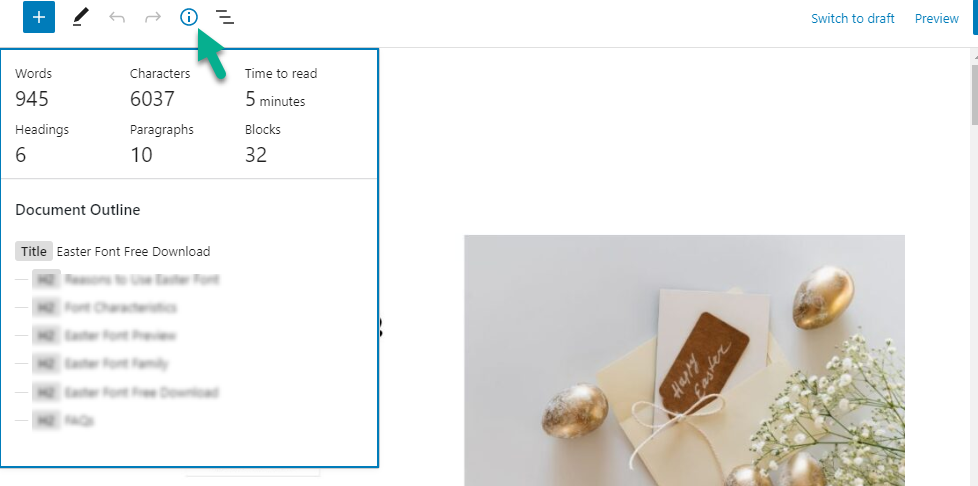
Once you write a heading you need to select its type as shown below,
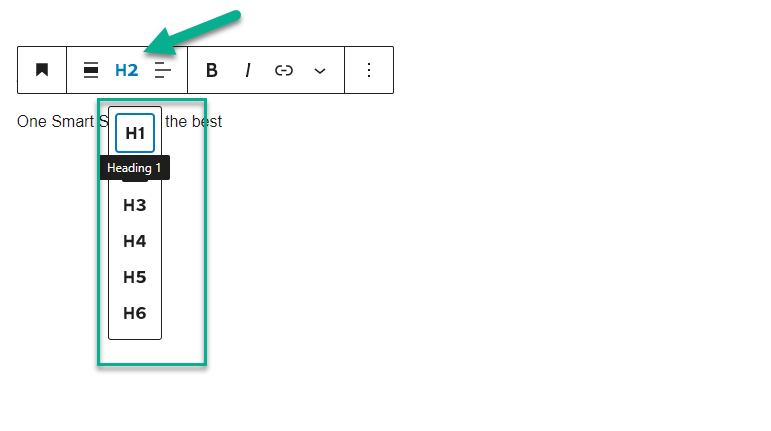
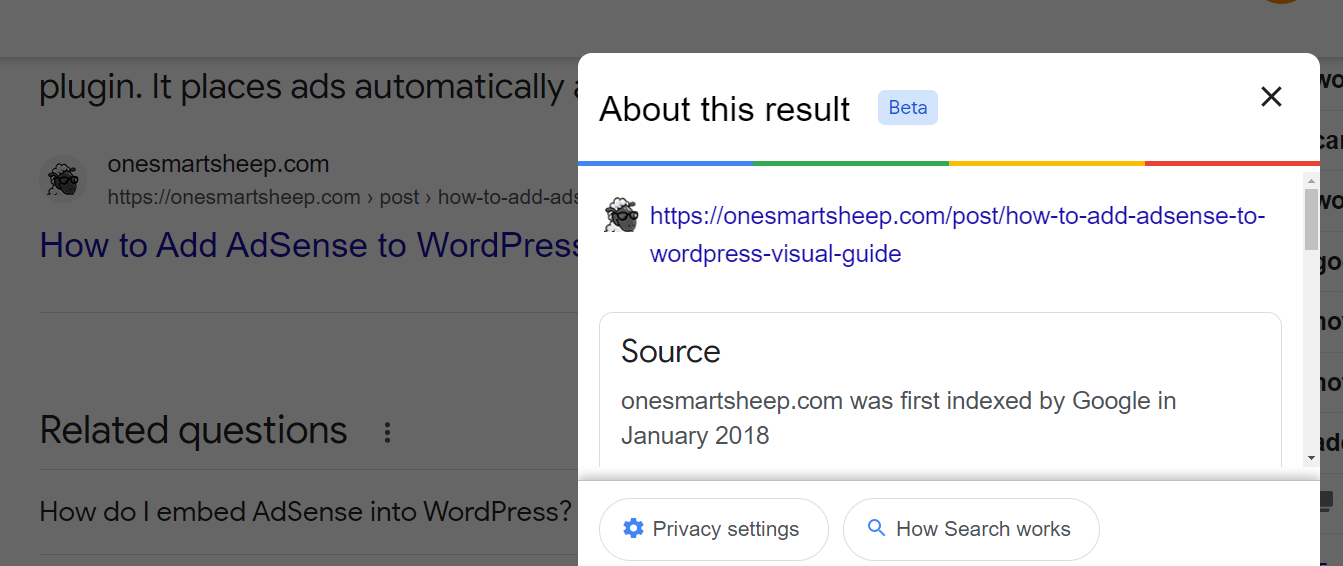
To get the information of the your page you just need to click on the “i”
Step 13: Create Unique Meta Descriptions
A meta description is a brief summary of a webpage's content that appears in search engine results. It's typically under 155-160 characters and is intended to drive clicks from searchers.
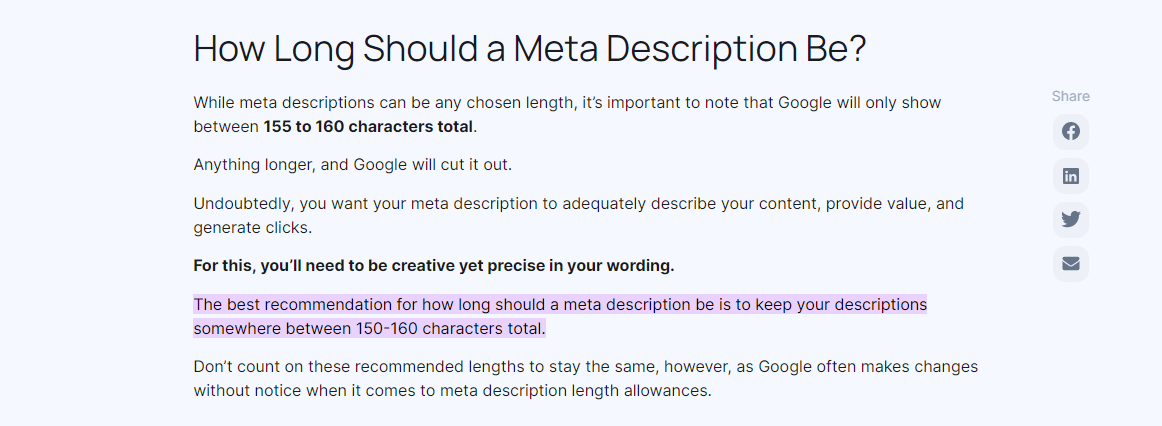
While meta descriptions are not a direct ranking factor in Google's algorithm, they can indirectly influence SEO by affecting click-through rates, a behavioral metric that search engines do consider.
In the Yoast SEO platform, it's entirely feasible to incorporate “Meta Descriptions” within the identical area where you input title tags. There's a handy progress bar present, which serves as a guide to maintain the meta description's length within the optimal spectrum.

Step 14: Perform Research on Relevant Keywords
In the realm of Search Engine Optimization (SEO), keyword research is a critical practice that involves identifying popular words and phrases people enter into search engines. The aim is to figure out what to rank for.
How to do relative keyword research?
- Use Keyword Research Tools: Tools like SEMRush, Ahrefs, Google Keyword Planner, etc., can help you identify related keywords.
- Analyze Competitor Content: Look at the content that ranks well for your primary keyword and identify any related keywords they include.
- Use Google's "Searches Related To" Feature: At the bottom of Google search results, you can often find a "Searches related to..." section, which can be a good source of relative keywords.
- Use Google Autocomplete: As you type a search query into Google, it will suggest completions. These can often be excellent relative keywords.
- Use Topic Clustering: In this approach, you choose a broad keyword and then develop a series of related subtopics, each with its own relative keywords.
In Semrush, we can do keyword research using the tool called “Keyword Gap.”
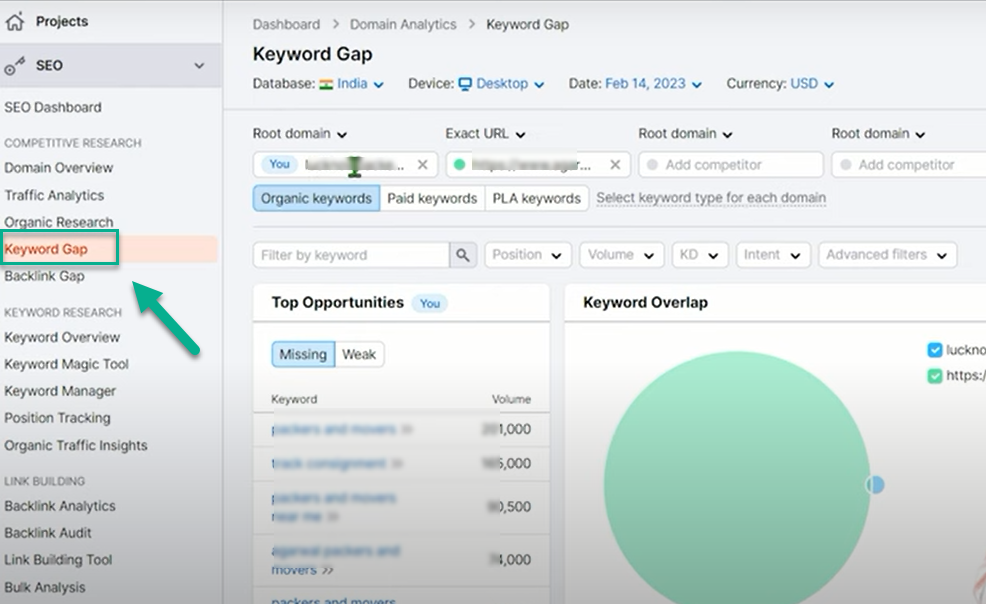
Alright, so after you've navigated to the "Keyword Gap" feature, it's time to input some information. You'll want to enter your website's domain URL in the "Root domain" field and then input your competitor's website URL in the "Exact URL" field.
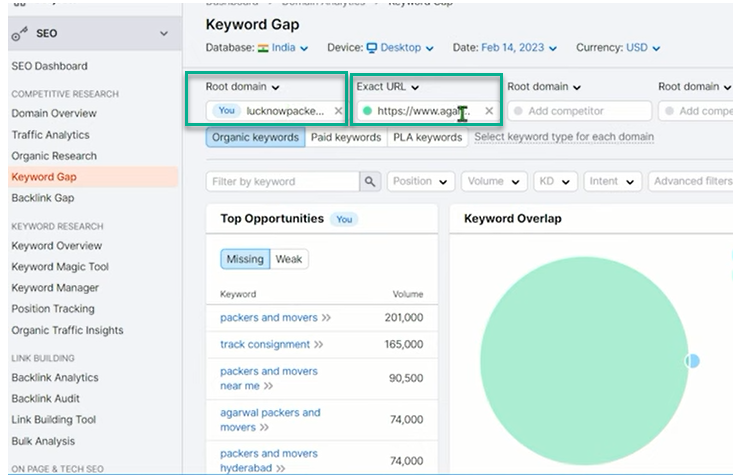
Make sure you have the correct web addresses for both your site and your competitors to get accurate results. This way, the tool can analyze and compare the keywords you both rank for, helping you identify potential opportunities to improve your SEO strategy.
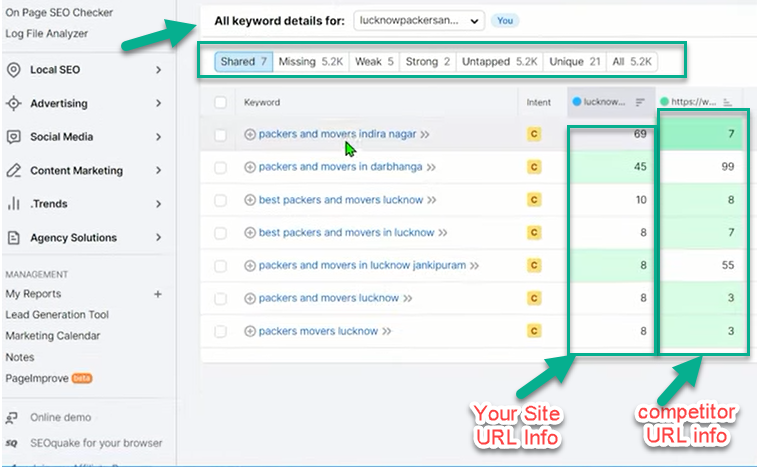
In SEMrush's Keyword Gap tool, "Shared" keywords are those common to the websites being compared, indicating direct competition.
"Strong" keywords are those where your website ranks higher than competitors, representing areas of strength. "Weak" keywords are those where competitors outrank you, signaling areas for improvement.
"Missing" keywords are ones your competitors rank for but you don't, providing potential opportunities. "Untapped" keywords are those for which no competitors rank highly, representing potential low-competition opportunities.
Step 15: Craft Unique and Relevant Content
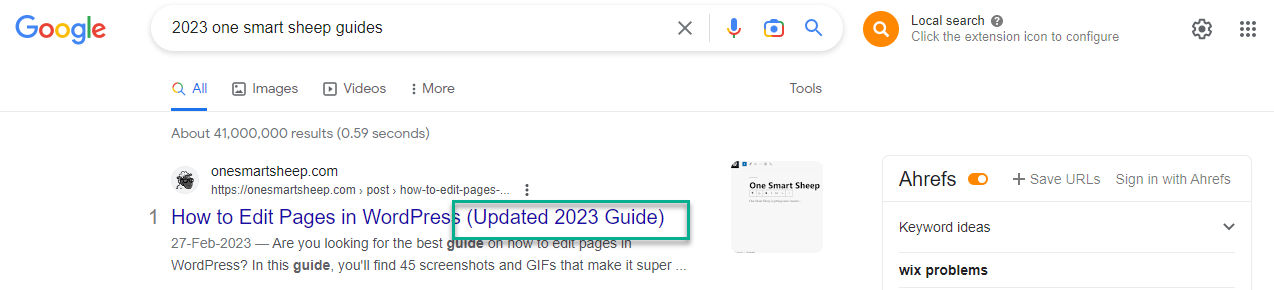
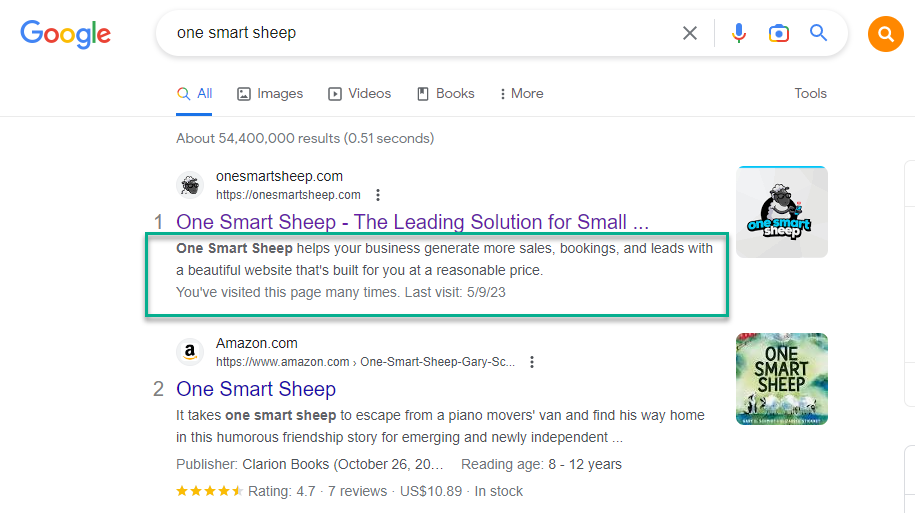
Analyzing the Search Engine Results Page (SERP) is crucial in unique content generation. It provides insights into what type of content ranks well for specific keywords, helping to tailor your content to meet these criteria.
By studying top-performing content, you can identify content gaps, trending topics, and effective formats (like blog posts, videos, and infographics).
Furthermore, understanding SERP features (like featured snippets, and 'People also ask' boxes) allows you to optimize your content to target these, enhancing visibility. In essence, SERP analysis helps create unique, SEO-friendly content that stands out.
For this purpose you need to enter a keyword in Semrush's Keyword Overview tool to see SERP in any country location.
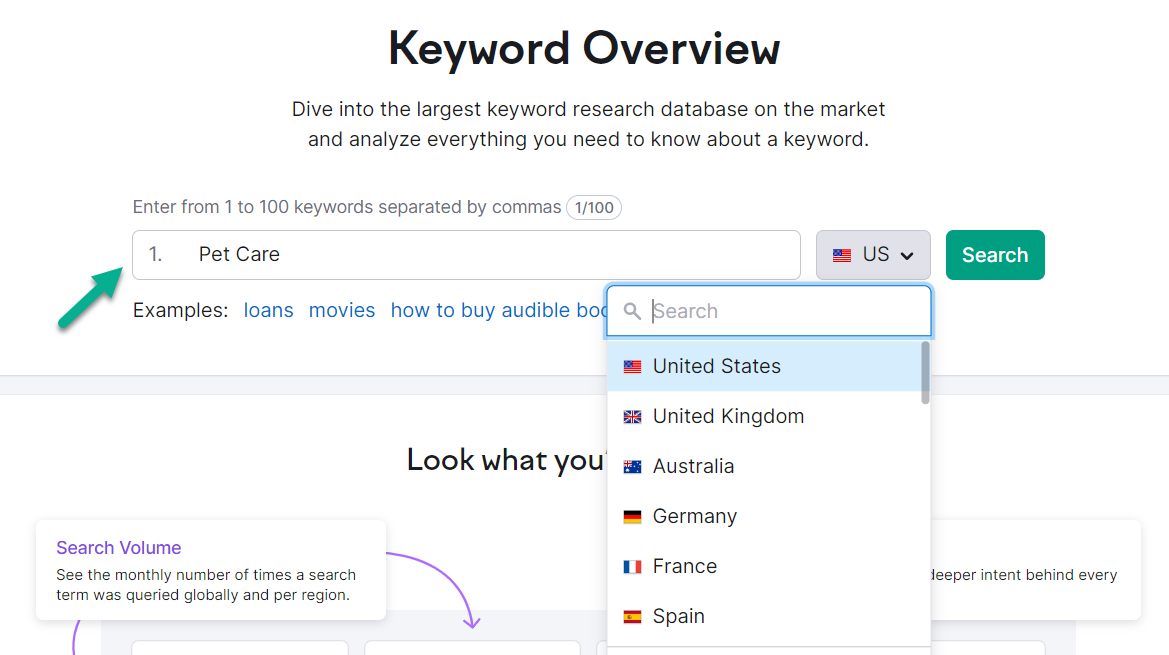
Once you've chosen a specific location to investigate keywords, you'll receive a “SERP analysis” report. This valuable tool will help you comprehend which keywords could rank higher if you create unique content tailored to them.

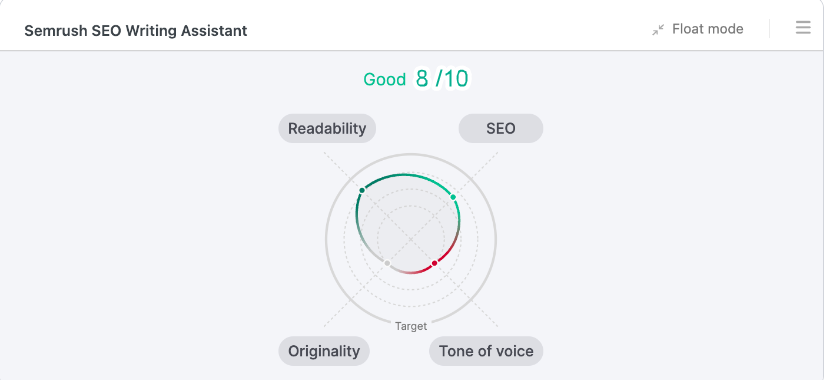
When crafting SEO-friendly content around well-researched keywords, consider readability; ensure your content is easily digestible and caters to the intended audience. Tone of voice should align with your brand and resonate with your readers.
Prioritize SEO by incorporating keywords naturally, optimizing meta tags, and using internal and external links. Originality is key - search engines favor unique content, so avoid duplication.
Lastly, maintain high content quality. Well-researched, accurate, and valuable content will not only rank well but also engage and retain your audience.
Step 16: Ensure Your URLs Are SEO Optimized
By default, WordPress uses the "Post name" option for URLs, which is not the most SEO-friendly. This format includes the date of the post and the post title. Here's an example:
http://www.yourwebsite.com/sample-post/
However, if your post title gets a bit lengthy, don't worry! You can tweak it for better ranking potential. After all, URLs for pages with long titles can look something like this,

To forge a URL that aligns more effectively with search engine optimization principles, navigate downwards to the segment labeled "Permalink" within the interface of your page or post editor. There, you'll find the ability to modify the "URL Slug."
Also, you can change URL using Yoast SEO plugin, which you will see in the bottom of the editor.
Step 17: Strategize the Layout of Your Website
Strategizing your website layout plays a significant role in SEO. A well-structured site aids search engines in understanding and indexing your content, improving your visibility.
It also enhances user experience by providing easy navigation, which can lower bounce rates and increase time on site.
Furthermore, an effective layout helps distribute link equity across your site, boosting the ranking potential of all pages, not just your homepage. Hence, strategic website layout is a crucial component of SEO.
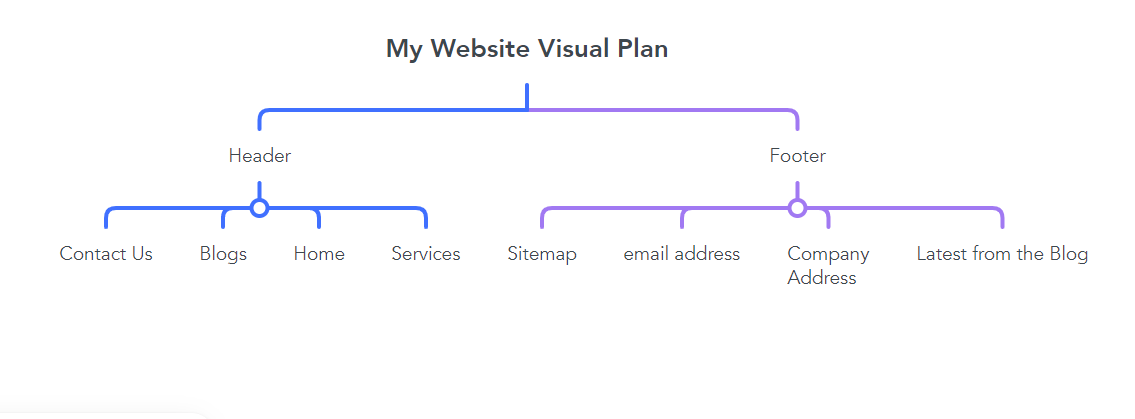
Now, you can use the mind mapping platform like MindMeister to architecture your site.
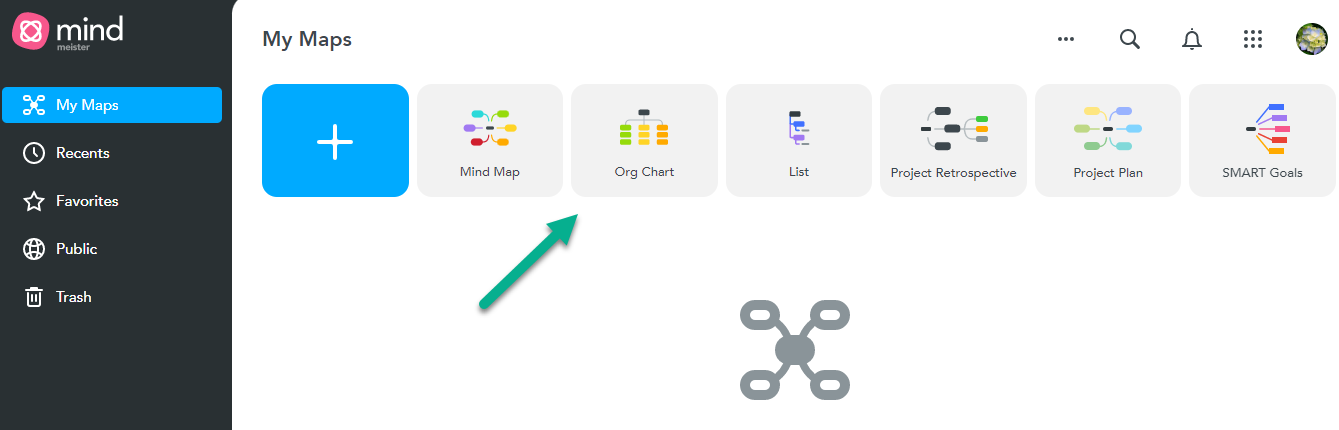
Simply, you can plan about your website using “Org Chat” like this
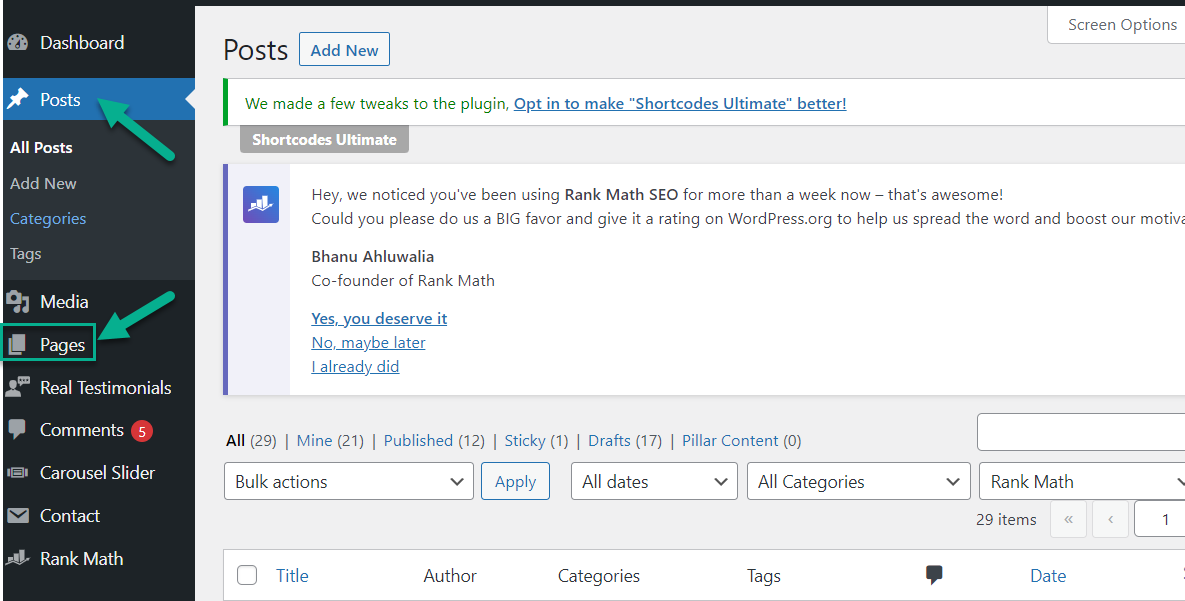
In WordPress, Pages and Posts are two different types of content, and both come by default. “Posts” are typically used for dynamic content such as blog articles, news, and updates. They're organized by categories and tags and appear in reverse chronological order on your blog page.
On the other hand, “Pages” are static and used for timeless content like 'About Us', 'Contact', and 'Services'. Pages don't have a publish date and aren't meant to be social or interactive as Posts are.
Step 18: Organize Your Pages into Subfolders
By default, WordPress does not nest URLs for posts, as it uses a simple structure like http://www.yourwebsite.com/sample-post/.
However, when you create pages and subpages or use categories and tags for posts, WordPress will nest the URLs.
For instance, if you create a subpage under an existing page, the URL might look like this: http://www.yourwebsite.com/parent-page/child-page/.
Similarly, for posts within categories, the URL could be http://www.yourwebsite.com/category/post-name/. You can adjust these settings according to your SEO strategy.
For a pet care website without URL nesting, the structure might look like this:
1. Homepage
2. Blog Post
3. Service Page
4. Contact Page
Each page and post has its own unique URL, but they're not nested under any categories or parent pages. They exist independently at the root level of the site.
For a web design website using URL nesting, the structure might look like this:
1. Homepage
2. Service category page
3. Specific service page
4. Blog category page
5. Specific blog post
In this structure, specific service pages and blog posts are nested under their respective category pages, creating a hierarchy that helps organize the content and can improve SEO.
Step 19: Design a User-Friendly Navigation Menu
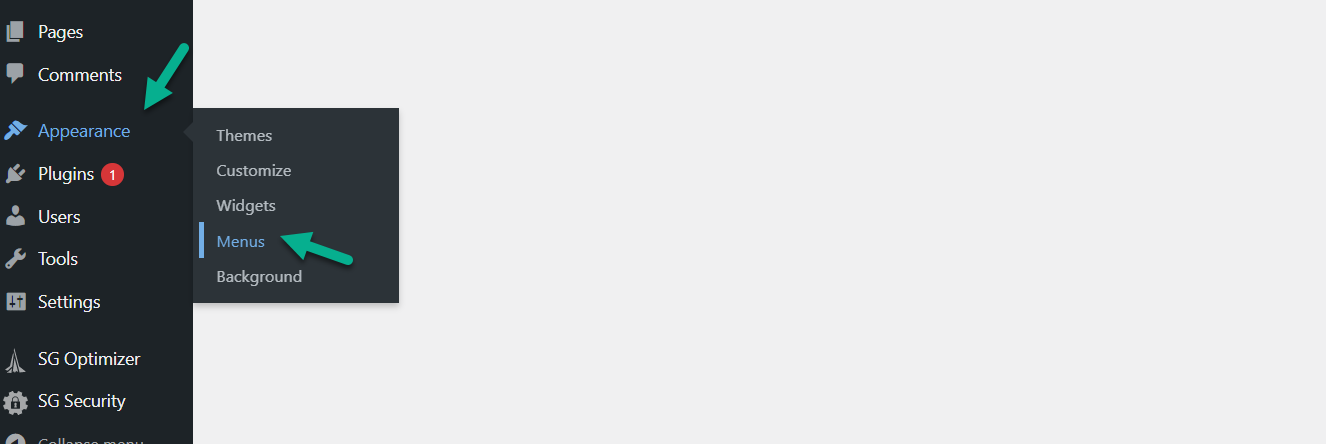
In WordPress, a menu is a crucial part of your website as it helps visitors navigate your site's content and layout. WordPress allows you to create and manage menus from your dashboard, under the 'Appearance' > 'Menus' section.
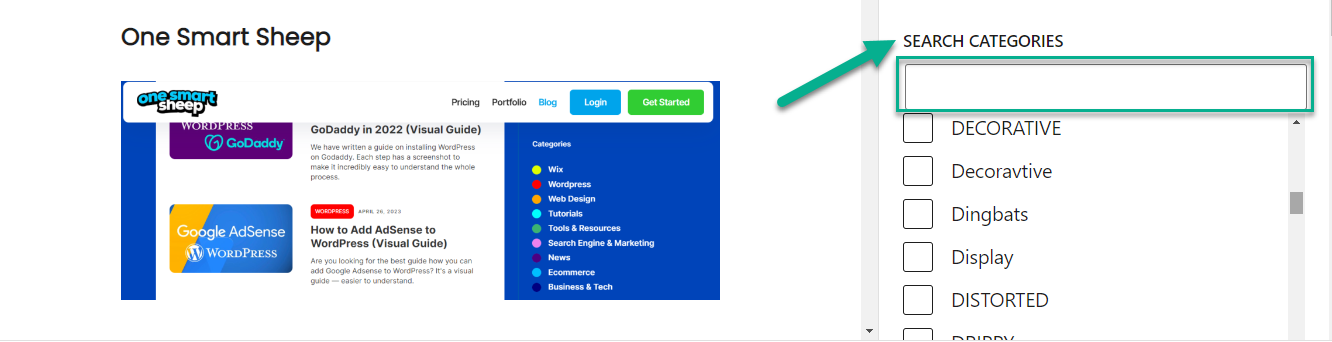
You can add different types of items to your menu, including pages, posts, custom links, and categories.
Furthermore, you can create multiple menus and display them in different locations on your site, such as the header, footer, or sidebar, depending on your theme's options.
WordPress also supports dropdown (nested) menus, providing a hierarchical view of your site's content.
How can you create a menu?
Just head over to your dashboard, and you'll spot the 'Appearance' option. Give that a click and a pop-up will appear. Now, you see the 'Menu' section? Just click on 'Menus,' and you're good to go.
Then you need to click on the “create a new menu”.

Now, if you want to rename them, you must drag and drop the main menu items in the ‘Menu structure’ section.
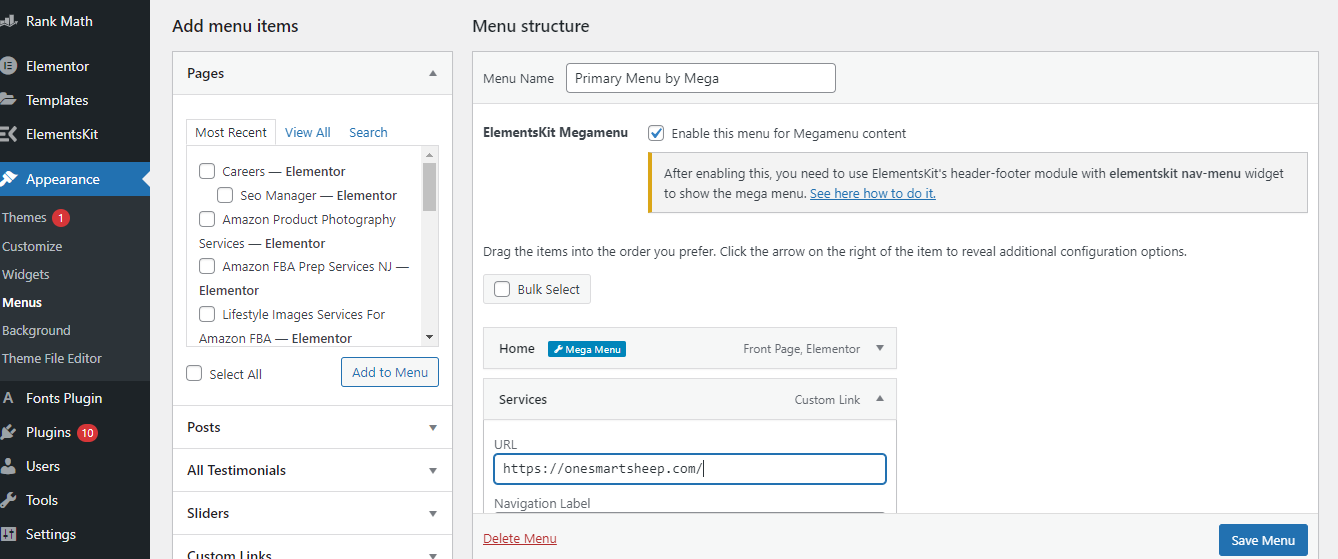
Note: You can create multiple menus in the “Menus” section of WordPress. Its implementation will depend upon your theme and page builder.
Wrapping Up
In conclusion, achieving proficiency in WordPress SEO is a realistic goal that can be reached by following the comprehensive 19-step guide.
This guide entails vital steps ranging from selecting a reliable hosting provider to designing an intuitive navigation menu, all of which contribute significantly to optimizing your website for search engines.
Building a strong foundation for your site's success can be achieved by implementing SEO-optimized permalinks, SSL certificates, and meaningful image alt texts.
The guide also emphasizes the importance of choosing an appropriate URL structure, installing and adjusting a suitable SEO plugin, and avoiding indexing insignificant pages to enhance your site's relevance and authority.
Other essential steps involve submitting your sitemap to Google Search Console and creating optimized title tags and meaningful alt texts for images, all of which help search engines better understand and rank your content.
Moreover, the guide covers the importance of properly using headers, crafting unique meta descriptions, performing diligent keyword research, creating unique and relevant content, strategically structuring your website, organizing pages into subfolders, and designing a user-friendly navigation menu.
All these strategies enhance your brand's identity, boost your site's visibility in search results, and improve the user experience. In essence, optimizing a WordPress site for SEO is an ongoing, comprehensive endeavor that requires strategic planning and meticulous execution of key actions.
By diligently following these steps, you can significantly enhance your website's SEO performance, improve its visibility, raise its ranking in search engine results, and attract more traffic. The journey from being a beginner to becoming a pro in WordPress SEO can be achieved through continuous learning and adaptation.
FAQs
What is the importance of proper header use in WordPress SEO?
Headers in a WordPress website hold a unique and vital position as they are the first thing visitors see, making them a powerful tool for establishing your brand's identity. Depending on your theme and plugins, they can be customized with various elements, such as your logo, navigation menu, search bar, and even a call-to-action. With the right theme or page builder, you can create different headers for different pages, enhancing the overall user experience. Therefore, proper use of headers is essential for effective WordPress SEO.
How does creating unique meta descriptions contribute to WordPress SEO?
Meta descriptions summarize a webpage's content in search engine results. While they do not directly influence search rankings, they can indirectly affect SEO by influencing click-through rates, a behavioral metric that search engines consider. Crafting unique and engaging meta descriptions can encourage users to click on your site in search results, improving your site's visibility and SEO.
What is the role of keyword research in optimizing a WordPress site for SEO?
Keyword research is a critical practice in SEO that involves identifying popular words and phrases that people enter into search engines. The goal is to determine what your content should rank for. Various tools like SEMRush, Ahrefs, and Google Keyword Planner can assist you in identifying related keywords. Additionally, analyzing competitor content and using Google's features can help you discover relevant keywords. These keywords can then be incorporated naturally into your content, improving your site's SEO.
Why is it important to have SEO-optimized URLs and a well-structured website layout in WordPress SEO?
SEO-optimized URLs and a well-structured website layout play a significant role in WordPress SEO. By default, WordPress uses the "Post name" option for URLs, which is not the most SEO-friendly. For better ranking potential, you can tweak the URL using the "Permalink" segment within the interface of your page or post editor. On the other hand, a well-structured site aids search engines in understanding and indexing your content, improving your visibility. It also enhances user experience by providing easy navigation, which can lower bounce rates and increase time on site. Therefore, having SEO-optimized URLs and a well-structured website layout is crucial for effective WordPress SEO.


.svg)