


Are you ready to embark on an exciting journey to create a stunning and successful WordPress blog that stands out from the crowd? In today's digital era, having a captivating online presence is vital for anyone looking to share their thoughts, ideas, or skills.
This comprehensive guide will lead you through the essential steps to launch your dream blog, from securing your unique domain name and hosting to crafting engaging content that captivates your audience.
Dive into the world of WordPress, where customizing your blog's appearance is a breeze, and discover how to elevate your site by adding new functionalities with plugins. And to top it all off, learn the importance of installing Google Analytics to gain valuable insights into your audience and content performance.
So, are you ready to transform your ideas into reality and become a successful blogger? Let's get started.
Why Should You Choose Bluehost Hosting?
- Reliability: Bluehost is known for its reliable service and robust server performance, which is important for maintaining your website's uptime.
- Customer Support: Bluehost offers 24/7 customer support, which can be vital for solving any technical issues you might encounter while running your website.
- Pricing: Bluehost offers competitive pricing for its hosting packages, making it a cost-effective choice, especially for individuals and small businesses.
- User-friendly Interface: Bluehost's interface is intuitive and easy to navigate, making it user-friendly even for those without a technical background.
- WordPress Integration: Bluehost is recommended by WordPress.org and offers easy 1-click installations for WordPress, making it a great choice if you're planning to use this platform.
- Scalability: Bluehost provides a variety of hosting plans, including shared hosting, VPS, and dedicated server hosting. This means your hosting can grow with your website, and you can upgrade to a larger plan if needed.
- Free Domain: Bluehost offers a free domain name for one year with each of their hosting plans, which can save you some extra costs when starting a website.
- Security Features: Bluehost provides several security features, such as free SSL certificates and tools to prevent spam, which is crucial for safeguarding your website and your visitors' information.
Step 1: Get Your Domain Name and Hosting
To begin, navigate to the Bluehost website and take a look at their various pricing options to select the plan that best suits your needs. On the homepage, you'll notice a 'Get Started' button - go ahead and click on it.
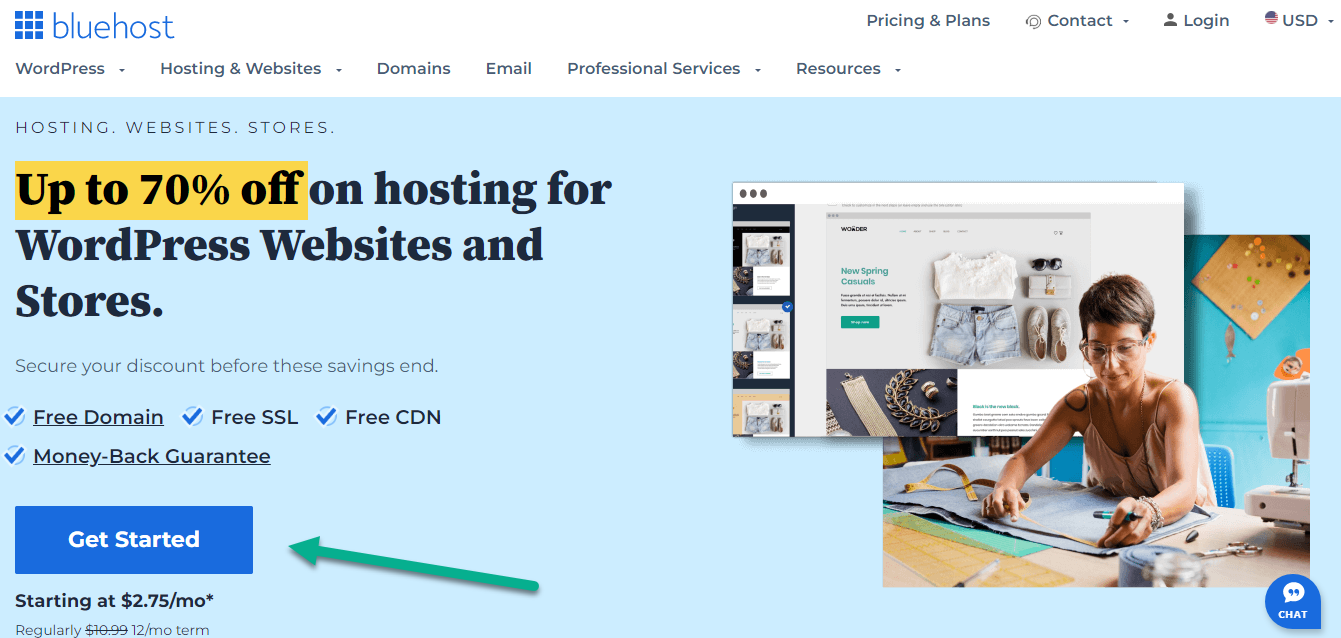
This “Get Started” button will lead you to a detailed overview of Bluehost's various plans, providing you with more information to help you make the best choice.
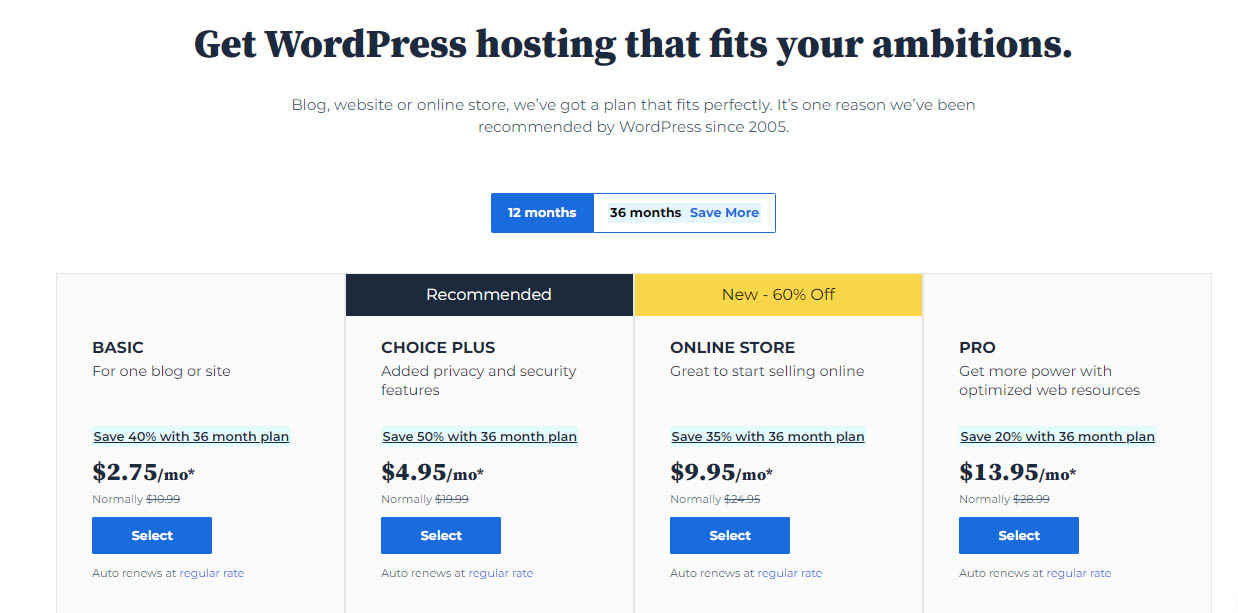
Next, it's time to pick the plan that fits your needs the best. If you're just starting out, for example, the 'Basic' plan might be the most suitable choice for you.
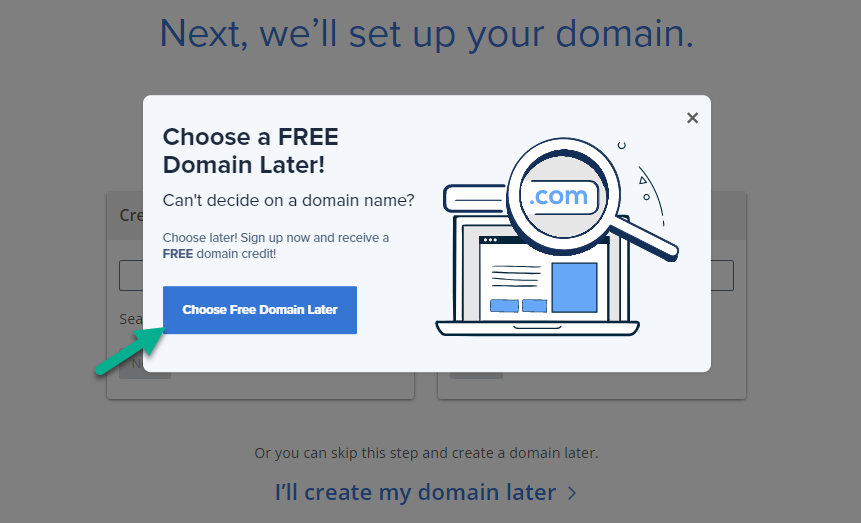
After selecting your preferred plan, Bluehost will guide you to the next step, which involves choosing a domain name. Don't worry if you haven't decided on a domain name yet - Bluehost gives you the option to choose your free domain name at a later stage.
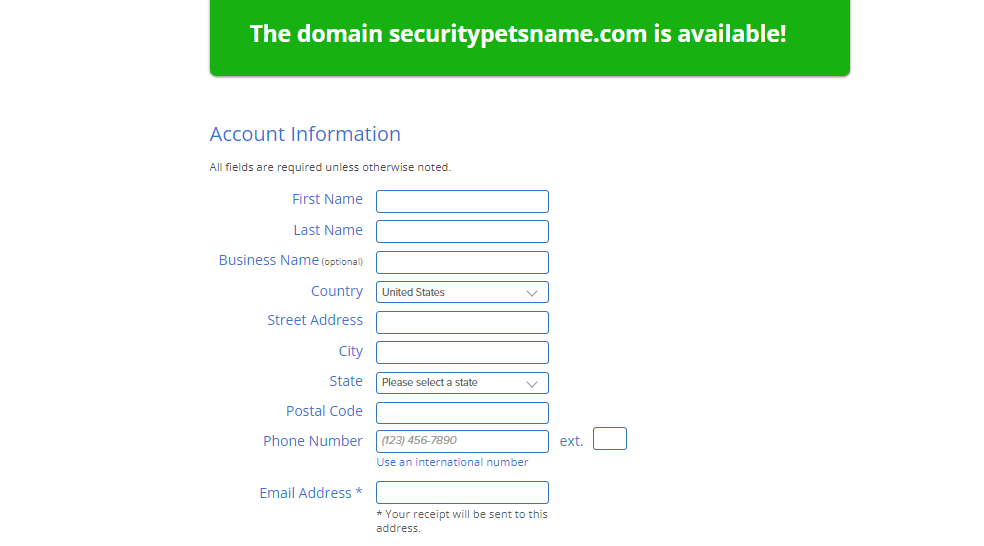
Now, you will set up your new domain
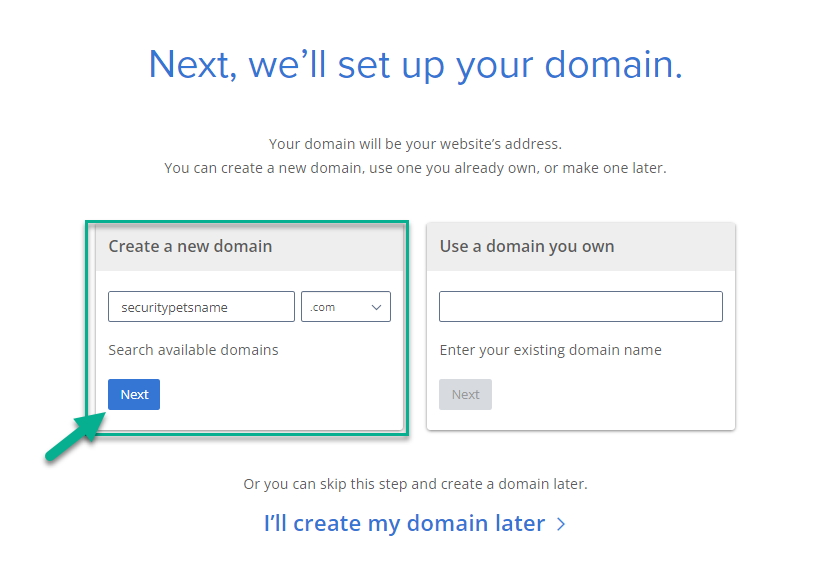
Once you click on the “Next”, you will find a screen where you have to enter your basic data and billing information.
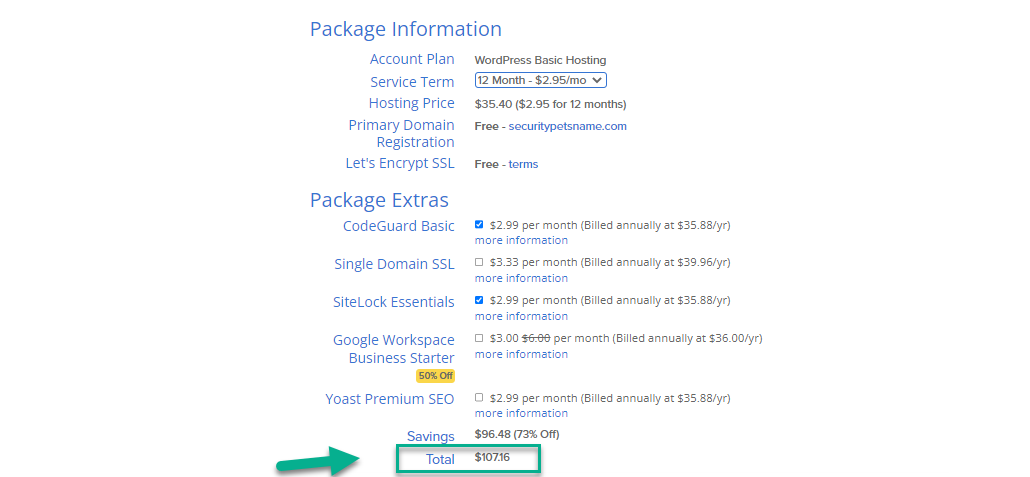
Following that, you'll need to decide on the duration of your hosting plan with Bluehost. At this stage, Bluehost will prompt you to fill in your "Package Information." This involves choosing the length of your hosting term, which can range from a few months to several years. So, take a moment to consider the commitment that suits you best.
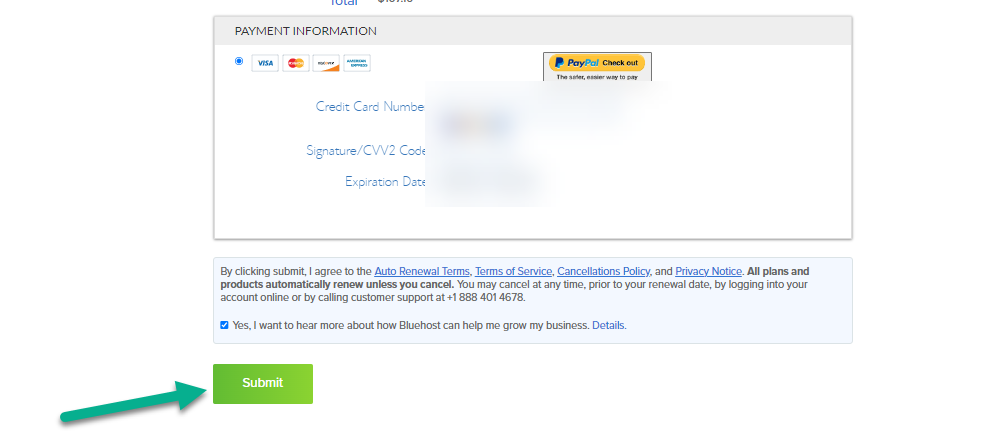
Lastly, you need to enter your card details and then click on the “Submit” button.
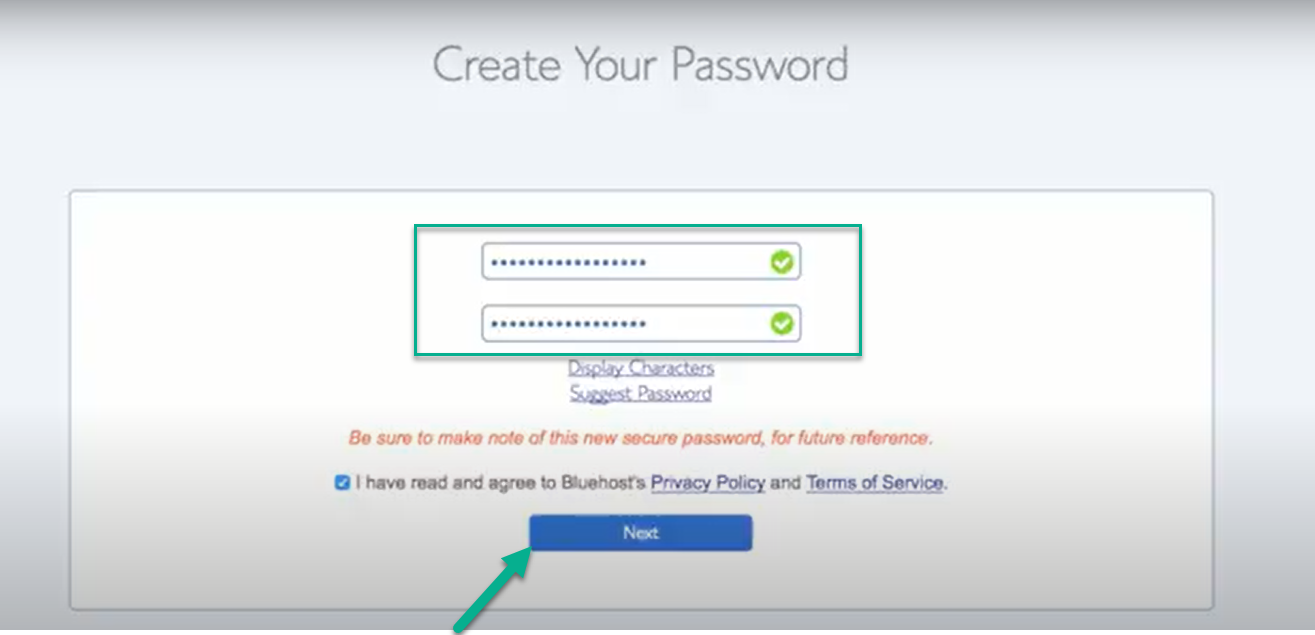
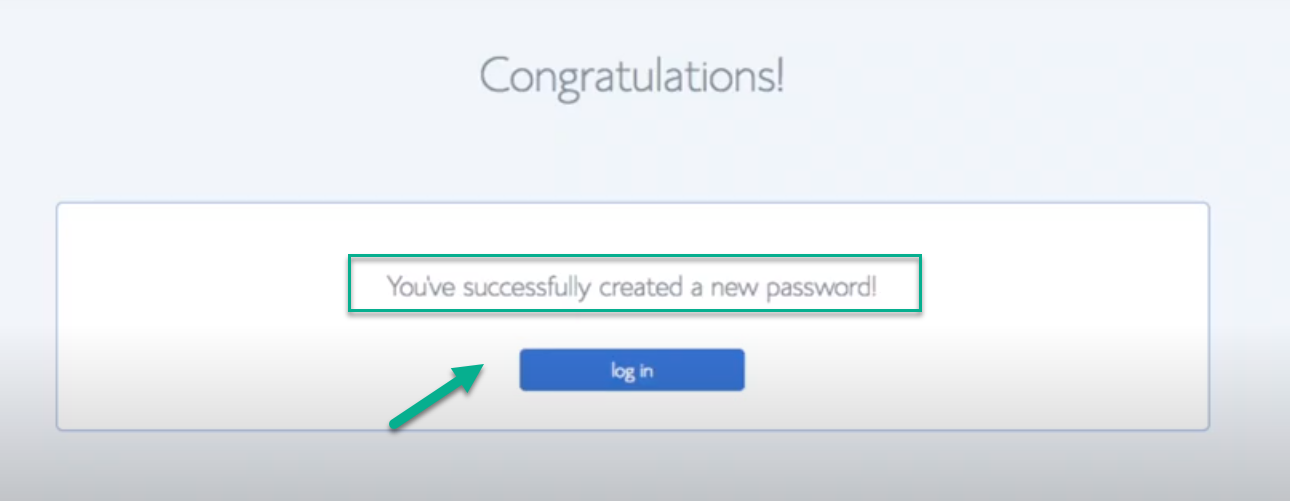
Before you can dive into your Bluehost account, there's one essential step left - setting up a secure password. Bluehost places a strong emphasis on account security, so you'll be prompted to create a strong password for your account. Once you've thought of a secure password, go ahead and click on the "Create your password" button.

At this point, you'll need to input a robust, secure password of your choice. Remember, a good password is key to protecting your account. Once you've done that, proceed by clicking on the "Next" button.
You'll know you've successfully secured your Bluehost WordPress Hosting when you receive a “Congratulatory” message. This is Bluehost's way of confirming that everything is set up correctly. Congratulations on this step in your website creation journey.
Step 2: Get Started with the Free WordPress Software for Your Site
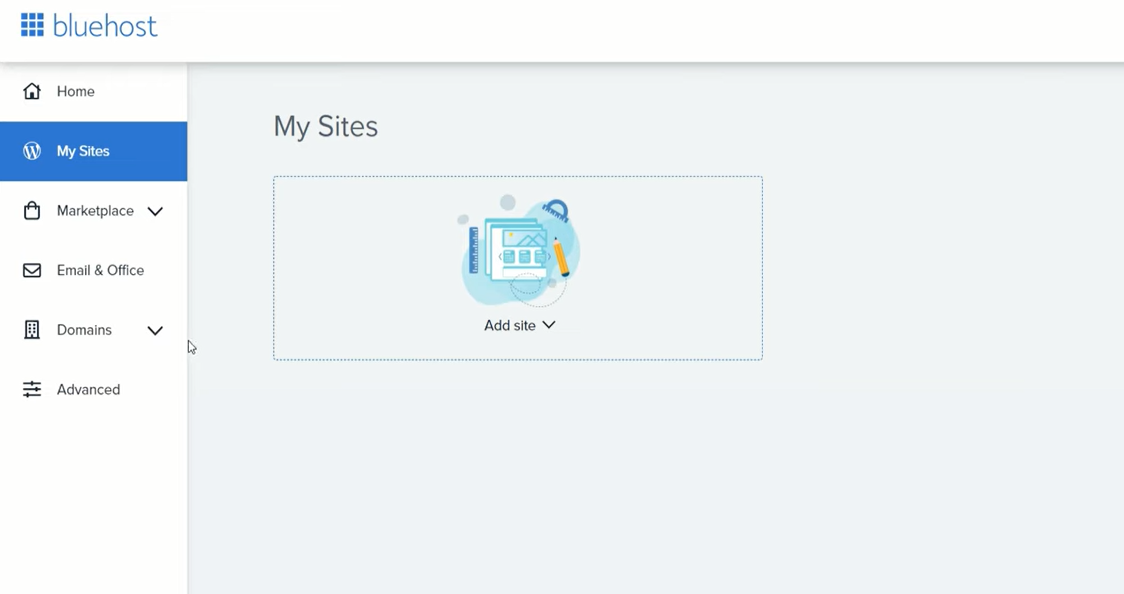
Now that you're signed up and have your secure password ready, it's time to get your WordPress blog set up.
Your first step will be to install the WordPress software. Bluehost makes this easy, especially for first-time users. When you log in for the first time, Bluehost presents you with a Wizard that guides you through the process of installing the WordPress software.
In this blog, we're delving into the world of starting a WordPress blog, guiding you through the process step by step. If you're specifically interested in learning how to install WordPress on GoDaddy, we've got you covered. Just head over to our dedicated blog post on "How to Install WordPress on GoDaddy" for a comprehensive walkthrough.
Don't worry, it's a straightforward process. Just keep following our agency's steps, and you'll have your WordPress blog up and running quickly and smoothly.
Now click on the “Create New Site”
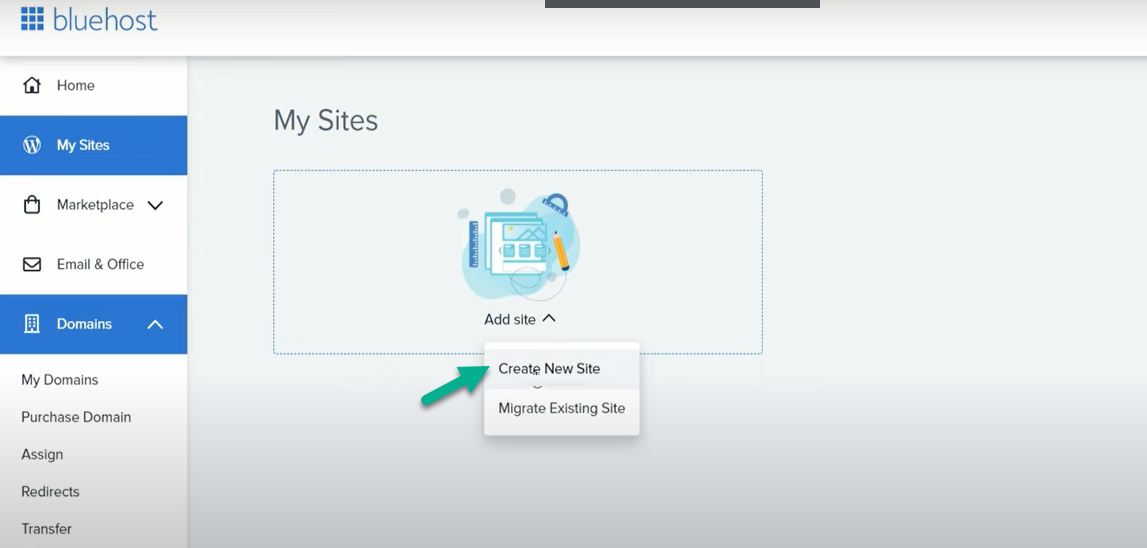
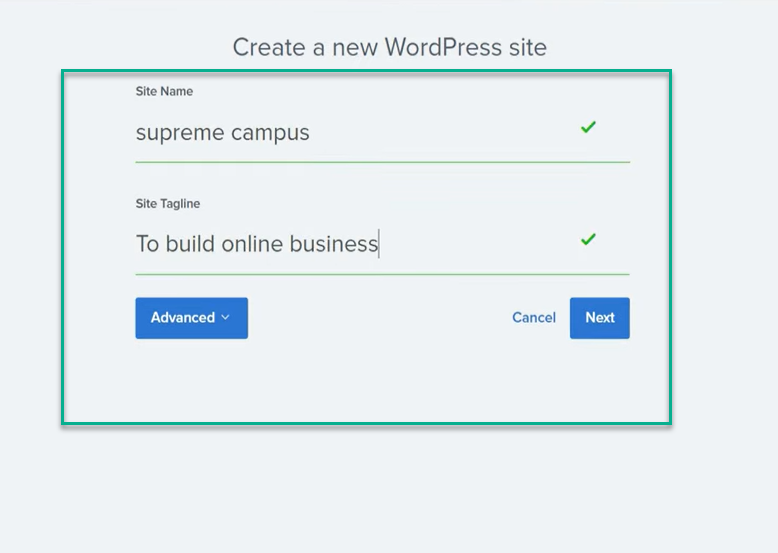
Once you click on 'Create new site,' a pop-up will appear, prompting you with a series of questions. Take a moment to review and respond to these, as they are designed to help you set up your site more efficiently.
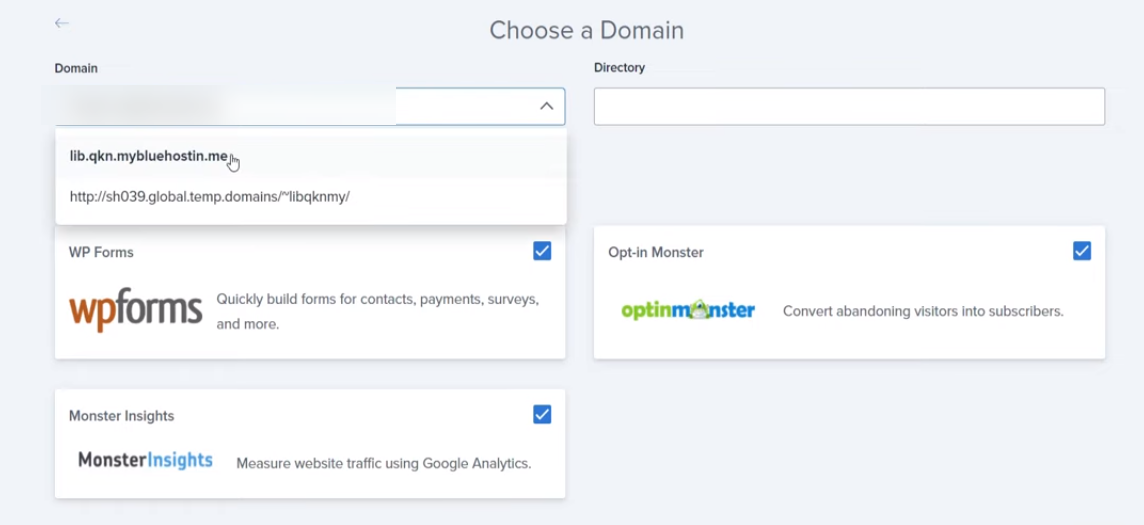
Now, you have to choose a domain,
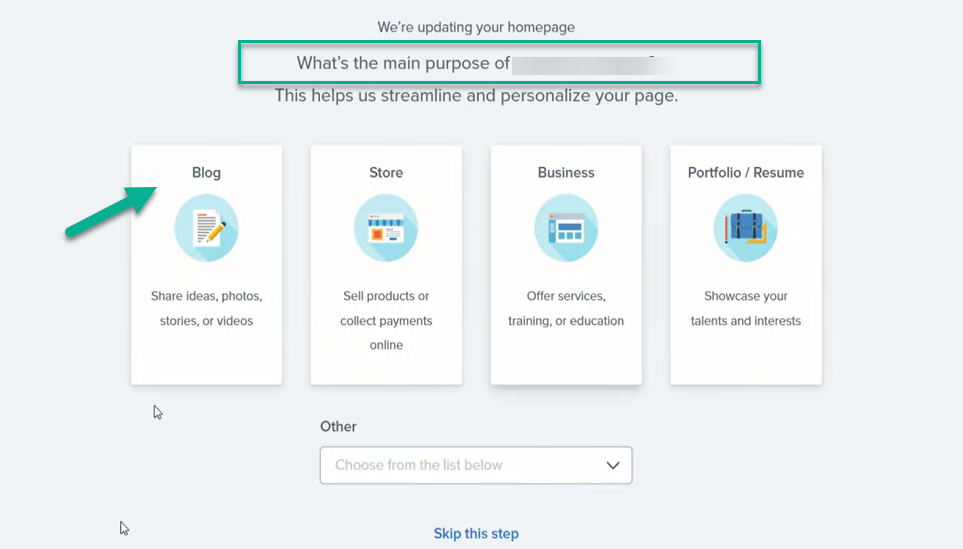
As Bluehost begins to update your homepage, it will ask you about the primary purpose of your site. Are you looking to create a blog, an online store, a business site, or a portfolio? Your answer will help Bluehost tailor the setup process to your specific needs.
Once you've defined the purpose of your site, Bluehost will provide you with your account details. With this information at hand, you can directly “log in“ to the WordPress page of your site. This is where the magic happens, and your website starts to come to life.

After you've completed the installation process, you can easily navigate to the dashboard of your newly created blog. Simply type in 'yourwebsitename.com/wp-admin' into your browser's address bar, replacing 'yourwebsitename' with your actual domain name.
Step 3: Embark on Your Blogging Journey with Your Initial Post
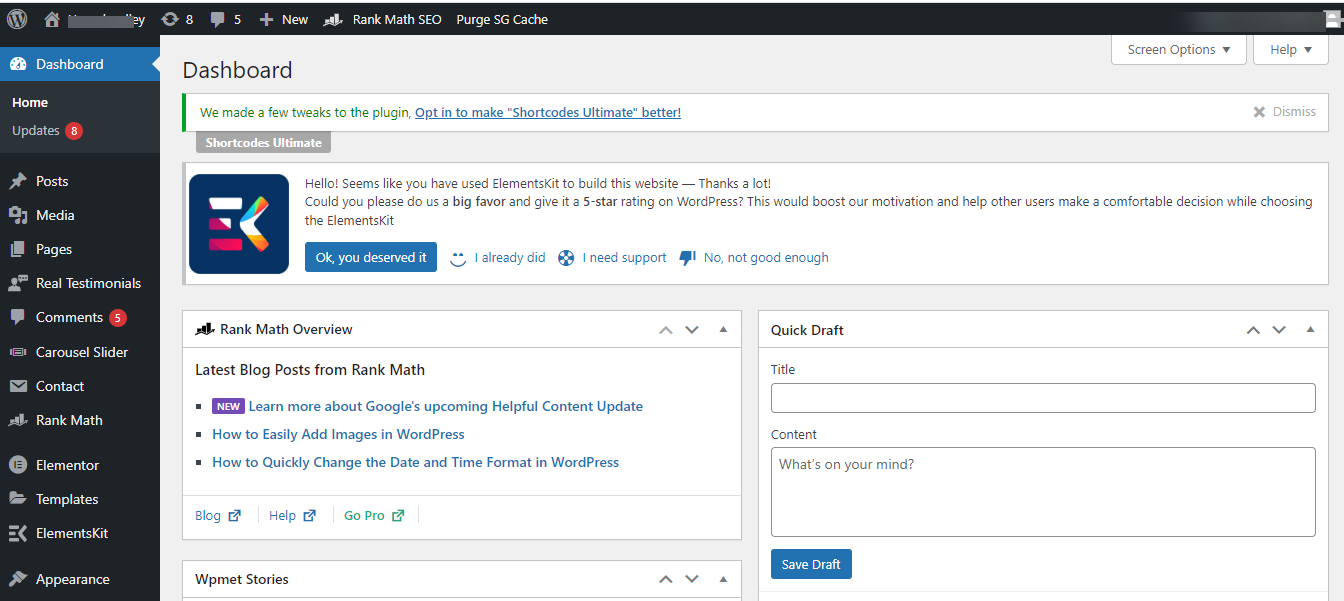
Once you login to your wordpress dashboard you will see the dashboard as,
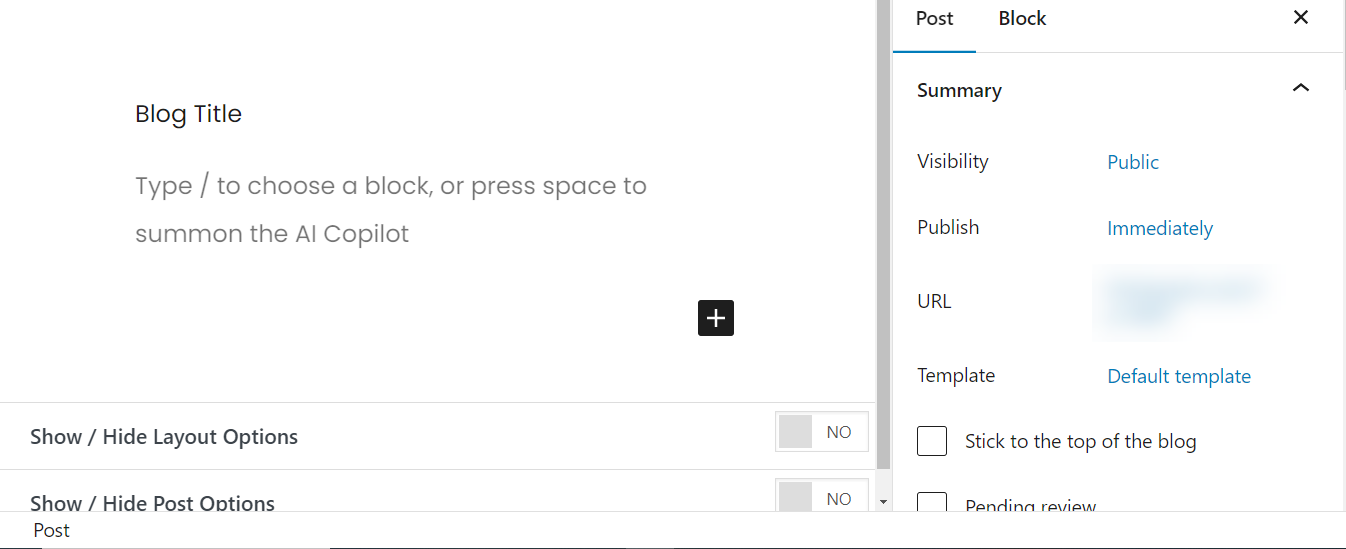
Next, navigate to the 'Posts' section and you'll see a submenu pop up next to it, listing options like 'All Posts', 'Add New', 'Categories', and 'Tags'. To create a new blog post, simply click on the 'Add New' option. This is where you'll begin crafting your first piece of content.

Within the block system, you'll come across the WordPress Editor. This is your creative space, the place where you can begin crafting and shaping your blog posts. Let your creativity flow and start writing.
If you're looking to enrich your blog post with images, it's quite simple. Begin by clicking on the "+" symbol, then use the search tab to look for the 'image' option. Once you've found it, you can proceed to add your desired visuals to your blog.
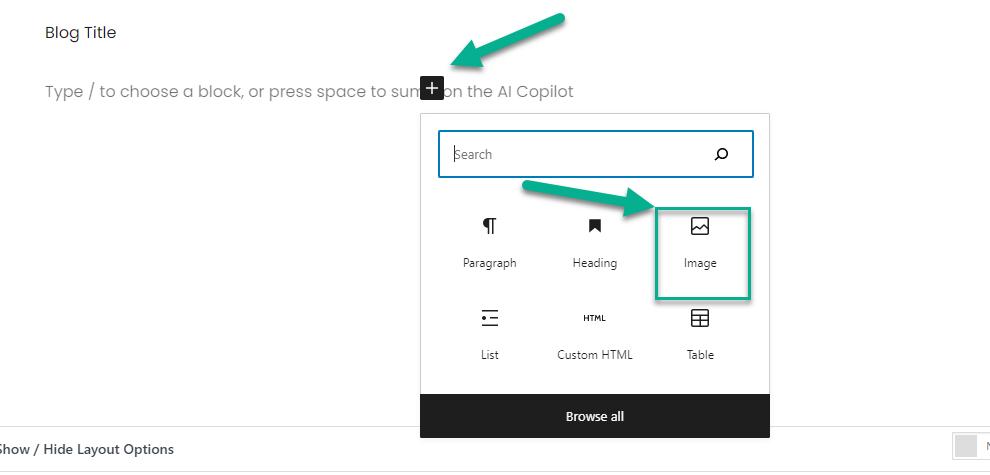
The "+" button is a versatile tool that can help you add various elements to your blog post. Whether you need to insert an HTML table, create a list, or add headings, this button is your go-to resource. Simply click on it and select the feature you require for your blog post.
Step 4: Ways to Modify Your Blog's Appearance
WordPress Themes and WordPress Plugins are essential components that significantly enhance the functionality and design of a WordPress blog or website.
WordPress Themes are collections of templates and stylesheets that define the appearance and display of a WordPress-powered website. They provide the design of your website, including layout options, color schemes, font styles, and overall aesthetics. Themes can be changed, managed, and added from the WordPress admin area under Appearance » Themes. They're important because they allow you to maintain a consistent look and feel across your blog, providing a pleasant and engaging user experience for your readers.
WordPress Plugins are pieces of software containing a group of functions that can be added to a WordPress website. They can extend functionality or add new features to your WordPress websites. What is WordPress with Visual examples?
For example, you might use a plugin to add a contact form, create an online store, or improve SEO. Plugins are installed through the WordPress admin area under Plugins » Add New. They're crucial because they allow you to customize your site to suit your specific needs, adding features that aren't included in the basic WordPress installation.
How to Find the Right WordPress Theme for Your Blog?
For Free Theme you can visit WordPress.org.com theme directory.
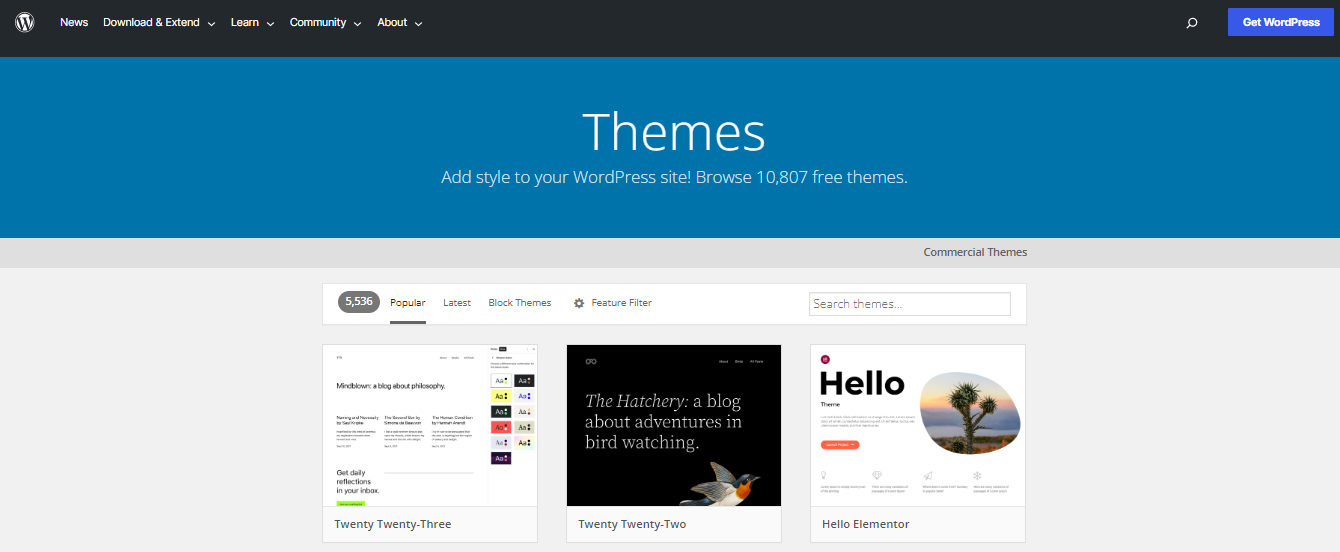
If you're interested in premium themes, consider checking out the ThemeForest site. They have a diverse selection of top-notch themes that can add a spectacular touch to your website. It's a great resource for finding a theme that can really elevate the look and feel of your site.
WordPress Theme Installation Process
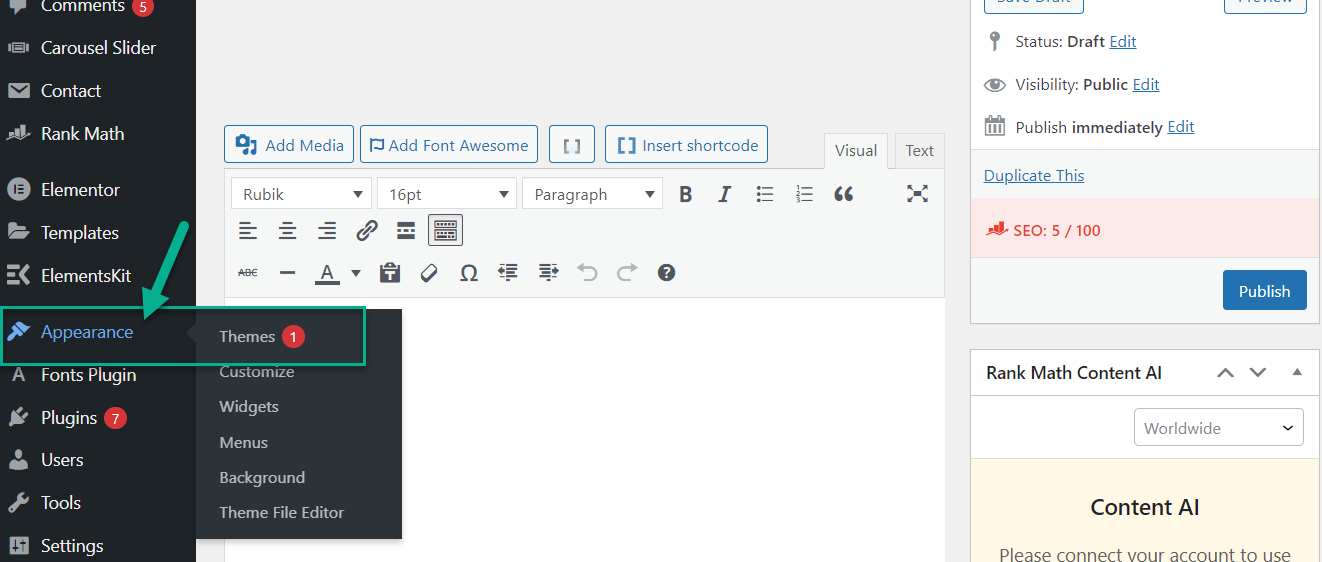
To begin, navigate to the 'Appearance' option on your dashboard. Upon clicking, a pop-up will appear where you'll need to select 'Themes'. Following this, a new window will open up presenting you with various theme options.
Now click on the “Add New”.

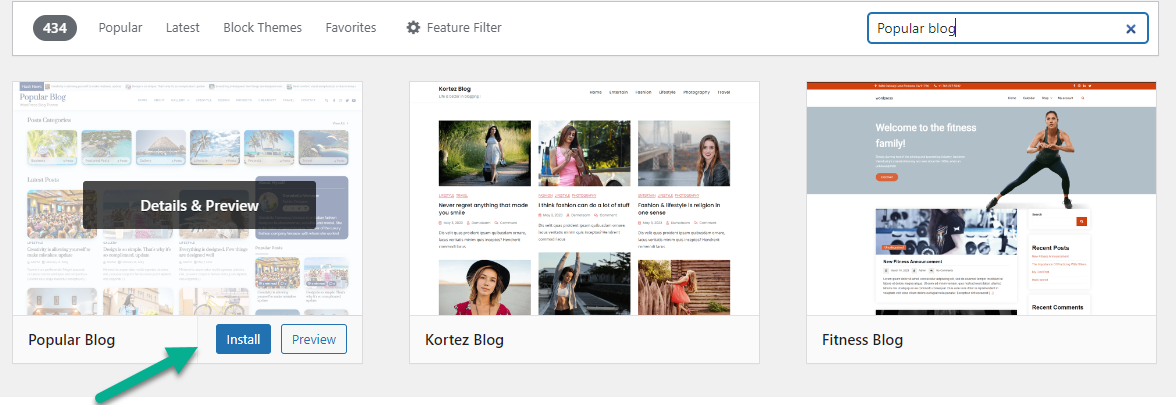
You'll be presented with two options for installing your theme. If you've chosen a free theme from the WordPress.org theme directory, simply search for it by name and hit 'install'. On the other hand, if you've purchased a premium theme, you can install it by clicking on 'upload'.
Then, select the theme file you've bought and upload it right there. Both methods are straightforward, so just choose the one that aligns with your theme choice.
Personalize your WordPress theme; it's pretty straightforward. Just head over to your dashboard and find the 'Appearance' section. Once you're there, you'll see a 'Customize' option appear in a pop-up. Give that a click, and you're all set to start customizing!
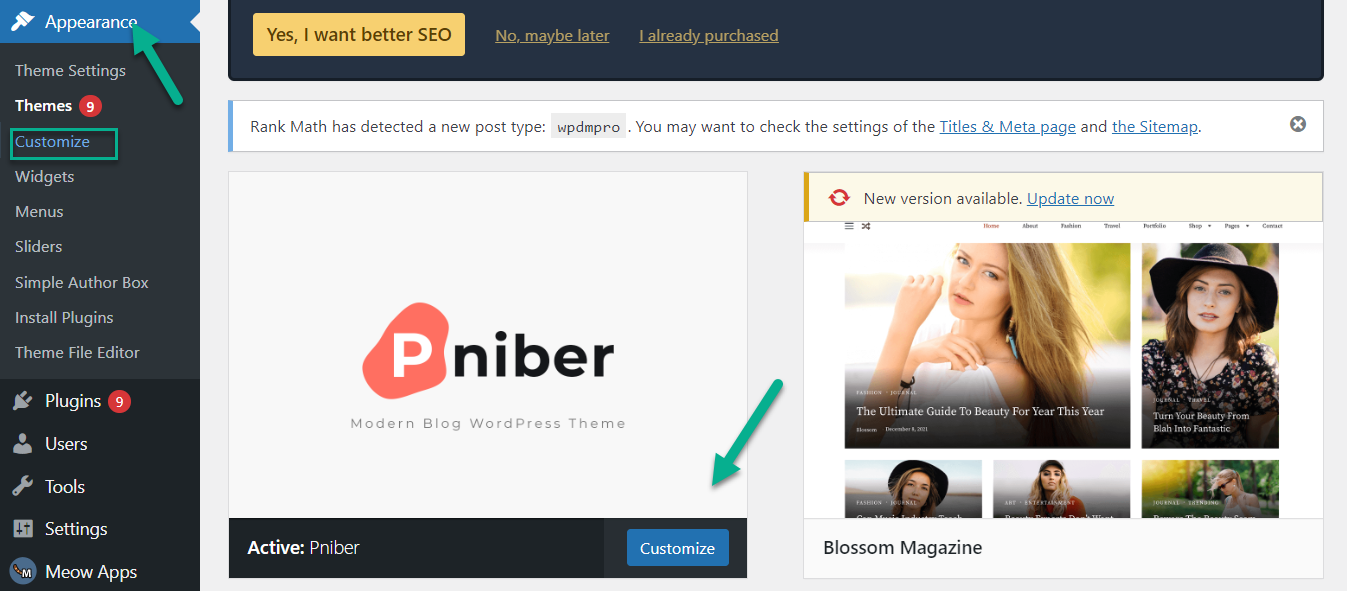
Once you've completed your desired customizations within the WordPress theme, you can simply click the "Publish" button to save your changes.

Step 5: Elevate Your Blog by Adding New Functionalities
If you're looking to enhance the capabilities of your WordPress blog, working with plugins is the way to go. Plugins are essentially add-ons for your WordPress site.
They can provide new features and expand functionality, helping you customize your blog to better suit your needs and the needs of your audience. So, to really elevate your WordPress blog, start exploring and integrating plugins.
WordPress plugins can add a wide variety of functionalities to your website or blog. Here are a few examples:
- SEO Optimization: Plugins like Yoast SEO can help improve your website's search engine ranking, making it easier for people to find your content.
- E-commerce: If you want to sell products or services directly from your website, plugins like WooCommerce can turn your WordPress blog into a fully-functioning online store.
- Social Media Integration: Plugins like Jetpack can help you connect your website with your social media accounts, allowing for automatic post sharing and increasing your online presence.
- Security: Security plugins can help protect your website from hackers and spam. They offer features like firewalls, malware scanning, and spam comment filtering.
- Website Analytics: Plugins like Google Analytics for WordPress allow you to monitor your website traffic and gain insights about your audience.
- Form Builders: Plugins like Contact Form 7 can help you to create forms for your website for things like customer feedback or inquiries.
- Page Builders: These types of plugins allow you to build and customize your website pages with ease, even if you have little to no coding experience.
- Backup and Migration: These plugins help you create backups of your website and move your website data from one location to another.
How to Find the Right WordPress Theme for Your Blog?
You can find a free plugin on WordPress.org official plugins directory to add functionality in your blog.

If you're seeking more advanced features for your WordPress site, it's definitely worth considering purchasing plugins created by top-tier developers. These premium plugins are designed to provide you with more sophisticated functionality that can truly elevate your website.
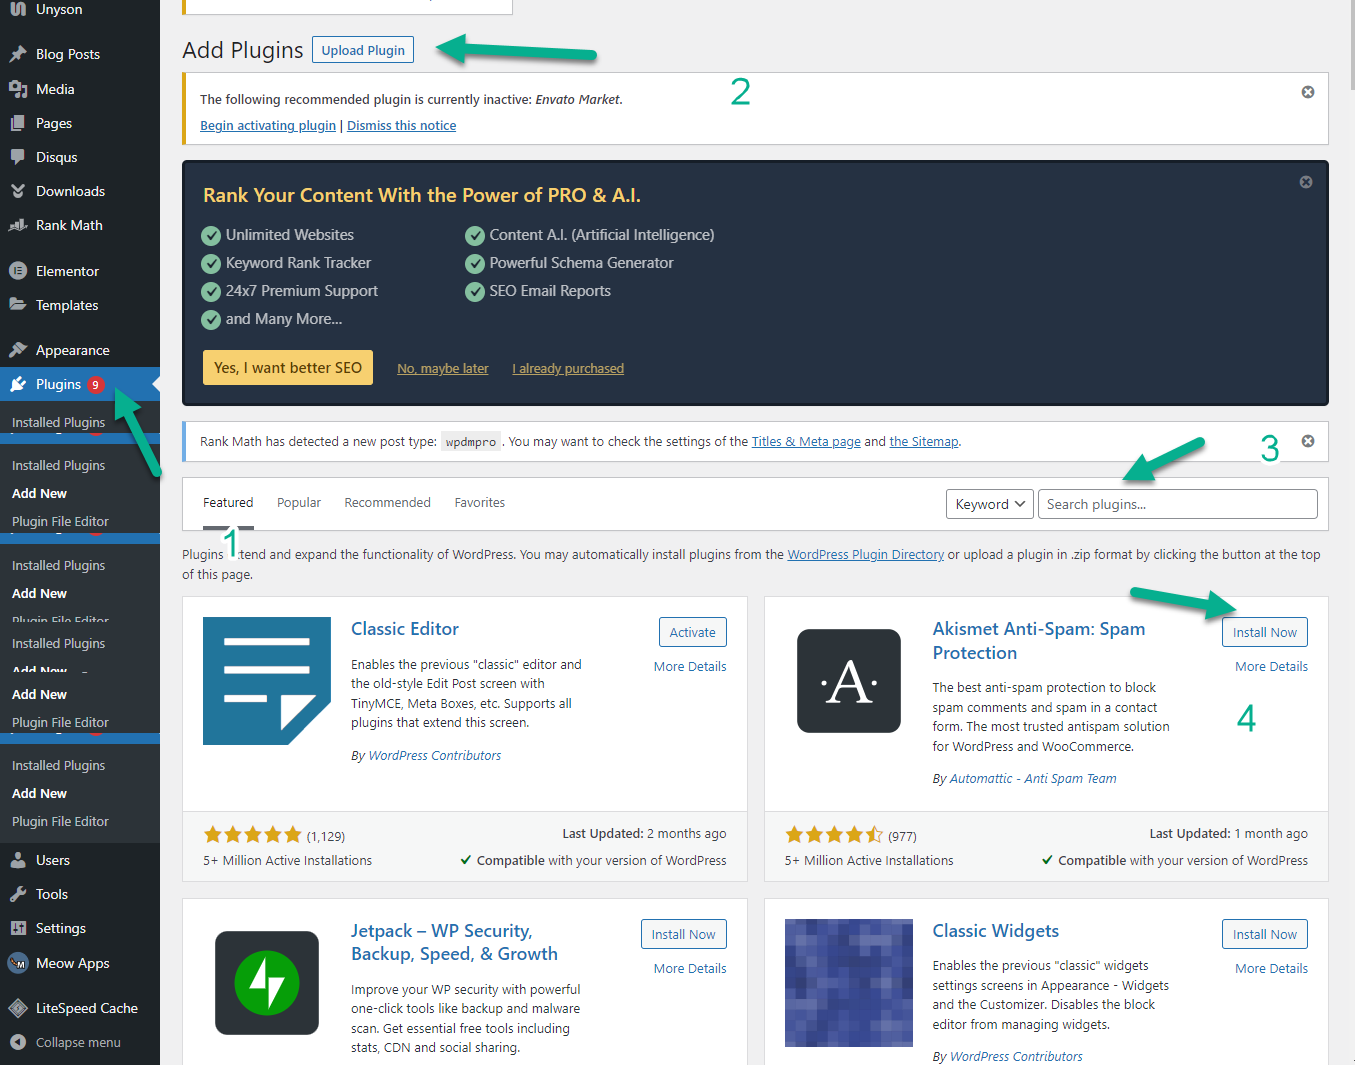
How to install WordPress plugins?
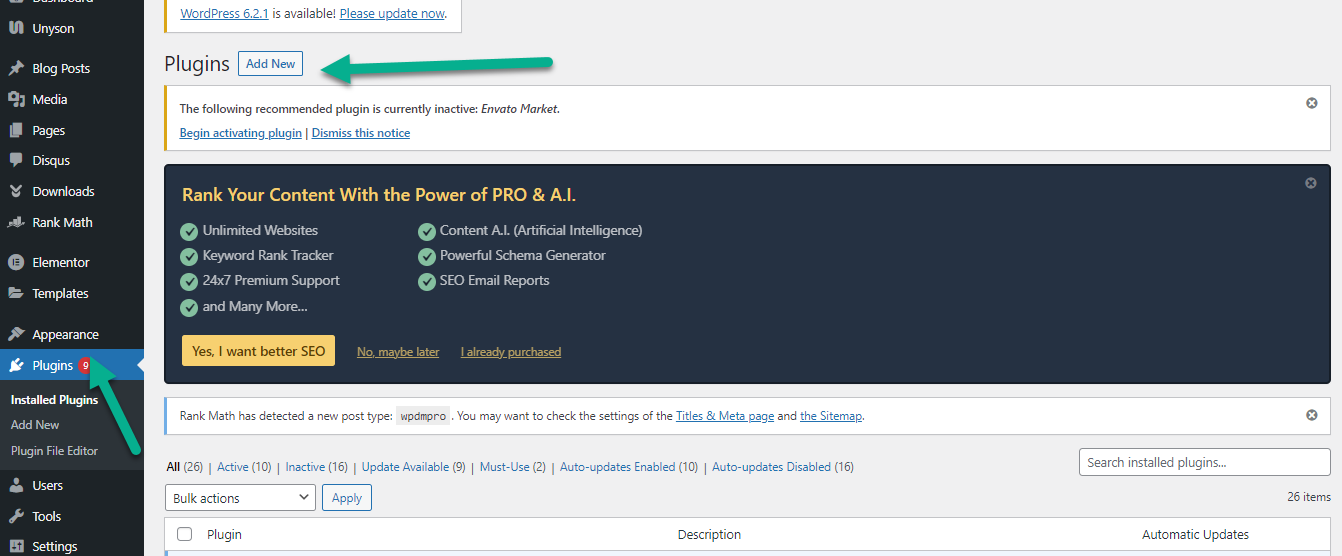
To install plugins on your WordPress site, start by navigating to the "Plugins" section in your dashboard.
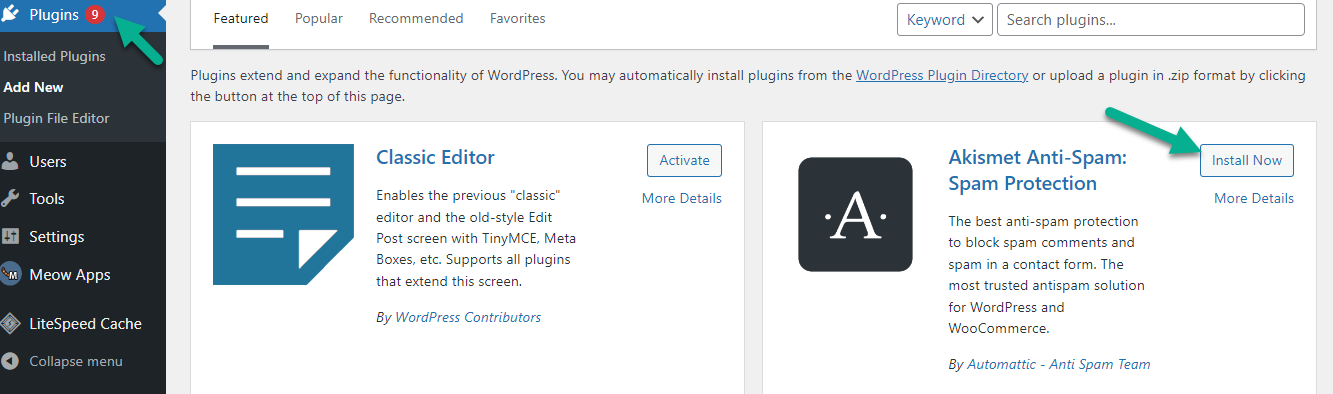
If you're interested in adding a free plugin from the official WordPress plugins directory, just type in the name of the plugin you're interested in and click the "Install" button.
In this blog, we're focusing on the ins and outs of launching WordPress Plugins, walking you through each step of the process. If your interest lies in getting up and running with WordPress on DigitalOcean specifically, we've got just the resource for you. Simply check out our detailed blog post titled "How to Install WordPress on DigitalOcean."
However, if you've bought a premium plugin, the process is a bit different. You'll have received a ZIP file when you make your purchase. To install this plugin, click the "Upload Plugin" button, then select and upload the ZIP file. This will add your purchased plugin to your WordPress site. Remember, whether you're installing a free or premium plugin, it's essential to keep them updated for the best performance and security.
Step 6: Install Google Analytics onto Your WordPress Web Page
Let's dive into a discussion about Google Analytics, starting with an overview of what it is. Following that, we'll explore the numerous benefits that come with integrating Google Analytics into your WordPress website.
Google Analytics is a powerful tool that can provide invaluable insights when used with your WordPress site. There are numerous benefits to leveraging this platform, some of which I'd like to highlight.
- Understanding Your Audience
One of the key advantages of Google Analytics is its ability to help you understand your audience in depth. It allows you to track user behavior, including what pages they visit, how long they stay on your site, and what kind of content engages them the most. You can also gather demographic information such as the geographical locations of your visitors, the devices they use, and even their interests. This data can guide you in tailoring your content and layout to meet the needs and preferences of your visitors.
- Evaluating Your Content
Google Analytics can also help you determine what content is working well on your site and what isn't. By tracking metrics like page views, bounce rate, and average time spent on each page, you can identify which posts or pages are the most popular and which ones might need a little tweaking. This can be a game-changer in improving your content strategy and driving more traffic to your site.
- Optimizing for SEO
Another benefit of Google Analytics is its ability to help you optimize your site for search engines. By analyzing the keywords that bring people to your site, you can refine your SEO strategy to improve your ranking in search engine results. This will help to increase your site's visibility and attract more organic traffic.
- Tracking Marketing Campaigns
If you're running marketing campaigns, Google Analytics can track their effectiveness. Whether it's a social media campaign, email marketing, or pay-per-click advertising, you can see exactly how much traffic is being driven to your site through these efforts. This can help you allocate your marketing budget more effectively and focus on the strategies that yield the best return on investment.
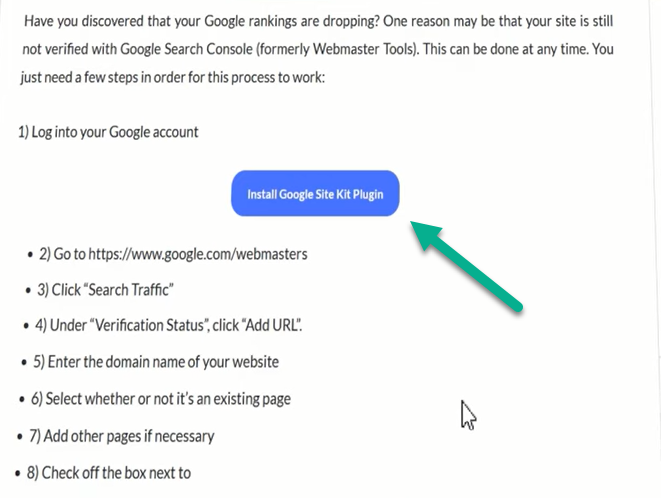
How Can You Install Google Analytics?
Firstly, you will need to sign in with your Gmail account on the Google Analytics website. Editing is not possible on the platform.

Then install the “Site Kit” Plugin to add Google Analytics.
Now it's time to insert the tracking code into your website's header file “header.php”. This will allow you to monitor site traffic and other user activities on your website.

To complete the process, paste your tracking code at the end of the "header.php" file. Once you've done that, simply click on the "Update File" button to save your changes.

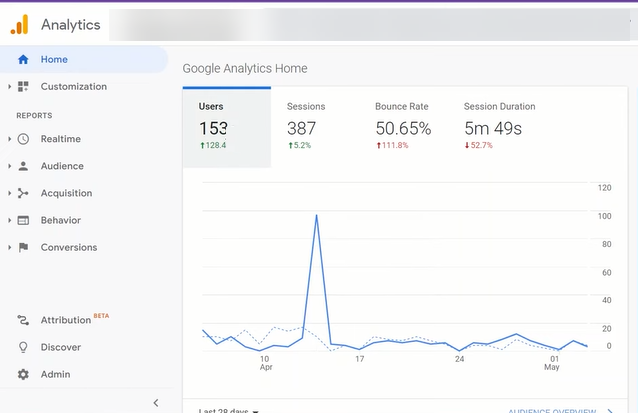
Once you've made the update, give it about 24 hours. After that, you'll be able to see your site's performance data tracked by Google Analytics.
Wrapping Up
In conclusion, building and maintaining a successful website involves a series of crucial steps. It begins with securing a unique domain name and choosing a reliable hosting provider which acts as your site's address and ensures it's accessible worldwide.
Setting up your WordPress site with a hosting provider follows this. Once installed, customization is the key - whether you're creating a blog, online store, or portfolio, using the right themes and plugins will help make your site unique and engaging.
Creating your first blog post through the WordPress Editor is a significant step, allowing you to craft engaging content and add visual appeal. WordPress Themes and Plugins then enable you to refine your site's appearance and extend its functionality.
The right theme, either free or premium, gives your site the desired aesthetic, and plugins help tailor your site to your specific needs by enhancing SEO, integrating social media, and more.
Furthermore, adding new functionalities with plugins can enhance your blog's capabilities, including SEO optimization, e-commerce integration, and website analytics. This can transform your site from a simple blog to a fully functional and interactive platform, making it more compelling for users.
Finally, integrating Google Analytics into your WordPress website is a vital step. It provides detailed insights into your audience, your content's performance, SEO effectiveness, and marketing campaign outcomes.
By giving you a deeper understanding of your audience's behavior and preferences, Google Analytics guides your content creation and layout decisions, optimizes your content strategy, and improves your site's visibility on search engines.
In essence, creating a successful blog involves writing engaging content, optimizing the blog's appearance and functionality, and using data-driven insights from tools like Google Analytics. By paying attention to these elements, you can create a compelling, user-friendly, and successful blog that stands out from the crowd.
FAQs
How do I start writing my first blog post on my WordPress site?
To start writing your first blog post, log in to your WordPress dashboard. Navigate to the 'Posts' section, and from the submenu that appears, click on the 'Add New' option. You can now start creating your content within the WordPress Editor. The "+" button can help you add various elements to your post, such as images, tables, headings, or lists.
What are WordPress Themes and Plugins, and why are they essential?
WordPress Themes and Plugins are critical components of a WordPress blog or website. Themes provide the design, including layout options, color schemes, font styles, and overall aesthetics. They help maintain a consistent look and feel across your blog. Plugins, on the other hand, are pieces of software containing a group of functions that can be added to a WordPress website. They can extend functionality or add new features to your WordPress websites, such as a contact form, an online store, or SEO improvements.
How can I modify the appearance of my blog on WordPress?
You can modify your blog's appearance by changing the WordPress theme. For this, navigate to the 'Appearance' option on your dashboard and select 'Themes'. You can then search for a free theme or upload a premium theme that you've purchased. After installing the theme, go to the 'Appearance' section on your dashboard and click 'Customize' to start making desired changes.
What kind of functionalities can WordPress plugins add to my blog?
WordPress plugins can add a wide variety of functionalities to your blog, including SEO optimization, e-commerce capabilities, social media integration, security features, website analytics, form building, page building, and backup and migration capabilities.
Why should I integrate Google Analytics into my WordPress website, and how can I do it?
Google Analytics is a powerful tool that can provide invaluable insights about your audience, your content, your SEO optimization, and your marketing campaigns. It can guide you in improving your content strategy and driving more traffic to your site. To install Google Analytics, sign in with your Gmail account on the Google Analytics website, install the “Site Kit” Plugin, and insert the tracking code into your website's "header.php" file. After updating the file, you'll start receiving data on your site's performance within 24 hours.


.svg)