


GoDaddy offers two methods to install WordPress: the automatic one-click installer during hosting setup, and manual installation via cPanel. Both methods take under 15 minutes. This guide covers both methods with screenshots and includes a bonus section on installing a free 15-year SSL certificate using Cloudflare, saving you $40 per year.
📋 What You Need Before Starting
📑 Table of Contents
01 What Is GoDaddy Hosting?
02 Method 1: Auto-Install WordPress on GoDaddy (19 Steps)
03 Method 2: Manual Install via cPanel (8 Steps)
04 How to Install a Free SSL Certificate (23 Steps)
05 Frequently Asked Questions
What Is GoDaddy Hosting?
GoDaddy is a web hosting provider founded in 1997. GoDaddy serves over 21 million customers and manages 84 million domain names worldwide. GoDaddy offers domain registration, shared hosting, VPS hosting, dedicated servers, and managed WordPress hosting.
GoDaddy hosting plans include cPanel access, one-click WordPress installation, 24/7 customer support, and a 99.9% uptime guarantee. All plans support PHP 8.x, MySQL 8.0, and free bandwidth. GoDaddy data centers operate in North America, Europe, and Asia-Pacific.
GoDaddy offers 7 types of hosting services. Each hosting type supports WordPress installation:
- Web Hosting (Shared) starts at $5.99/month. Multiple websites share server resources including CPU, RAM, and storage. WordPress runs on all Web Hosting plans. Shared hosting suits websites with fewer than 25,000 monthly visitors.
- WordPress Hosting starts at $6.99/month. WordPress comes pre-installed. GoDaddy manages automatic WordPress core updates, security patches, daily backups, and PHP 8.x optimization. WordPress Hosting includes a one-click staging environment.
- Business Hosting (VPS) starts at $19.99/month. You receive dedicated CPU and RAM resources without sharing with other accounts. Business Hosting includes root access, dedicated IP address, and SSD storage.
- WordPress Ecommerce Hosting starts at $15.99/month. This plan includes WooCommerce pre-installed with free extensions valued at over $3,000. It supports unlimited products, payment gateway integration, and PCI compliance.
- VPS Hosting starts at $4.99/month. VPS provides full root access, dedicated resources, and choice of CentOS, Ubuntu, or Fedora operating systems. VPS Hosting requires manual WordPress installation via command line or cPanel.
- Reseller Hosting starts at $17.99/month. Reseller plans allow you to create and manage hosting accounts under your own brand. Each sub-account supports independent WordPress installations.
- Dedicated Servers start at $129.99/month. You receive an entire physical server with full root access, up to 64GB RAM, and up to 2TB SSD storage. Dedicated servers deliver the highest performance for high-traffic WordPress sites.
The two installation methods below work on all GoDaddy hosting types. WordPress Hosting plans come with WordPress pre-installed, so you can skip directly to the SSL installation section.
Method 1: How Do You Install WordPress on GoDaddy Using Auto-Setup?
GoDaddy provides an automatic WordPress installer during the initial hosting setup. This method completes WordPress installation in under 5 minutes. The auto-installer configures the MySQL database, uploads WordPress core files, and creates the wp-config.php file automatically.
Follow these 19 steps to install WordPress on GoDaddy using the auto-setup method:
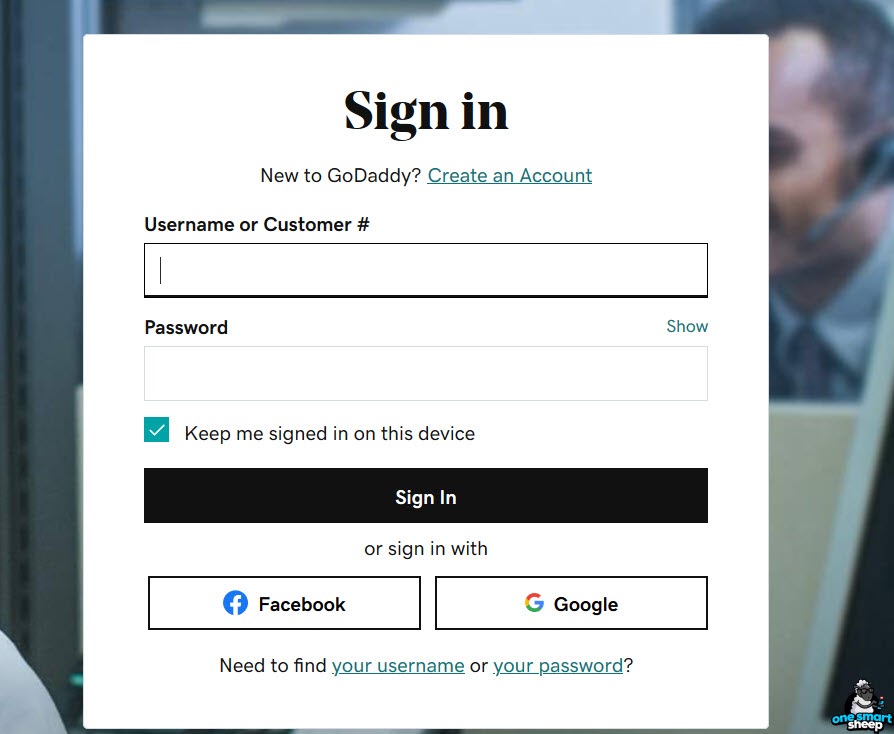
Step 1: Sign In to Your GoDaddy Account
Go to sso.godaddy.com and enter your GoDaddy username and password. Two-factor authentication (2FA) may be required if enabled on your account.
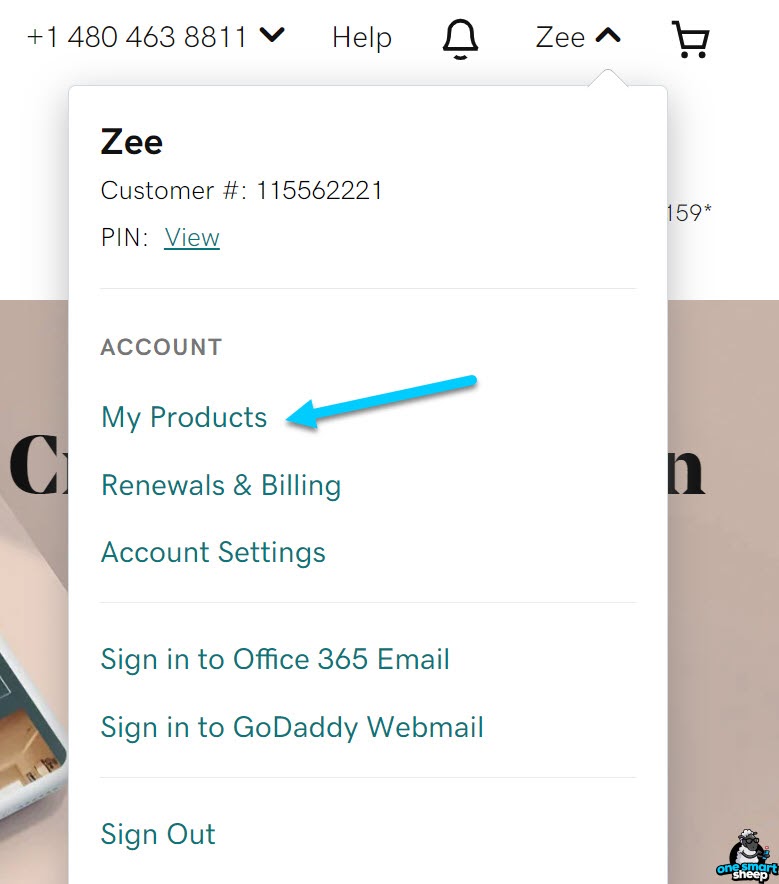
Step 2: Go to My Products
Click your account name in the top-right corner. Select My Account from the dropdown menu. This opens your product management dashboard.
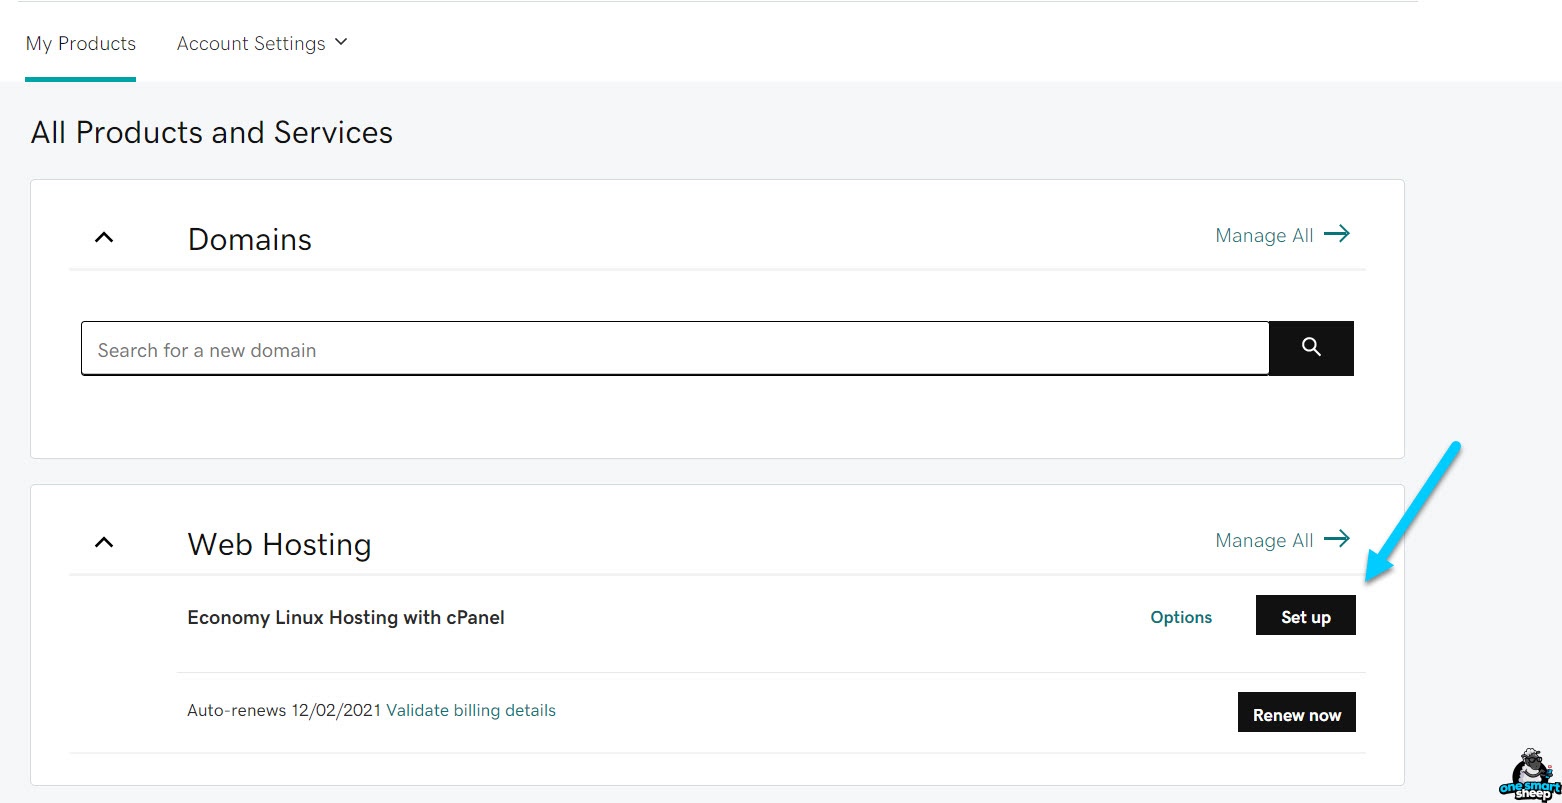
Step 3: Click Set Up
Locate your Web Hosting plan under the hosting section. Click the Set up button to begin the hosting configuration process.
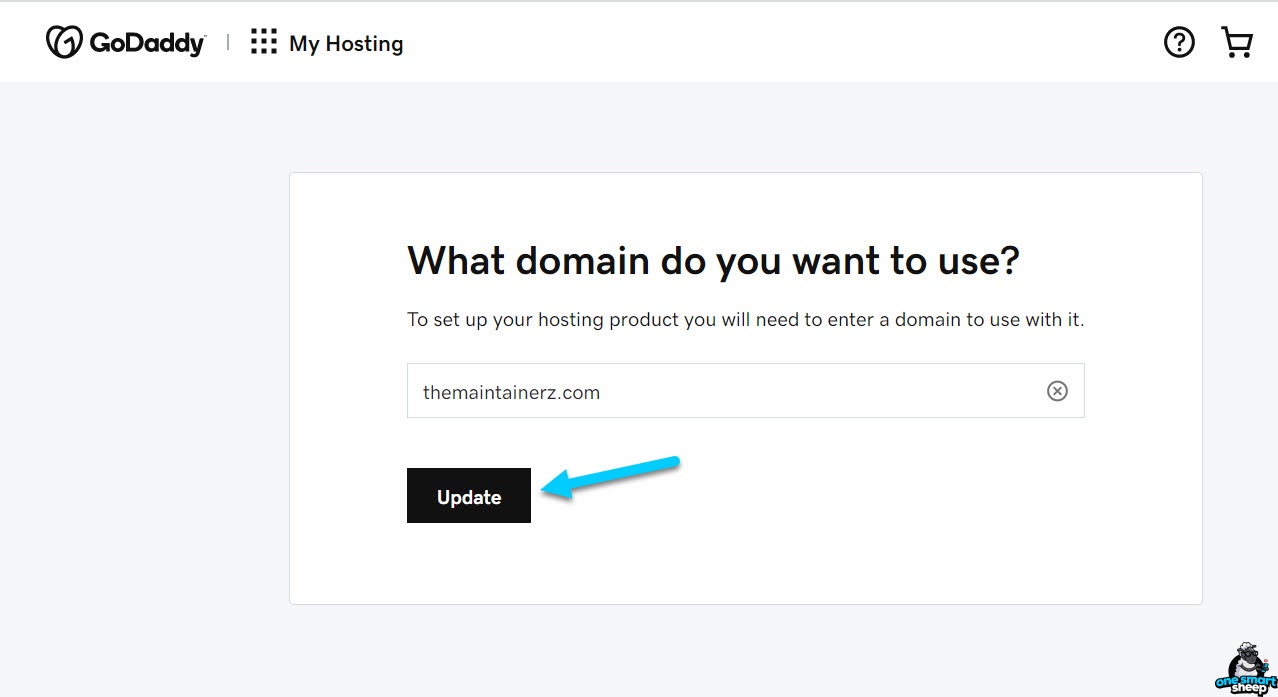
Step 4: Enter Your Domain Name
Type the domain name where you want to install WordPress. GoDaddy accepts domains registered with any registrar. The domain must point to GoDaddy nameservers (configured in Steps 12-14 if using an external registrar).
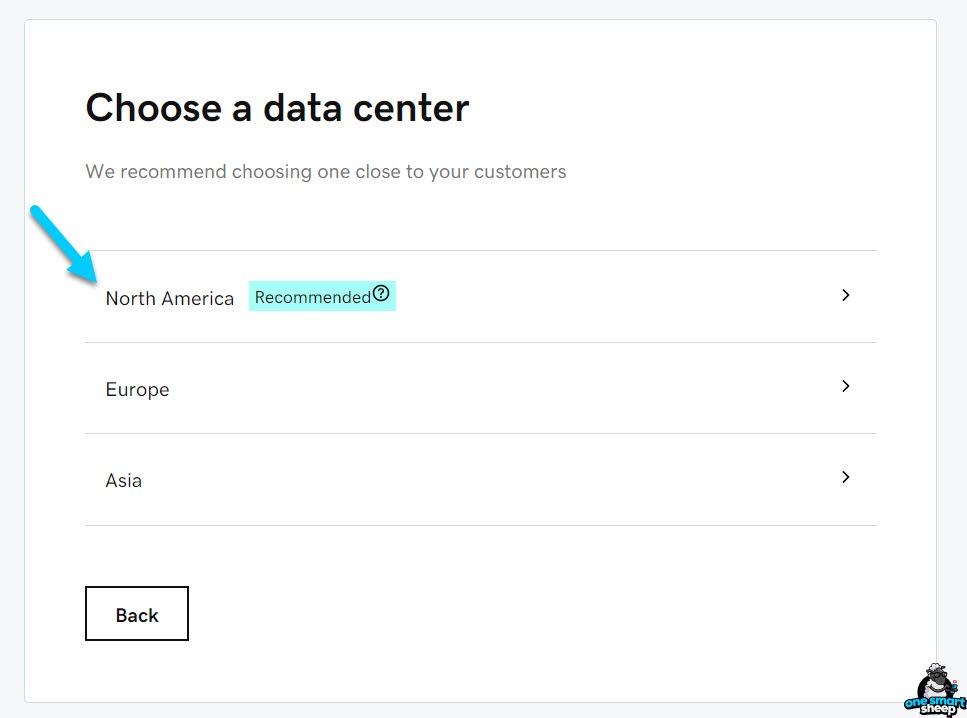
Step 5: Select Your Data Center Location
Choose the data center closest to your target audience. GoDaddy offers data centers in North America, Europe, and Asia-Pacific. Selecting the nearest data center reduces server response time (TTFB) by 50-200 milliseconds for your visitors.
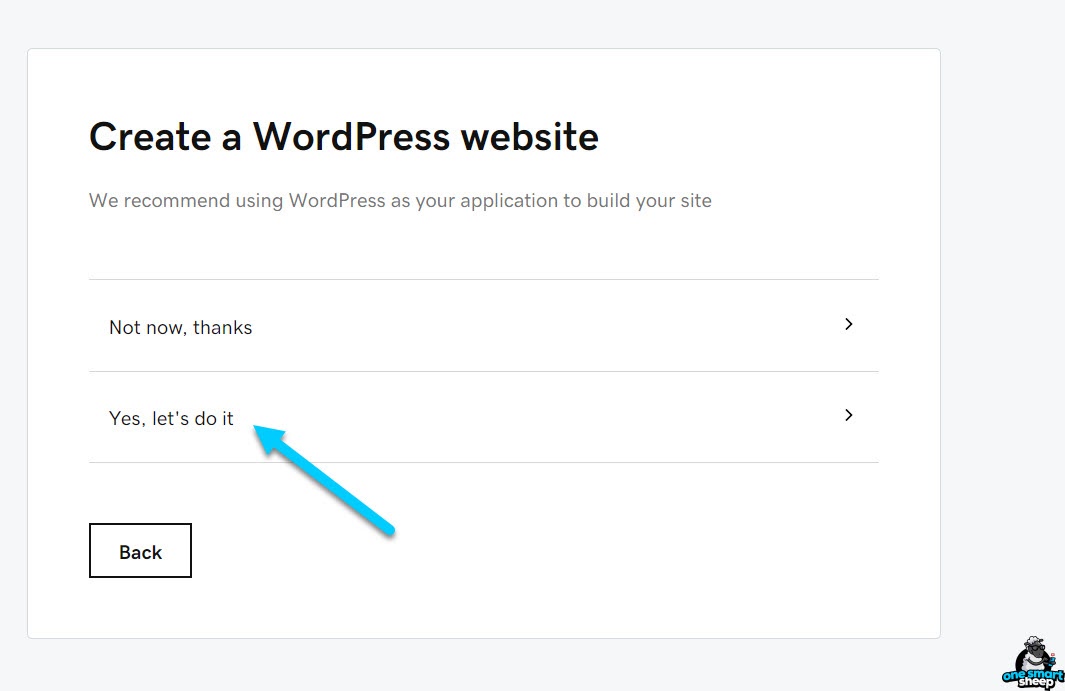
Step 6: Confirm WordPress Installation
GoDaddy displays a prompt asking if you want to create a WordPress website. Click "Yes, let's do it" to trigger the automatic WordPress installation on your GoDaddy hosting account.
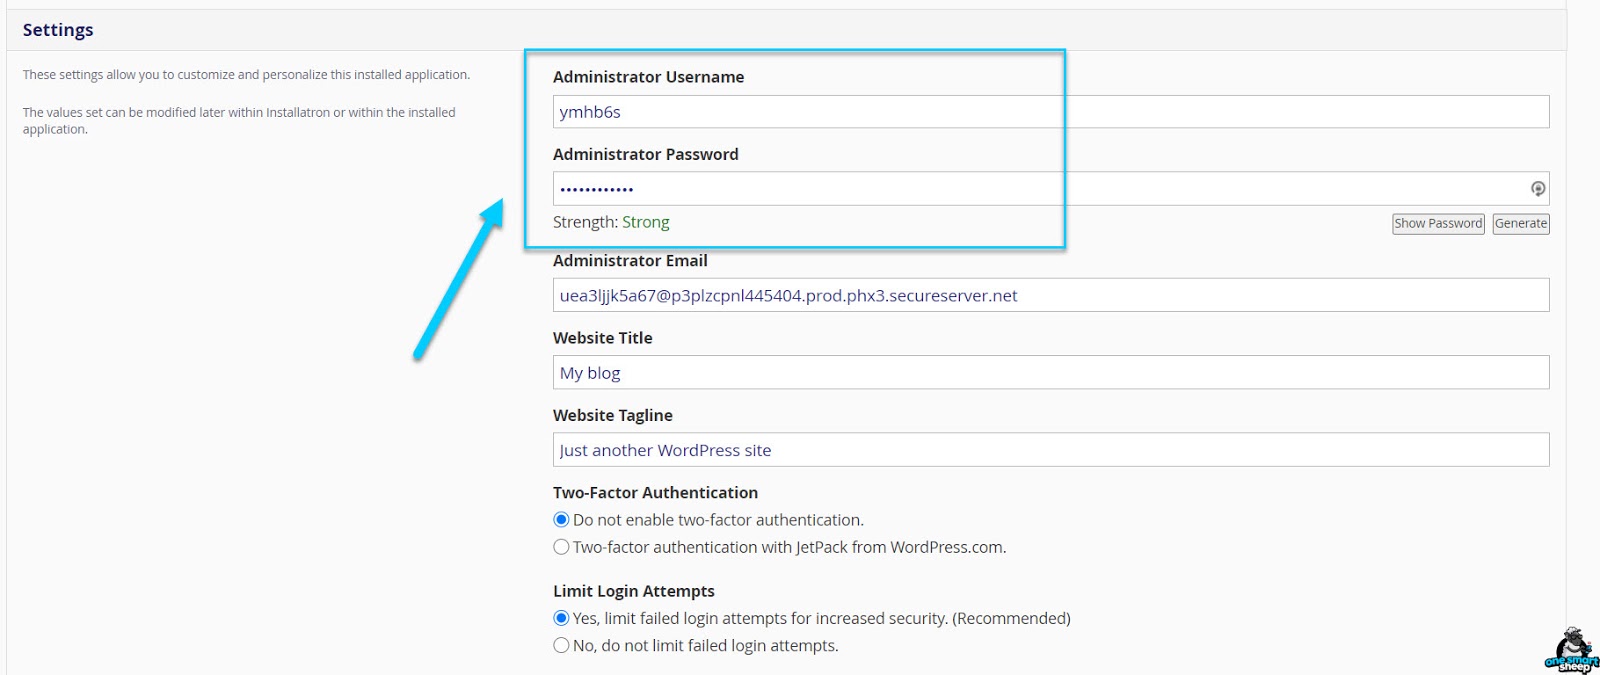
Step 7: Create Your WordPress Admin Account
Enter a username and a strong password for your WordPress administrator account. This account has full control over your WordPress site including plugin installation, theme changes, and user management.
Use a password with at least 12 characters, including uppercase letters, lowercase letters, numbers, and symbols. Store your credentials in a password manager like 1Password, Bitwarden, or LastPass. WordPress is targeted by over 90,000 brute-force attacks per minute globally.

Step 8: Wait for Provisioning
GoDaddy provisions your hosting account and installs WordPress automatically. This process takes 30-90 seconds. The progress bar indicates the installation status. Do not close your browser during this step.

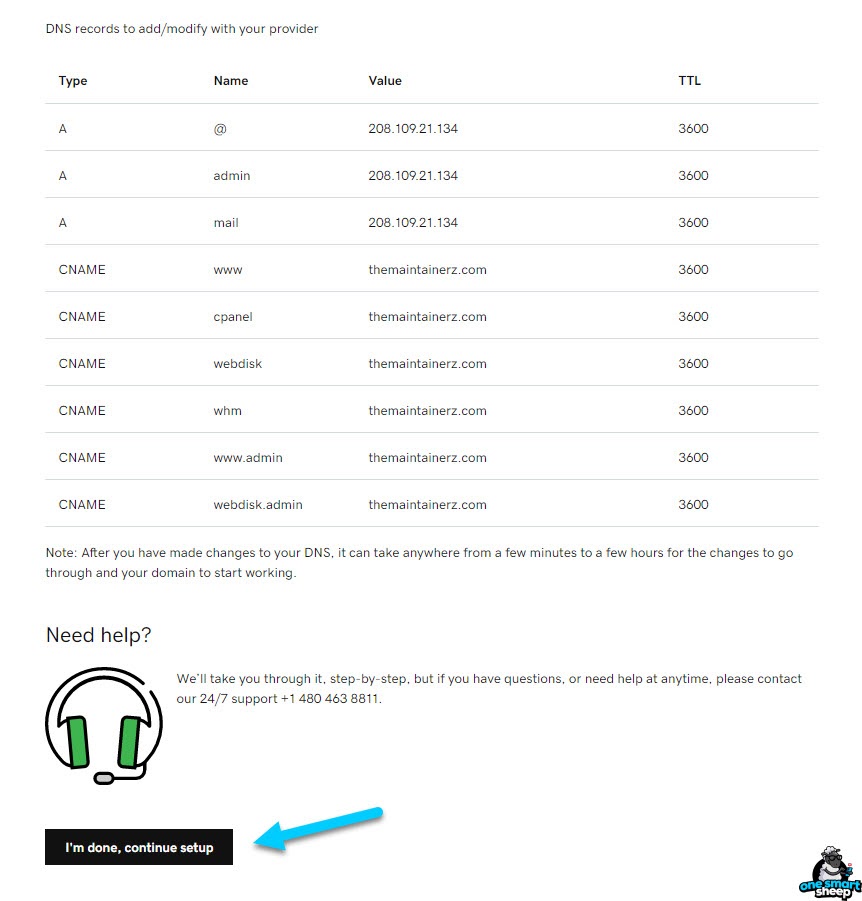
Step 9: Complete DNS Setup
Click "I'm done, continue setup" to proceed. If your domain is registered with GoDaddy, DNS records are configured automatically. External domains require manual nameserver configuration (Steps 12-14).
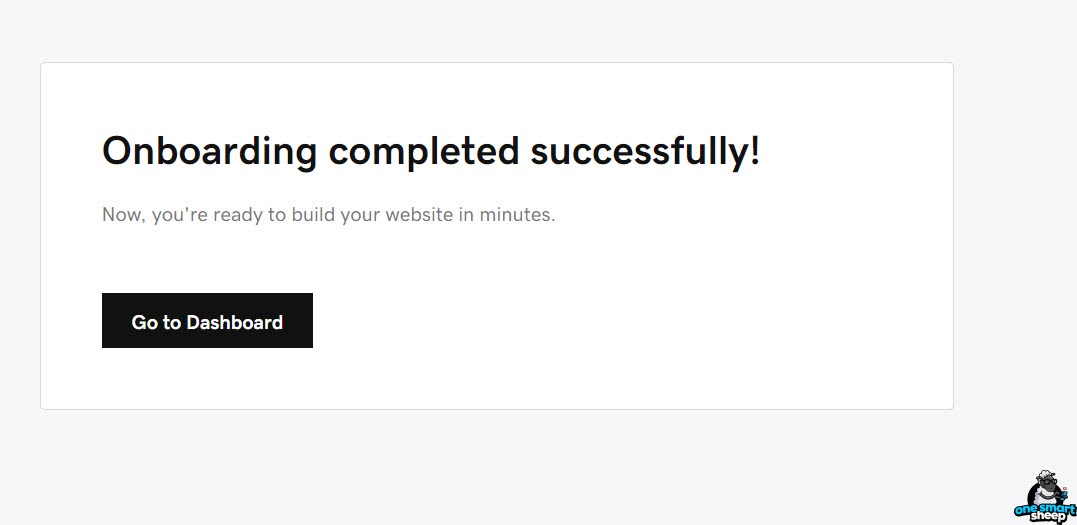
Step 10: Access Your Dashboard
The confirmation screen displays "Onboarding completed successfully." Click "Go to Dashboard" to access your GoDaddy hosting control panel.
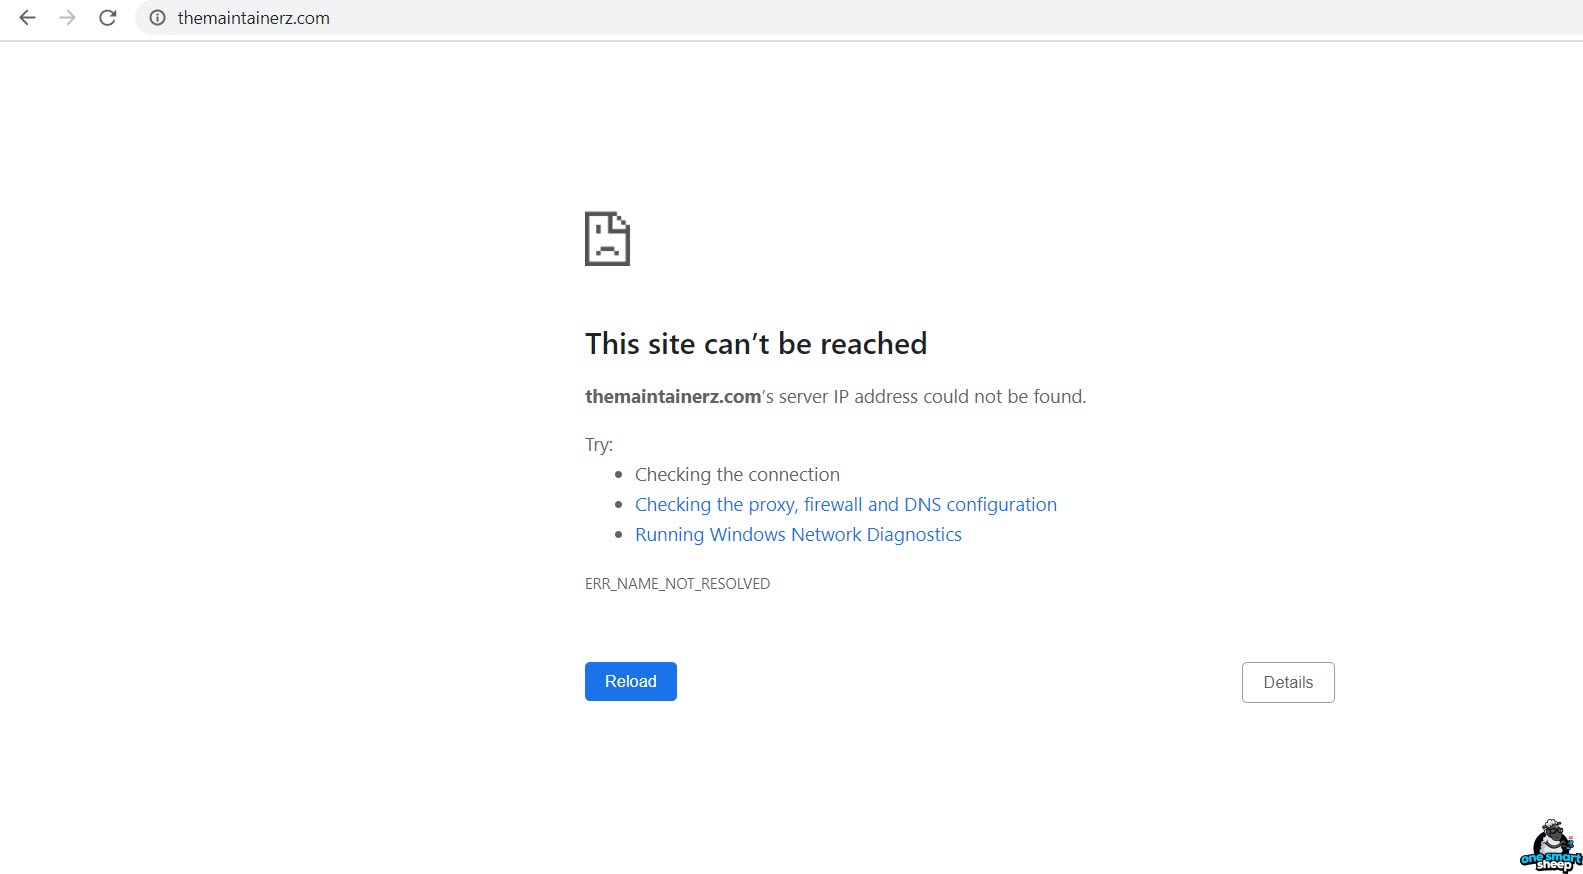
Step 11: Troubleshoot the DNS Error
An error may appear if your domain uses an external registrar (Namecheap, Google Domains, Cloudflare). This error means your domain does not point to GoDaddy nameservers yet. Domains registered directly with GoDaddy skip this step automatically.
Step 12: Find Your GoDaddy Nameservers
Open Domain Management in your GoDaddy account. Click DNS, then Manage DNSSEC DS Records. GoDaddy assigns unique nameservers to each hosting account, unlike other providers that use fixed nameservers.

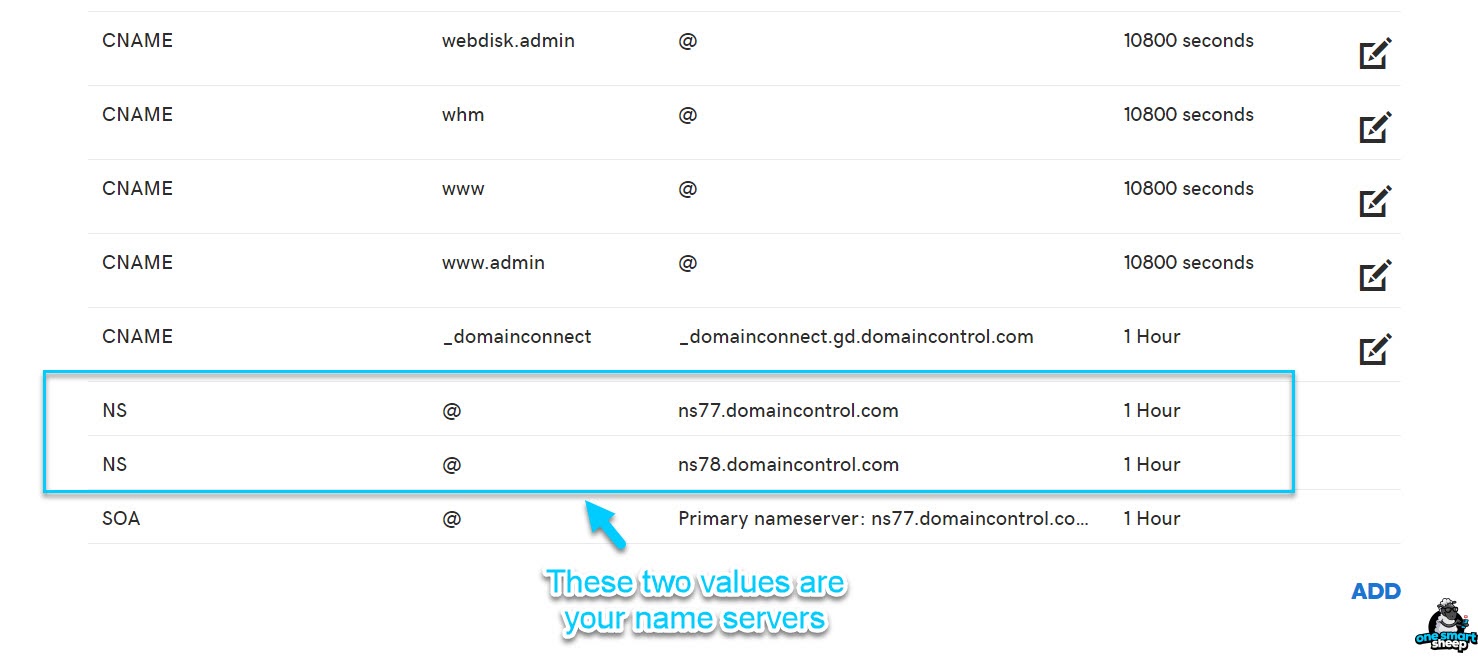
Step 13: Copy the NS Records
Locate the two NS records in your GoDaddy DNS settings. Copy both nameserver addresses. Each nameserver follows the format: nsXX.domaincontrol.com. You need both nameservers for proper DNS redundancy.
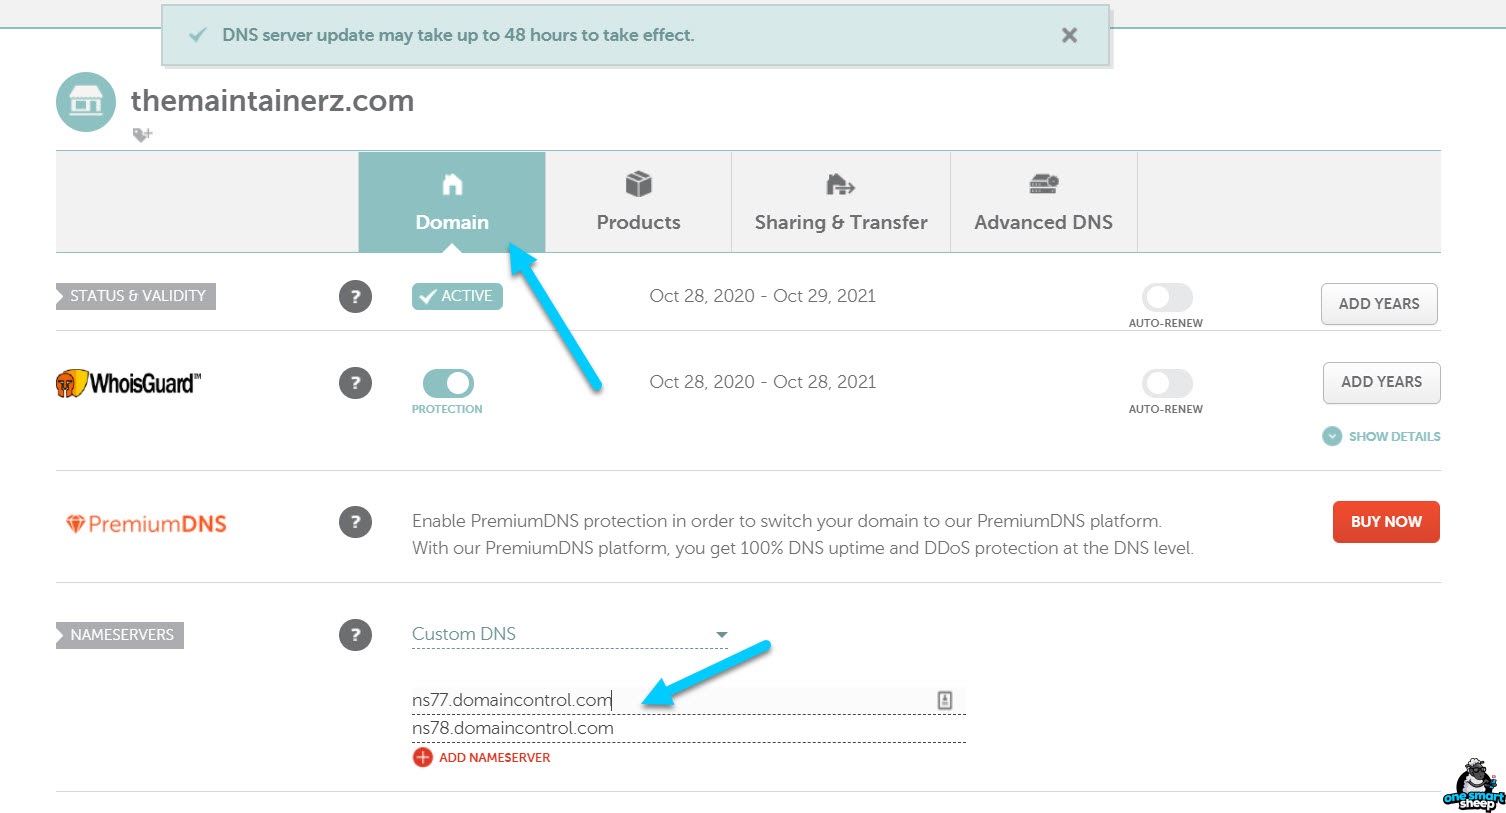
Step 14: Update Nameservers at Your Domain Registrar
Log into your domain registrar (Namecheap, Google Domains, or other). Go to the nameserver settings for your domain. Replace the existing nameservers with the two GoDaddy nameservers you copied in Step 13.
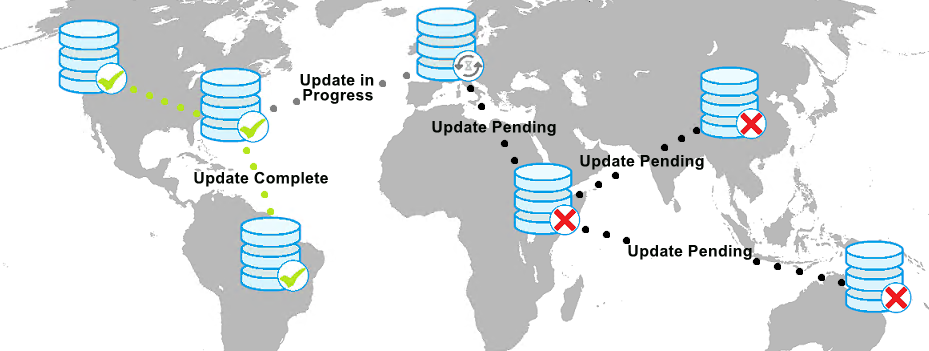
Step 15: Wait for DNS Propagation
DNS propagation takes between 15 minutes and 48 hours. Most nameserver changes propagate within 2-4 hours. DNS propagation is the process of updating nameserver records across all DNS servers worldwide. You can check propagation status at dnschecker.org.
Do not panic if you see an error after updating nameservers. DNS propagation requires time. Clear your browser cache and try again after 2-4 hours. You can also try accessing your site from a different device or network.
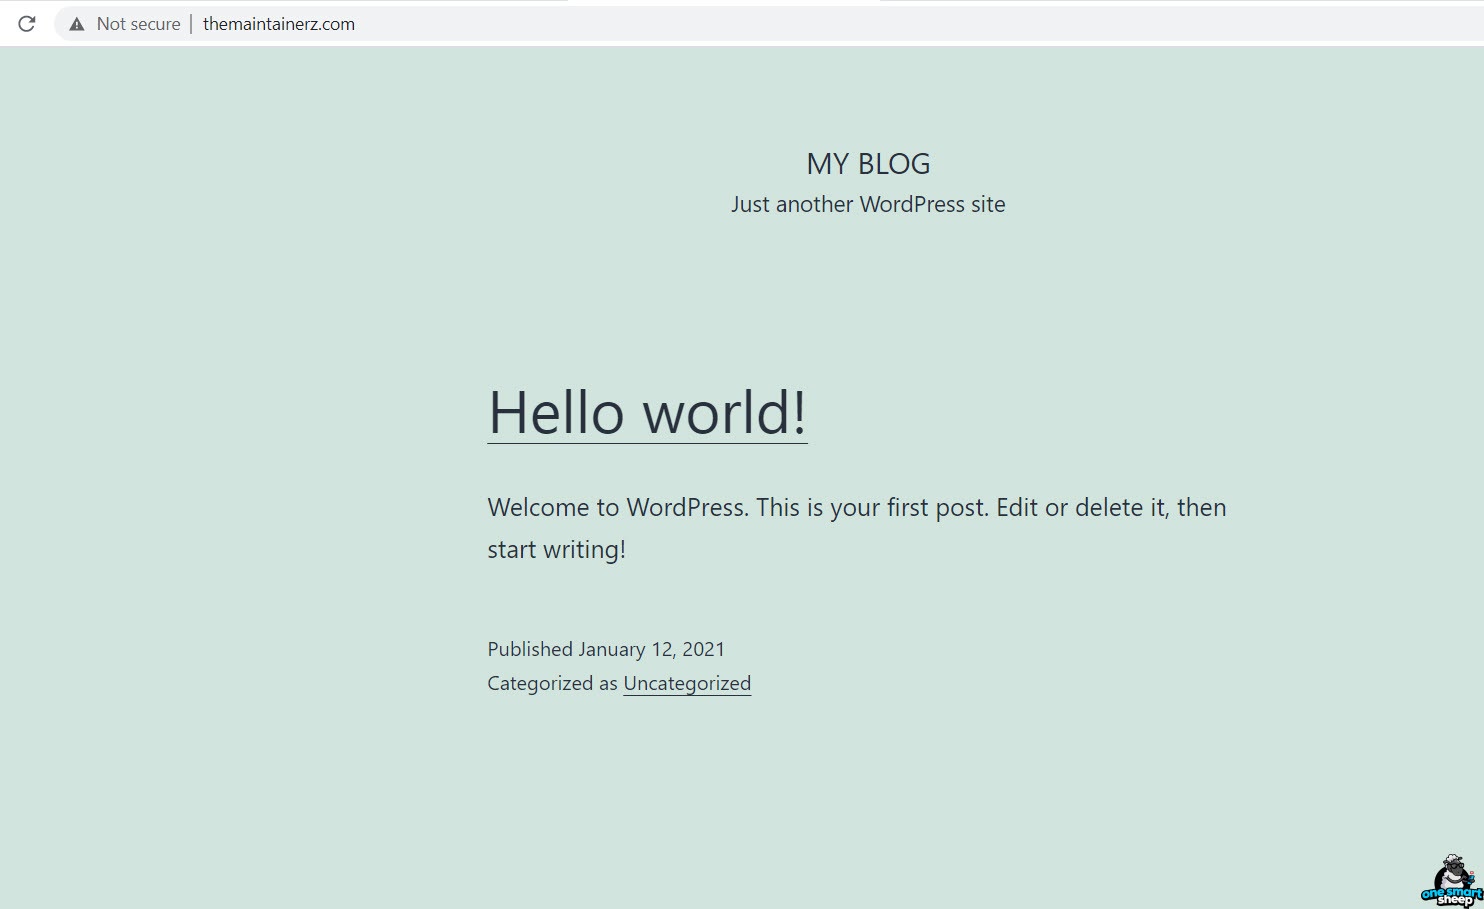
Step 16: Verify Your WordPress Installation
After DNS propagation completes, open your domain in a web browser. The default WordPress theme (Twenty Twenty-Five) appears, confirming successful installation. Your WordPress site is now live and accessible to visitors worldwide.
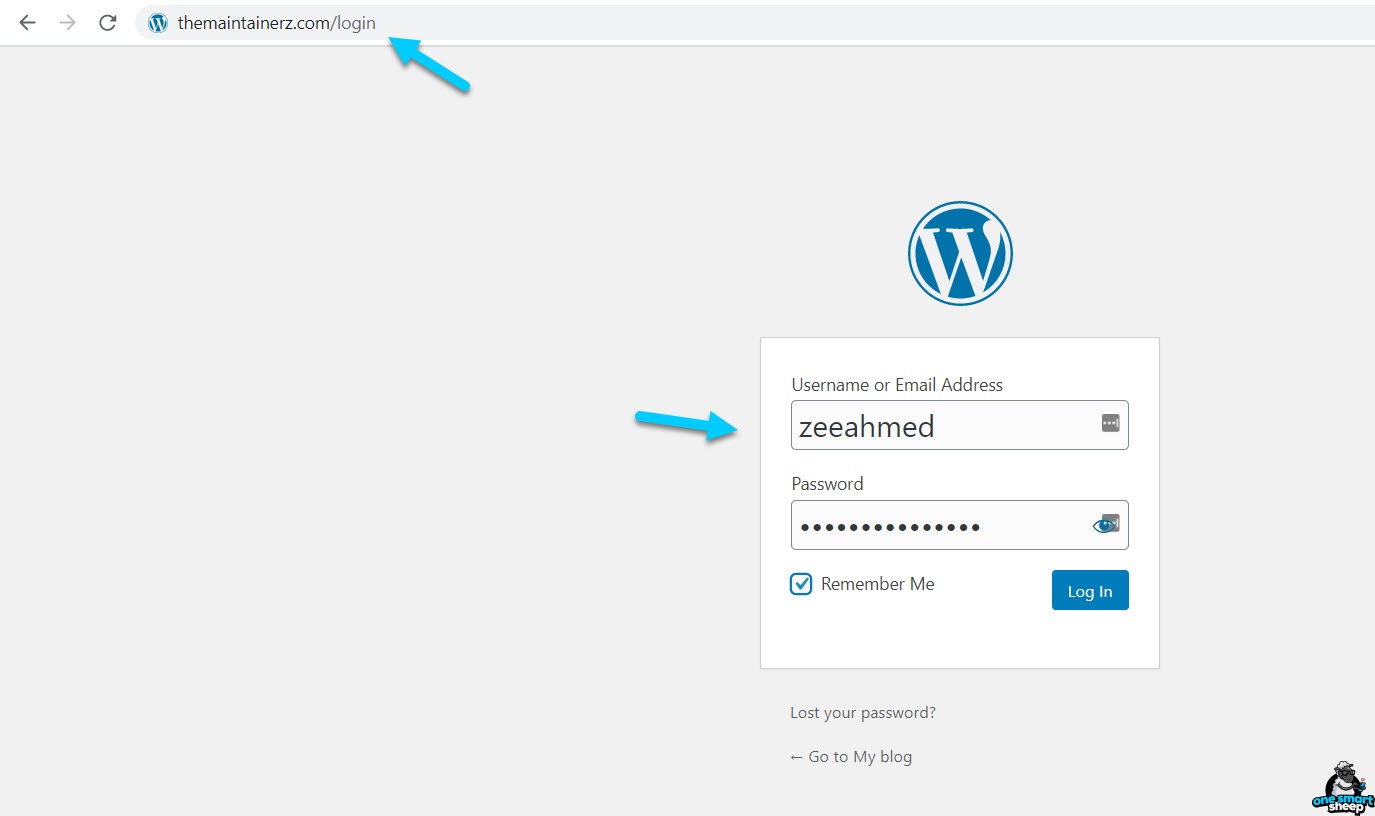
Step 17: Log In to WordPress Admin
Access the WordPress login page by adding /wp-login.php to your domain URL (example: yourdomain.com/wp-login.php). Enter the username and password you created in Step 7. The WordPress admin dashboard loads after successful authentication.
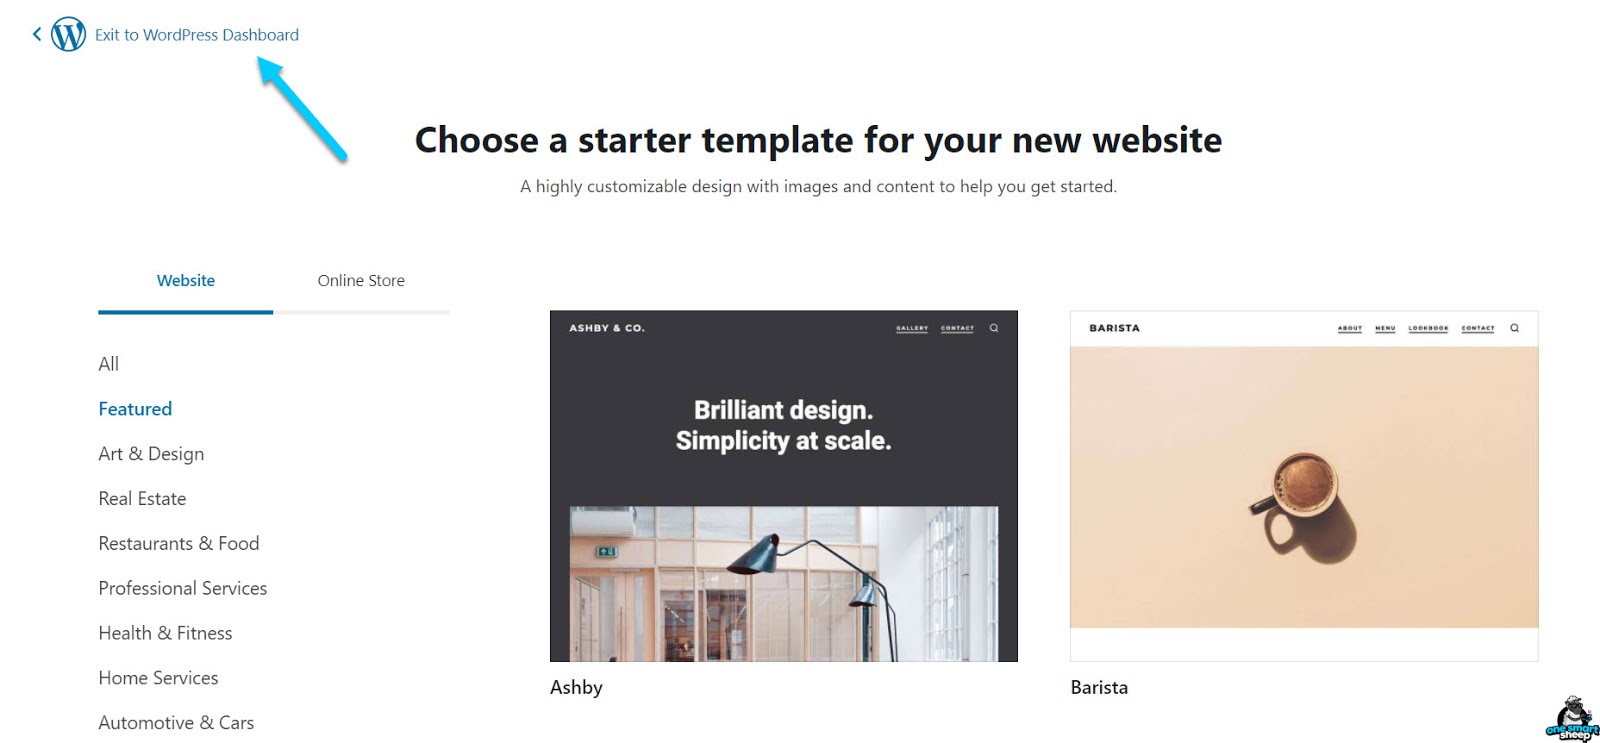
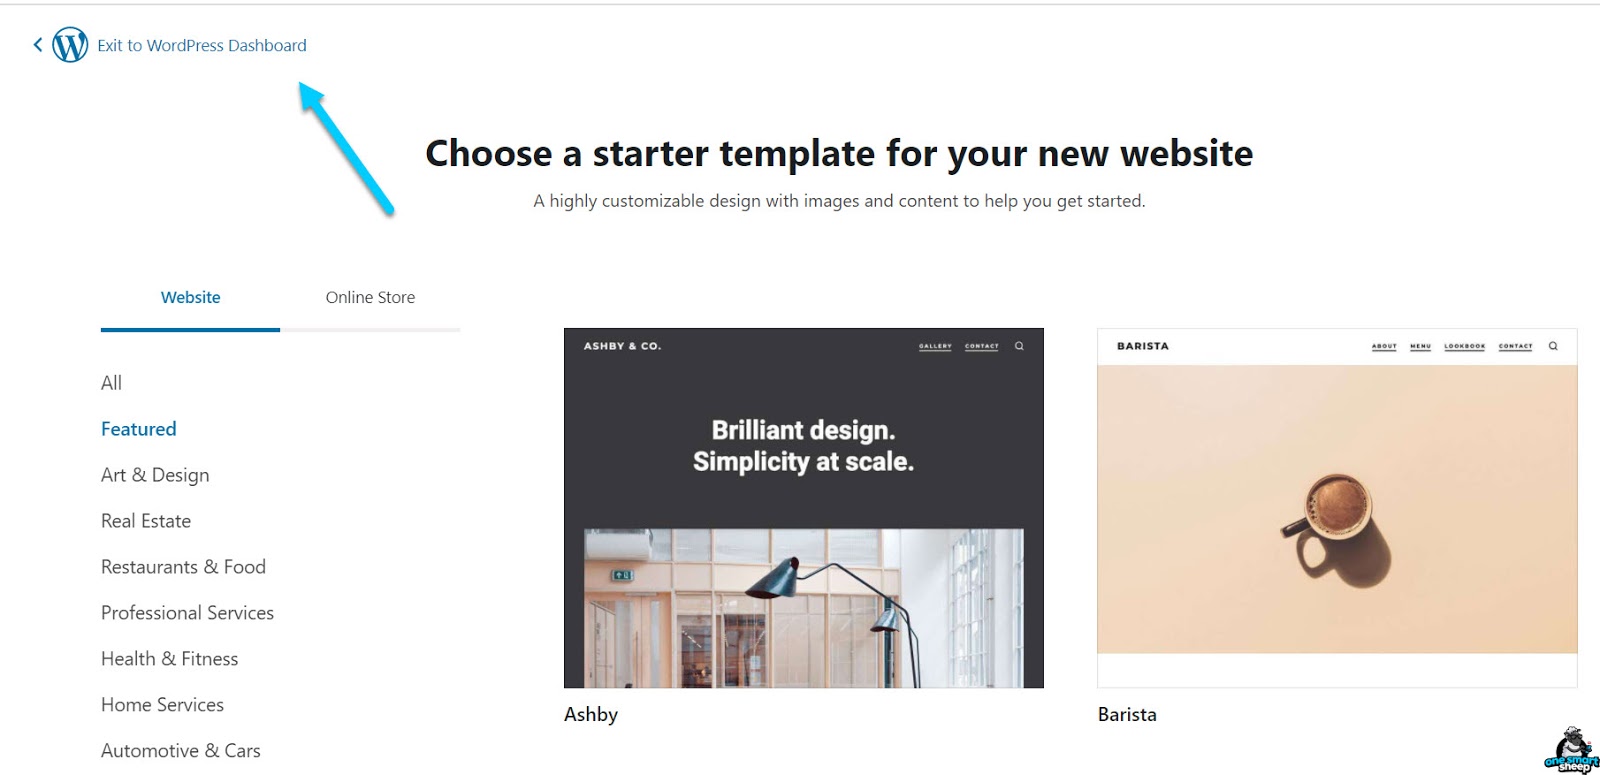
Step 18: Exit the Setup Wizard
GoDaddy displays a starter template selection screen. Click "Exit to WordPress Dashboard" to access the full WordPress admin panel. You can install any WordPress theme later from Appearance > Themes.
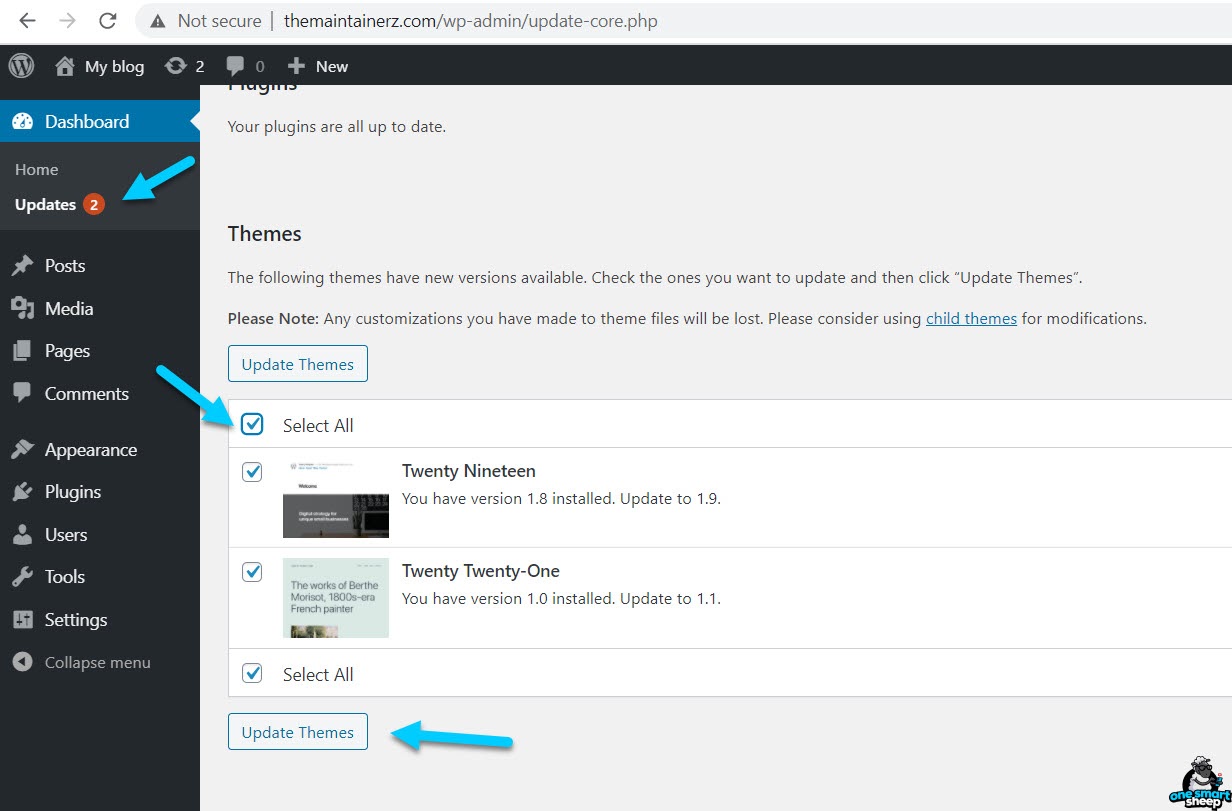
Step 19: Update WordPress Core, Plugins, and Themes
Go to Dashboard > Updates immediately after installation. Update WordPress core, all pre-installed plugins, and the default themes to their latest versions. Outdated WordPress installations are the primary attack vector for 70% of hacked WordPress sites.
🎉 Method 1 Complete!
WordPress is now installed on your GoDaddy hosting. Scroll down to learn how to install a free SSL certificate, or continue to Method 2 if you need to install WordPress on additional domains.
Method 2: How Do You Install WordPress Manually on GoDaddy via cPanel?
cPanel is a Linux-based web hosting control panel that provides a graphical interface for server management. GoDaddy includes cPanel with all Web Hosting and Business Hosting plans. Manual installation through cPanel allows you to install WordPress on additional domains, subdomains, or subdirectories within your existing hosting account.
Follow these 8 steps to install WordPress manually on GoDaddy via cPanel:
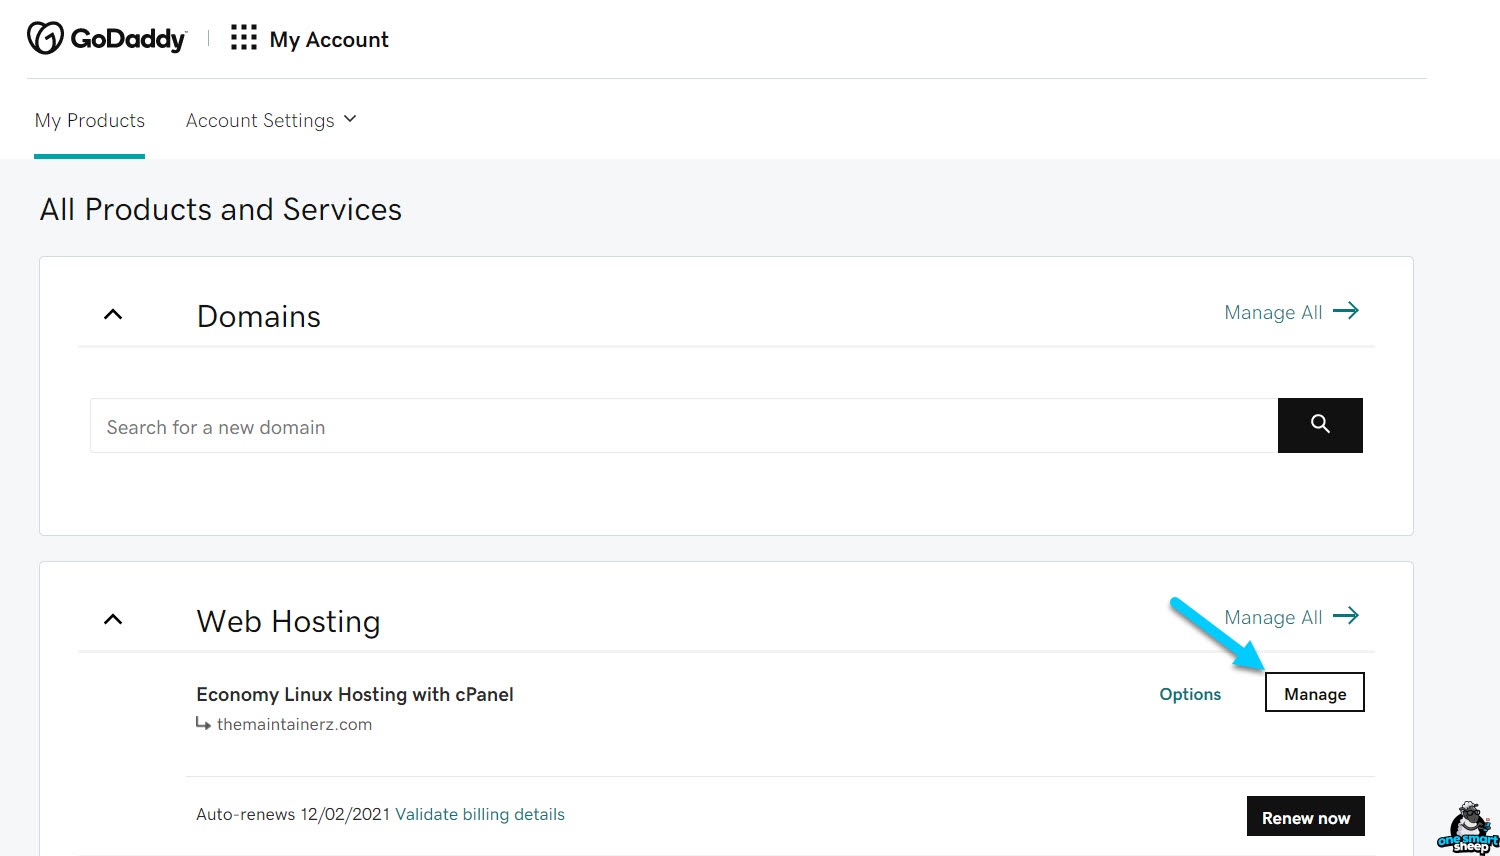
Step 1: Open Your Hosting Manager
Sign in to GoDaddy and go to My Account. Click Manage next to your hosting plan to open the hosting management dashboard.
Step 2: Launch cPanel
Click the cPanel Admin button to open the cPanel control panel. cPanel opens in a new browser tab with full access to file management, database administration, email configuration, and application installers.

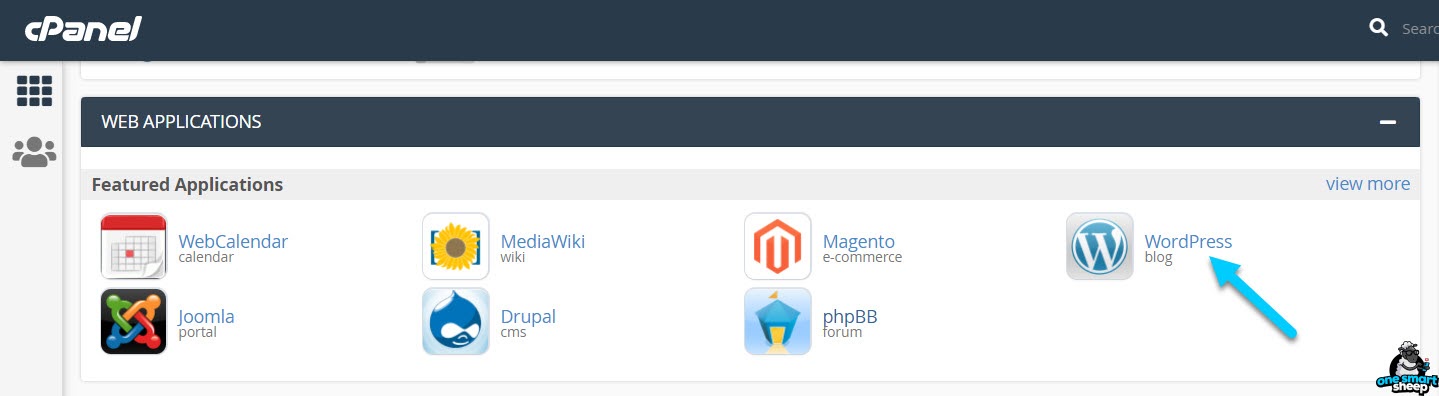
Step 3: Find the WordPress Installer
Scroll to the "Web Applications" section in cPanel. Click the WordPress icon. GoDaddy uses the Installatron application installer for one-click WordPress deployment.
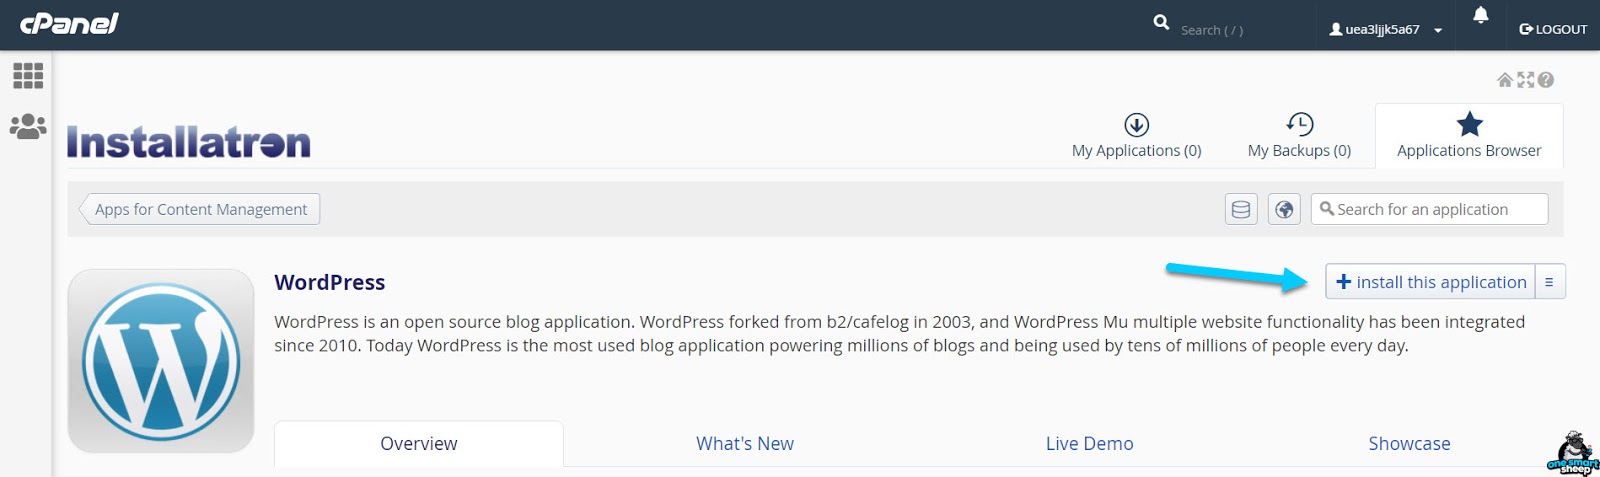
Step 4: Start the Installation
Click the "+ Install this application" button. The Installatron wizard opens with configuration options for your WordPress installation.
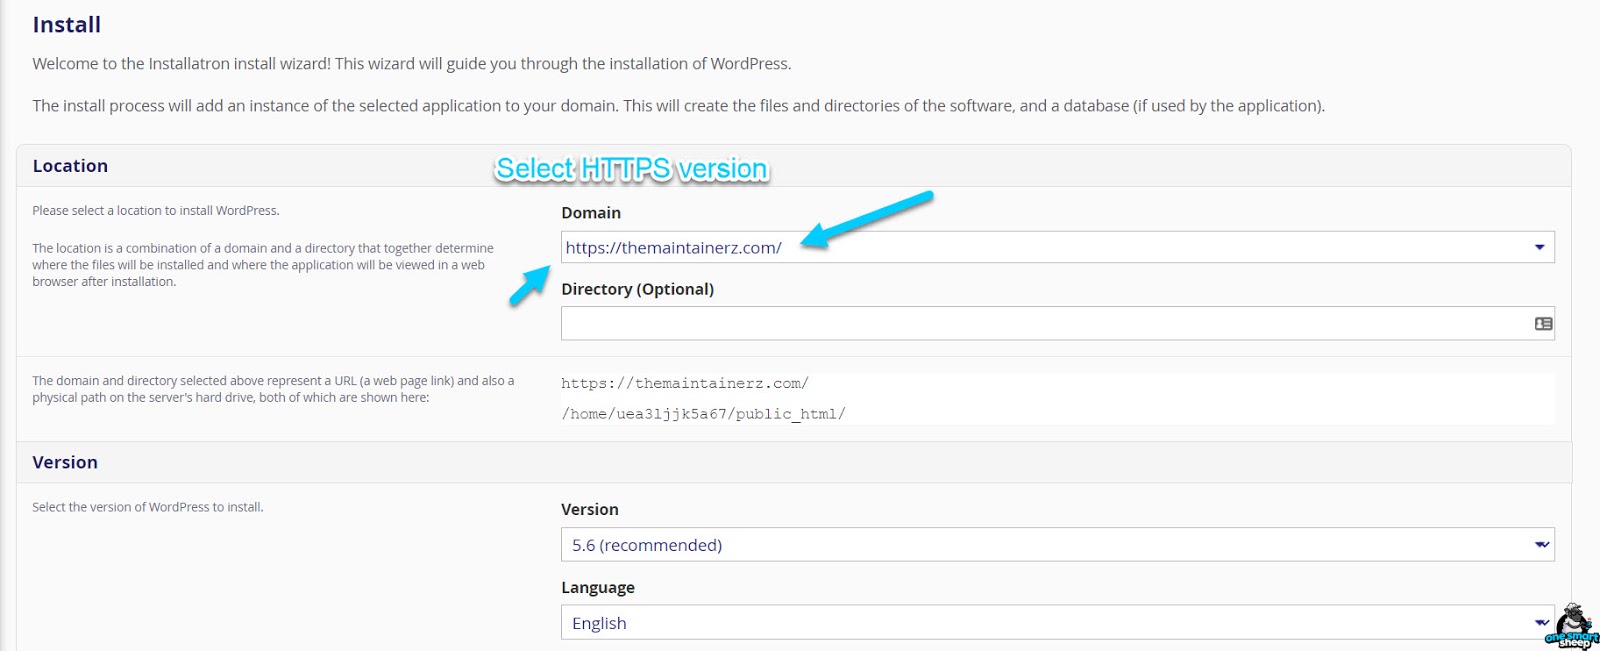
Step 5: Select HTTPS Protocol
Select the HTTPS version of your domain from the dropdown menu. HTTPS encrypts data between your visitors' browsers and your server. Google Chrome marks HTTP-only sites as "Not Secure" since July 2018, which reduces visitor trust and conversion rates.
Step 6: Set Your Admin Credentials
Create a WordPress admin username and password. Use a unique username (avoid "admin") and a password with 12+ characters. WordPress is among the most targeted platforms by hackers, with brute-force login attempts accounting for the majority of attacks.
Step 7: Run the WordPress Installer
Click "+ Install" to begin the installation. Installatron downloads WordPress core files, creates a MySQL database, generates the wp-config.php configuration file, and runs the installation script. This process takes 30-60 seconds.

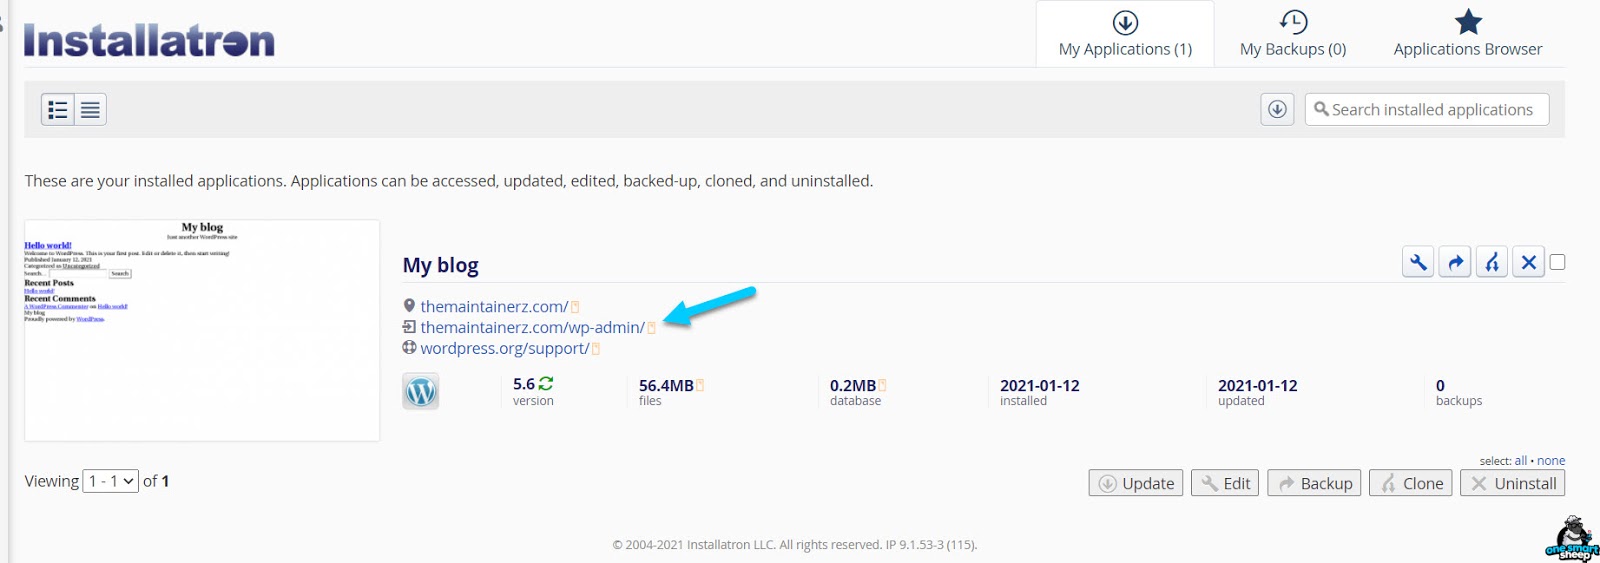
Step 8: Log In to Your New WordPress Site
After installation completes, Installatron displays two links. Click the link ending in /wp-admin to access your WordPress dashboard. Click "Exit to WordPress Dashboard" to bypass the GoDaddy theme wizard and access the full admin panel.
How Do You Install a Free SSL Certificate on GoDaddy WordPress?
SSL (Secure Sockets Layer) encrypts data transmitted between a web browser and your server. An SSL certificate enables HTTPS, which Google uses as a ranking signal since 2014. GoDaddy charges $39.99-$79.99 per year for SSL certificates.
Cloudflare provides free SSL certificates with a 15-year validity period. This method saves $40-$80 per year and provides additional security benefits including DDoS protection, CDN caching, and bot management.
Cloudflare's free SSL certificate lasts 15 years. Combined with Cloudflare's free CDN, your GoDaddy WordPress site will load 30-50% faster for international visitors while maintaining end-to-end encryption.
Follow these 23 steps to install a free SSL certificate on your GoDaddy WordPress site:
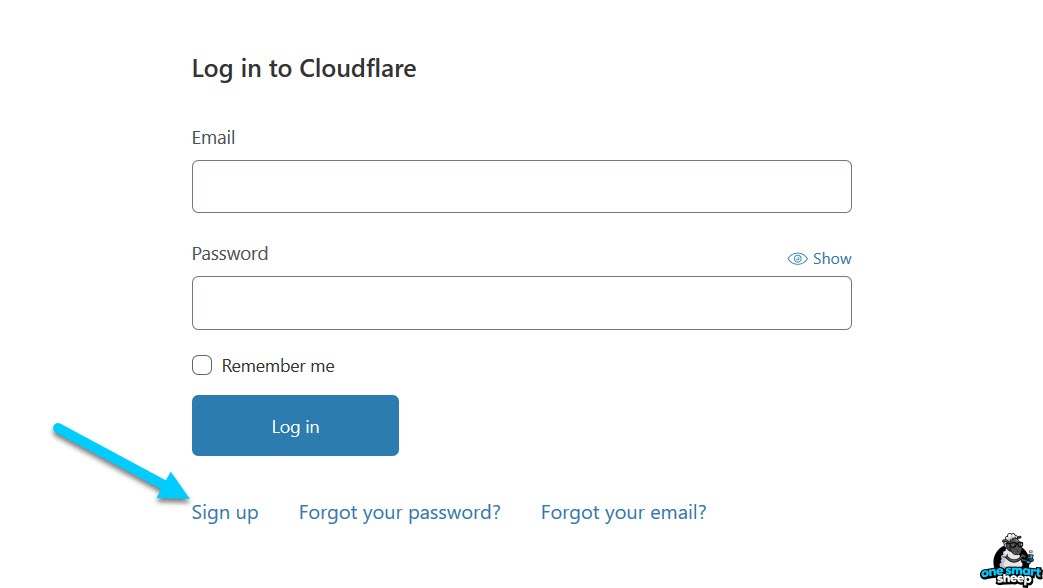
Step 1: Create a Cloudflare Account
Visit cloudflare.com and create a free account. Cloudflare is a web infrastructure company that provides CDN, DNS, DDoS protection, and SSL/TLS services. Over 20% of all websites use Cloudflare.
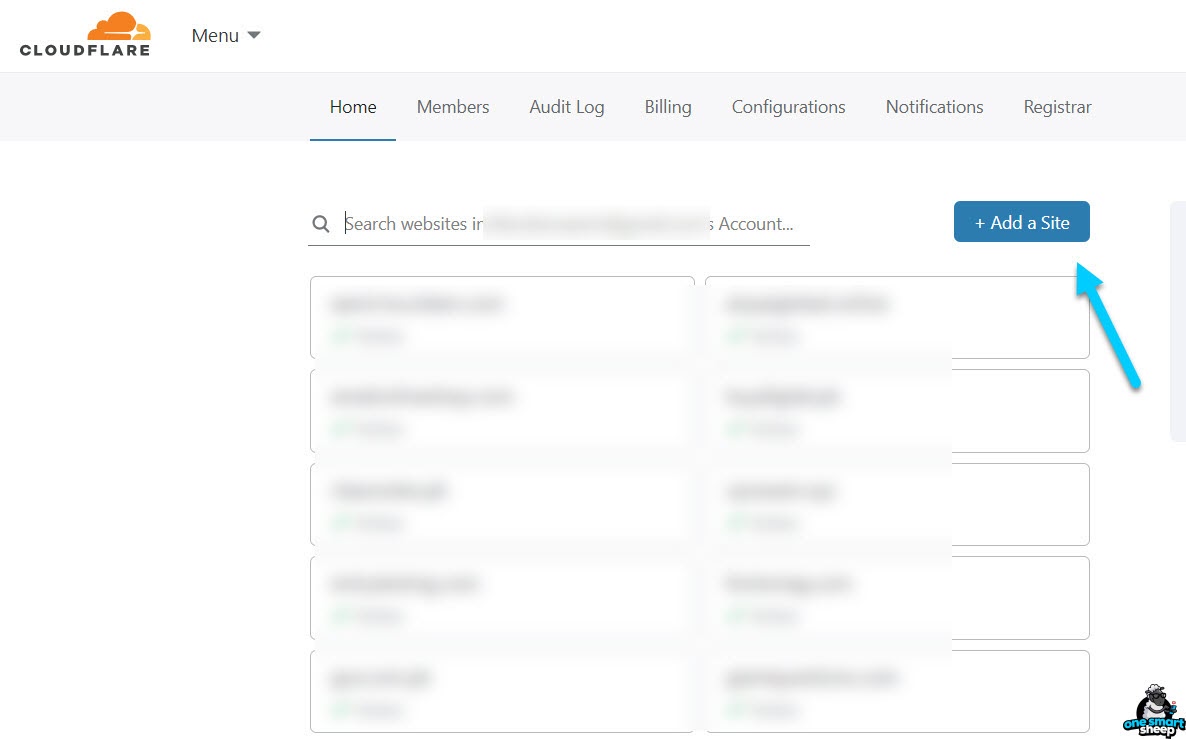
Step 2: Add Your Domain to Cloudflare
Click "+ Add a Site" in the Cloudflare dashboard. Enter your domain name (without www) and click Add Site.
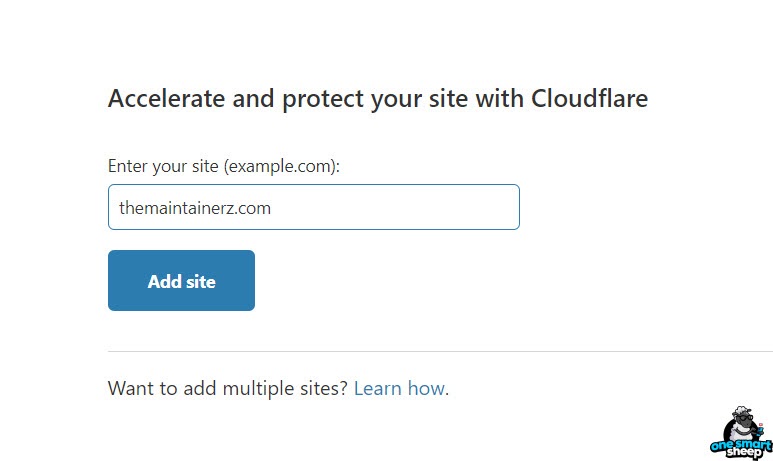
Step 3: Enter Your Domain Name
Type your full domain name. Cloudflare automatically scans your existing DNS records to maintain email, subdomains, and other services during the migration.
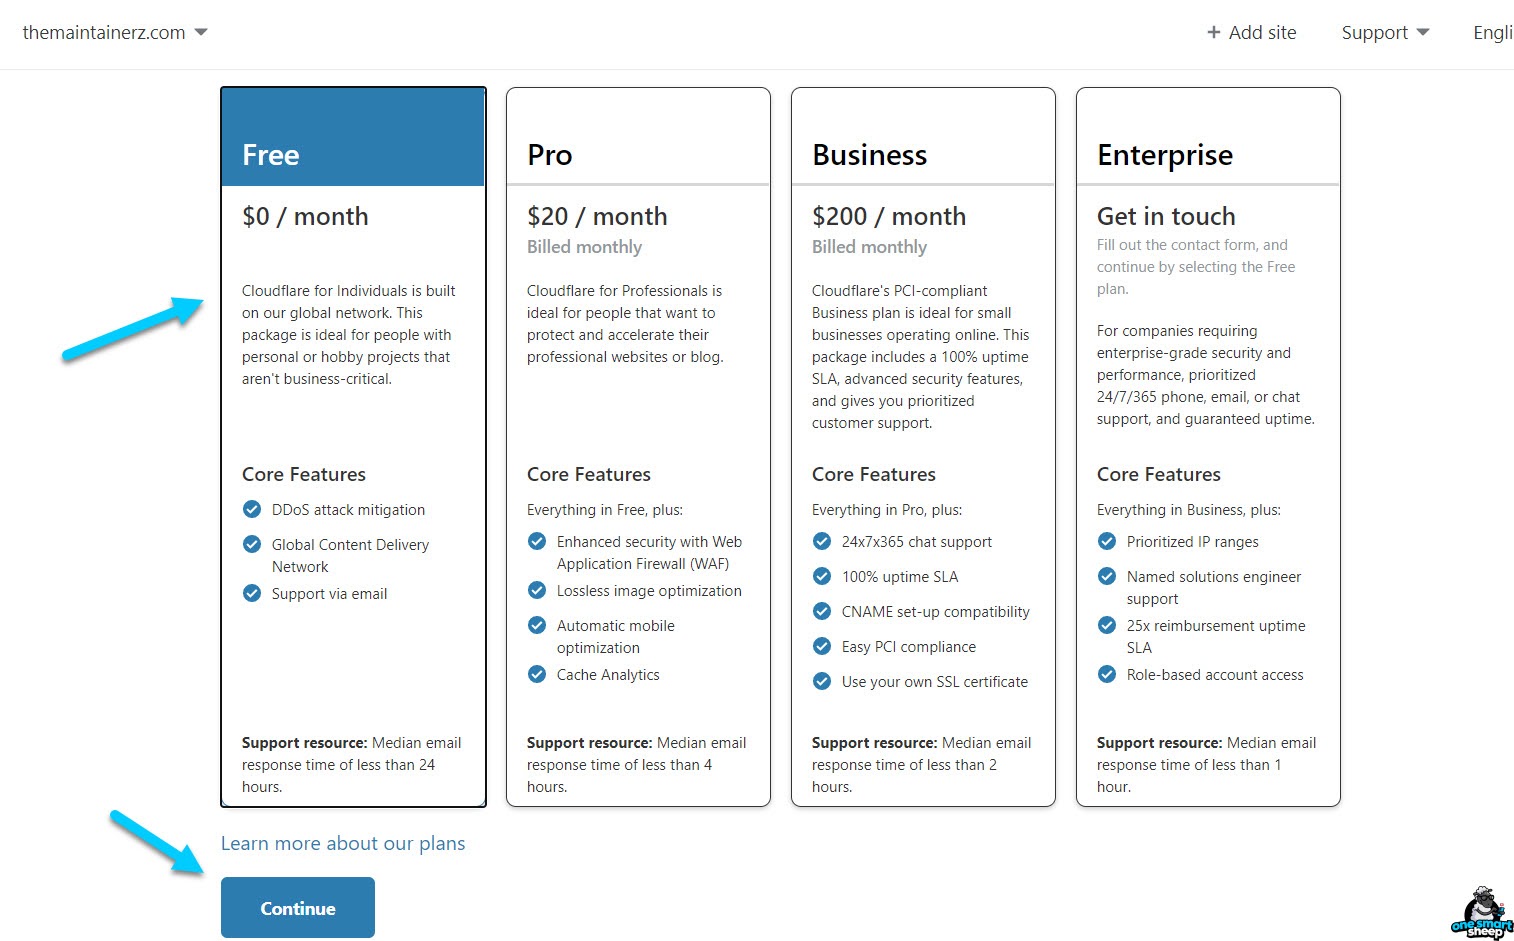
Step 4: Select the Free Plan
Choose the Free plan. Cloudflare's free tier includes SSL/TLS encryption, global CDN with 310+ data centers, basic DDoS protection, and 3 page rules. No credit card required.
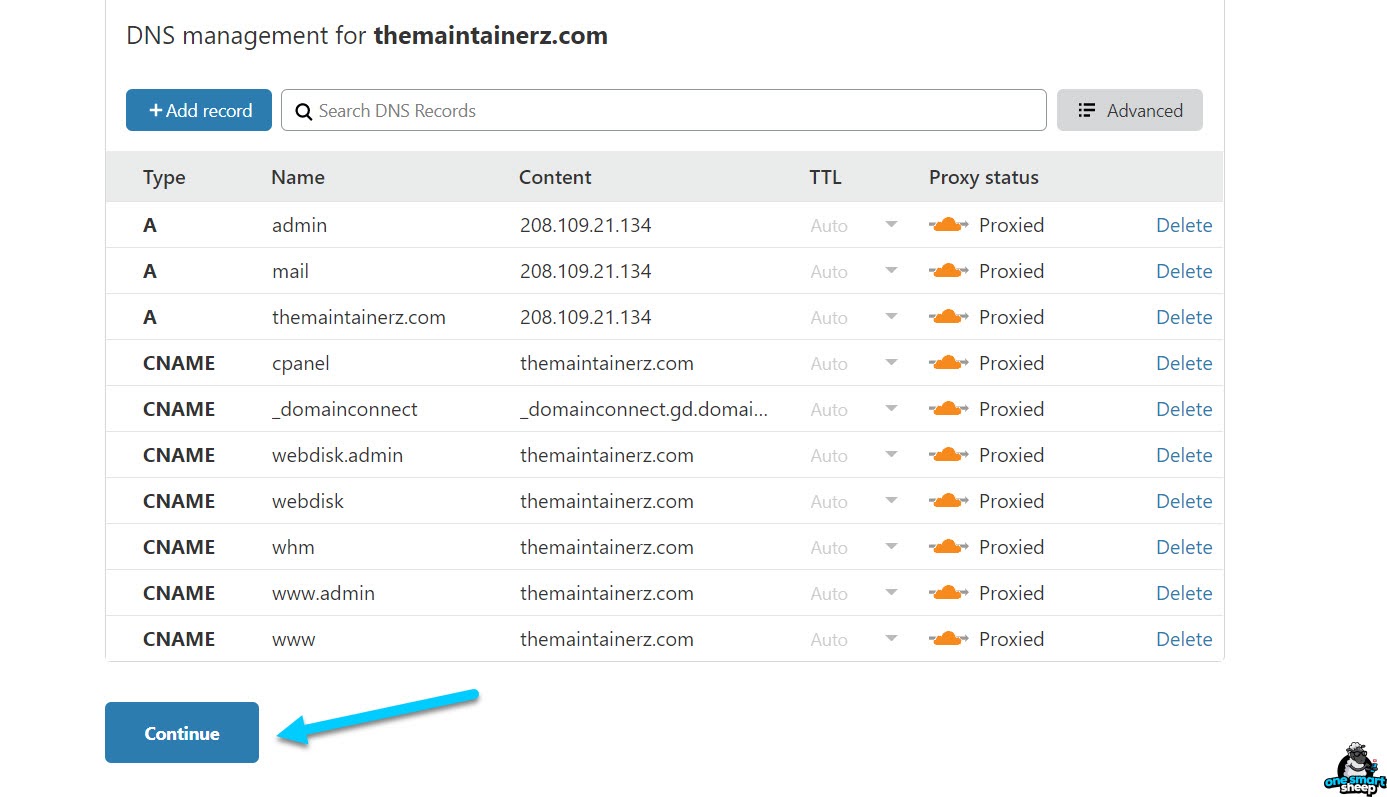
Step 5: Review DNS Records
Cloudflare displays your imported DNS records. Verify that your A record points to your GoDaddy server IP address. Click "Continue" to proceed.
Step 6: Copy Cloudflare Nameservers
Cloudflare assigns two unique nameservers to your account (example: emma.ns.cloudflare.com and rick.ns.cloudflare.com). Copy both nameserver addresses. These replace your current nameservers at your domain registrar.
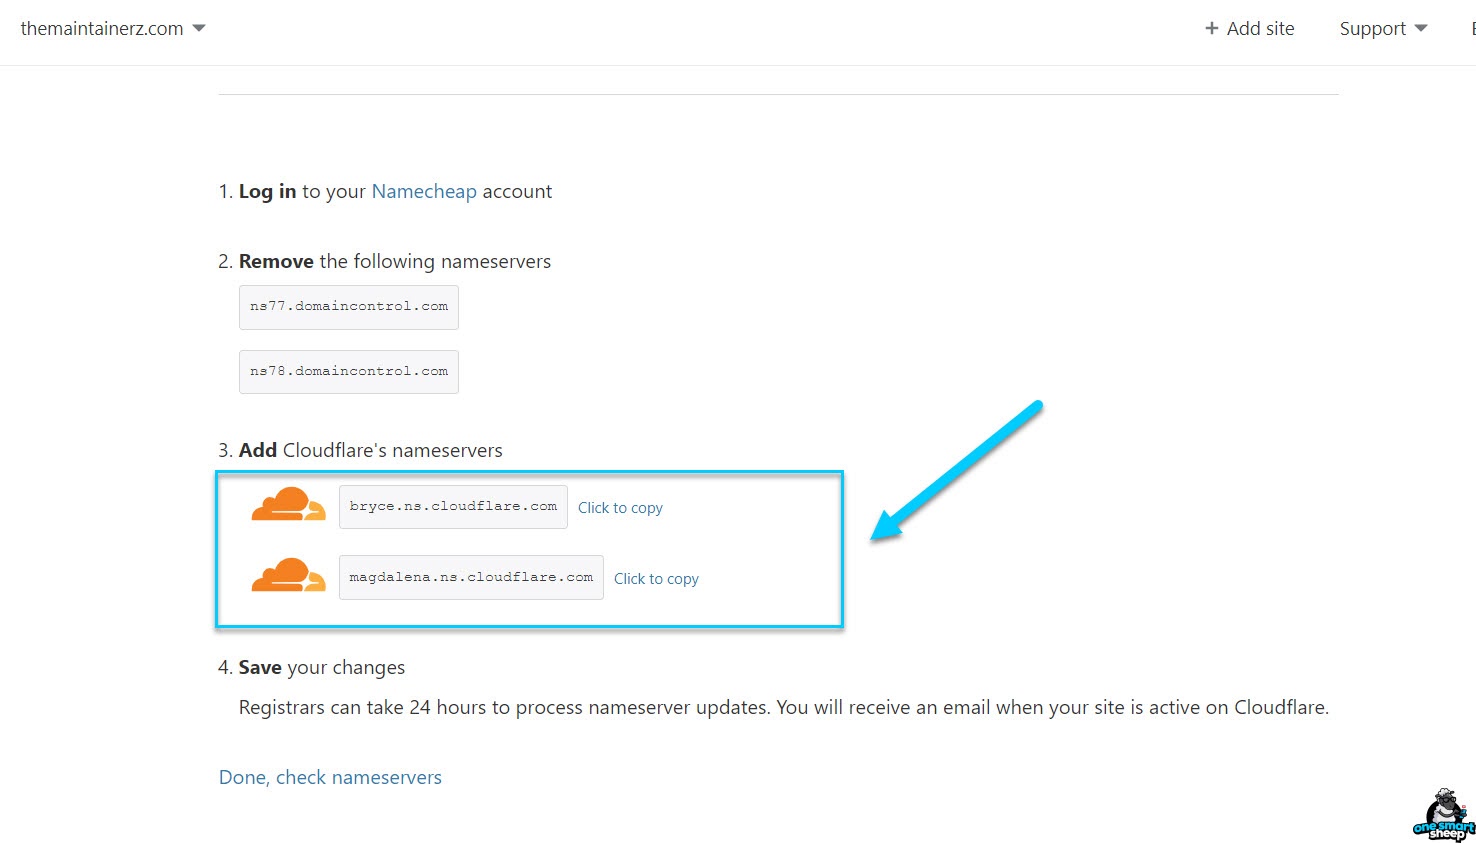
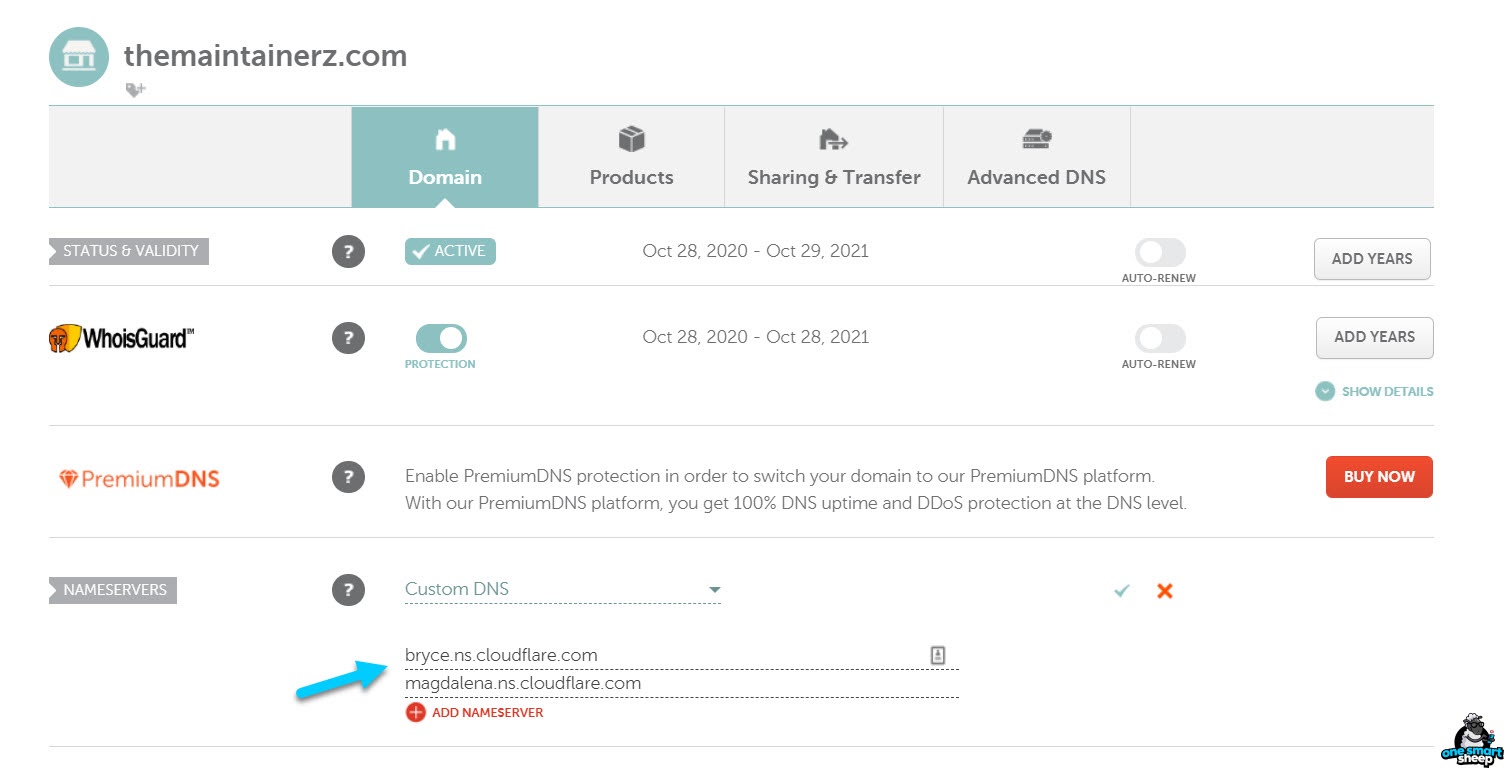
Step 7: Update Nameservers at Your Registrar
Log in to your domain registrar. Open the domain settings and replace the existing nameservers with the Cloudflare nameservers from Step 6. This redirects all DNS queries through Cloudflare's network.
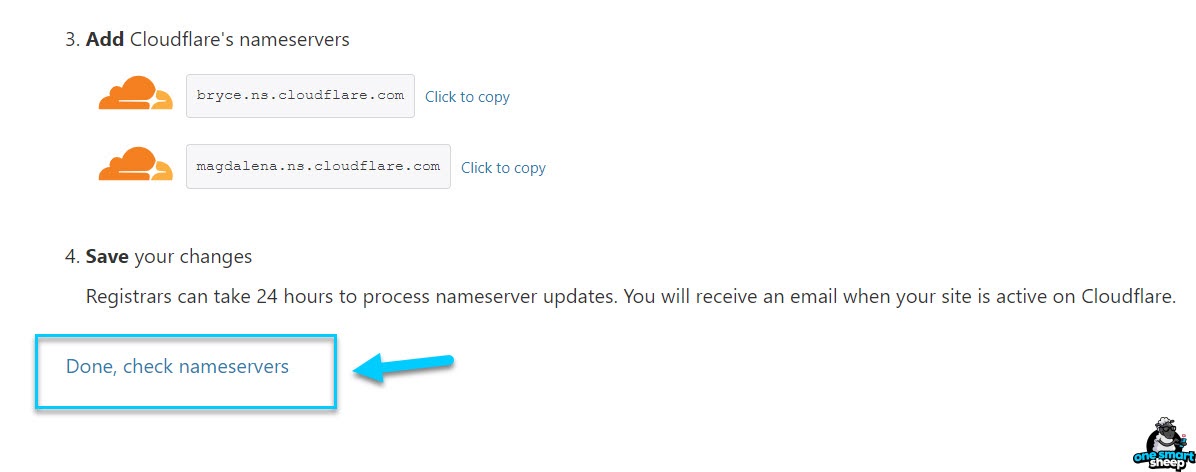
Step 8: Confirm Nameserver Changes
Return to Cloudflare and click "Done, check nameservers". Cloudflare begins monitoring for nameserver propagation and sends an email confirmation when your domain is active.
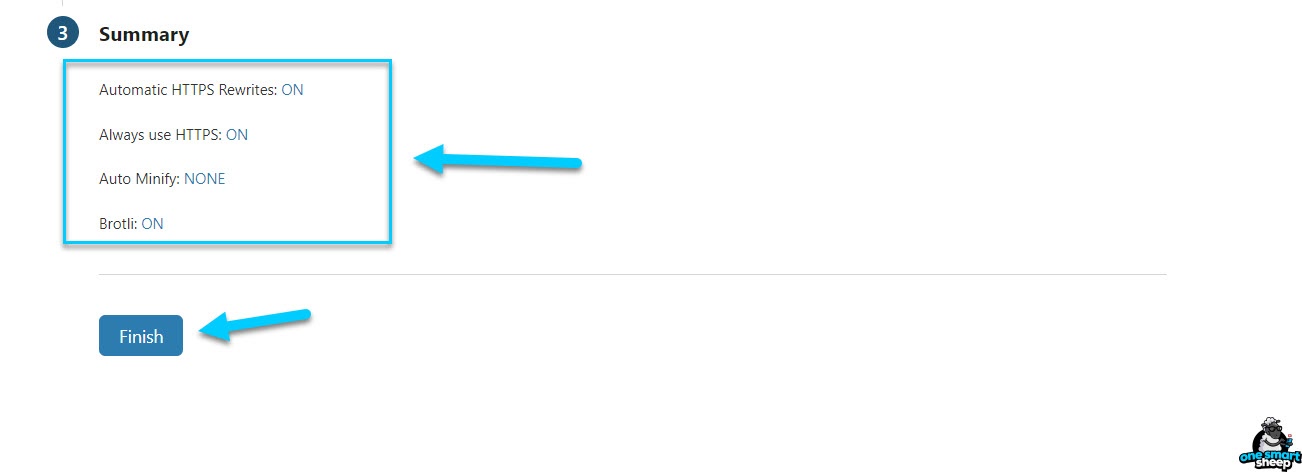
Step 9: Configure Quick Start Settings
Cloudflare displays recommended security and performance settings. Enable Automatic HTTPS Rewrites, Always Use HTTPS, and Auto Minify for optimal performance. These settings ensure all traffic uses encrypted connections.
Step 10: Wait for Cloudflare Activation
Cloudflare activation requires DNS propagation, which takes 15 minutes to 24 hours depending on your registrar. Most activations complete within 1-2 hours.
Step 11: Verify Cloudflare Is Active
Refresh the Cloudflare dashboard. The status message changes to "Great news! Cloudflare is now protecting your site." Your domain is now routed through Cloudflare's global network.

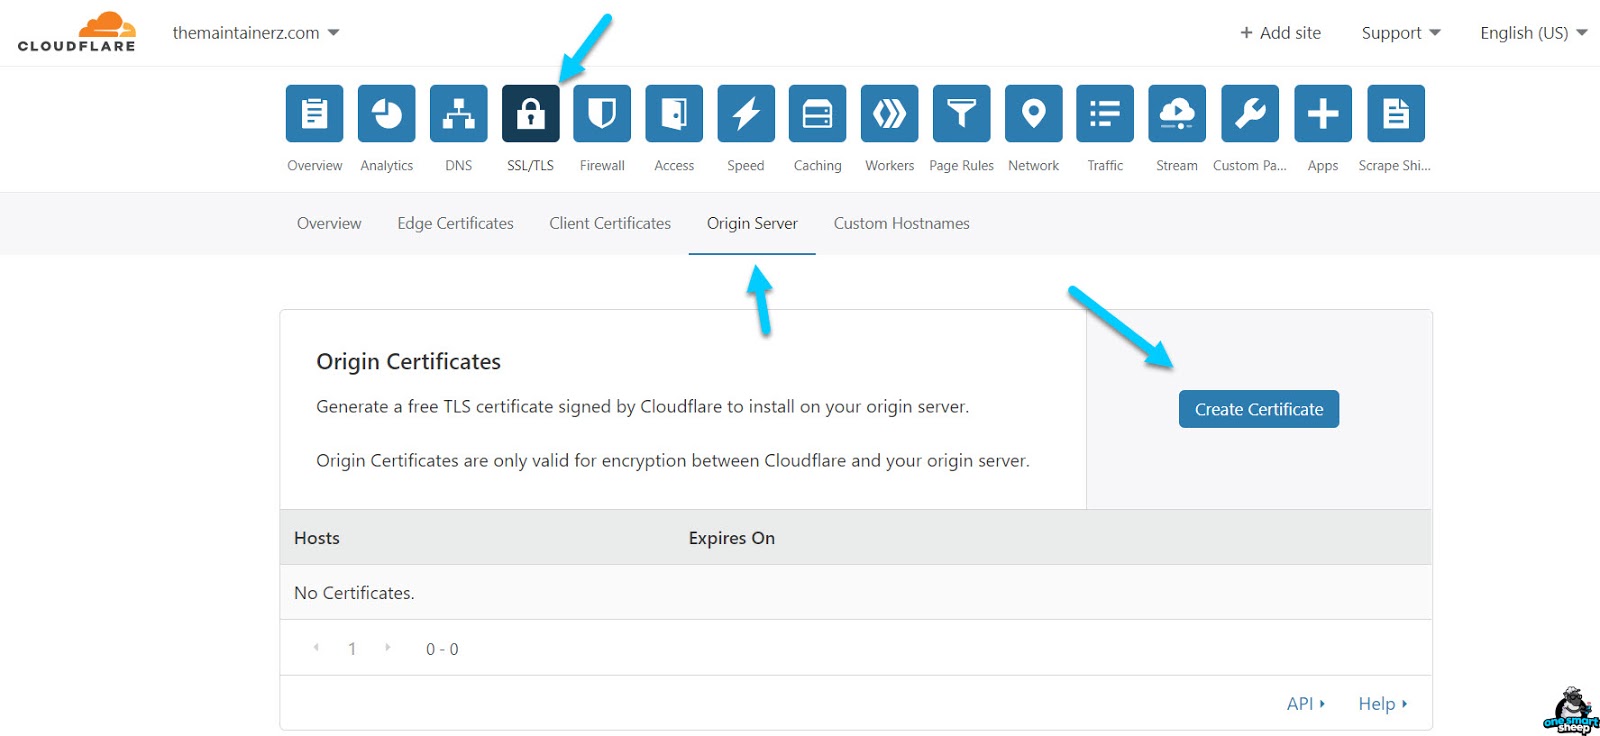
Step 12: Generate an Origin Certificate
Go to SSL/TLS > Origin Server in the Cloudflare dashboard. Click Create Certificate. An origin certificate encrypts traffic between Cloudflare's edge servers and your GoDaddy hosting server.
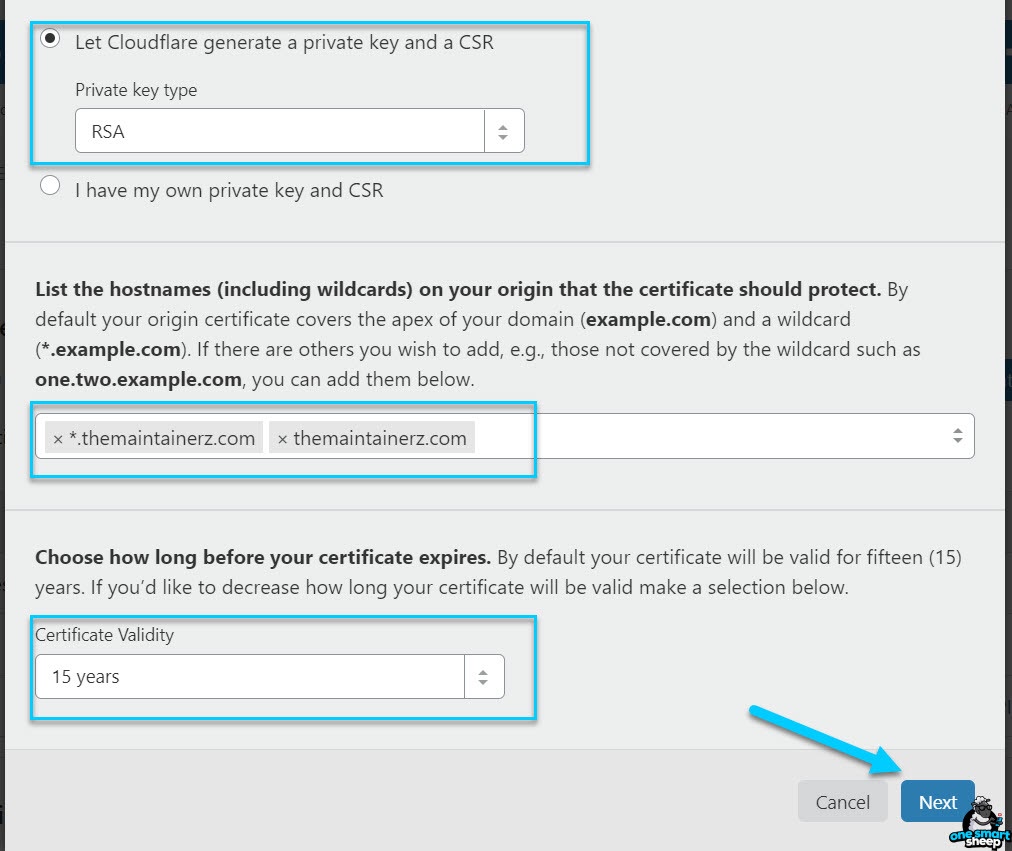
Step 13: Configure Certificate Settings
Select the following certificate options:
- Private key type: RSA (2048-bit, industry standard)
- Hostnames: Leave as auto-generated (covers yourdomain.com and *.yourdomain.com)
- Certificate validity: 15 years (maximum duration, free of charge)
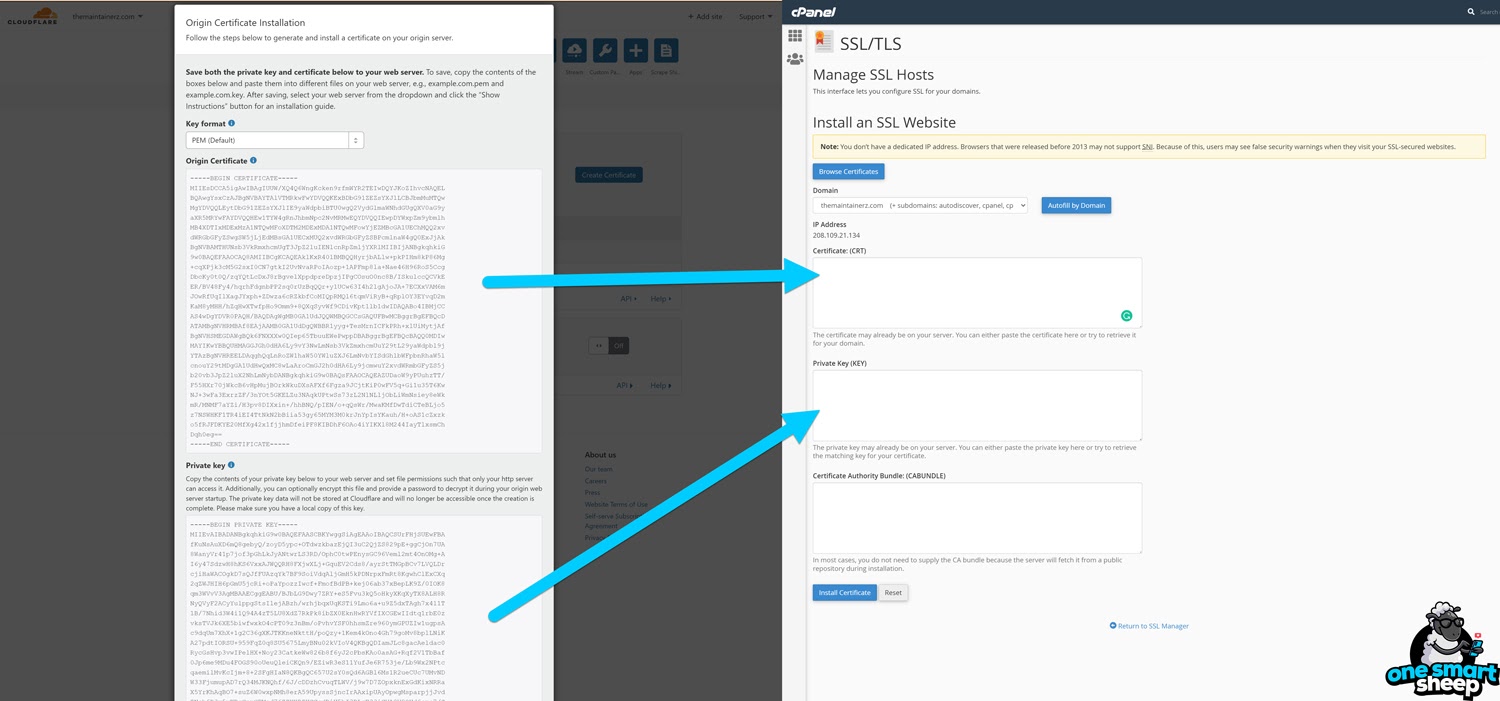
Step 14: Copy the PEM Certificate and Private Key
Cloudflare generates two text blocks in PEM format (Privacy-Enhanced Mail). Copy the Origin Certificate and the Private Key separately. Store both in a secure location. Cloudflare does not store your private key after you leave this page.
Save your Private Key immediately. Cloudflare displays it only once. If you lose it, you must generate a new certificate. Copy both the Origin Certificate and Private Key to a text file before proceeding.

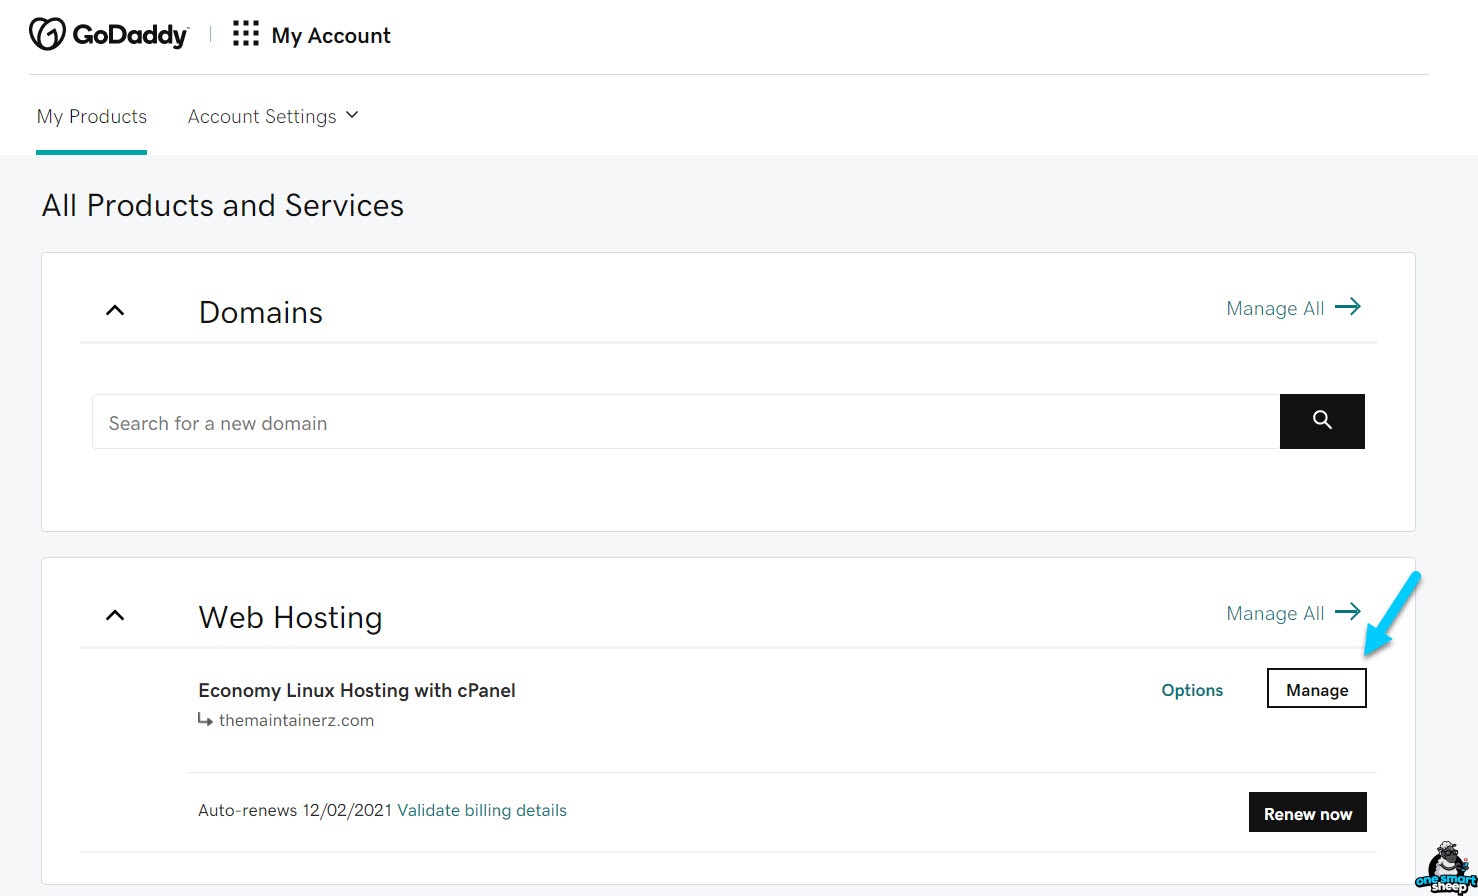
Step 15: Return to GoDaddy Hosting Manager
Open GoDaddy My Account and click Manage next to your hosting plan.
Step 16: Open cPanel
Click "cPanel Admin" to open the hosting control panel where you will install the SSL certificate.
Step 17: Find SSL/TLS Settings
Type "SSL" in the cPanel search bar. Click SSL/TLS from the search results. This opens the SSL certificate management interface.

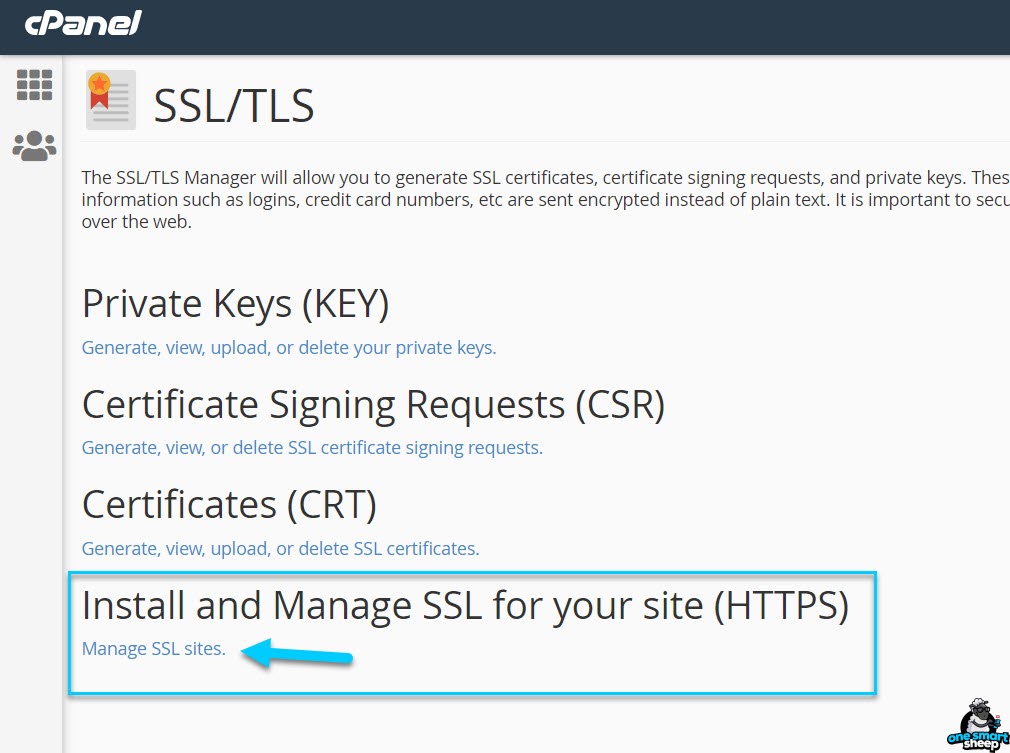
Step 18: Open SSL Installation Manager
Click "Manage SSL sites" under the "Install and Manage SSL for your site (HTTPS)" heading. This opens the form where you paste your Cloudflare certificate.
Step 19: Paste Your Certificate and Private Key
Paste the Cloudflare values into the corresponding GoDaddy cPanel fields:
- Origin Certificate (from Cloudflare) goes into the Certificate (CRT) field
- Private Key (from Cloudflare) goes into the Private Key (KEY) field
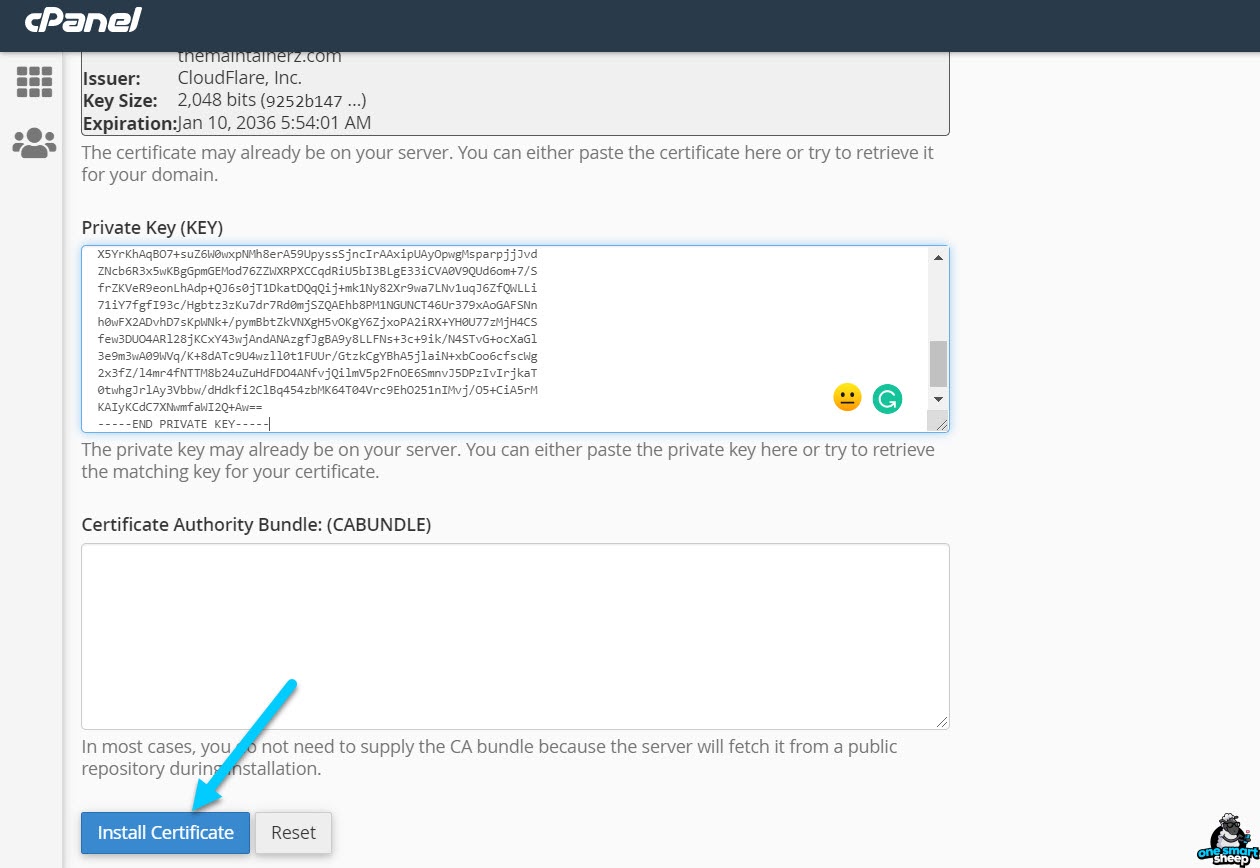
Step 20: Install the Certificate
Click Install Certificate at the bottom of the page. cPanel validates the certificate format and installs it on your domain. This process takes 5-10 seconds.
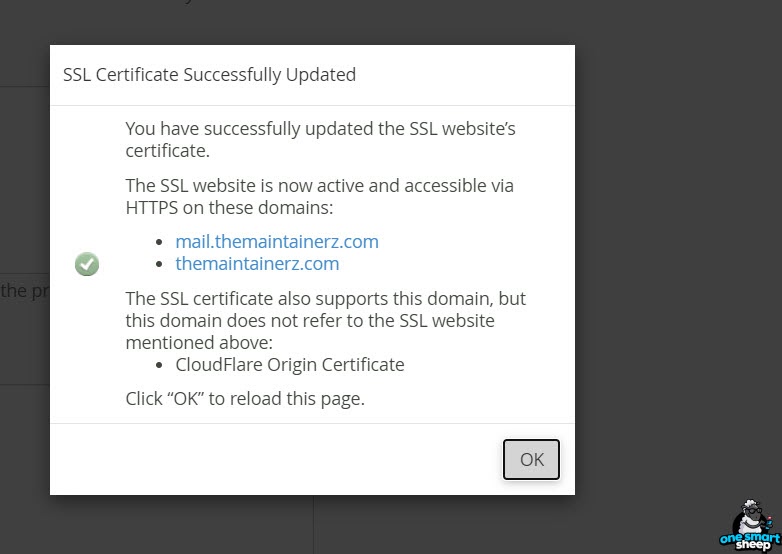
Step 21: Confirm Successful Installation
cPanel displays "SSL Certificate Successfully Updated" upon completion. Your GoDaddy server now accepts encrypted HTTPS connections using the Cloudflare origin certificate.
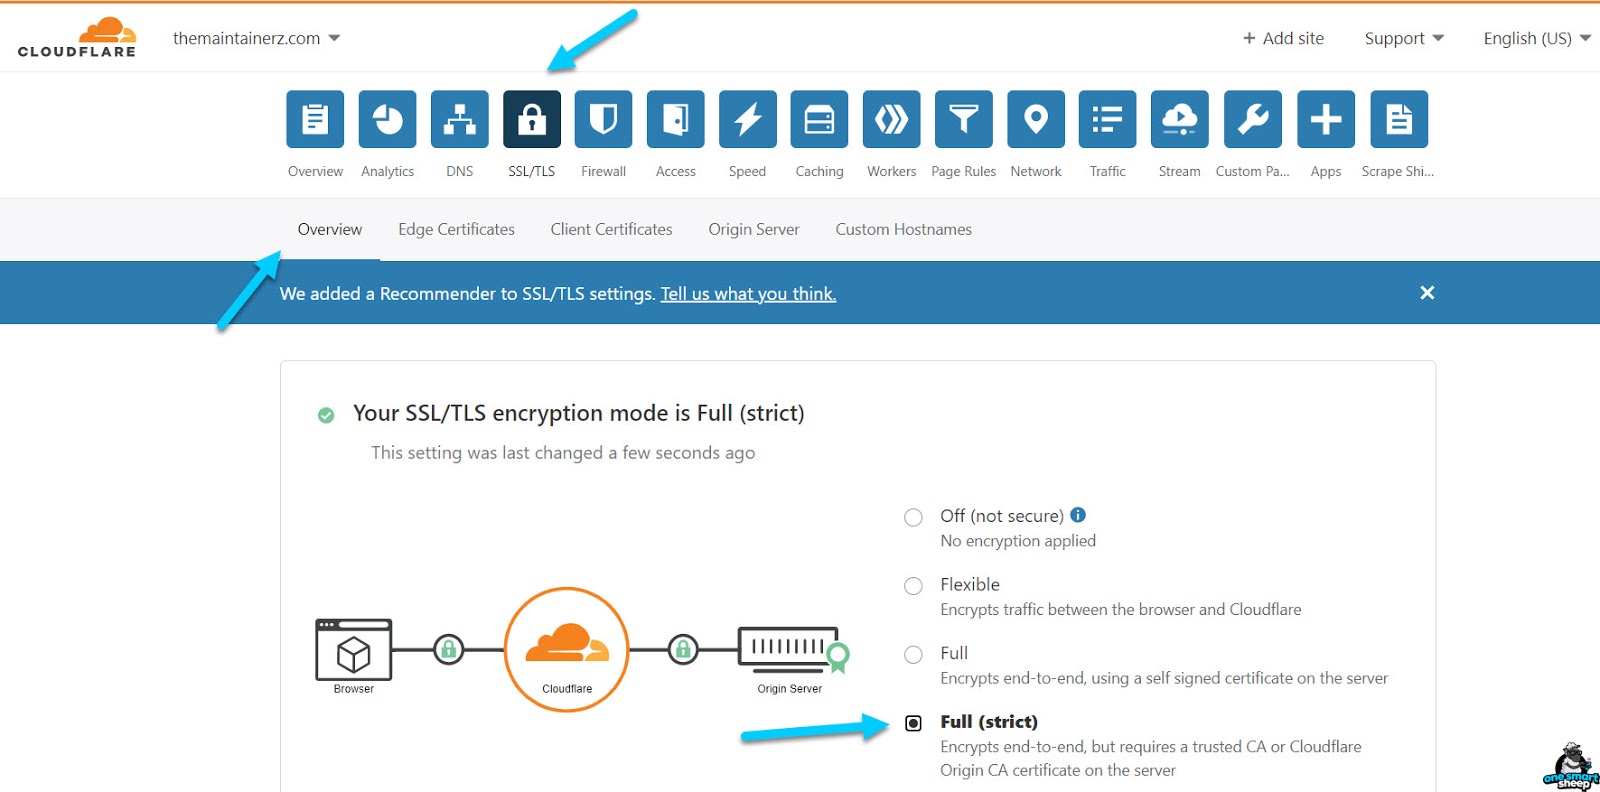
Step 22: Enable Full (Strict) SSL on Cloudflare
Return to Cloudflare > SSL/TLS > Overview. Select Full (Strict) mode. This mode encrypts traffic between visitors and Cloudflare, and between Cloudflare and your GoDaddy server. Full (Strict) validates the origin certificate, providing maximum security.
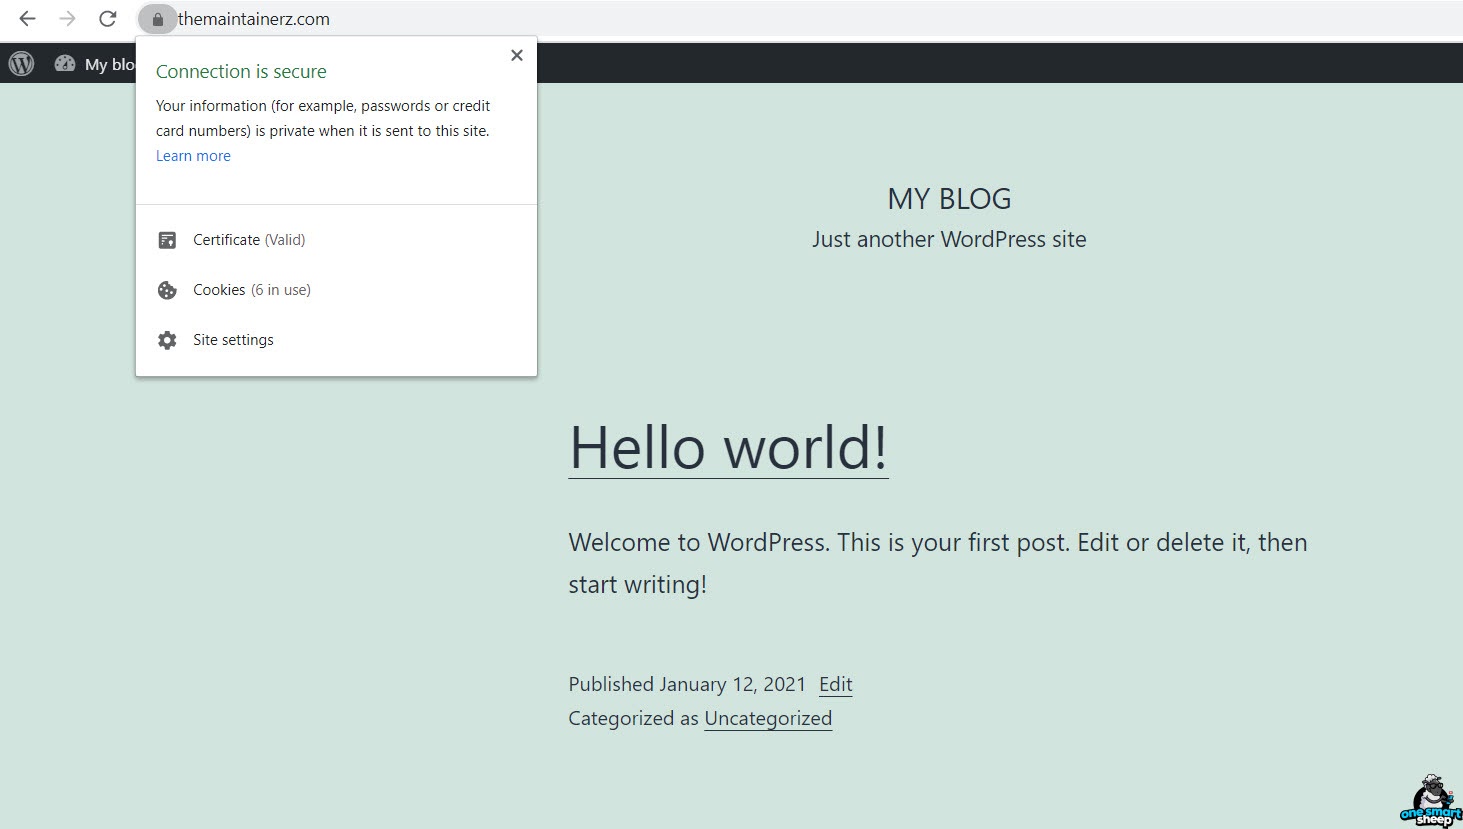
Step 23: Verify HTTPS Is Working
Open your website in a browser. A padlock icon appears in the address bar, confirming active HTTPS encryption. Click the padlock to verify the certificate details. Your GoDaddy WordPress site now uses end-to-end encryption with a free 15-year SSL certificate.
🎉 SSL Installation Complete!
Your GoDaddy WordPress site is now secured with a free Cloudflare SSL certificate valid for 15 years. You saved $40-$80 per year compared to purchasing an SSL certificate from GoDaddy directly.
What Should You Do After Installing WordPress on GoDaddy?
Complete these 5 post-installation tasks within the first 24 hours to secure and optimize your WordPress site:
- Set permalinks to "Post name" in Settings > Permalinks. Post name permalinks (yourdomain.com/post-title) improve SEO by including keywords in the URL structure.
- Install a security plugin. Wordfence or Sucuri Security blocks brute-force attacks, malware scanning, and firewall protection. WordPress sites without security plugins receive an average of 90,000 attack attempts per minute.
- Install a caching plugin. WP Super Cache or W3 Total Cache reduces page load time by 40-60% by serving static HTML files instead of processing PHP on each request.
- Delete unused themes and plugins. Remove the Hello Dolly plugin and unused default themes (keep one as fallback). Unused plugins and themes create security vulnerabilities even when deactivated.
- Create a full backup. Use UpdraftPlus to create a complete backup including files and database. Schedule automatic daily backups to prevent data loss.
Frequently Asked Questions
🎯 Key Takeaways
✦ GoDaddy provides two WordPress installation methods: auto-setup (Method 1) and manual cPanel installation (Method 2). Both complete in under 15 minutes.
✦ Cloudflare provides a free SSL certificate valid for 15 years, saving $40-$80 per year compared to GoDaddy SSL pricing.
✦ Complete post-installation security tasks within 24 hours: update WordPress core, install a security plugin, configure permalinks, and create a backup.
✦ Use PHP 8.x on GoDaddy for 15-30% better WordPress performance compared to PHP 7.4.
Questions about installing WordPress on GoDaddy? Leave a comment below and I will respond to every question personally.


.svg)