


In an era where cyber threats are perpetually evolving, ensuring the safety of your WordPress site is no longer a luxury, it's a necessity. Welcome to the "WordPress Security 2023 - Step-by-Step Visual Guide to Keeping Your Website Secure," where we'll dive into the most cutting-edge, effective strategies for safeguarding your online presence.
From implementing a sturdy two-factor authentication to choosing a reliable WordPress hosting service, this comprehensive guide explores the multifaceted world of WordPress security.
Learn how to maximize the potential of security plugins, understand the importance of regular backups, and discover the value of secure hosting services.
Additionally, we'll unpack the significance of user education in enhancing your site's security. As we move through the guide, you'll gain an intuitive understanding of how these layers of protection work together to fortify your site against potential threats.
Whether you're a seasoned WordPress user or a beginner, this guide offers valuable insights that will equip you to secure your WordPress site effectively in 2023 and beyond. Are you ready to take a proactive step toward enhanced security? Let's get started.
Install a WordPress Backup Solution
Backups for WordPress sites are critical for data security. They safeguard your site's content, themes, and plugins from unexpected data losses, crashes, or attacks.
In case of any mishap, a backup serves as your safety net, enabling quick restoration and minimizing downtime. Always remember the safety of your online presence is in your hands.
WordPress security plugins fortify your website against threats like hacking and malware. They offer features like firewalls, spam protection, and login security. A crucial component is a backup plugin, which regularly archives your site's data. If disaster strikes, this plugin helps you restore your site, preserving your hard work and maintaining site integrity.
The time needed for a WordPress site backup depends on its size and the backup method used. For a small site, it could take minutes. Larger sites may require hours. Regular backups help ensure minimal downtime during restoration.
For ensuring the security of your WordPress site, several plugins are at your disposal.
Consider UpdraftPlus, which lets you craft a full backup of your site and lets you either store it on the cloud or download it directly.
Next, we have VaultPress, also known as Jetpack Backup. This offers a solution that automatically backs up your data in real-time, ensuring a smooth restoration process.

BackupBuddy is another great choice. It provides flexibility in scheduling backups - daily, weekly, or monthly, and even supports backups in remote locations.
A duplicator is a handy tool, not just for regular backups but also if you plan to relocate your WordPress site.

Lastly, there's BackWPup. This tool can direct your site's backup to various locations, including Dropbox and Amazon S3.

Automatically Log Out Idle Users
When a logged-in user navigates away, their session may remain active, potentially exposing the site to unauthorized access. To mitigate this risk, it's important to have automatic session timeouts and encourage users to log out when not active.
Users logged into your WordPress site can pose a security risk if they have malicious intent or fall victim to phishing attacks. They can inadvertently introduce malware or other threats, especially if they have administrative privileges.
Therefore, it's crucial to grant user roles carefully, ensure strong password usage, and educate users about potential security risks.
To get the Inactive Logout plugin up and running, you'll first need to log in. Then, head over to the 'Plugins' section and look up the plugin we discussed. Once you've found it, just give 'Activate' a click, and you're all set.
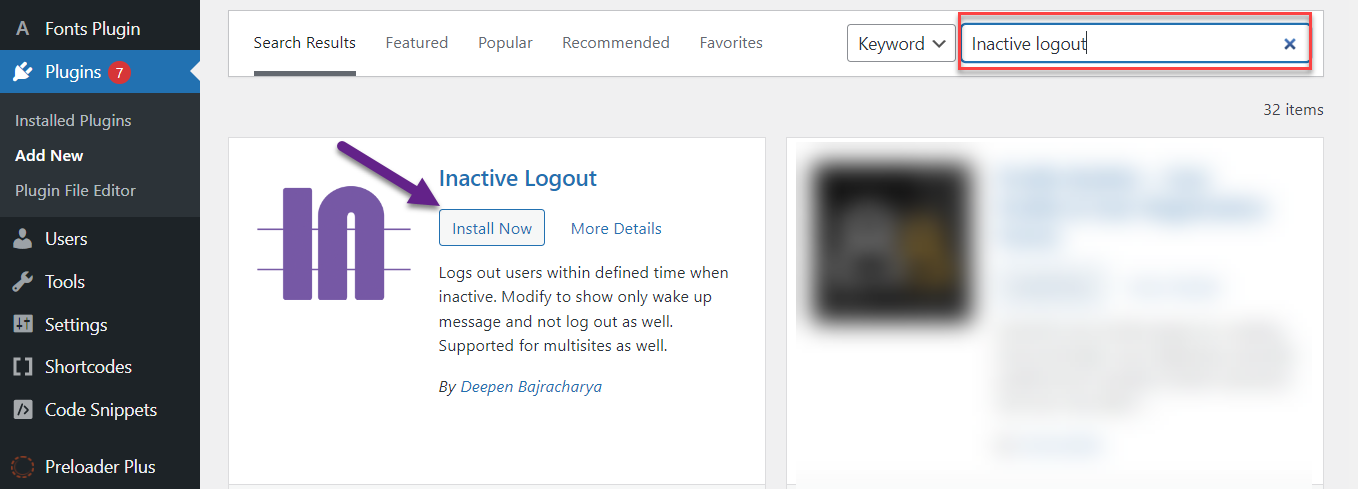
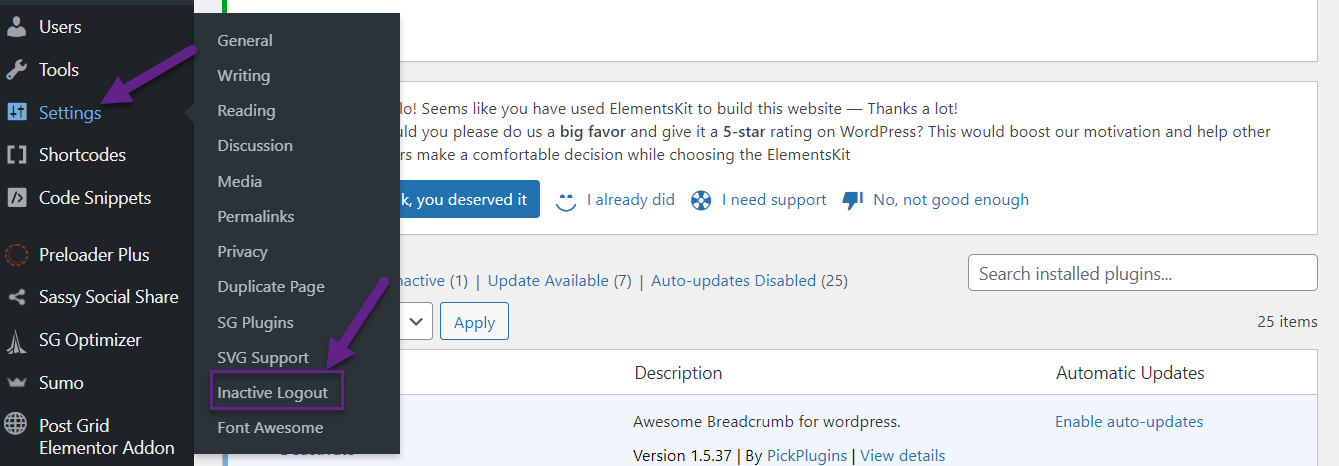
After you've enabled the Inactive Logout plugin, navigate to the settings menu. A pop-up will appear; look for the 'Inactive Logout' option and give it a click.
Change the Default “Admin” Username
In the past, WordPress used "admin" as the default username for the main administrator account. Unfortunately, this became a security loophole as hackers often targeted this default username for brute force attacks. Aware that many site owners did not change this username, they exploited this vulnerability to gain unauthorized access, jeopardizing site integrity.
In the past, WordPress used "admin" as the default username for the main administrator account. Unfortunately, this became a security loophole as hackers often targeted this default username for brute force attacks.
Aware that many site owners did not change this username, they exploited this vulnerability to gain unauthorized access, jeopardizing site integrity.
WordPress, by default, doesn't provide an option to change your username. However, there's a workaround - you can create a new user with the desired username and then remove the old account.
Thing to Remember: In case you're a Gmail user, you have a nifty trick at your disposal. By adding a plus sign and additional characters following your username, you can create a unique address for WordPress. So, if your primary email is onesheep@gmail.com, you could use onesheep+wordpress@gmail.com for WordPress. While it appears different from WordPress, all emails will still land in your original inbox.
To create a new user, navigate to 'Users' in your dashboard first. Then, in the pop-up that appears, select 'Add New.'

Next step: you'll see a form pop up on your screen once you click on 'Add New.' It's important to take a moment and fill it out thoroughly.

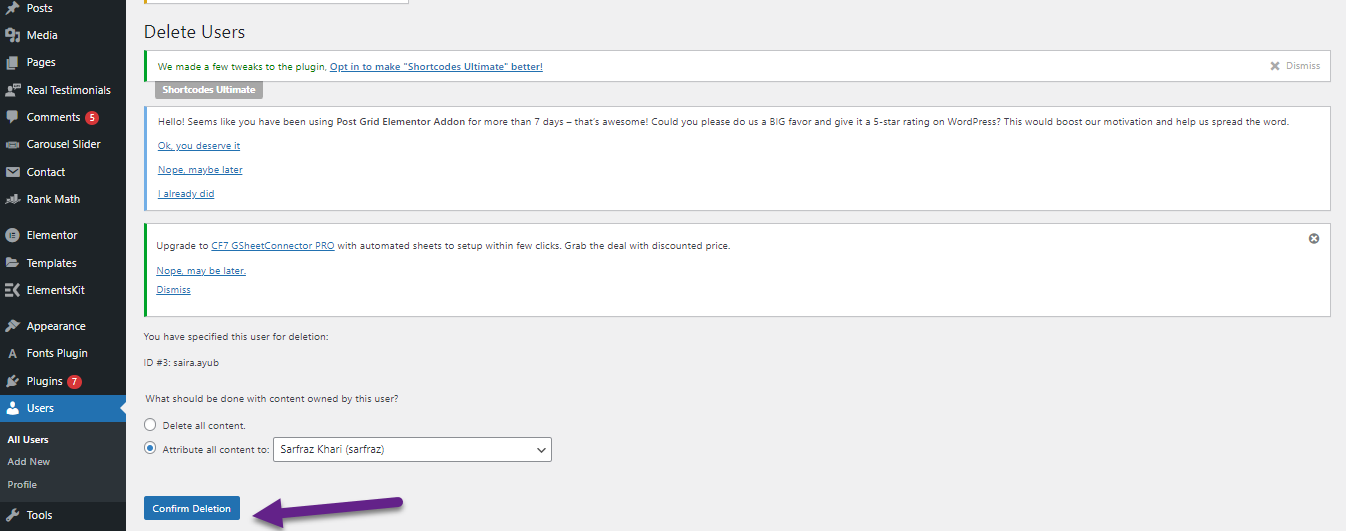
Once logged in as your new user, you must say goodbye to the old account. Head to 'All Users,' find your old username, and click 'Delete.' This ensures you're operating under your new, preferred username.

Now, you must hit the 'Confirm Delete' button to remove the previously selected user. It's as simple as that.
.
Limit Login Attempts
The unlimited login attempts feature in WordPress can indeed pose a security risk. Hackers can exploit this by using brute force attacks, trying countless combinations of usernames and passwords until they get it right.
Backdoors provide hackers with unauthorized access to a WordPress site, bypassing usual security measures. They can be injected into site files or plugins, allowing hackers to steal data, spread malware, or even take control of the site.
It's really necessary to know how you can fix your hacked website.
As there's no restriction on attempts, they can continue until they succeed, potentially gaining unauthorized access to your website. This is why using strong, complex passwords and limiting login attempts (through plugins or other security measures) is essential.
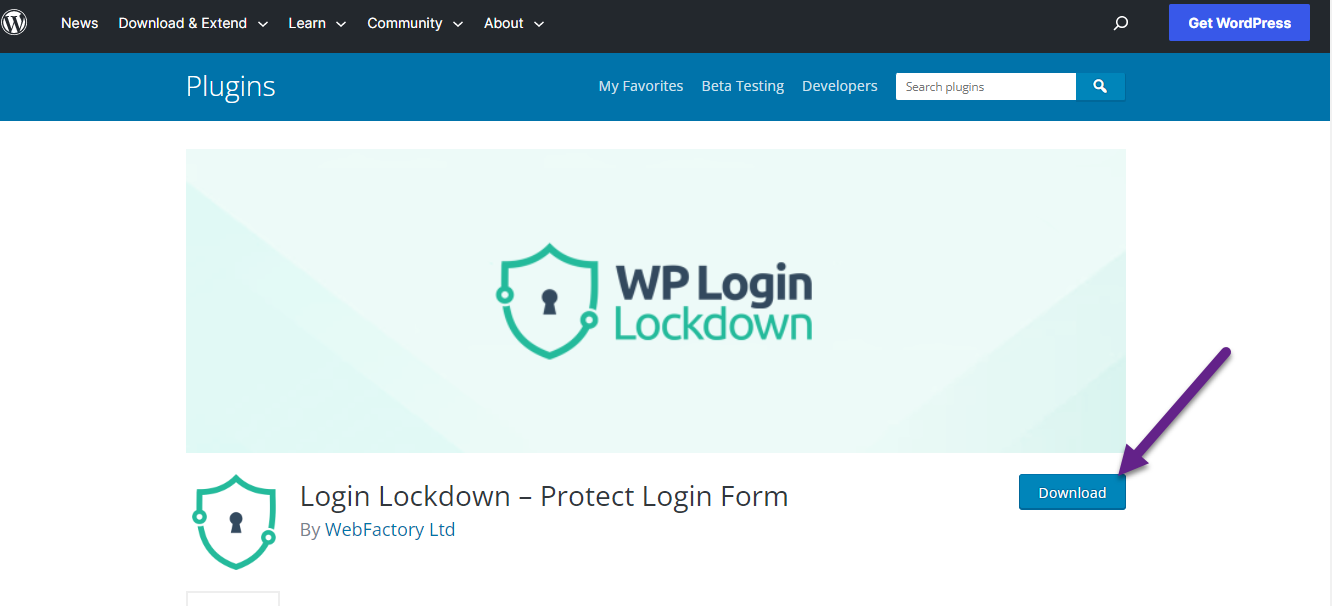
The "Login LockDown" plugin is a robust solution for mitigating the risk of unlimited login attempts in WordPress. It limits the number of login attempts from a single IP range within a specific time period.
If the limit is reached, the plugin locks down the login function for that range, foiling potential brute-force attacks. This adds an extra layer of security, safeguarding your site against unauthorized access.
Next, you should “activate” the 'Limit Login Attempts' plugin. This is a vital step in securing your WordPress site. When you are activated you will find this message on your screen.

Now you can click on the limit login attempt at the left bottom of the dashboard.
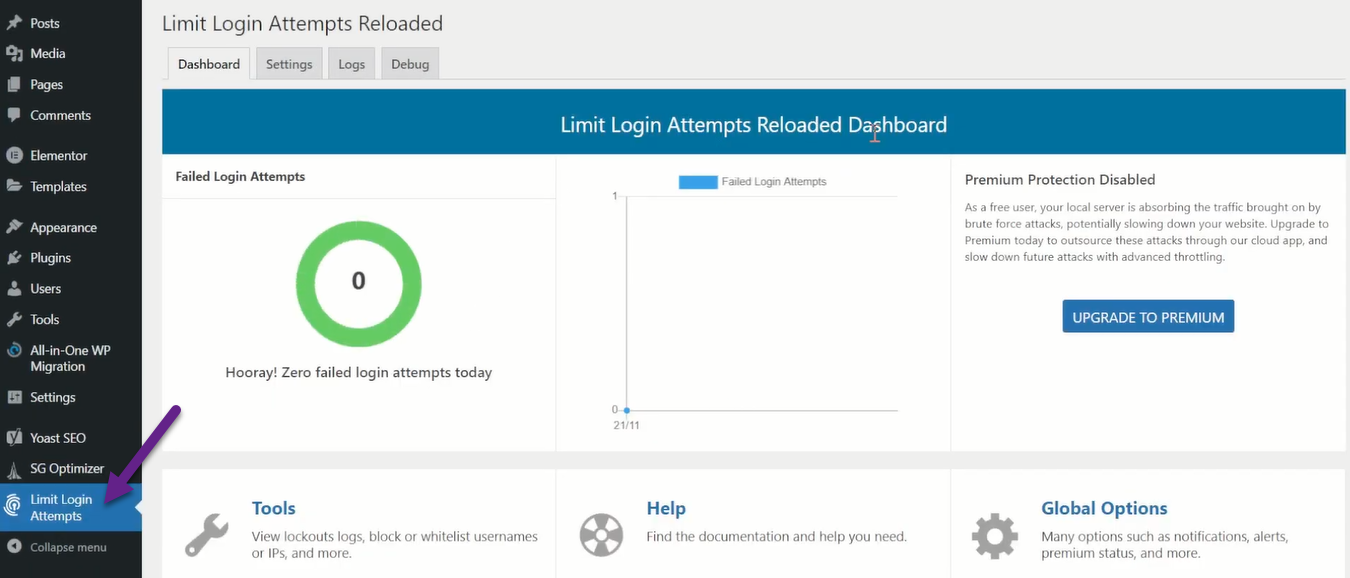
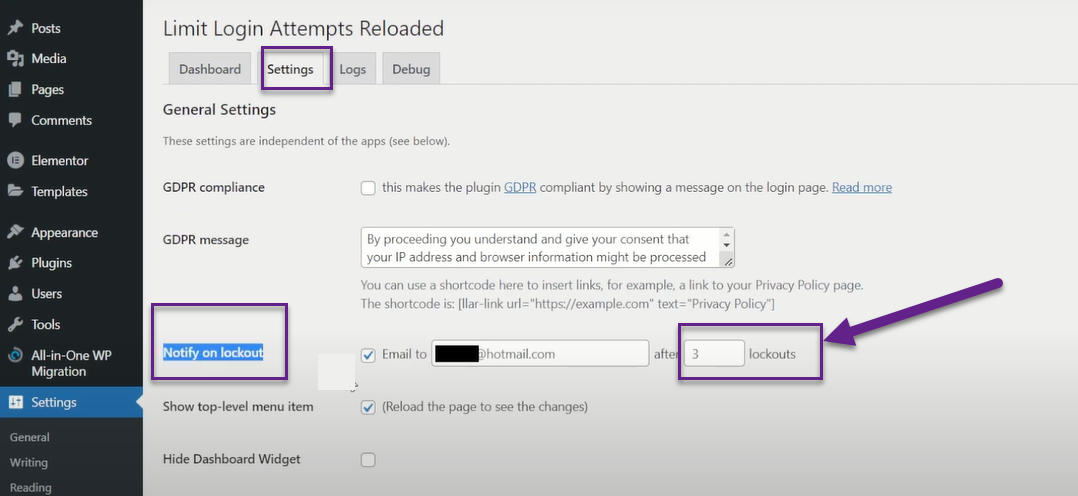
Let's talk about enhancing your WordPress site's security. Up top, you'll see options including Dashboard, Settings, Logs, and Debug. Click on Settings; this is where we're going to limit login attempts.
Look for 'Notify on Lockout.' This is where you set your preferred limit. I've chosen to limit my WordPress logins to 3. This means after three incorrect attempts, the user is barred from further attempts. This simple step can bolster your site's defenses quite significantly.
Add Two Factor Authentication
Two-step authentication, also known as two-factor authentication (2FA), is like having a double-lock system for your WordPress login; it simply gives an extra layer of security. You see, instead of just needing a username and password, 2FA asks for one more piece of information to confirm it's you.
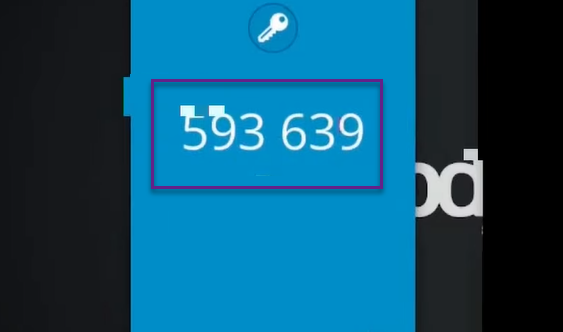
How does it work? Well, once you've keyed in your username and password, 2FA asks for a unique verification code. This code is usually sent to a device you trust, like your mobile phone, or created by an authentication app.
So, even if a cyber miscreant somehow gets hold of your password, they'd still be locked out without this second piece of verification. It's a brilliant way to fortify your account against unwanted intruders.
Now, it's time to enable the Two Factor Authentication plugin. This will help reinforce the security of your account, ensuring that authentication is robust and reliable.

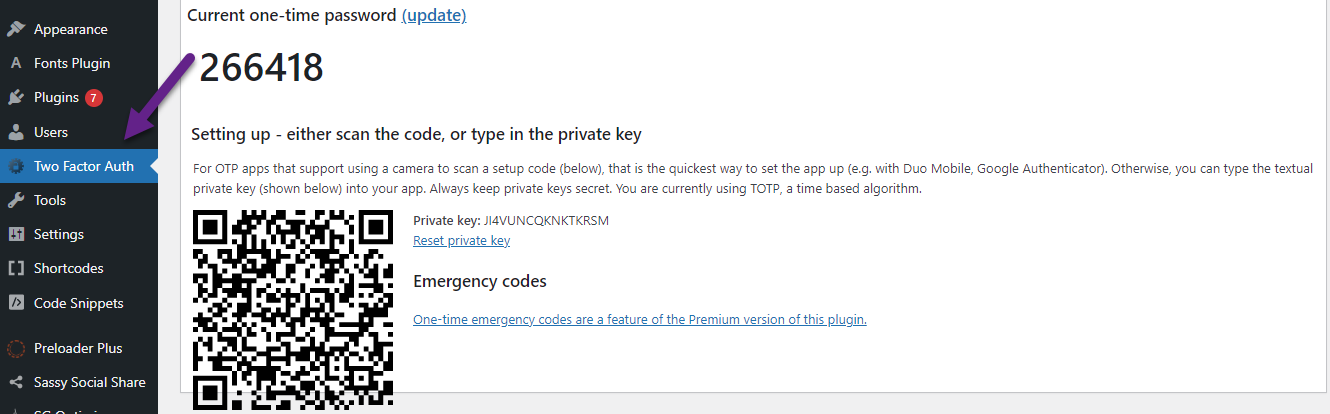
Once you've activated the feature, locate "Two Step Auth" in the dashboard and click on it. After this, you should see the following screen.
Two-step authentication mobile apps generate temporary, time-sensitive codes used to verify a user's identity during the login process.
These apps add an extra layer of security to your online accounts, including your WordPress site, by ensuring that only someone with access to the pre-approved mobile device can log in.
There are several reliable two-step authentication apps available, including:
- Google Authenticator: This app is user-friendly and can be used with many accounts. It's also free and works across different operating systems.
- Authy: Authy provides a seamless interface and allows for multi-device syncing. It also offers secure cloud backups.
- Microsoft Authenticator: This app offers password-free logins and notifications for suspicious activity.
- LastPass Authenticator: This could be a convenient choice if you're already using LastPass as a password manager.
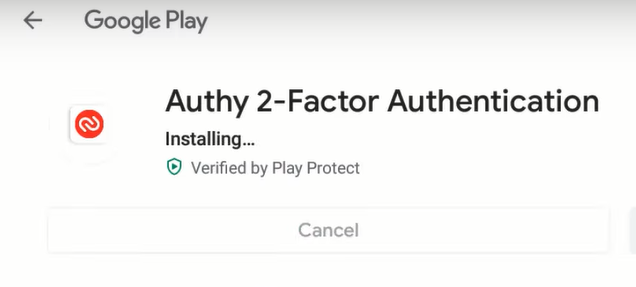
Authy is an excellent choice for two-factor authentication. It offers a user-friendly interface and multi-device syncing, which is handy if you switch between devices.
Additionally, it provides secure cloud backups, ensuring your account information remains safe even if you lose your device, thus strengthening your account's security.
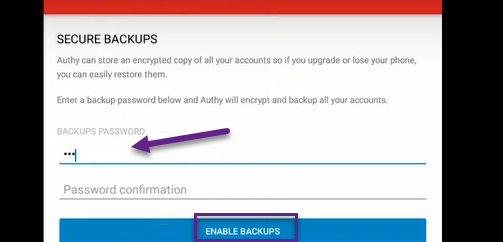
Let's move on to the next step. It's time to get Authy up and running. Go ahead and activate the app. You'll then need to sign up and create an Authy code. This code is a key part of your security setup, so make sure to keep it safe.
Next, you'll need to set your backup password. This is a failsafe measure that can come in handy if you ever lose access to your primary authentication methods. Choose a strong, unique password and, as with your Authy code, ensure it's stored securely.
With these steps completed, you're making great strides in enhancing your WordPress site's security.
As you continue on your journey to improve the security of your WordPress site, it's crucial to ensure you're using the latest version of WordPress. Updates often include essential security patches and improvements.
If you need help checking your WordPress version, don't worry. We've got you covered! Visit our comprehensive guide on the 10 Easiest Ways to Check Your WordPress Version and Stay on top of your site's security.
Let's proceed to the next step. You'll come across a code that you need to enter into the Two Step Authentication. It should look something like this:
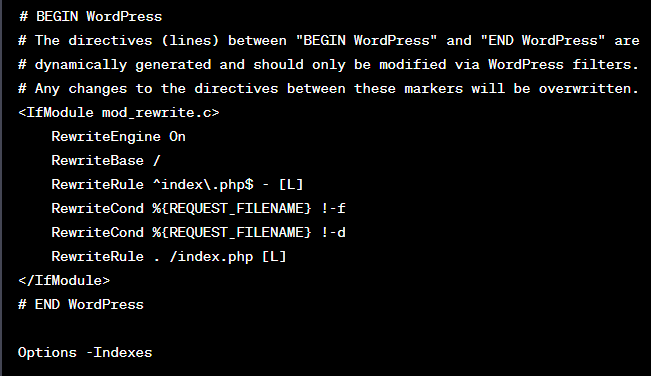
Disable Directory Indexing and Browsing
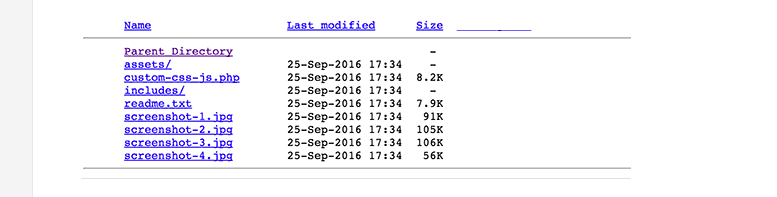
Disabling directory indexing and browsing is crucial for security. Without it, hackers can easily access sensitive files, scripts, or directories on your website. Directory indexing allows them to see the structure of your site, potentially revealing vulnerabilities.
By disabling this feature, you prevent unauthorized access and reduce the risk of exploitation. It's a proactive measure that enhances the overall security posture of your website, safeguarding your data and protecting against potential hacking attempts.
To disable directory indexing in WordPress, you'll need to modify the .htaccess file. After connecting to your site, navigate to the 'public' folder and locate the .htaccess file. Simply open it and add the provided code at the bottom.
This adjustment ensures that your website's directories are not accessible or indexed, enhancing the security and privacy of your WordPress site.
Disable XML-RPC in WordPress
XML-RPC is a protocol enabling software to perform actions over a network. It uses XML to encode calls and HTTP as a transport mechanism. Think of it as a way for applications to "talk" to each other.
It can unintentionally help brute-force attacks by allowing multiple login attempts per request. This makes WordPress websites vulnerable, as attackers can try many passwords swiftly and quietly without being easily detected.
Brute-force attacks involve guessing login credentials until the correct combination is found. With XML-RPC, hackers can bundle multiple login attempts into a single request, making their activity less noticeable.
This is especially problematic because it allows hackers to attempt these intrusions faster and with fewer traces, making it harder for security systems to detect and block these illicit activities.
The system. multi-call is a method in XML-RPC that allows the client to bundle multiple method calls into one request. This means a single request can execute multiple actions, increasing efficiency.
However, it's this feature that can be exploited by hackers to perform multiple login attempts in a single request during a brute-force attack, thus making their malicious activity less noticeable.
There are several ways to disable XML-RPC in WordPress, but the one we'll focus on here involves using the 'Disable XML-RPC-API’ plugin. This is a straightforward and reliable method to protect your site.

Let's proceed to the "XML-RPC Security" section and then go ahead and select "XML-RPC Settings" from the pop-up. From here, you can grant specific users access to XML-RPC by adding their IP addresses to the whitelist. This way, only authorized users can interact with XML-RPC.

Add Security Questions to WordPress Login
If you're considering extending the plugin's usage to more individuals or those who aren't necessarily administrators, you'd need to buy a license.
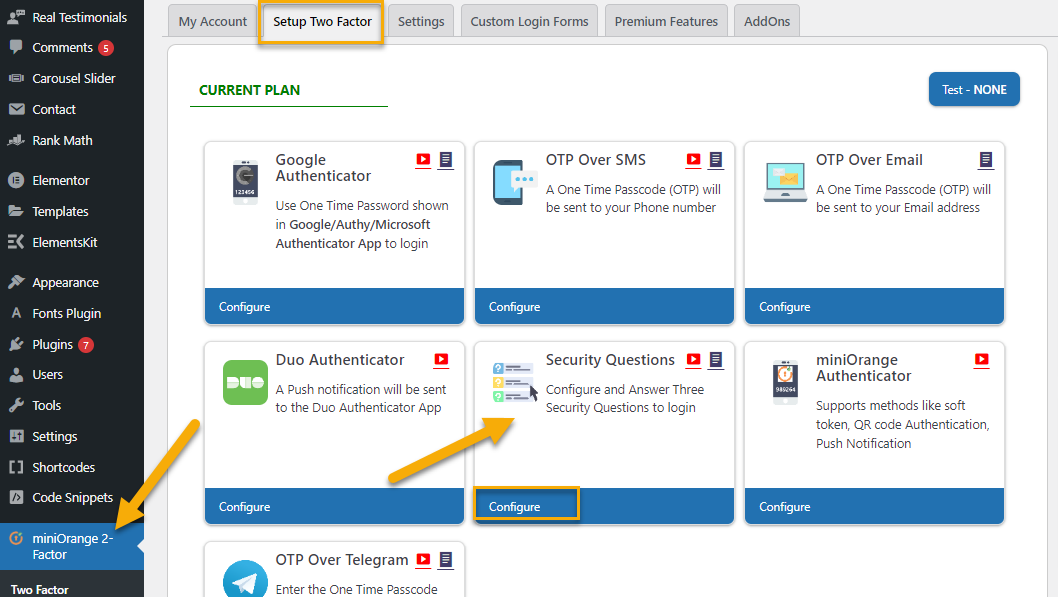
What you need to do next is install and activate the miniOrange Multi-factor Authentication Plugin. After doing so, simply proceed to click on the "MiniOrange 2-Factor".

Here's what you'll want to do. First, find and click on the option 'Setup Two Factor.' Once you've done that, you should be able to see the current Plan. Next, you will want to choose the 'Security Questions Plan.' Got that? Great. The final step is to click on 'Configure.'
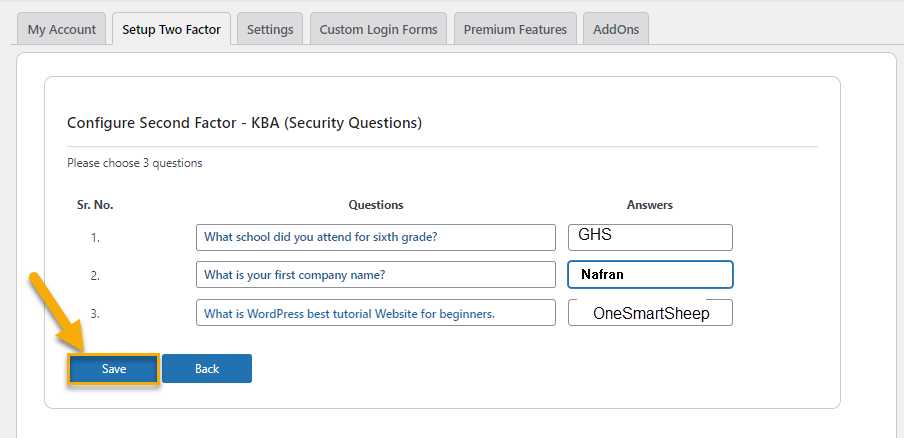
Now, if you click that 'Configure' button, a fresh page pops up with some security questions. It's an essential step for your security; you'll need to fill these in. GIve a click to the “Save” button.
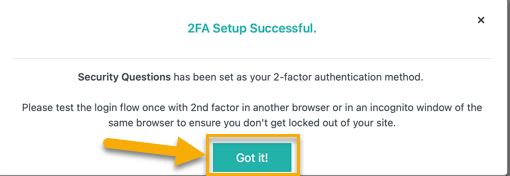
Once you've hit the "Save" button, a message will appear on your screen. This is just to confirm that your settings have been configured successfully.
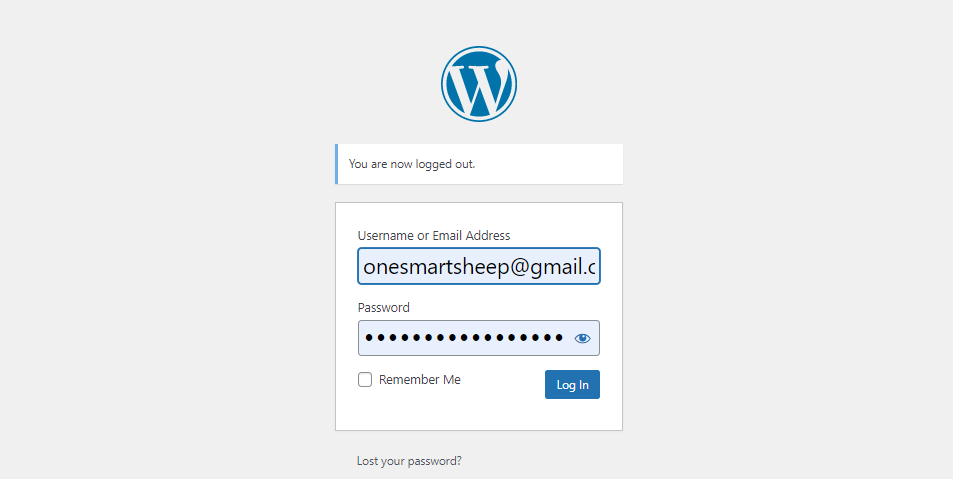
First, please log out. After that, you'll need to log back into your WordPress account. Just use your username and password for that. In my case, as the agency name is my username, I'd write 'one smart sheep.' Then, proceed by typing in your usual password.
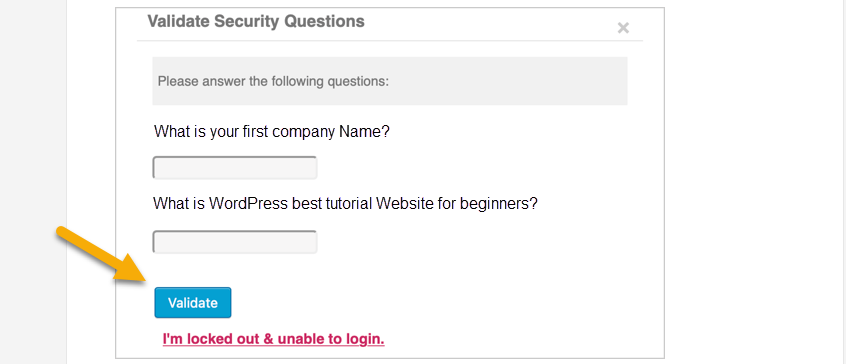
Once you hit the "Login" button, you'll be presented with a couple of Two Factor Authentication Security Questions. Once you've provided the correct answers to these, you'll need to click on the "Validate" button. After that, you'll be granted access to your WordPress admin panel.
The Role of WordPress Hosting
Your choice of WordPress hosting service can significantly impact the security of your WordPress site. A good hosting service will offer a number of security features that can help protect your site from threats.
WordPress hosting companies often implement a range of strategies and practices to ensure the security of WordPress sites hosted on their servers. Here are some key measures that they may undertake:
- Regular Updates and Patches: Hosting companies typically make sure that the server software and WordPress itself are always updated to the latest versions. This helps to prevent vulnerabilities that could be exploited in older versions.
- Firewalls and Security Hardening: They often put in place strong firewalls and hardening security measures to protect against common attacks such as DDoS, Brute Force, and SQL Injection. They may also provide application-level firewall rules specifically tailored to WordPress.
- Malware Scanning and Removal: Many hosts routinely scan for malware, and some will even remove it for you if they find any. They often provide real-time monitoring of security issues and alert you if there is a problem.
- Backups and Restoration: Reliable WordPress hosting services usually offer regular automatic backups of your site, allowing you to restore it to a previous state if needed. This can be a lifesaver if your site gets hacked or experiences other significant issues.
- Secure Sockets Layer (SSL): They often provide free SSL certificates for your sites. SSL ensures that data transferred between your users and your site is encrypted, which is particularly important if you are collecting sensitive information like credit card details.
- Two-Factor Authentication (2FA): Some hosting companies offer 2FA for their hosting accounts, providing an additional layer of security.
- Least Privilege User Access: Hosting companies typically enforce the least privileged user access, meaning each user is given the minimum levels of access necessary to perform their tasks. This reduces the potential for unauthorized access.
Wrapping Up
Safeguarding your WordPress site requires a comprehensive and multifaceted approach. Firstly, backing up your data with the help of plugins like UpdraftPlus, VaultPress, and BackupBuddy protects against unforeseen data loss, reducing recovery time and mitigating impacts.
Incorporating additional security measures, such as automatic logouts, changing default usernames, and limiting login attempts, further bolsters your defenses, keeping potential threats at bay.
For added protection, implementing two-factor authentication (2FA) provides a robust extra layer of security. By requiring a unique verification code sent to a trusted device, this measure ensures that only authenticated users gain access.
Directory indexing and browsing can be disabled to prevent unauthorized access to sensitive files or directories while disabling XML-RPC thwarts silent brute-force attacks.
Adding security questions to your WordPress login, preferably using the miniOrange Multi-factor Authentication Plugin, creates another barrier to unauthorized access.
Moreover, choosing a secure hosting service contributes significantly to the overall security of your WordPress site. Such services provide regular updates, firewalls, malware scanning, backups, SSL encryption, and enforce least privilege user access.
Education, too, is an integral part of your site's security strategy. Keeping your site's users informed about potential security risks and promoting safe online practices can greatly contribute to overall security.
A secure WordPress site results from the strategic layering of technical safeguards, diligent practices, and ongoing education. Through these steps, you can achieve a resilient and secure online presence.


.svg)