Today, we're diving headfirst into the world of Webflow - a powerful no-code web design tool that's been making waves in the industry. You see, Webflow isn't just another web design tool; it's an entire platform that allows you to design, build, and launch websites in a highly visual way. It's like having your cake and eating it, getting the flexibility of hand-coding with the convenience of a visual design tool.
If you're into web design, whether as a seasoned pro or a curious beginner, Webflow is worth your attention. Why, you ask? Because it's not only about creating aesthetically pleasing designs but also about understanding how to build functional, responsive websites without necessarily needing to dive into complex coding. Mastering Webflow could mean leveling up your web design game, potentially opening up new opportunities and enhancing your workflow. So, buckle up, folks, as we explore the nuts and bolts of this game-changing tool!
What is Webflow?
Let's get this show on the road: what exactly is Webflow? In a nutshell, Webflow is a cloud-based web design tool that allows you to design, build, and launch responsive websites without having to write a line of code. Think of it as a bridge between traditional website templates and hand-coding. With Webflow, you can visually create a professional, custom-designed website, and the platform automatically generates the underlying HTML, CSS, and JavaScript code.
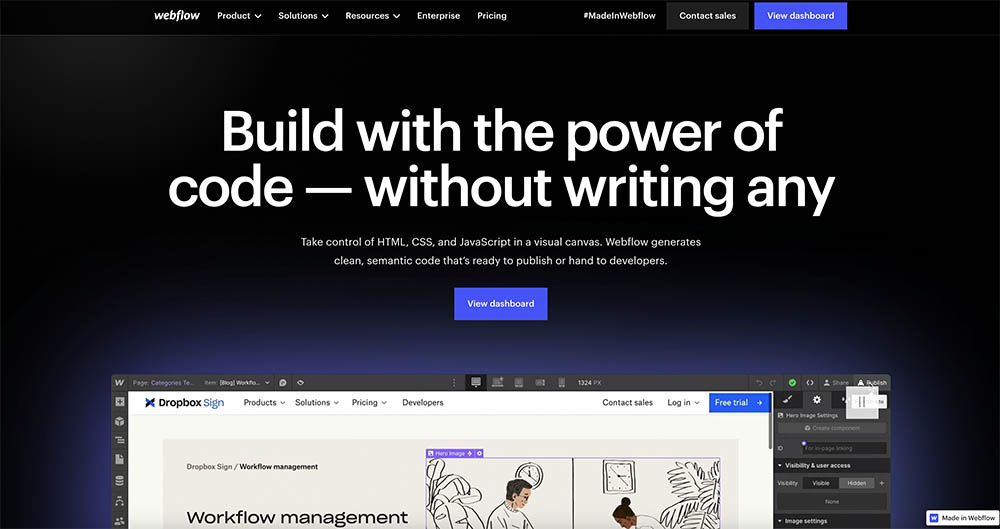
Now, what sets Webflow apart from the rest? Quite a few things, actually! One unique feature is its "box model" layout system. Unlike other tools that rely heavily on pre-set templates, Webflow allows you to structure your website as you see fit, creating a unique layout that suits your exact needs. It also provides a powerful CMS (Content Management System), enabling you to easily create complex, dynamic sites. Webflow even includes e-commerce capabilities so that you can design and launch an online store, again, without the need for coding.
Perhaps one of Webflow's most impressive features, however, is its visual CSS designer. Rather than writing CSS code manually, Webflow lets you adjust styles like layout, typography, and colors visually, instantly showing you the results. This visual, intuitive interface is a game-changer, especially for those who aren't coding wizards. So, in a world full of web design tools, Webflow certainly stands out, offering a unique blend of power, flexibility, and ease of use.
Getting Started with Webflow
So, you're ready to get your feet wet with Webflow? Perfect! First things first, you'll need to create a Webflow account. Head over to their website, click the "Get started for free" button, and fill out the signup form. Easy as pie. Once you're signed up, you're all set to start exploring.
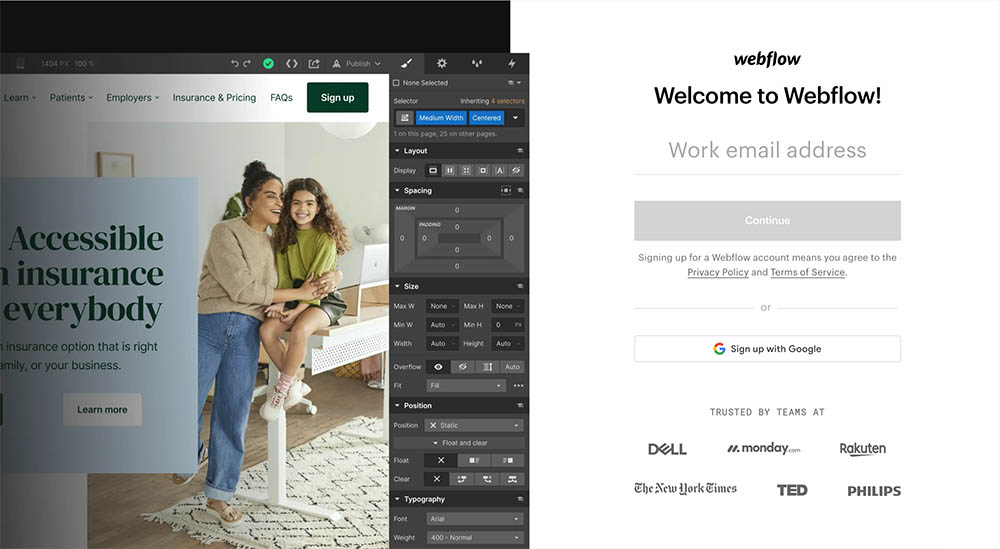
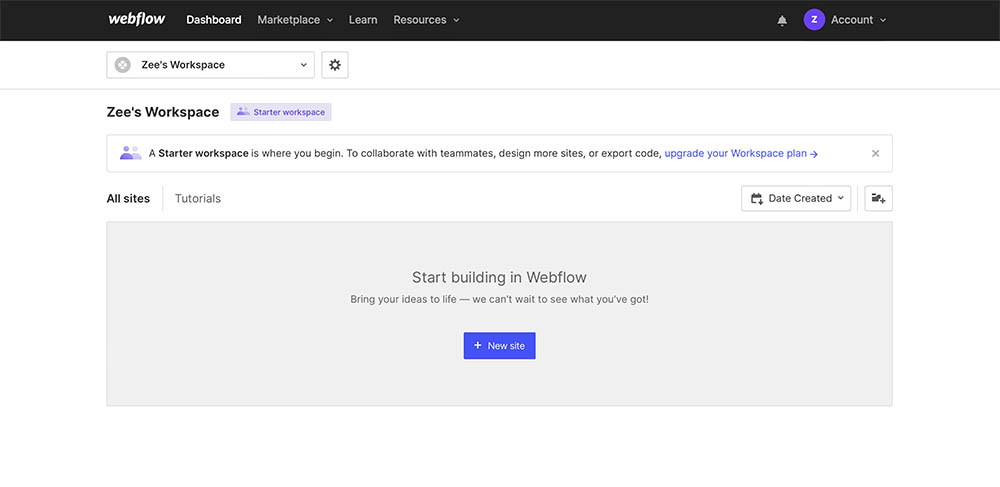
Now, let's take a moment to familiarize ourselves with the Webflow user interface. After logging in, you'll land on your dashboard - this is where you'll find all your projects. To start a new one, just click on the "New Site" button. This will open the Designer, the heart of Webflow, where all the magic happens.
Webflow's Designer has a clear, intuitive layout. On the left, you'll see the site structure panel and the tools for adding elements to your page. On the right, you'll find the style panel, where you can adjust the design of your elements. And, of course, in the middle, you have the canvas, where you can see your website come to life.
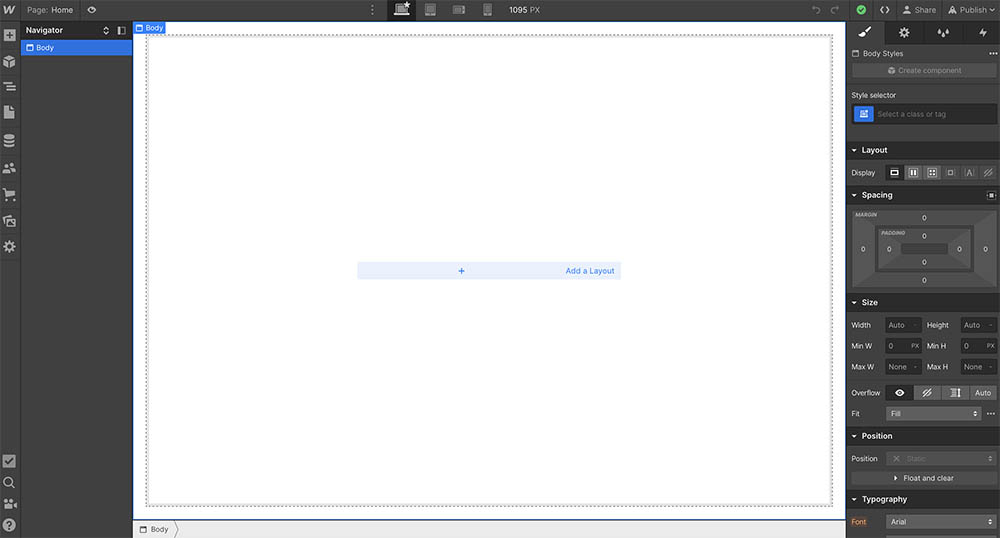
So, what about building your website? Webflow has a hierarchical structure, kind of like a set of Russian dolls. You start with a Page, which you can divide into Sections, like headers, footers, or content areas. Inside these Sections, you can add Containers, which help keep your content neatly aligned and responsive. Then, within these Containers, you can add Elements, like text, images, buttons, and more. It's a flexible system that allows you to build just about any layout you can imagine. So, strap in, folks - you're about to embark on a fun ride of creating beautiful and functional websites with Webflow!
Understanding the Box Model
Now, we're going to dive into one of the fundamental aspects of web design in Webflow: the box model. If you're coming from a design background, this might seem a little abstract at first, but trust us, once you get the hang of it, it's a powerful tool for creating pixel-perfect designs.
Webflow's box model is a way of understanding the layout of elements on a page. Essentially, every element you add in Webflow is a box - a rectangle that can have a width, a height, padding, borders, and margins. This is the case whether it's a section, container, or a simple text block.
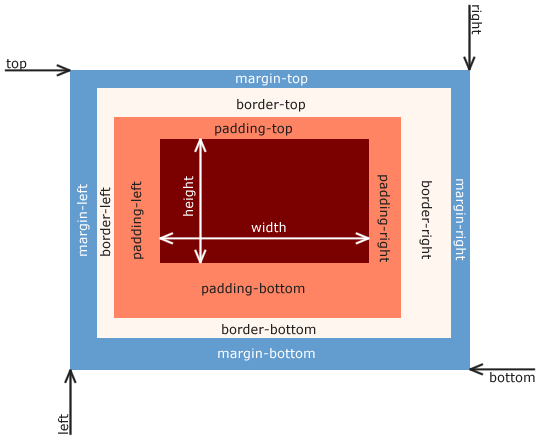
So, let's break this down. The width and height of an element are pretty self-explanatory. The padding is the space inside the element, between the content (like text or an image) and the border of the element. The border is the line that goes around the outside of the padding. And finally, the margin is the space outside the border, separating the element from other elements.
In Webflow, adjusting these settings is a breeze. Just select an element, go to the style panel on the right, and you'll find controls for padding, border, and margin in the "Spacing" section. You can adjust these values simply by clicking and dragging, or by entering a specific number.
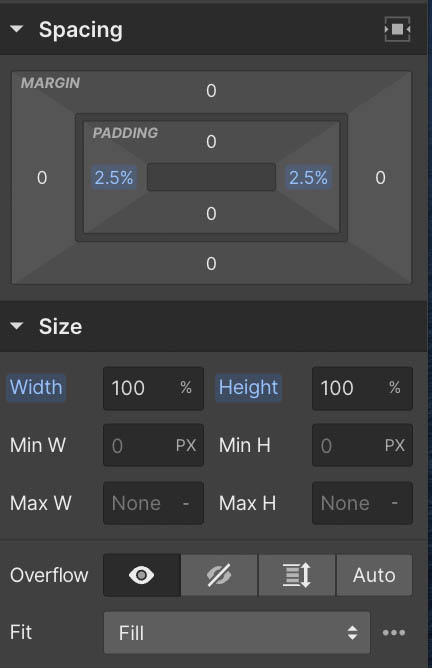
Mastering the box model is crucial because it helps you control the layout of your website precisely, ensuring your designs look great on any device. So, go ahead and play around with padding, border, and margin settings - you'll be surprised at how much control you have over your design.
Exploring Webflow’s Core Concepts
Before we jump headlong into designing a whole website, there are a couple of core Webflow concepts we should get acquainted with: Classes and Symbols. In Webflow, a Class is a reusable set of style properties. This means you can style an element in a certain way, save it as a Class, and then apply that same style to other elements. It's a massive time saver and ensures consistency across your site.
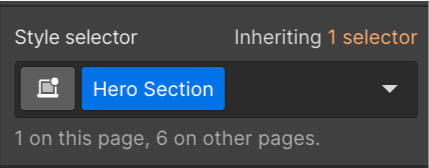
Now, Symbols are another step up the ladder of efficiency. Symbols are reusable groups of elements. Think of things like navigation bars, footers, or contact forms that appear on multiple pages. Design it once, save it as a Symbol, and you can reuse it anywhere in your project.
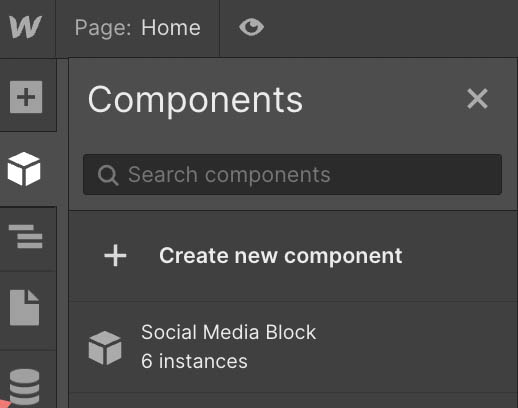
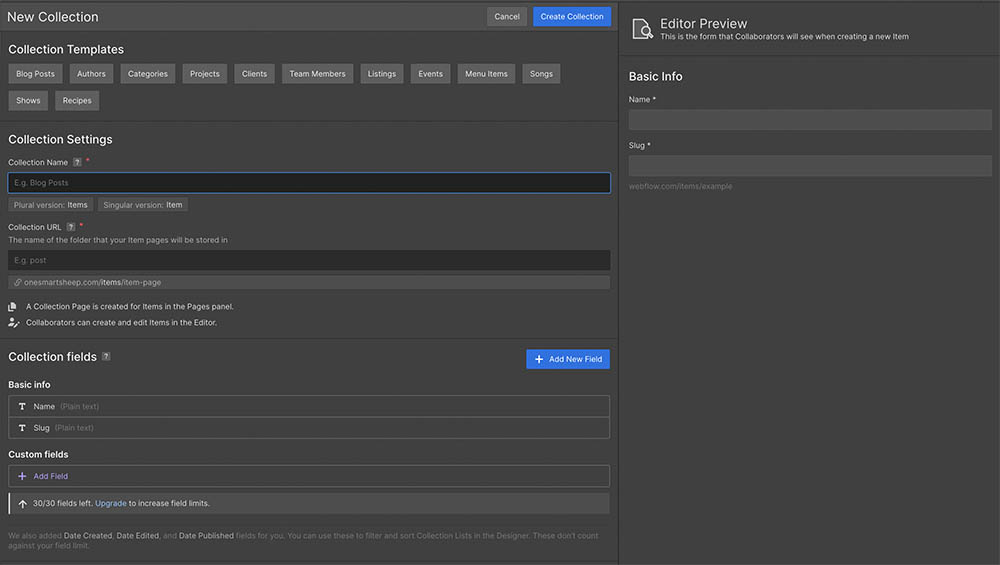
Let's not forget about Webflow's CMS and Ecommerce features. The CMS (Content Management System) in Webflow is powerful yet easy to use. It allows you to create custom content types (like blog posts, product pages, or team members) with custom fields. Once you've defined your content structure, you can start adding actual content, which can then be dynamically displayed on your site. It's a flexible system that's great for sites with a lot of content.
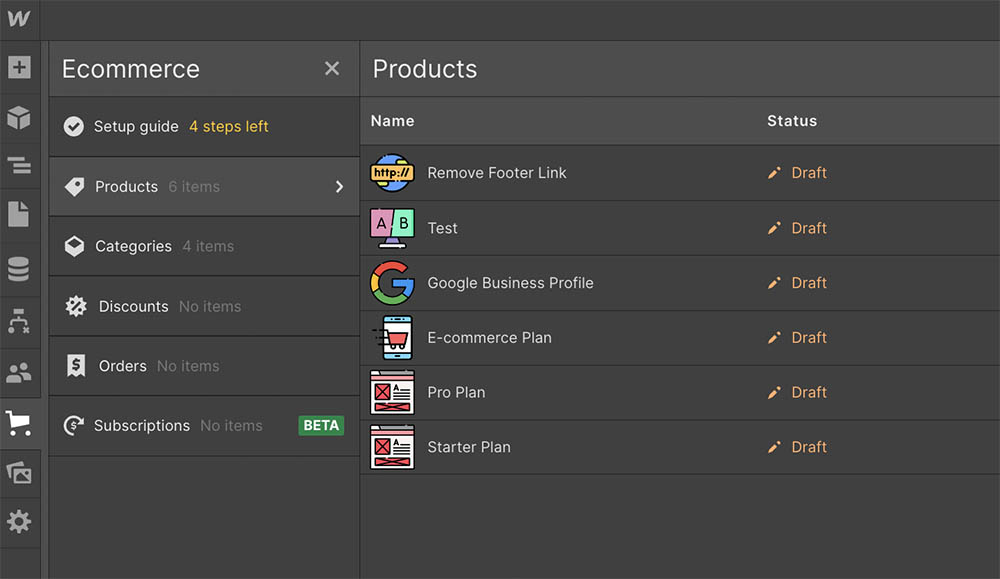
Webflow's Ecommerce feature, on the other hand, is a comprehensive solution for building online stores. It offers you the tools to design your product pages, manage your inventory, set up secure payments, and even handle taxes and shipping. Plus, it's fully integrated with Webflow's CMS, so you can easily include dynamic product information.
All these features combined make Webflow not just a web design tool, but a complete platform for building and managing websites. So, whether you're a web design newbie or a seasoned pro, there's plenty for you to explore and create with Webflow.
Building Your First Webflow Project
It's time to roll up our sleeves and create your very first Webflow project. Get excited, folks! Let's start from scratch, shall we?
Step 1: Creating a new project
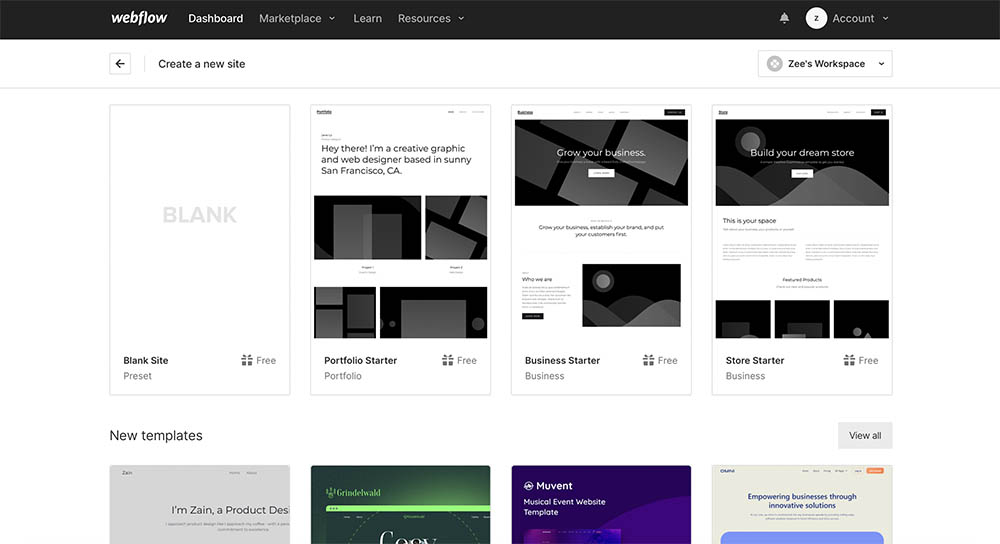
From your dashboard, click on 'New Project'. You can either start with a blank project or choose from a variety of templates. For now, let's choose the blank project.
Step 2: Adding Elements
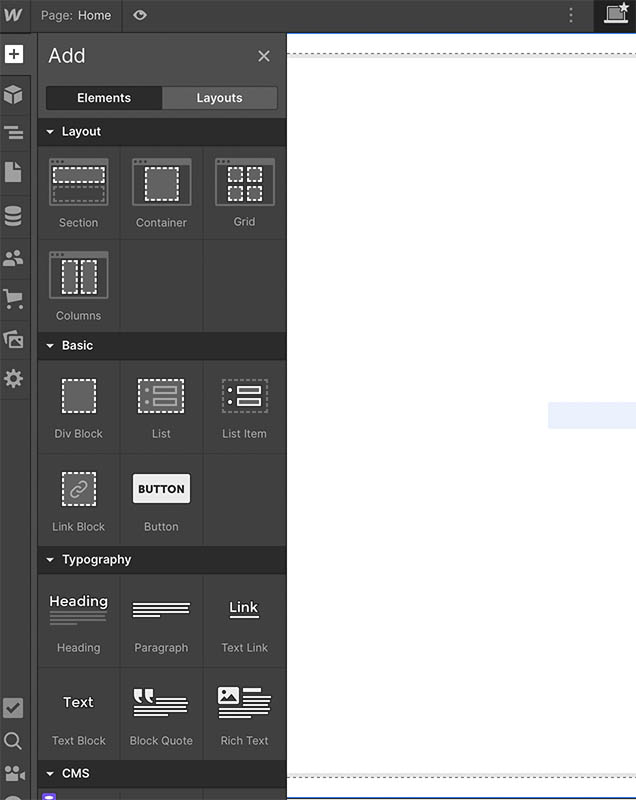
Once you're in the Designer, you'll see an '+' icon on the left side. Clicking it opens the 'Elements' panel. Here you can find different types of elements like sections, containers, headings, paragraphs, links, etc. Start by dragging a 'Section' onto your canvas, then drag a 'Container' inside that section.
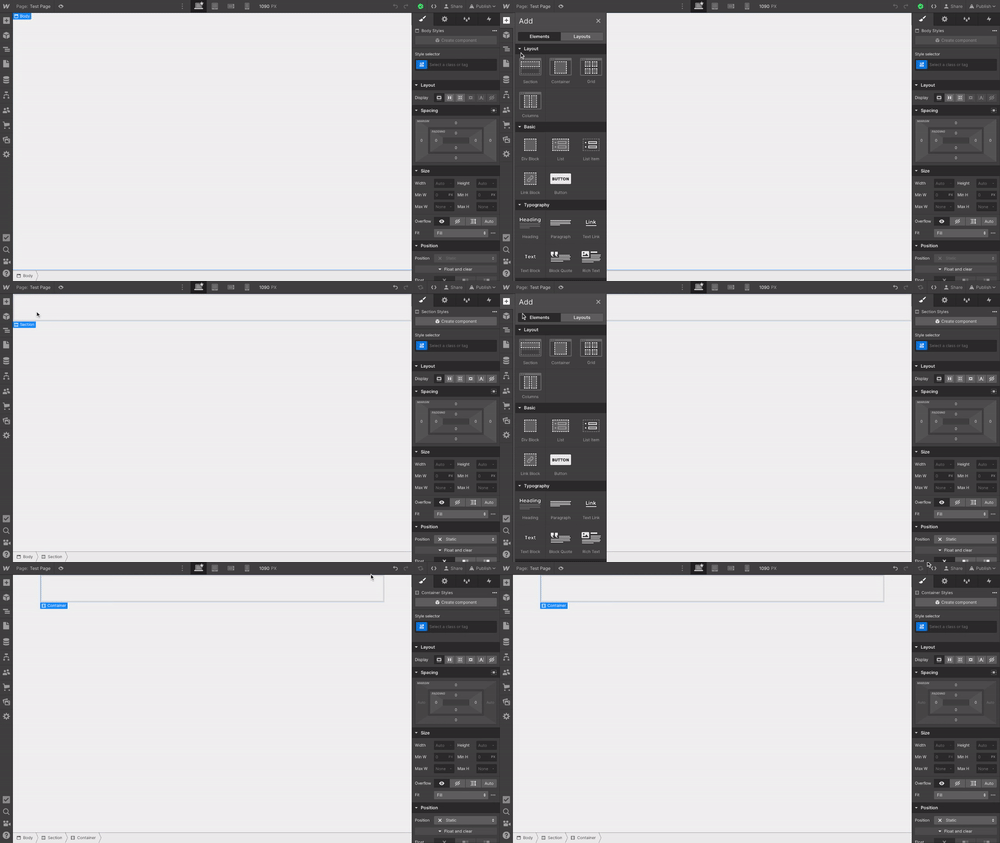
Step 3: Styling Elements
Once you have your elements on the page, it's time to make them look good. Select the element you want to style, head to the 'Style' tab on the right side, and you can adjust things like typography, color, size, and spacing.
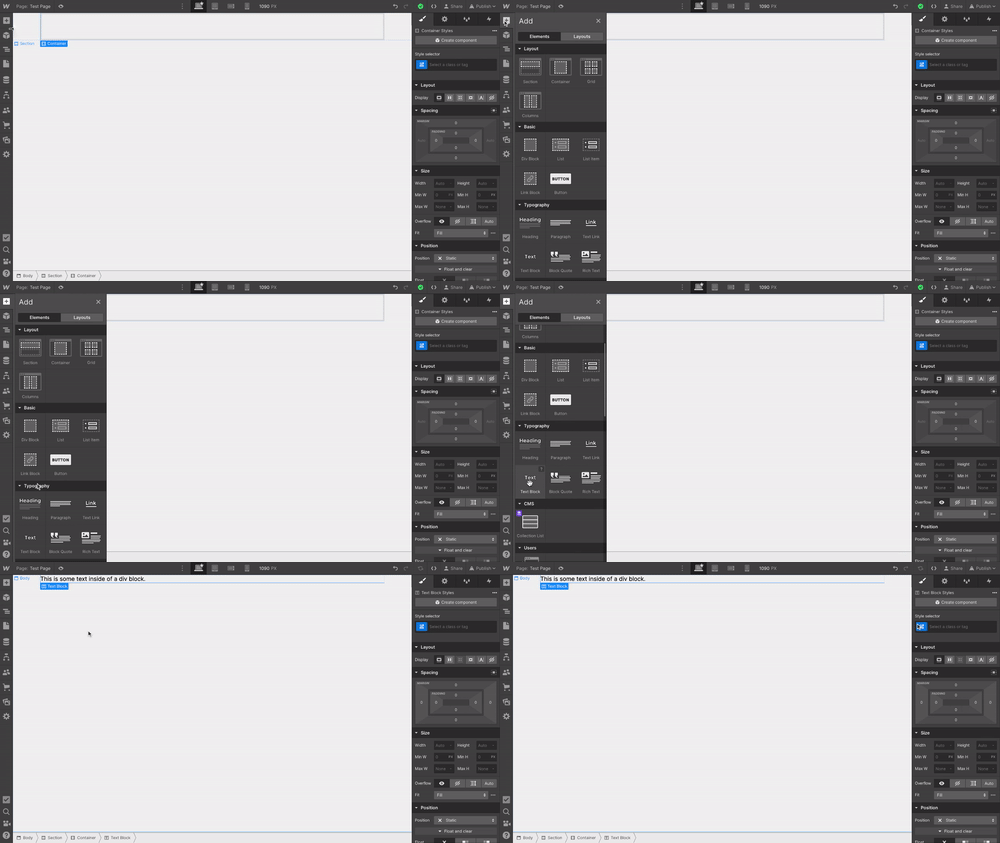
Step 4: Adding Classes:
Remember the class concept we discussed? Once you've styled an element, you can save that styling as a class and apply it to other elements. It's a major time saver! Learn more about Classes at Webflow University.
Rinse and repeat these steps until you've built your basic webpage layout.
Now, a quick word about templates and clonable projects. Webflow has a range of templates you can use as a starting point for your projects. These are fully designed and responsive websites that you can customize to your liking. Similarly, clonable projects are designs shared by the Webflow community that you can clone and use as a jumping-off point. They can be a massive time saver and a great source of inspiration.
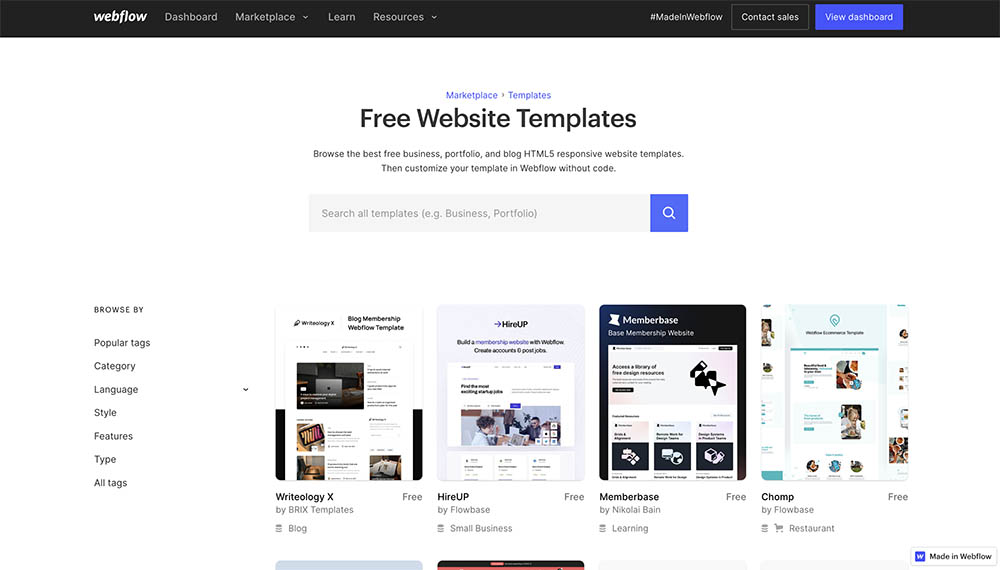
So, there you have it - the basics of building your first Webflow project. Go ahead and get your hands dirty, make mistakes, and most importantly, have fun with it!
Webflow’s Interactions and Animations
Buckle up as we're about to dive into one of the most exciting aspects of Webflow: Interactions and Animations! These powerful features allow you to add life and dynamism to your website, creating an engaging and interactive experience for your users.
Webflow's Interactions panel, which you'll find on the right side of the Designer, offers a broad range of animation capabilities. From simple element triggers (like elements moving as you scroll) to complex, timeline-based animations, there's a ton of potential to let your creativity flow.
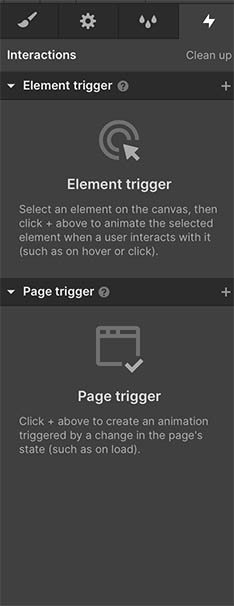
Just remember, while animations and interactions can be a great tool to enhance your website's user experience, they should be used thoughtfully and in moderation. Too much movement can be distracting or even annoying for your visitors. So go ahead, play around with these features, and discover the possibilities they offer to make your web designs stand out.
Publishing and Hosting with Webflow
Alright, folks! You've designed a beautiful webpage and added some snazzy animations. It's time to show it off to the world. But how do you do that? By publishing your website, of course!
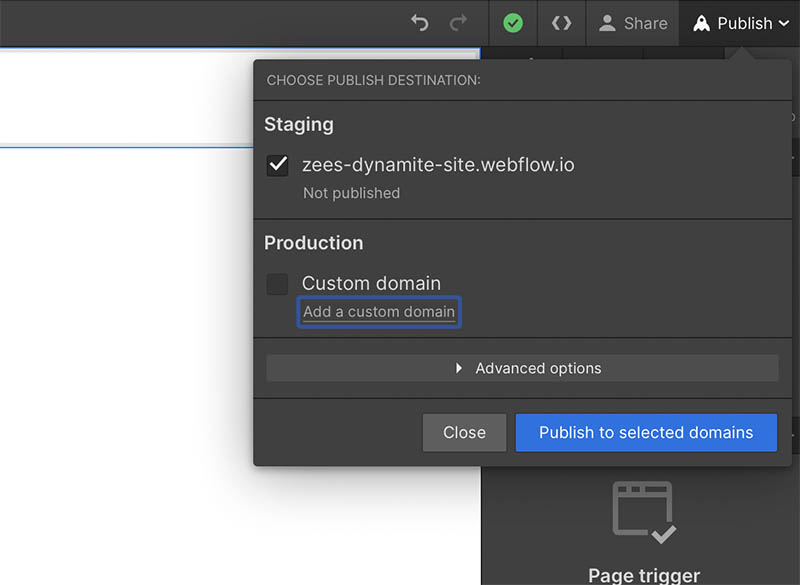
Publishing in Webflow is a breeze. Just click the 'Publish' button in the top right corner of the Designer. A window will pop up, allowing you to select where you want to publish your site - either to your webflow.io staging site (a free domain provided by Webflow for testing your site) or to your custom domain. If everything looks good, hit 'Publish' again, and voila, your website is live!
Webflow Hosting
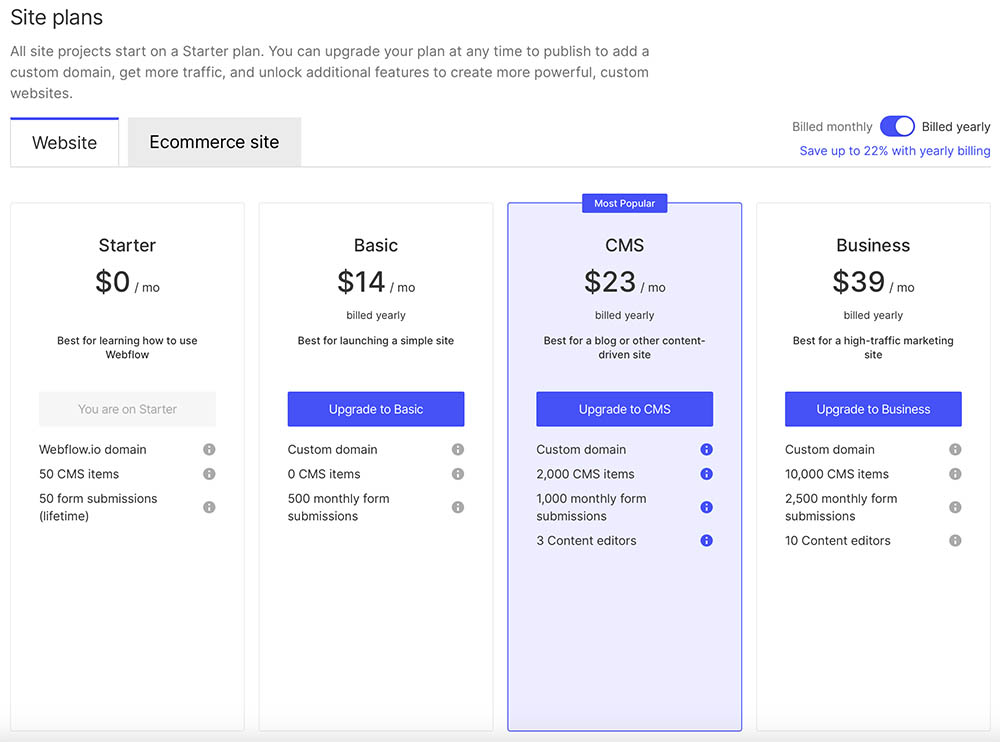
But hold on, what about hosting? Well, Webflow has got you covered there too. Webflow offers several hosting plans, catering to everything from personal projects to large-scale enterprise websites. These plans include features like automatic backups, SSL security, global CDN, and more. And the best part? Webflow's hosting is fully managed, meaning you don't have to worry about server setup, maintenance, or security - Webflow handles all of that for you. Check out our blog post "Webflow Pricing Plans: Choosing the Right Option for Your Website" to learn more about the plans Webflow offers.
Moreover, Webflow's hosting provides exceptional site performance. Its global CDN ensures fast load times for your visitors no matter where they're located, and the enterprise-grade infrastructure guarantees 99.99% uptime. So not only is it super convenient, but it also delivers an outstanding experience for your users.
So, to sum it up, Webflow makes it easy to get your website out into the world and ensures it performs flawlessly once it's out there. And with that, you're well on your way to becoming a Webflow pro!
Webflow Resources and Community
We're nearing the end of our Webflow 101 journey, but before we wrap things up, let's talk about the wealth of resources available to help you continue your Webflow education. Webflow has a stellar learning ecosystem, with tools and platforms designed to support your growth at every stage of your Webflow journey.
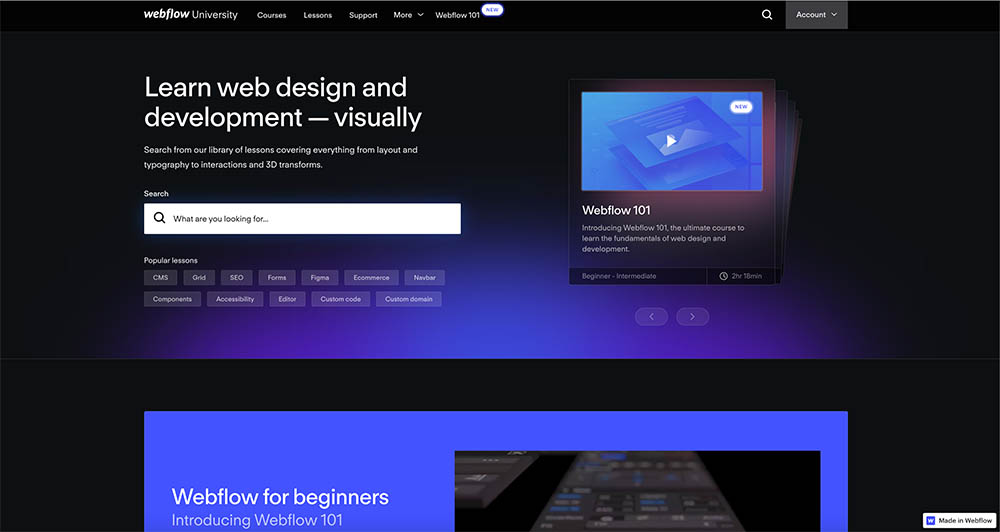
First up is Webflow University. It's a treasure trove of information, with video tutorials, guides, and lessons covering everything from the basics to advanced topics. Best of all, it's free!
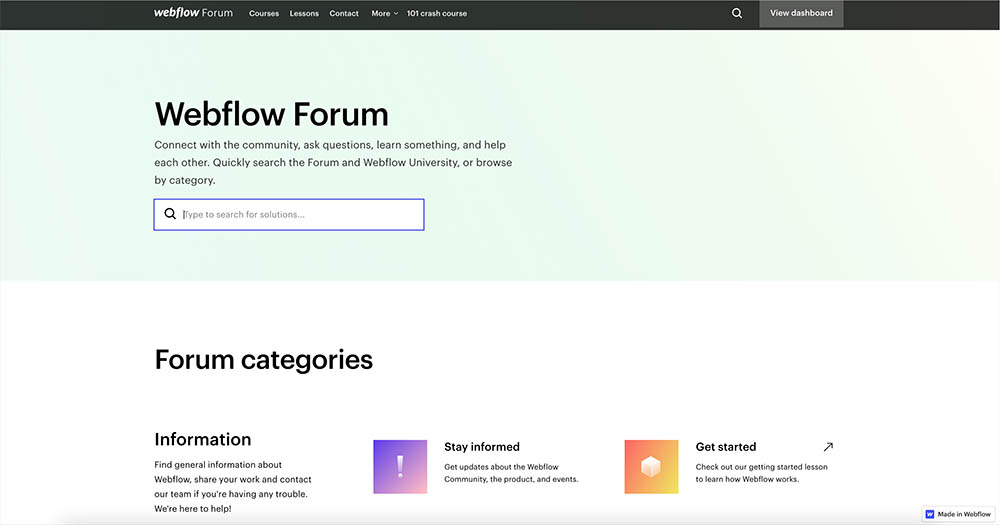
Next, we have the Webflow Forums. Here, you'll find a vibrant community of Webflow users discussing a wide range of topics. Whether you've hit a roadblock with your project or you're looking for design inspiration, the Forums are a great place to get help and share ideas.
Webflow's Blog is another fantastic resource. It features articles on web design best practices, inspirational case studies, product updates, and more. It's a must-read for any aspiring web designer.
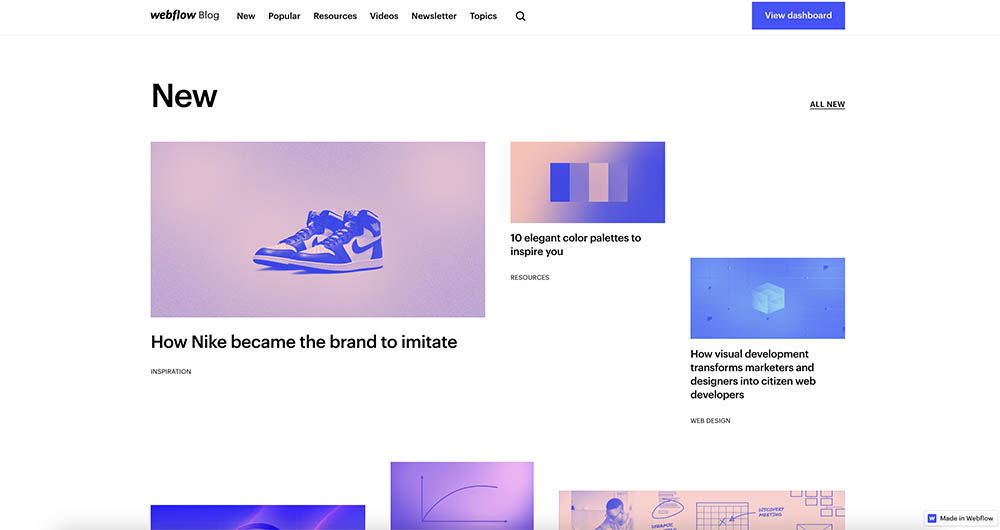
But the learning doesn't stop there. Webflow also hosts regular webinars and virtual workshops, where you can learn directly from the Webflow team and industry experts. It's also worth checking out the Showcase, a collection of exceptional websites built with Webflow. You can even clone projects from the Showcase to see how they were built and learn from them.
Last, but certainly not least, is the Webflow community itself. Made up of designers, developers, entrepreneurs, and creative professionals from around the world, the community is the heart of Webflow. Whether you're sharing your work, seeking feedback, or collaborating on projects, being part of this community is both enriching and inspiring.
So, that's it, folks! With all these resources at your disposal, you're well-equipped to continue your journey with Webflow. Remember, learning is an ongoing process, so keep exploring, experimenting, and engaging with the community. Happy designing!
Wrapping Up
And there you have it! We've ventured through the basics of Webflow, right from understanding what it is, navigating the interface, grasping key concepts, and even publishing your very own webpage. From the flexibility of its box model to the dynamism of its interactions and animations, and let's not forget the ease of publishing and the strong community support - it's clear that Webflow is a powerful and versatile tool for anyone keen on web design.
Now it's your turn to take the reins. Get out there and start playing with Webflow. Remember, the best way to learn is by doing. So, create that account, explore the platform, start your first project, and let your creativity run wild!
In a world where digital presence is key, Webflow stands out as a comprehensive solution that empowers you to build, design, and launch responsive websites. It's user-friendly for beginners while still offering depth and complexity for the more seasoned designers. Webflow is more than just a web design tool; it's a canvas for your creativity and a launchpad for your ideas. So, why wait? Get started on your Webflow journey today, and let's create some amazing things together. Happy designing, folks!


.svg)