


Have you ever tried to add an outside image to your WordPress and just felt stuck? Don't worry. In this guide, we'll show you how to import outside images to WordPress. With seven easy steps and helpful pictures, it'll be simple to follow.
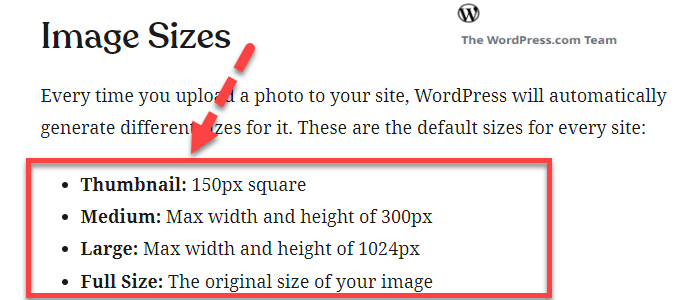
In WordPress, images are automatically generated in various default sizes upon upload:
- Thumbnail: 150px square.
- Medium: Maximum width and height of 300px.
- Large: Maximum width and height of 1024px.
- Full Size: The original uploaded image size.
In WordPress, the default upload size is typically 2MB to 150MB, depending on the server settings. However, always prioritize web-optimized images to ensure swift page loads.
Following that, we'll delve into the reasons behind importing images and explore the significance of visuals within WordPress sites.
To top it off, we'll also touch upon the optimal image formats for WordPress. Dive in and enhance your understanding.
Steps to Import External Images in WordPress
Images enrich the visual appeal of a WordPress site, enhance user engagement, and aid in conveying complex messages succinctly. They can also boost SEO when appropriately optimized, providing an all-rounded enhancement to a site's functionality and aesthetic.
Let's now explore the process of uploading images in WordPress. For clarity, we've accompanied each step with detailed screenshots to guide you.
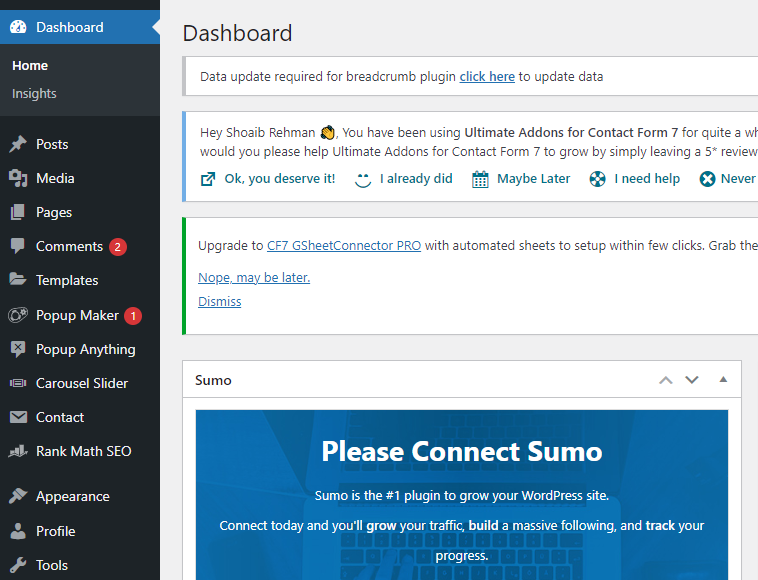
Step 1. Visit WordPress Dashboard
Firstly, head over to your site's wp-admin page. At this point, you'll need to input the email and password tied to your WordPress backend. After entering the details, tap the blue 'Login' button.

After pressing the login option, you'll land on your WordPress admin dashboard. From here, you have the flexibility to tweak your site, publish articles, enter codes, install plugins, and adjust various site configurations.
Let's now use the dashboard to import external images into WordPress.
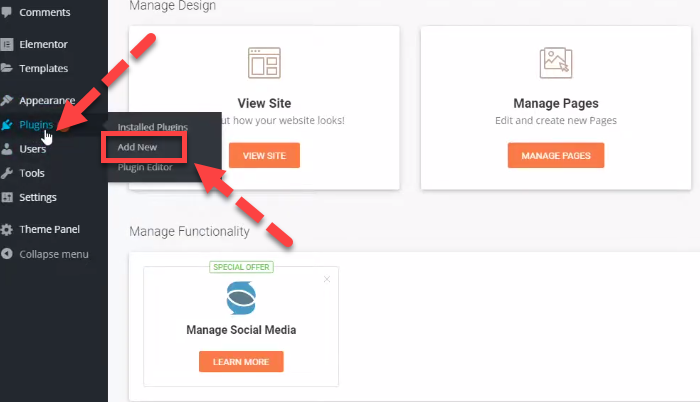
Step 2. Click on Plugins
On the dashboard, look for 'plugins' on the left side. Hover over the 'plugin' option, and a dropdown will appear. From this dropdown, select 'Add New.'
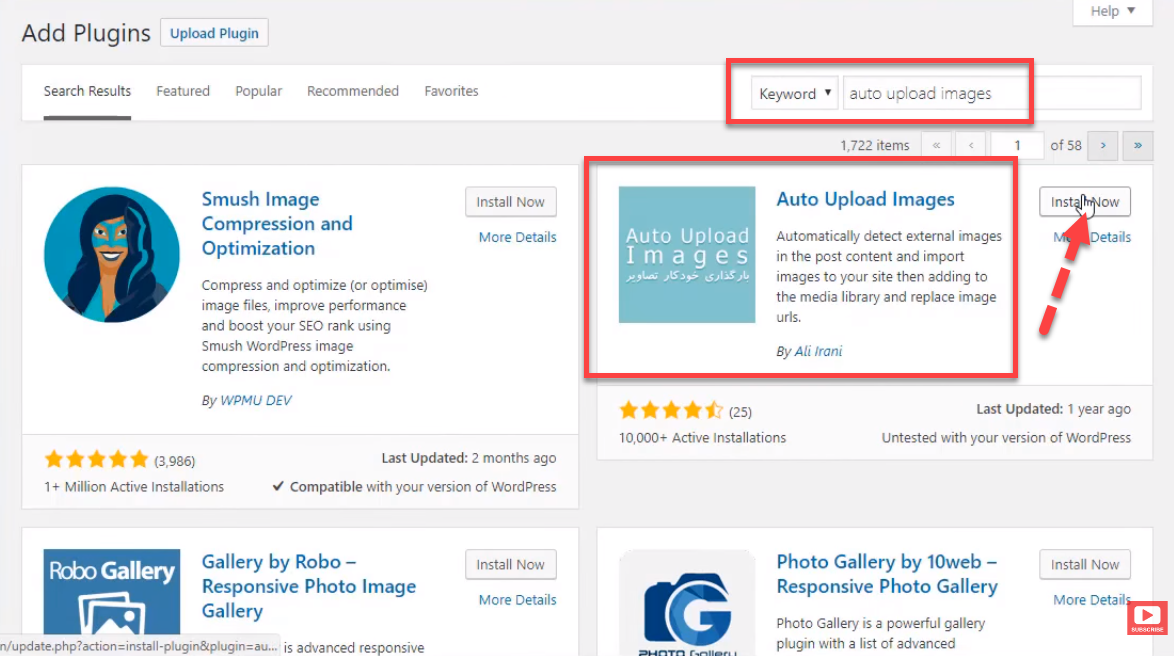
Step 3. Navigate for Auto Upload Images
Clicking 'Add New' brings up a new window. Use the search bar in the top right to search for our desired plugin, which is 'Auto Upload Images.' This plugin aids in importing external images to WordPress.

Step 4. Click on the Install Button
After entering your keyword and pressing enter, the plugin will be displayed. Next to the plugin, there's an 'install' button; click on it.
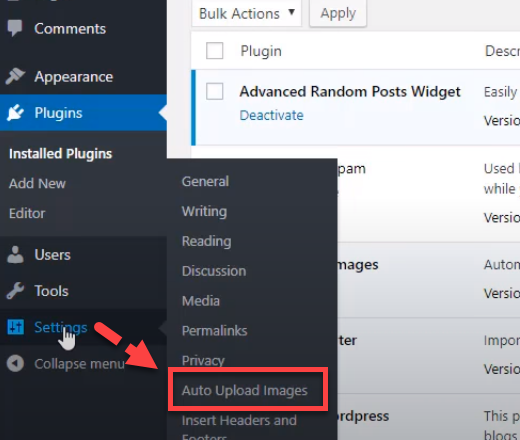
Step 5. Do Auto Upload Image Settings
After activating and setting up the plugin, you'll need to tweak its preferences. Navigate to the 'settings' tab on the primary dashboard. A menu will drop down. Pick 'Auto Upload Images' from the dropdown.
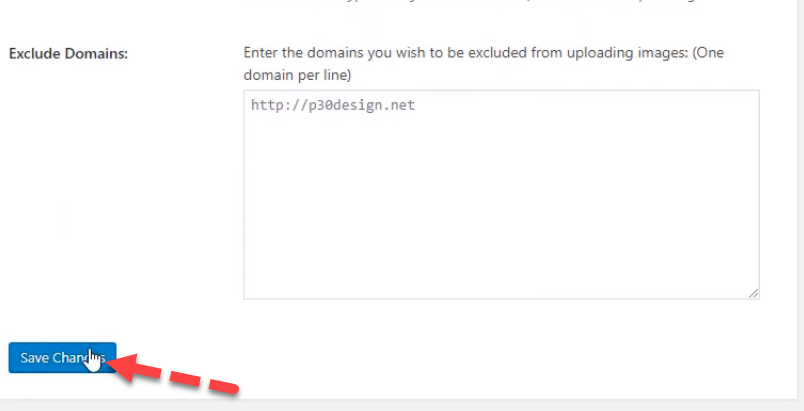
By selecting 'auto upload images,' you'll be directed to its configuration page. Here, you have the option to specify the format of the image name and alt name and set the upper limit for image uploads on your WordPress platform. Once done, hit the 'Save Changes' icon.

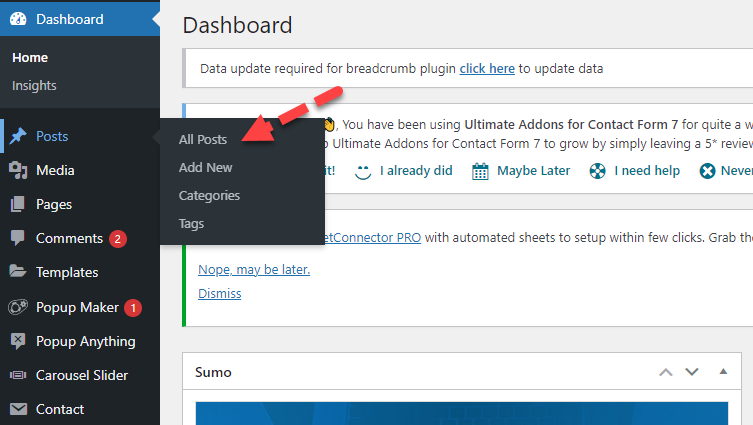
Step 6. Click on Screen Options
Now, head back to the primary dashboard and click on 'Posts.' A menu will unfold, prompting you to pick the 'All Posts' choice.
To display all your articles on one page, a few tweaks are required. Tap on the 'Screen option' found at the upper right side.

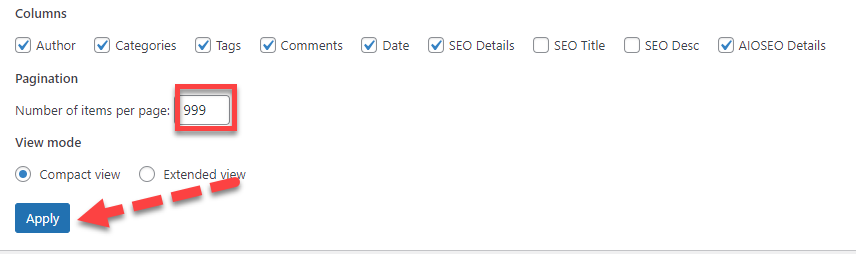
Step 7. Set up No. of Items Per Page and Update it
In this section, you can adjust the settings for the display. For instance, you can specify the number of items shown per page. You also have the option to switch between a compact and extended view.
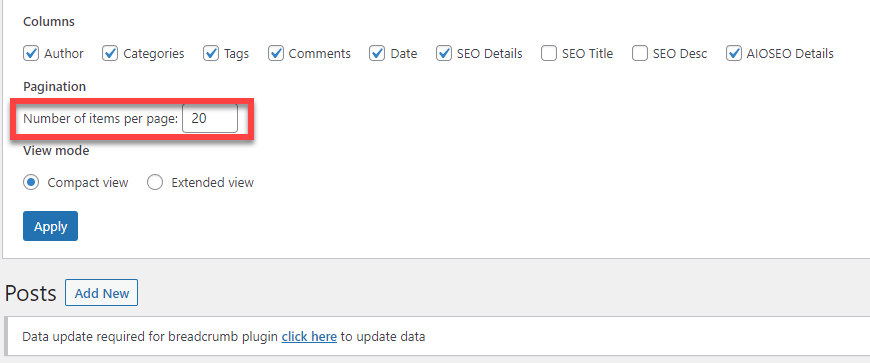
I've adjusted the number of items displayed per page from 20 to 999. After making these modifications, access all your posts simultaneously by clicking on the 'Upload' button.
What Are the Formats Suitable for Import Images in WordPress
ComparisonJPGGIFWEBPPNGCompression MethodLossy & LosslessLosslessBothLosslessSupport for AnimationNoYesYesNoTransparencyNoYes (1-bit transparency)YesYes (Full alpha channel)Color DepthUp to 24-bit (16.7 million colors)Up to 8-bit (256 colors)HighUp to 48-bit (Trillions of colors)File Size (generally)Typically smaller for photosLarger than JPG for similar qualitySmaller than JPG & PNG for similar qualityGenerally larger than JPG but
Steps: How to Convert JPG and PNG Images to WebP
WebP offers better compression than JPEG and PNG, leading to smaller file sizes without sacrificing image quality. You can also learn WordPress maintenance mode without plugin. This ensures faster website load times, which is beneficial for user experience and SEO.
Next, we'll delve into the method of turning JPG and PNG images into WebP format. This will be explained in a concise 4-step process, which also includes a way to change existing photos with a single click.
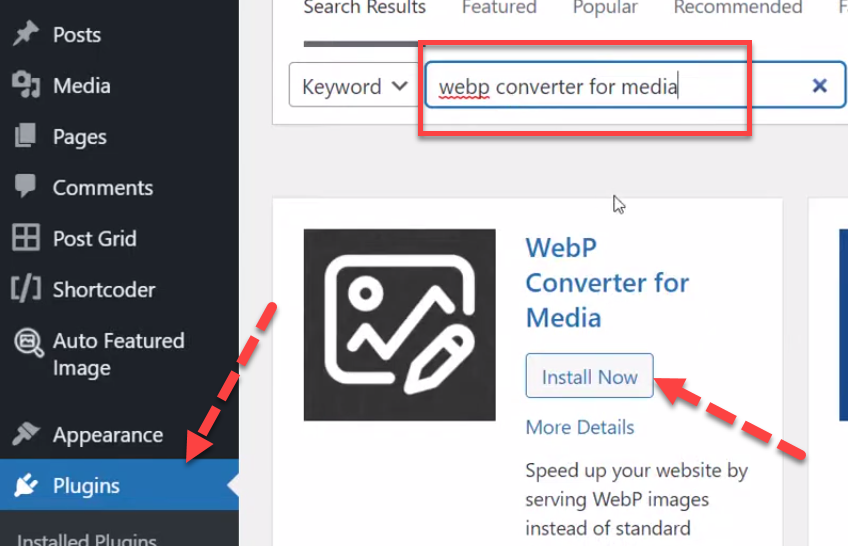
Step 1. Activate Webp converter for Media Plugin
Want to change your WordPress images from JPG and PNG to WebP? Start by searching for the WebP converter for media in the Plugin tab. Find the right one and hit 'Install'.
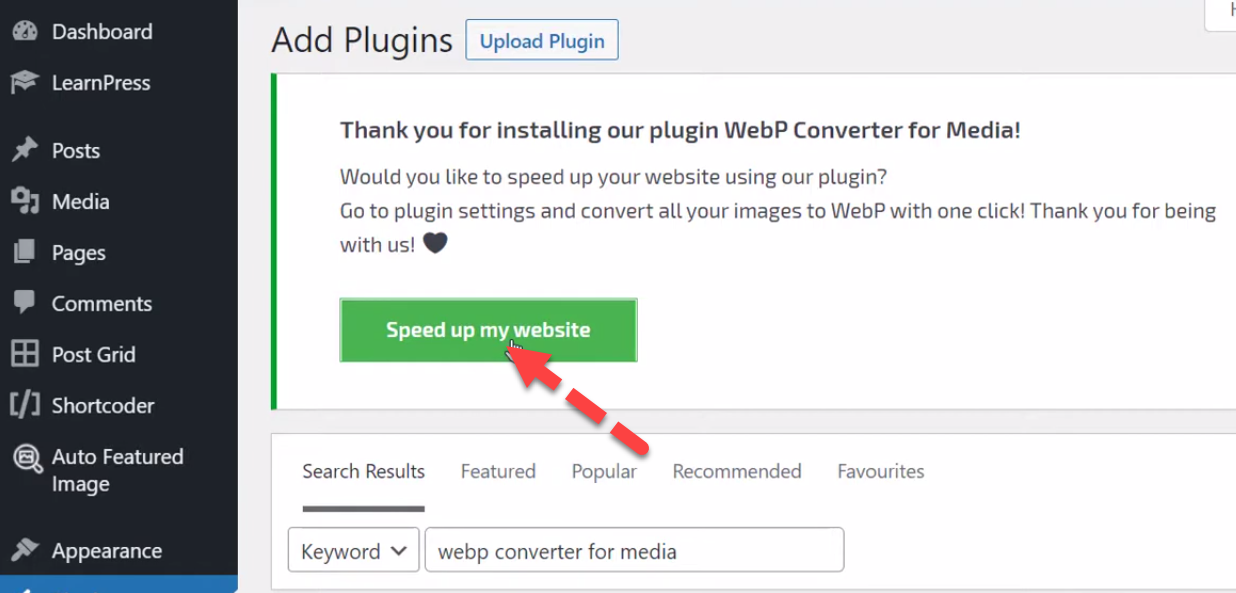
Once it's installed, turn on the WebP converter for Media by clicking 'Activate'.

Step 2. Do Webp convertor Settings
After activating, you'll see a thank you note. Then, there's a 'Speed up my website' button. Just click it.
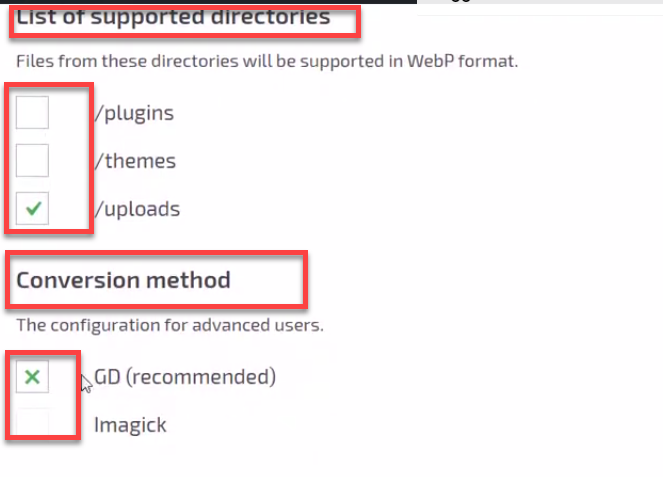
Next, adjust the plugin settings. First, see if 'via.htaccess' is marked. Allow the formats like Jpg, Jpeg, png, and gif."

Now, set up directories. Pick 'Upload' and make sure it's set to 'Yes'. Choose 'GD' as your conversion method.
Set the image quality. Remember, better quality means bigger files. 85% is a good choice.

Step 3. Click on ‘Save Changes’
You can also enable more features to boost the plugin. Delete any WebP files that are bigger than the original. Remember to hit 'Save Changes'.

You'll see a message that confirms your changes. It'll also remind you to clear cache using a plugin or through your host.
Step 4. Convert Existing Images to Webp in Just One Click
After adjusting settings, new photos you add will be in WebP. But old ones won't change. To convert them, find the 'regenerate images' section. Click 'yes' and then 'Regenerate All'.

While converting all images successfully you will find a message that shows you have successfully converted existing images. Clear the cache and find the good results.

How Importing External Images to Your Website Can Help in SEO?
Importing external images to your website can enhance SEO by making content more engaging, potentially increasing user dwell time and positively influencing rankings.
By incorporating relevant alt tags with images, you boost both accessibility and give search engines context, aiding image search rankings. Unique and high-quality images might be shared or referenced by other sites, offering valuable backlinks that can increase your site's authority.
Moreover, apt images enhance readability, potentially reducing bounce rates, while optimized images can extend your visibility in image search results. Always ensure you have the rights to use these images and that they are optimized for loading speed.
Wrapping Up
Images play an indispensable role in enhancing visual appeal, fostering user engagement, and bolstering SEO performance. In this blog, you learn about how to import external images in WordPress.
The platform offers a systematic approach to importing external images, which can be invaluable for myriad reasons, including content migration, performance improvement, and consistent backups, among others.
Images not only beautify a site but also serve crucial purposes like conveying intricate messages, strengthening branding, and supporting e-commerce functionalities.
With diverse image formats available, such as JPEG, PNG, GIF, and WebP, WordPress empowers users to choose the most appropriate format that balances quality and performance, ensuring an optimized user experience.
As digital landscapes evolve, the integration and proper management of images within WordPress will remain pivotal for webmasters aiming for an impactful online presence.


.svg)