


Do you want to reinstall WordPress without losing data? I got you covered.
You might need to reinstall WordPress when:
- Installing a WordPress theme messes out everything.
- Activating a WordPress plugin troubles your whole WordPress settings.
- Testing a new feature on a fresh WordPress website.
- Fixing your site when hackers have compromised your site with malicious code.
Don’t worry!
In this guide, I’ll explain each step with screenshots.
Before You Reinstall WordPress…
Creating a backup of your website is practically essential before you make any significant change to your WordPress.
Anything can go wrong during the process — even a small mistake can result in more significant losses.
The easiest way to backup your WordPress is to use the All in One Migration plugin. It’s easy to create a backup and restore your site without any technical knowledge.
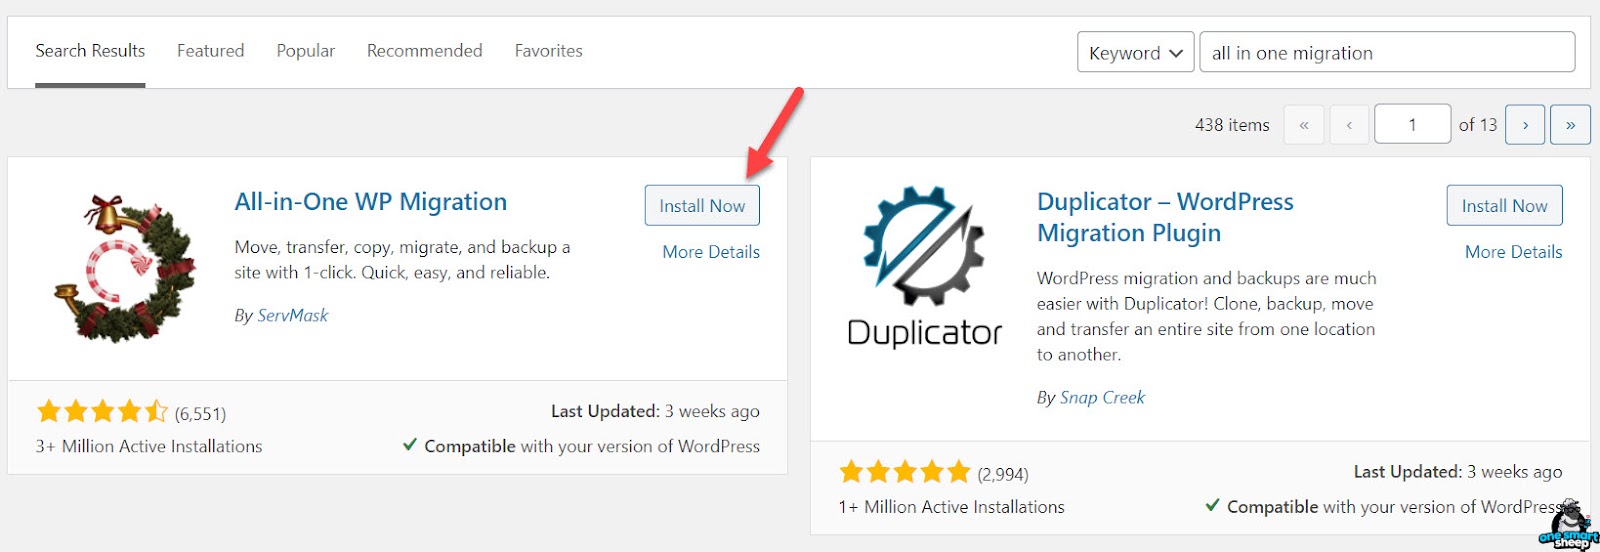
Once installed and activated, go to All in One Migration and click Backups.

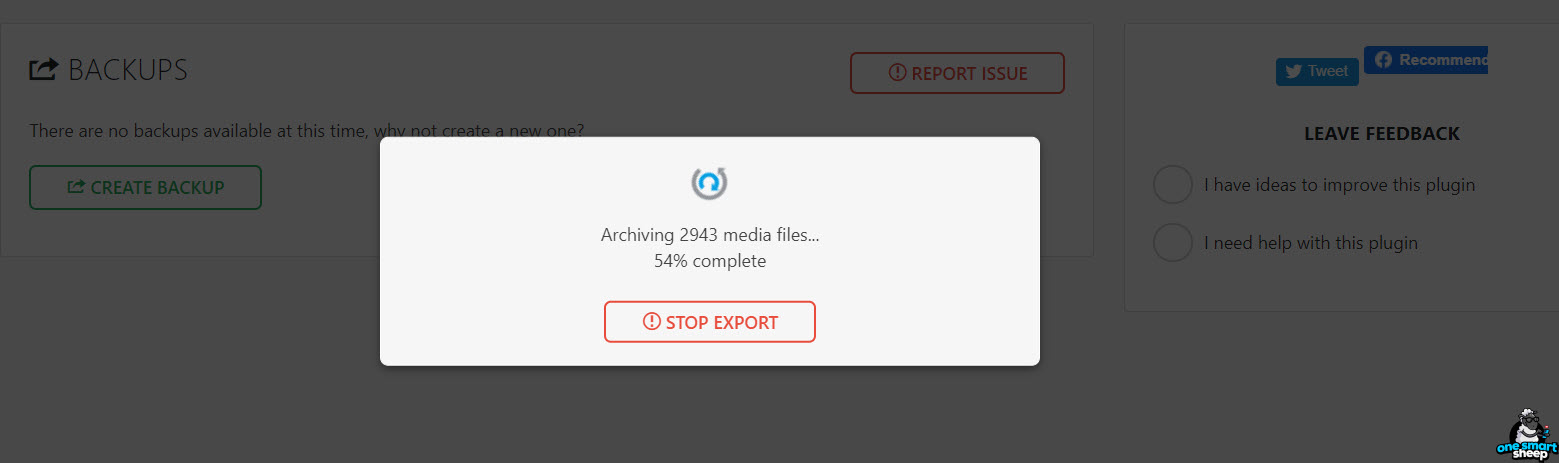
It will take a few minutes to create your website’s complete backup, including your images, posts, pages, and databases. I mean everything.
After it finishes you should download the backup file and store it on your local computer.
Have a slow internet connection? Don’t worry, use the other plugin where you can store on cloud storage like Google Drive. Keep reading!

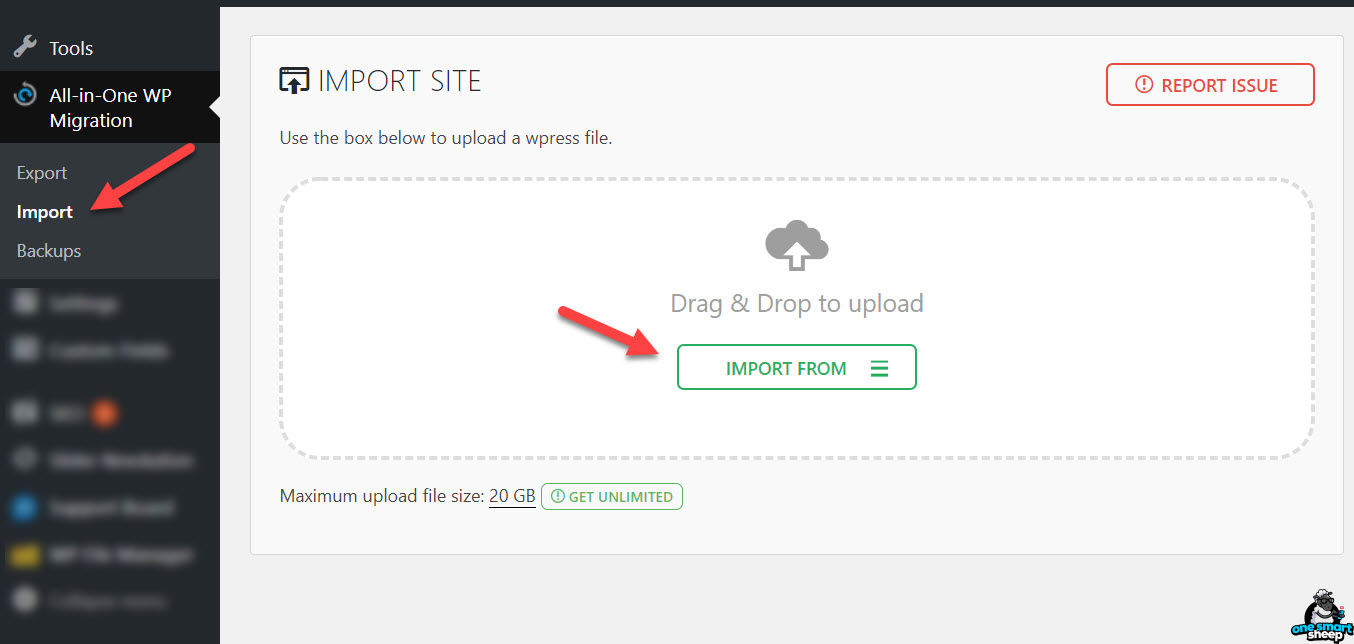
If something wrong goes, don’t worry, you can always recover from the Import section of the plugin.
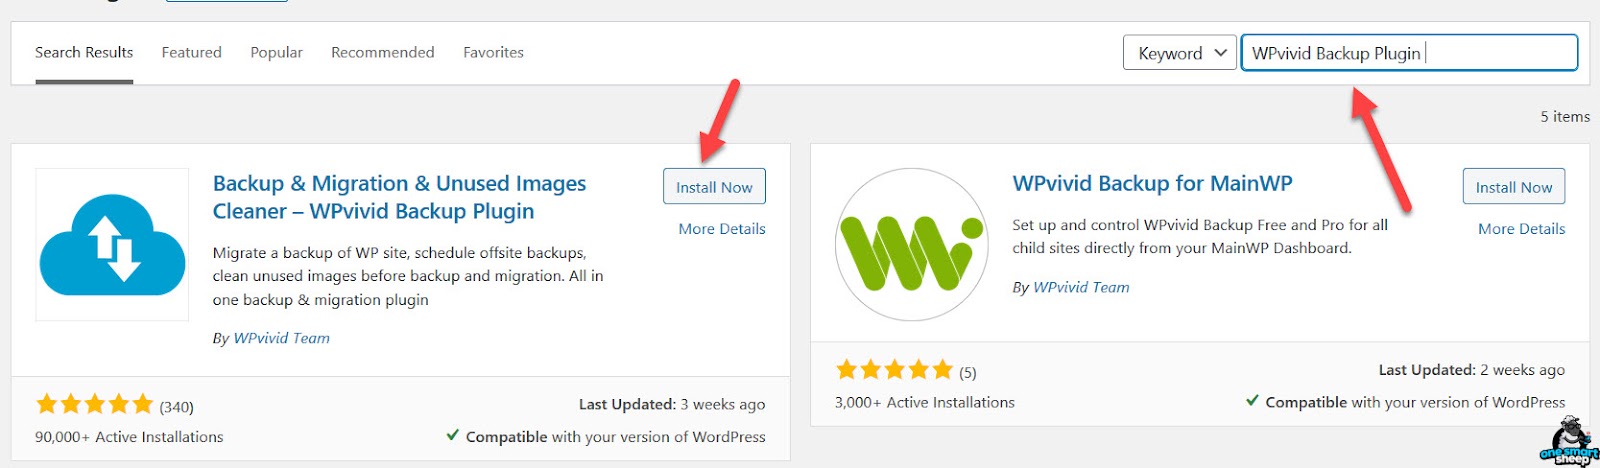
Most users might have no idea about increasing the All in One Migration plugin’s upload size limit.
I have an excellent alternative.
You should install WPVivid Backup Plugin instead since it allows you to store backups on cloud storage.
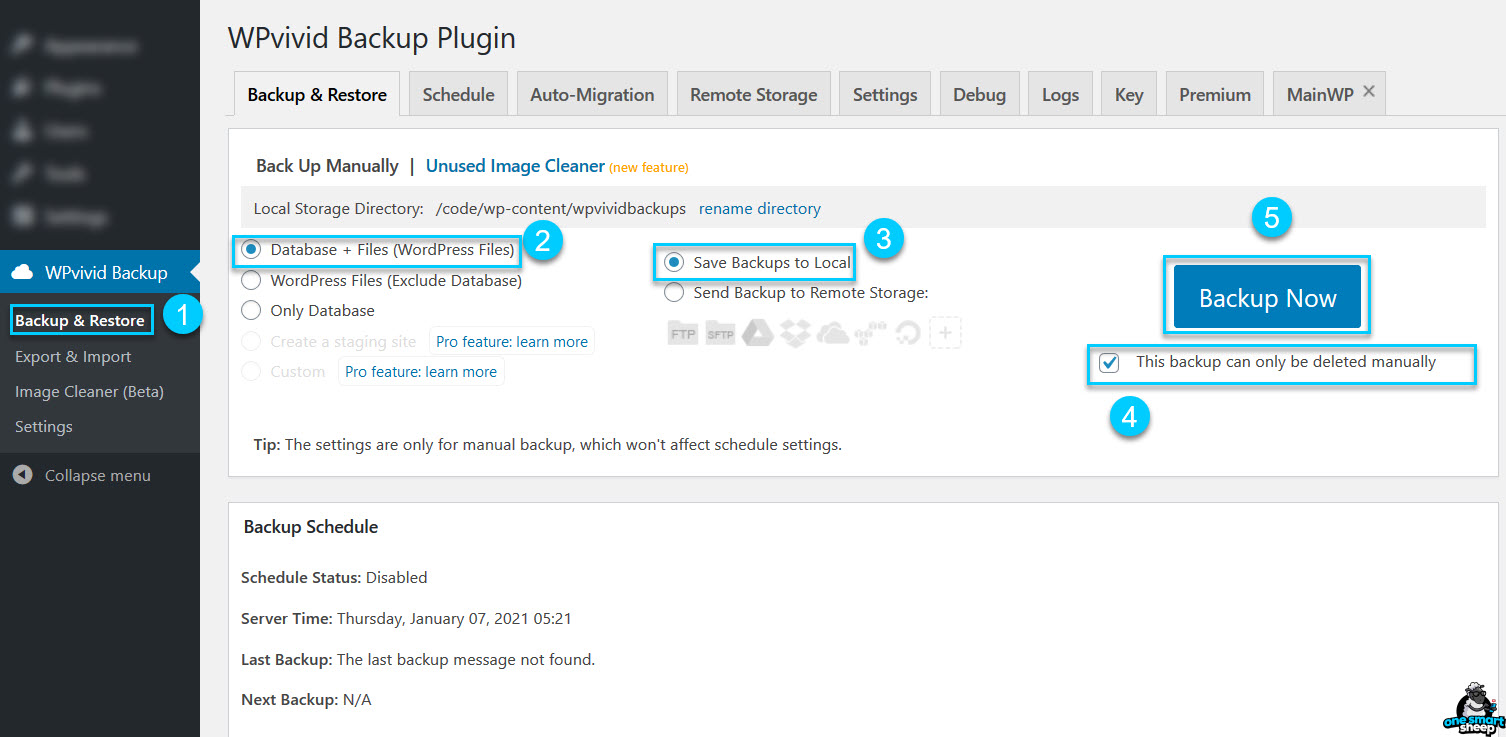
Once installed, you’ll be redirected to creating a backup automatically. Make sure to select:
- Database + Files (WordPress Files)
- Save Backups in Local. (Note: You can also select send a backup to remote storage like Dropbox, Google Drive, or OneDrive for free from the Remote Storage section.)
- Select “This backup can only be deleted manually.”
- Click Backup Now.
A progress bar will appear with all the essential information you need to know.
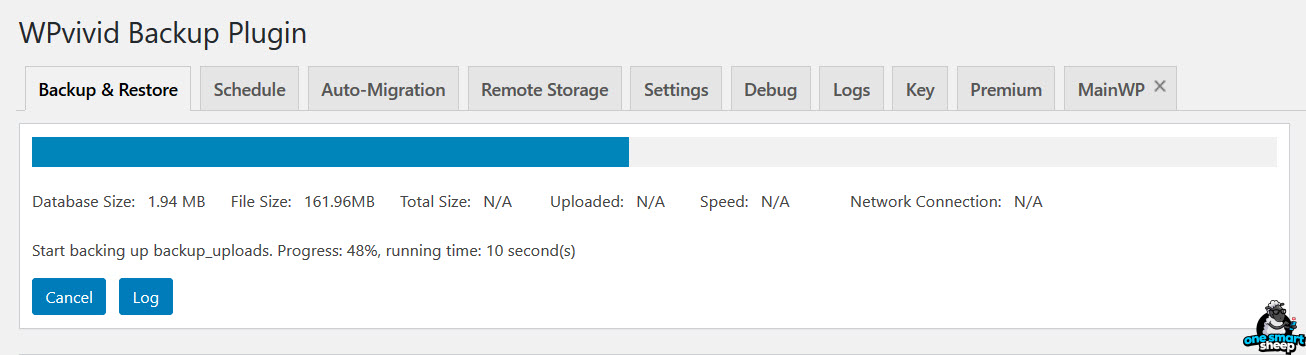
When your backup is completed, scroll down a little to see your newly created backup file.
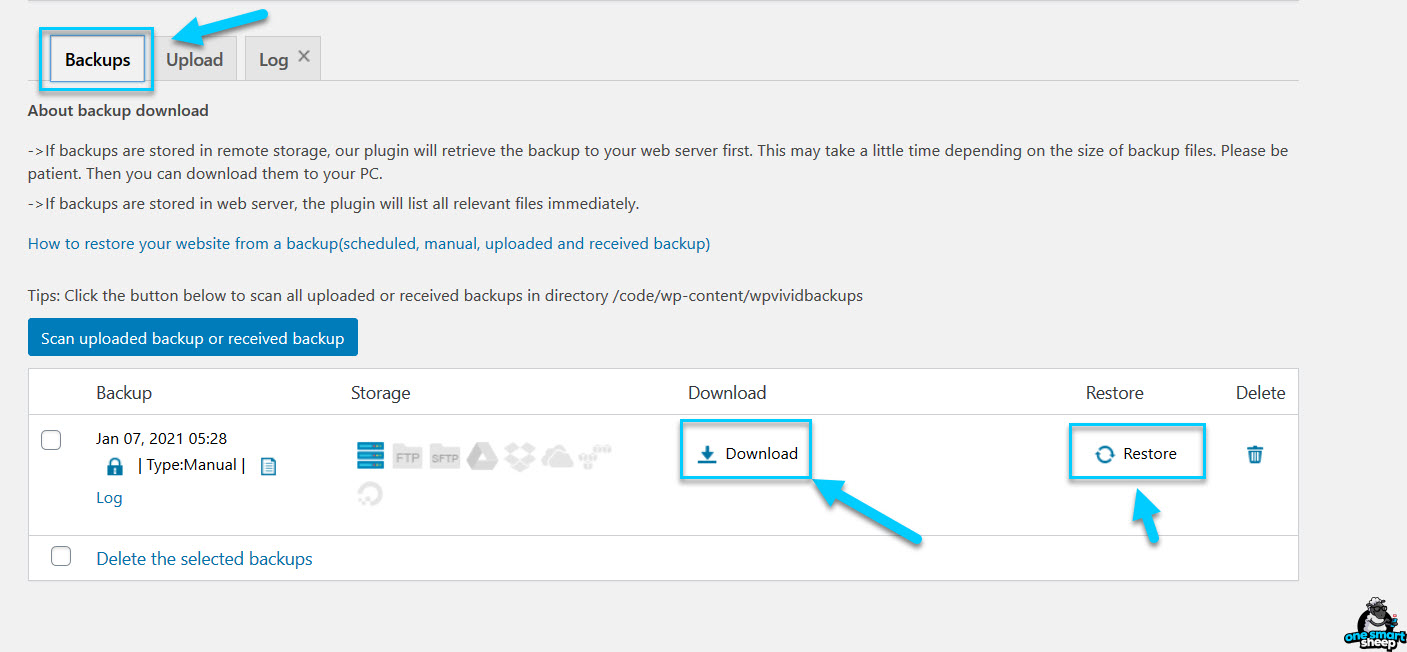
You can either download it or restore it anytime.
I’ll highly recommend installing it on your remote storage like Google Drive if your internet speed is slow and your website has a massive amount of data from the Remote Stroage section.
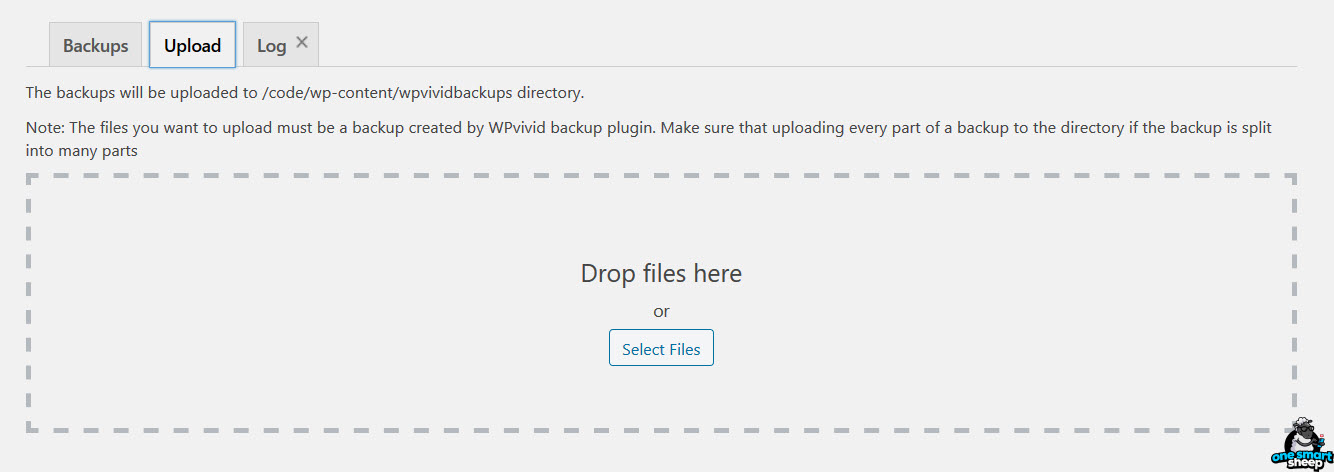
If you want to restore it, it’s pretty simple.
Go to the Upload section and drop your backup file.
3 Ways to Reinstall WordPress
There are several ways to reinstall WordPress, but I’ll depict the most painless method first.
Way 1 - Reinstall WordPress Without Losing Content With a Reset Plugin
It’s one of the easiest ways to reinstall WordPress without any technical knowledge.
Unfortunately, all the free plugins that performed reinstalling WordPress without losing data have been converted into a Pro version, meaning you need to pay to achieve the goal.
If you cannot spend $39 on your site, it’s recommended to try other ways mentioned below — Way 2 and Way 3.
Note: We’re not affiliated with WPReset anyway, which means we don’t get paid to promote it.
We’ll use the Pro version of WPReset as the free version deletes everything. Pro version allows you to keep the essential data.

When you activate the plugin, you’re prompted to download the emergency script. It allows you to recover your WordPress in case if it crashes or something goes wrong.
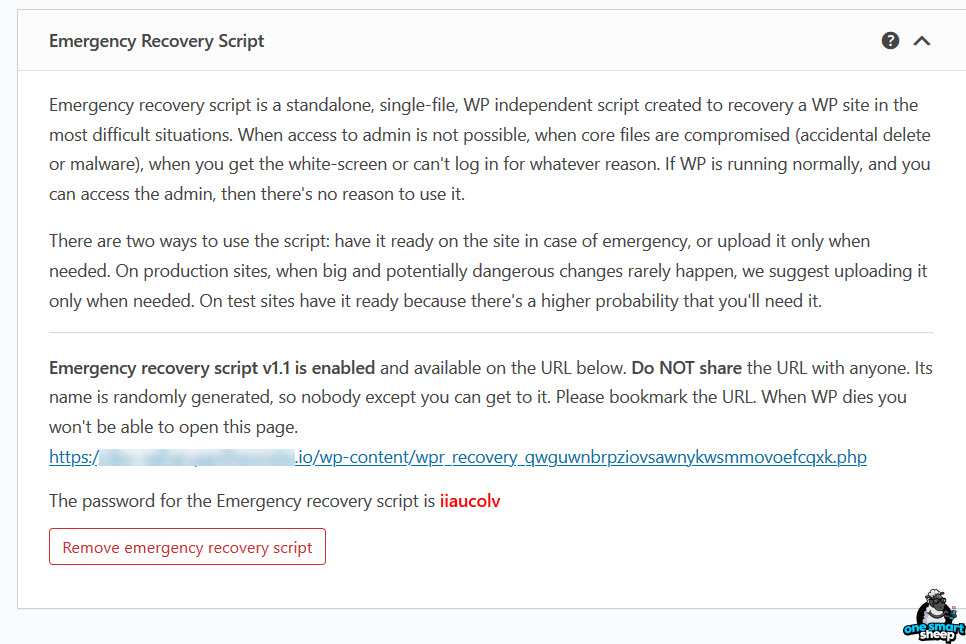
When you click on the provided URL, it asks for the password, as shown in red text.
You can recover any missing files instantly and create users if someone hacks your WordPress site with the emergency script.

Let’s reinstall WordPress.
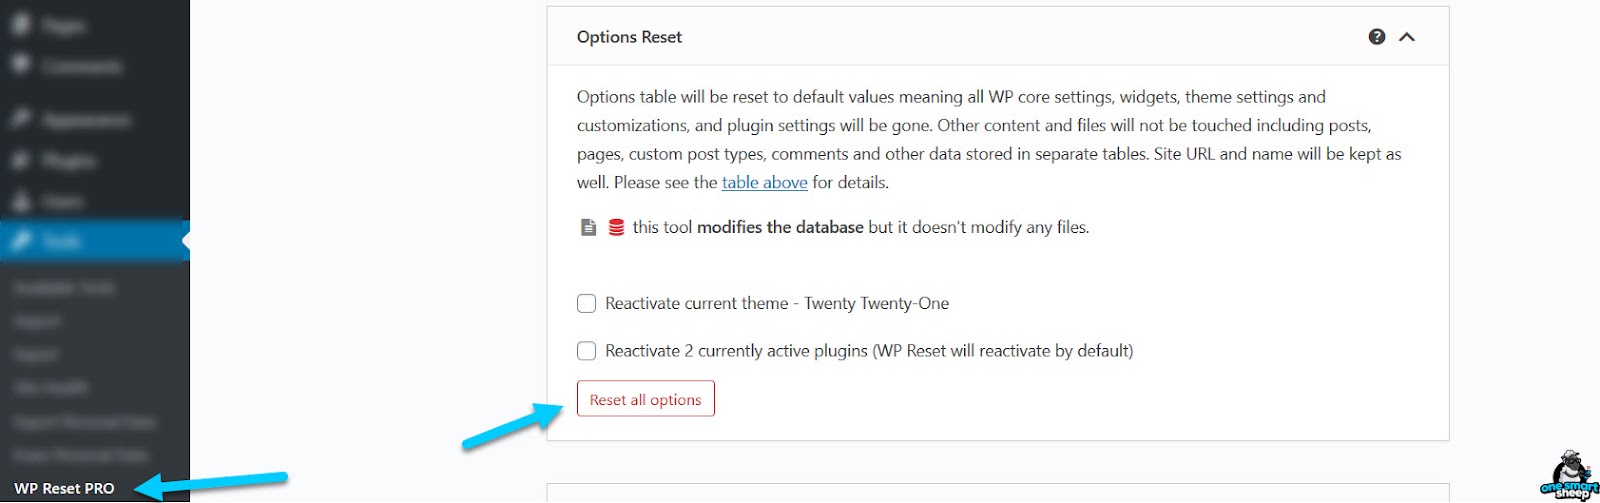
Go to Tools > WP Reset PRO > Options Reset > Reset All Options.
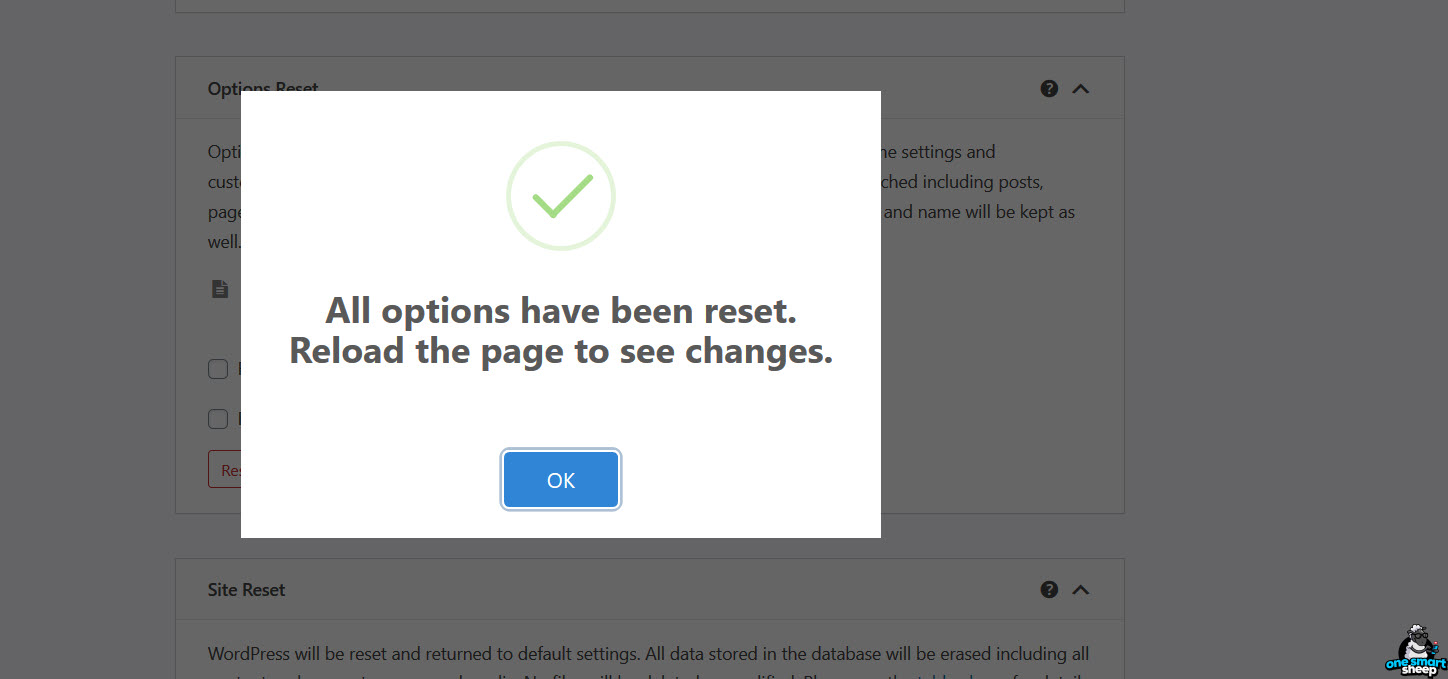
It takes a few seconds to complete the process and shows a success message like this:
The Option Resets removes the followings:
- WP core settings
- Widgets
- Theme settings & customizations
- Plugin settings
- Transients
Other data will not be touched, including:
- Images
- Posts
- Pages
- Custom post types
- Comments
- Data stored in separate tables.
You end up having a clean re-install of WordPress without deleting your essential data.

Pretty easy and dandy, right?
Way 2 - Update WordPress
Do you just want to reinstall the core WordPress files without losing your content?
You don’t need to install any plugin or write any complicated code.
It’s simple.
Go to Dashboard > Updates > click the button Re-install Now.
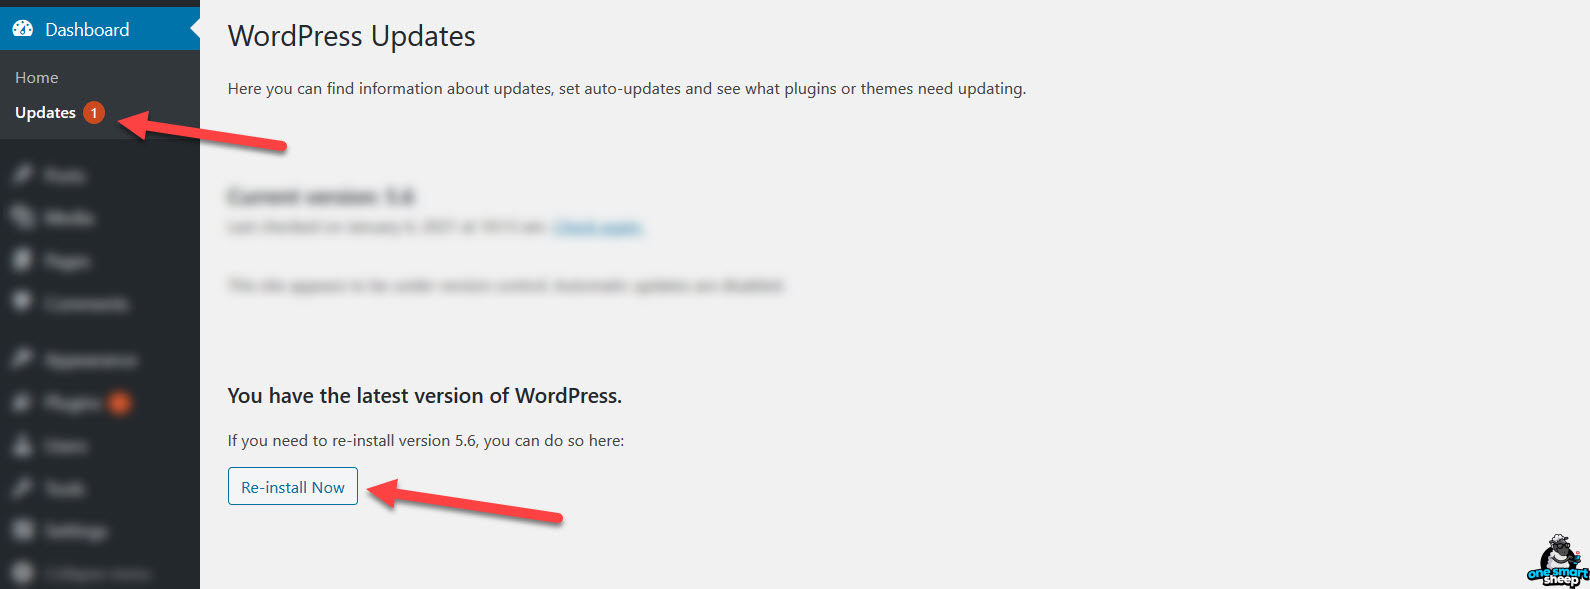
When you hit the button, here is the process window.

It takes a few seconds to download the latest version of WordPress from the repository and install it.
That’s it. I have solved plenty of WordPress issues by just updating it.
Way 3 - Reinstall WordPress Core Software Via cPanel Without Losing Content
Sometimes updating the core WordPress software doesn't fix your issues. cPanel comes in handy to resolve issues that need to be fixed.
Note: You can perform the same actions via FTP like FileZilla.
First, we’ll make a backup of our important files.
Navigate to Export, choose All Content, and click Download Export File.
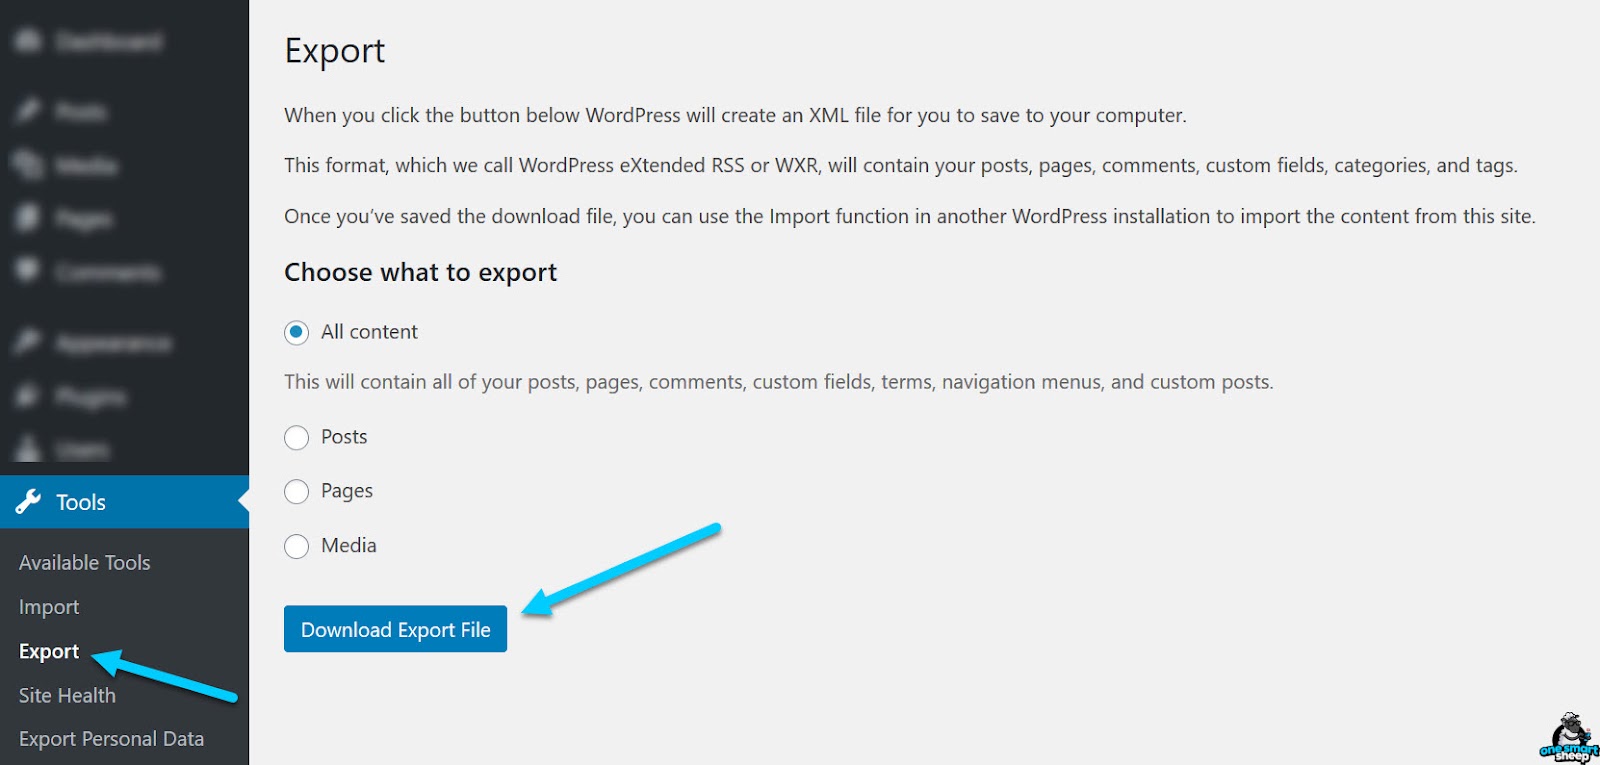
You’ll get an XML file that looks like this:

It literally says it contains everything in the XML file, but actually, it doesn’t include your media files like images, videos, and funny GIFs of your dog.
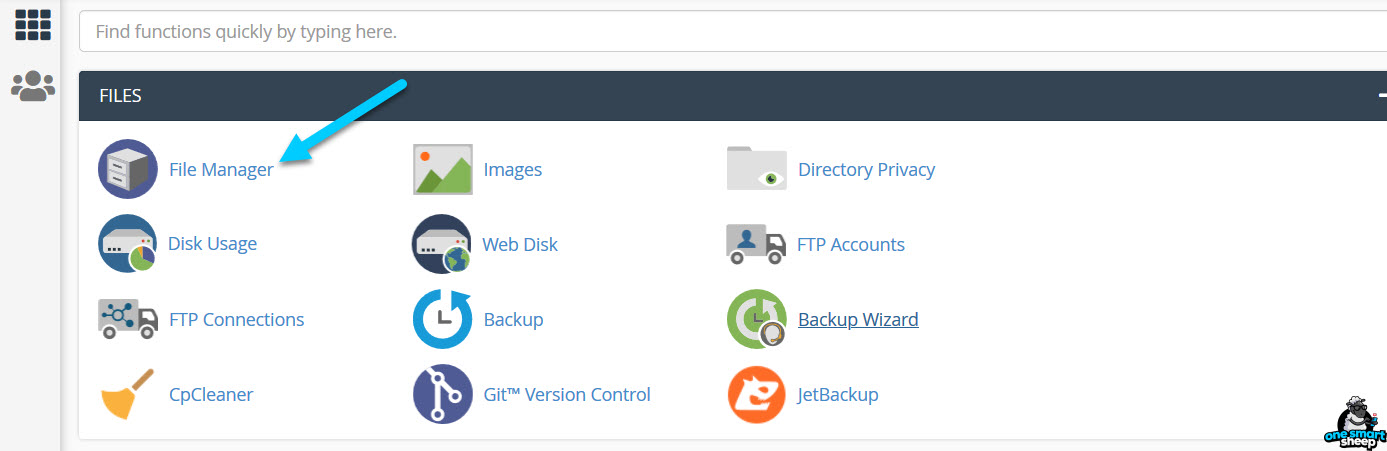
For that, you need to take a backup of your media manually. Go to your cPanel and look for File Manager.
You might have lots of WordPress websites residing in your File Manager due to the number of domains you own.
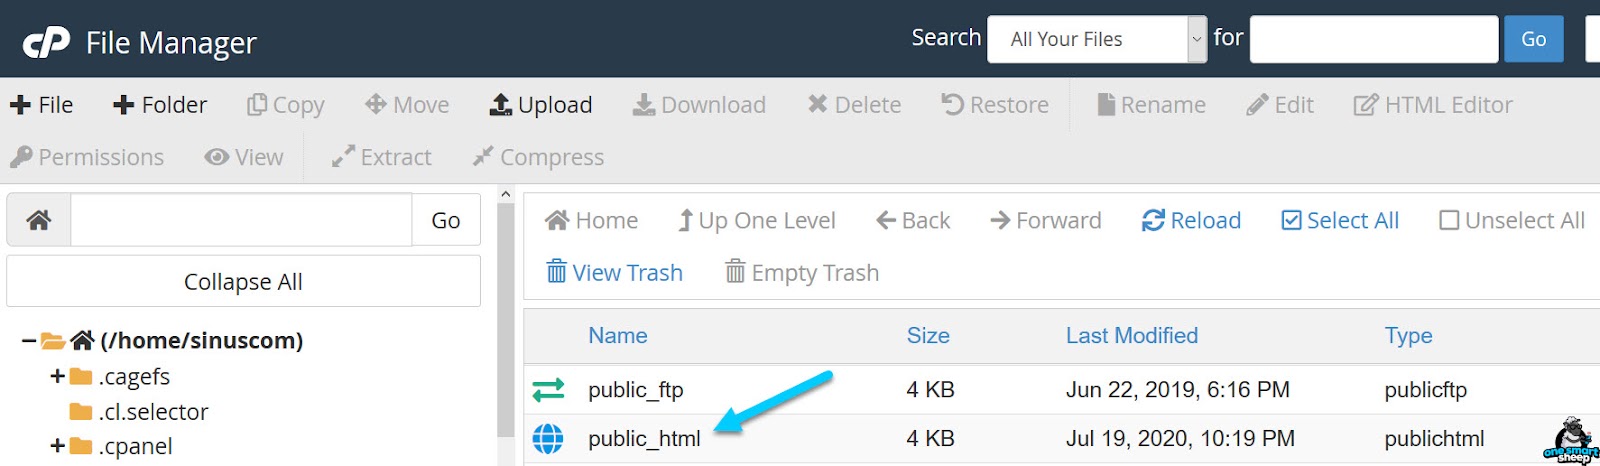
The rule is simple. If your hosting is connected to only one domain, it probably lives under the public_html folder.
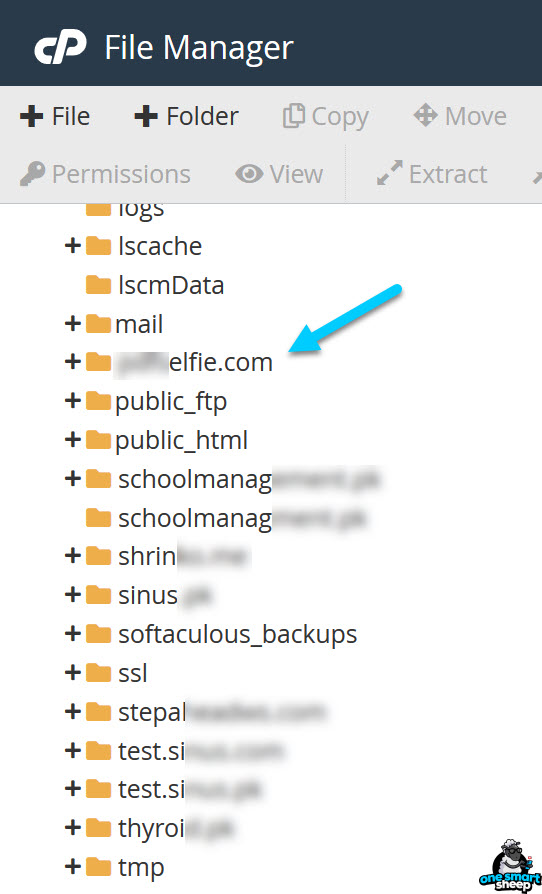
In any case, if you have installed plenty of domains on your hosting; it shows website names as a folder on the left side as shown below in the screenshot.
Let’s suppose your domain name is schoolmanagment.com, click on the folder name that is actually the name of your domain. Now compress wp-content that has your media files like images, videos, and GIFs. And of course, themes and plugins as well.
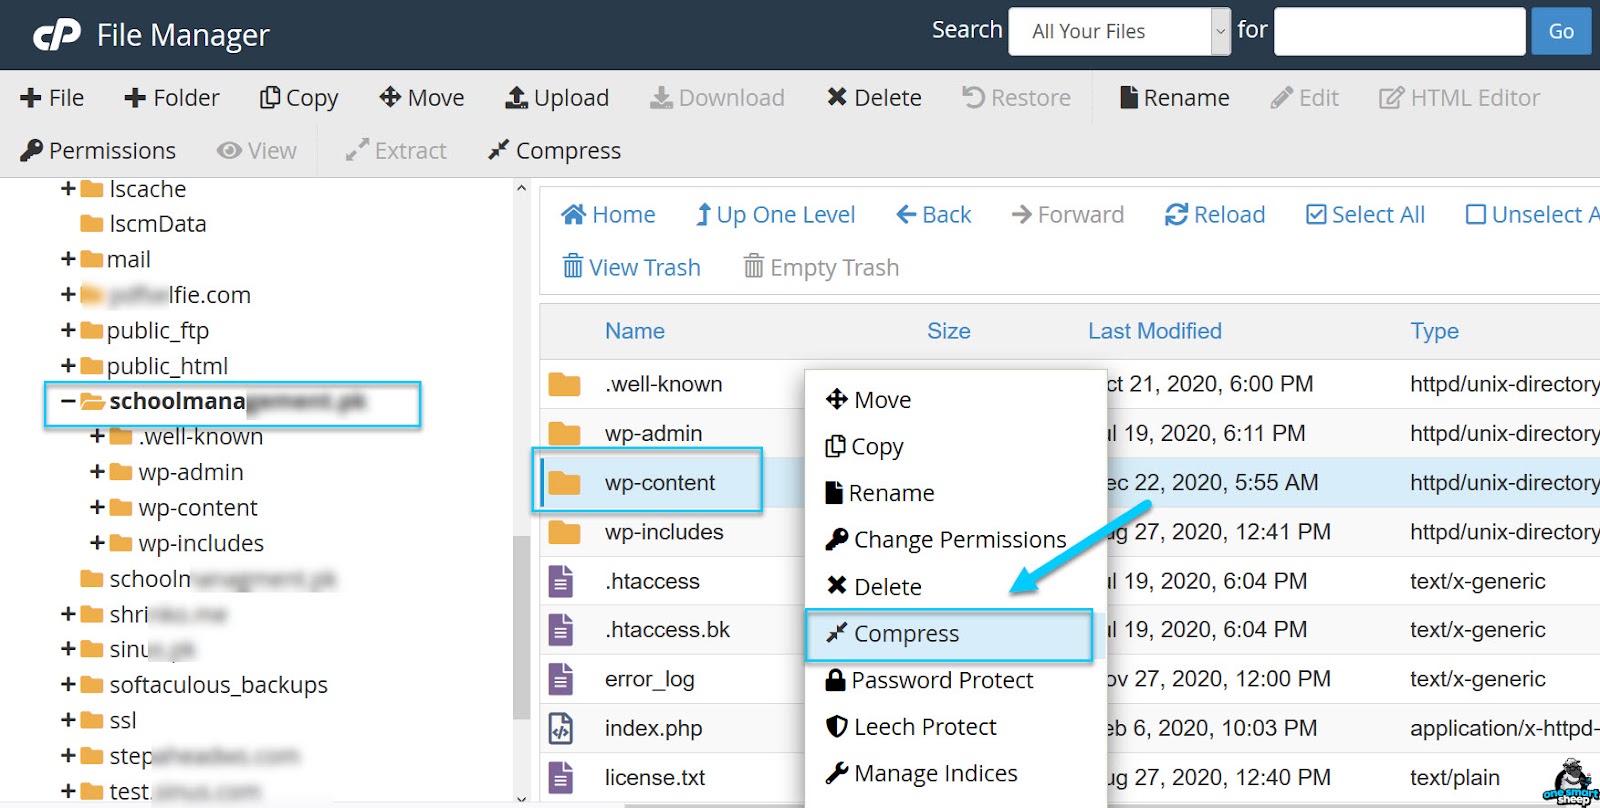
Don’t forget to select the zip option and click Compress.
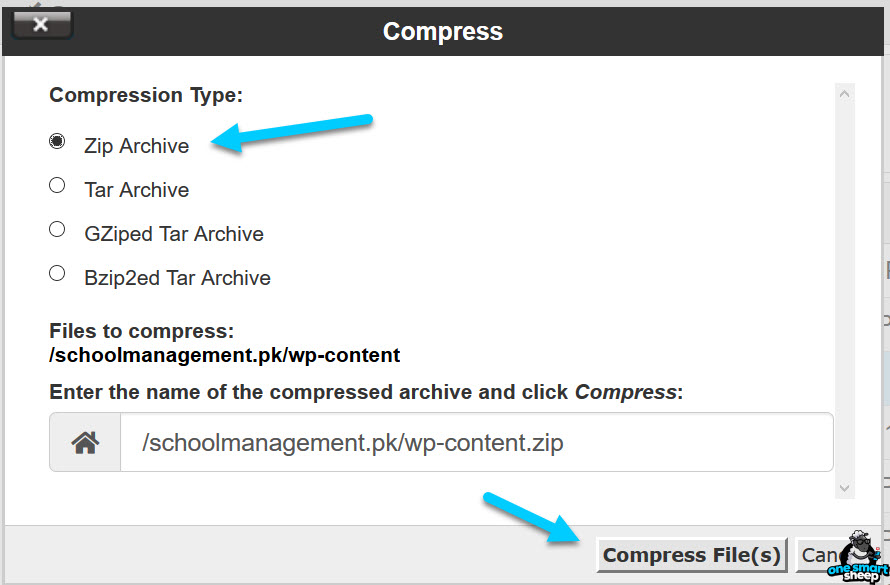
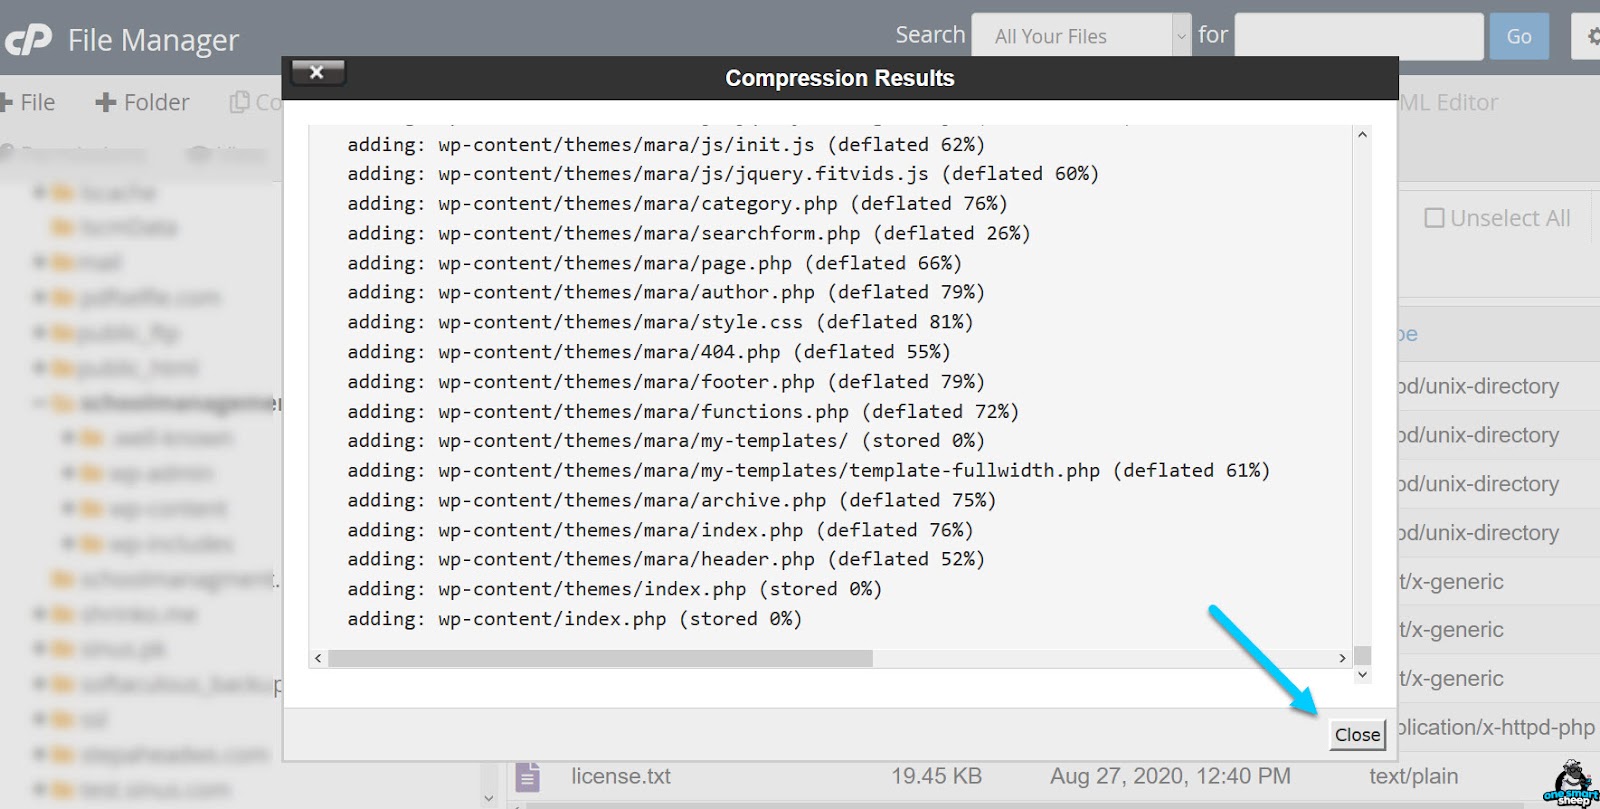
It takes a few seconds, depending on the data in your wp-content directory. Once done, click Close.
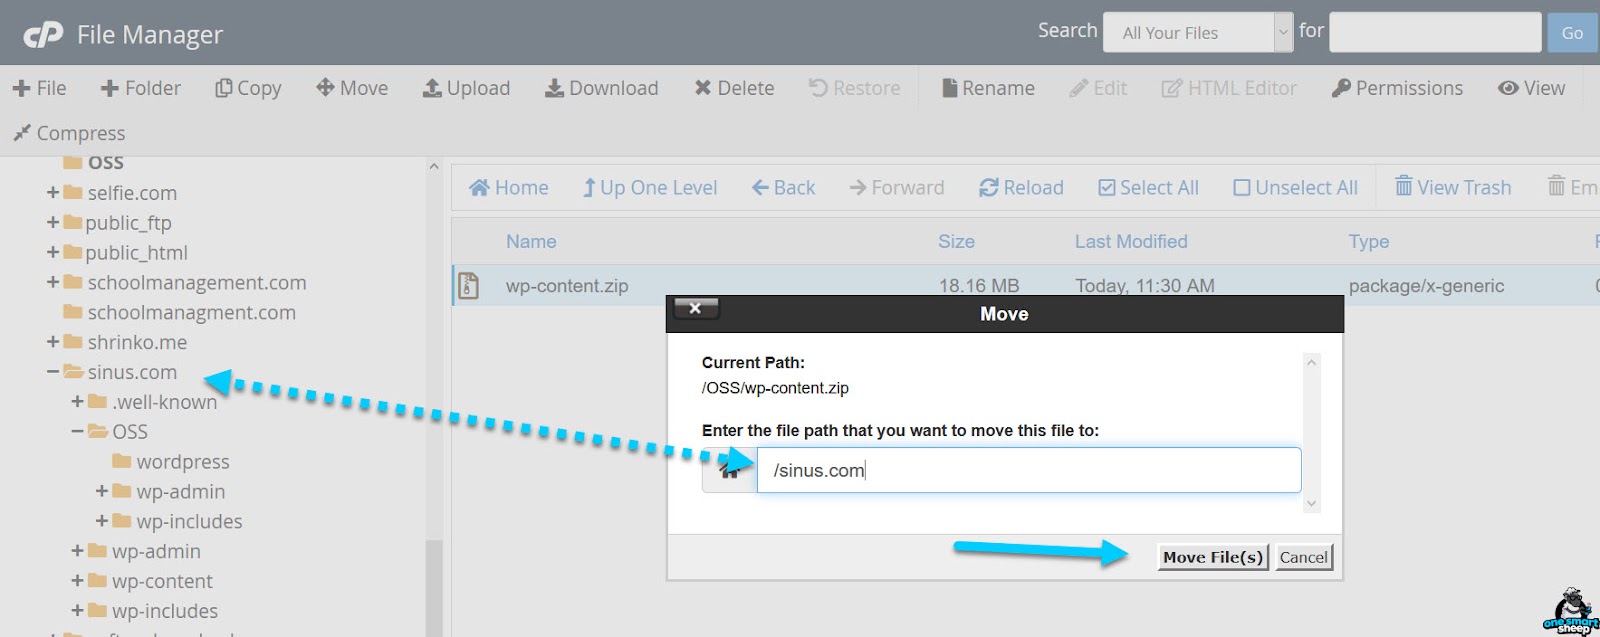
You need to move the zip file to another folder to avoid mistakenly deleting the file.
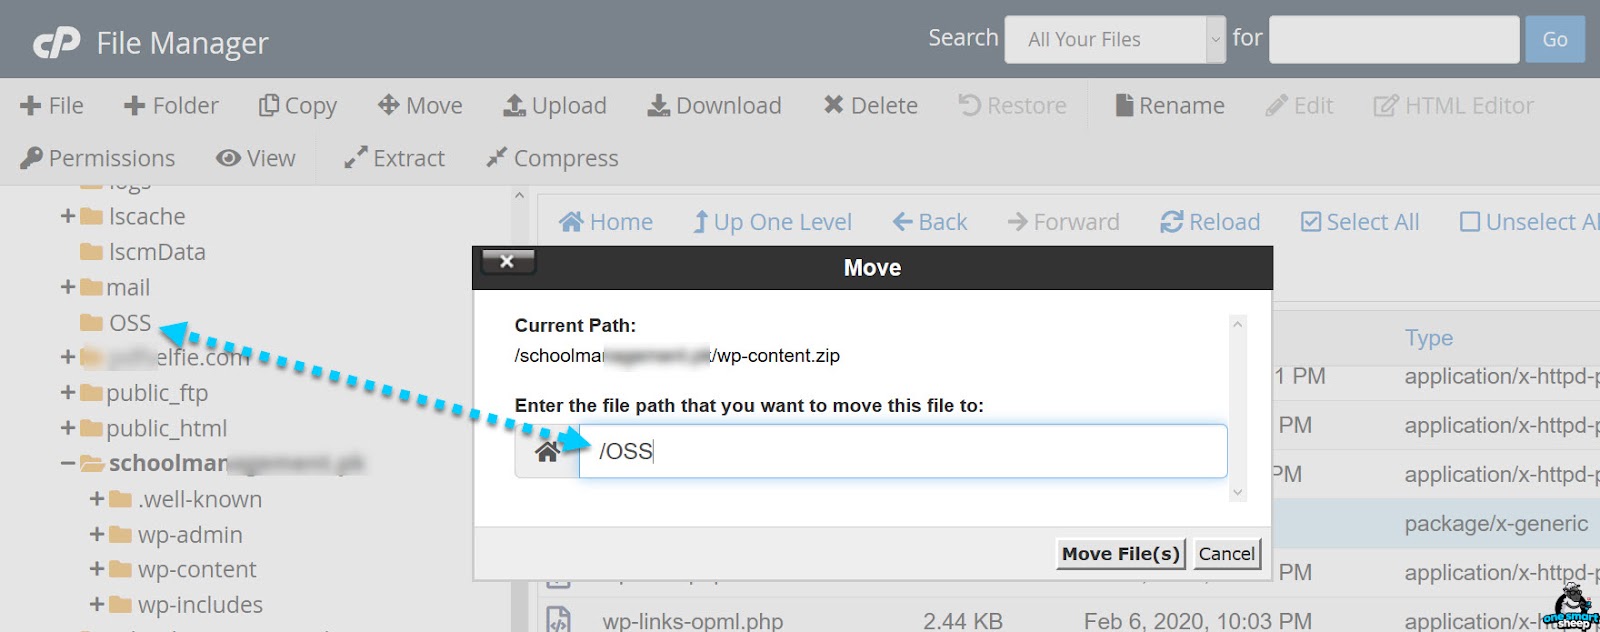
Find the file name wp-content.zip, right-click on it and click Move.
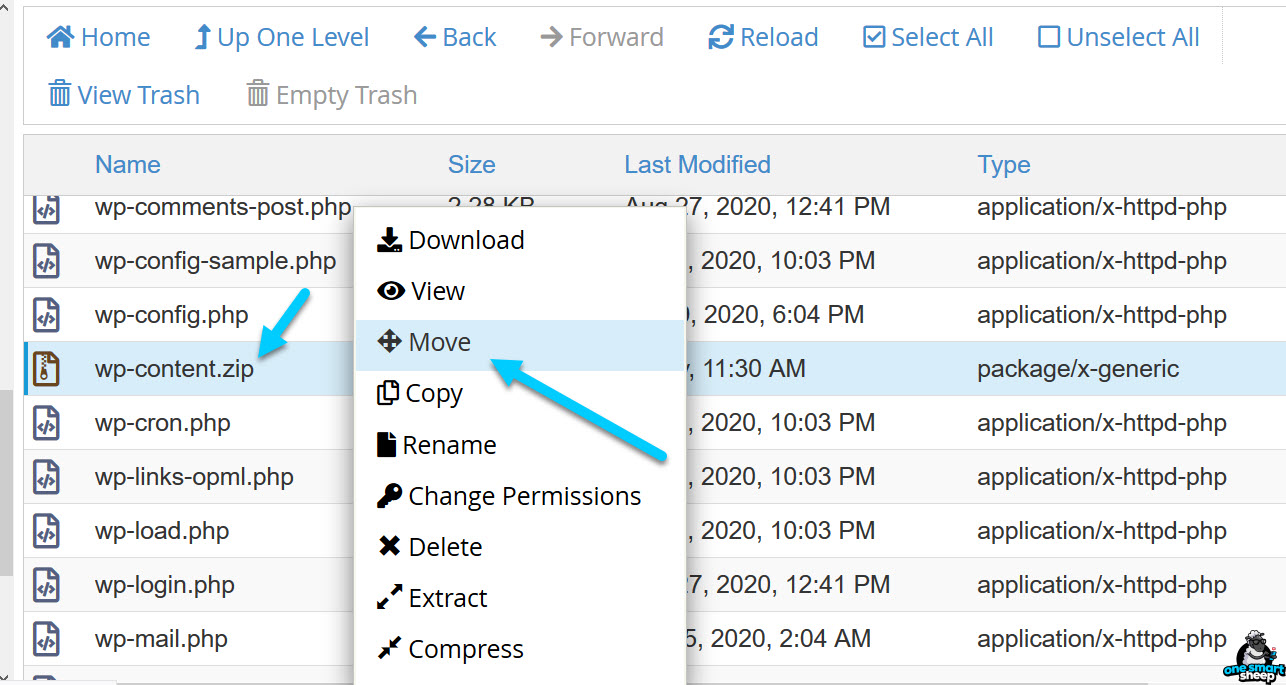
A window will appear where you need to write a folder directory where you want to transfer it. You can type any folder name.
I created a folder named OSS, and I moved the file, wp-content.zip into it.
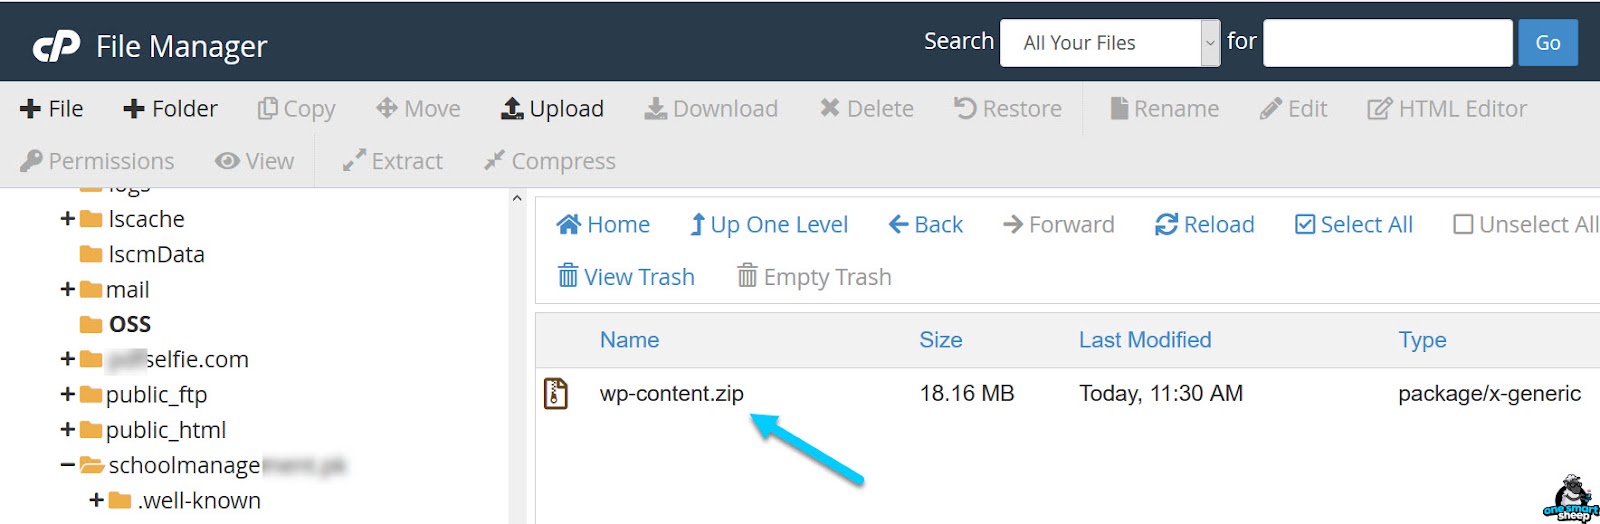
You’ll see a lonely file located in a folder.
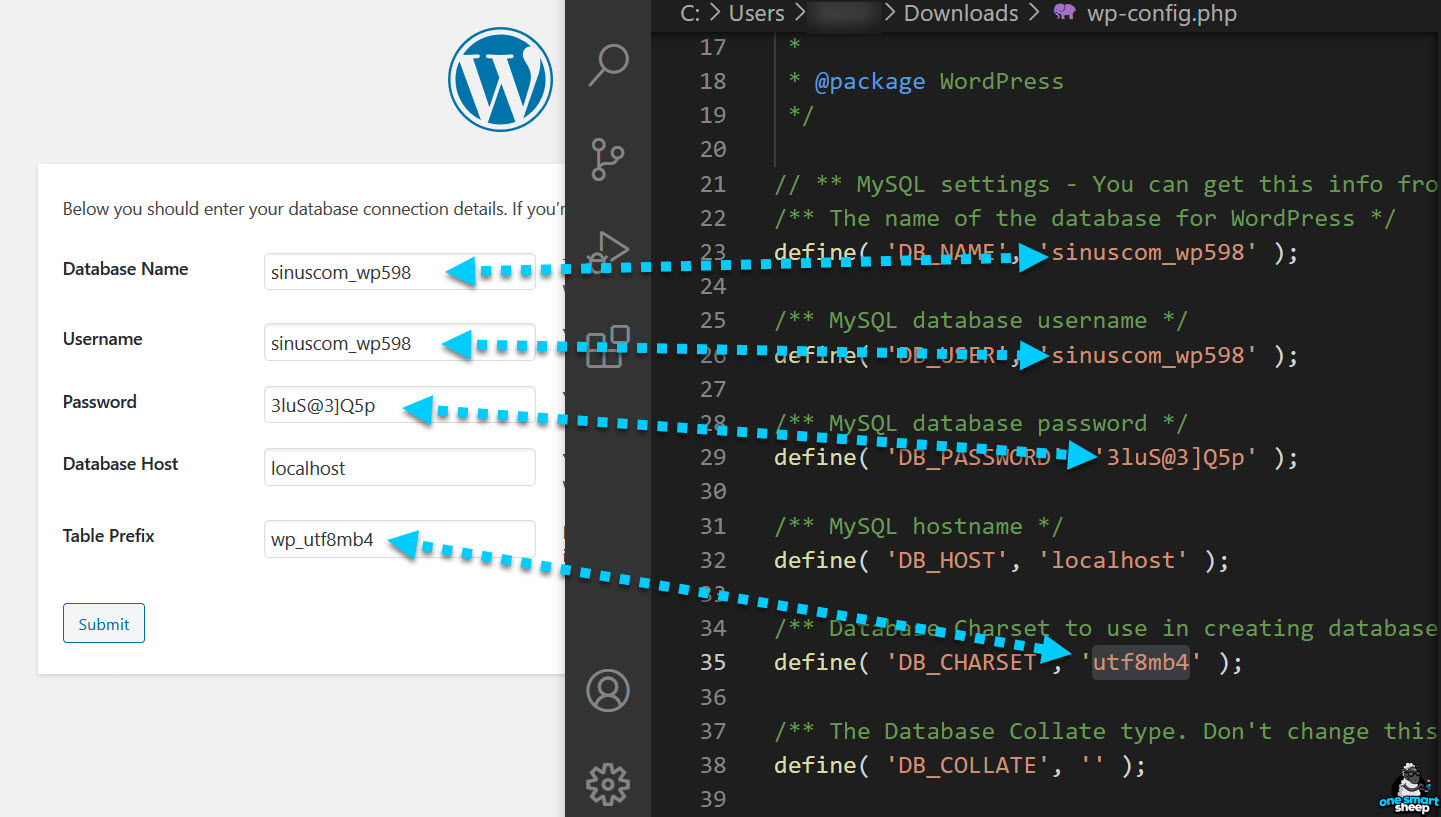
IMPORTANT! Download wp-config.php as a backup to view the database name, database password, and table prefix; otherwise, you’ll lose everything.
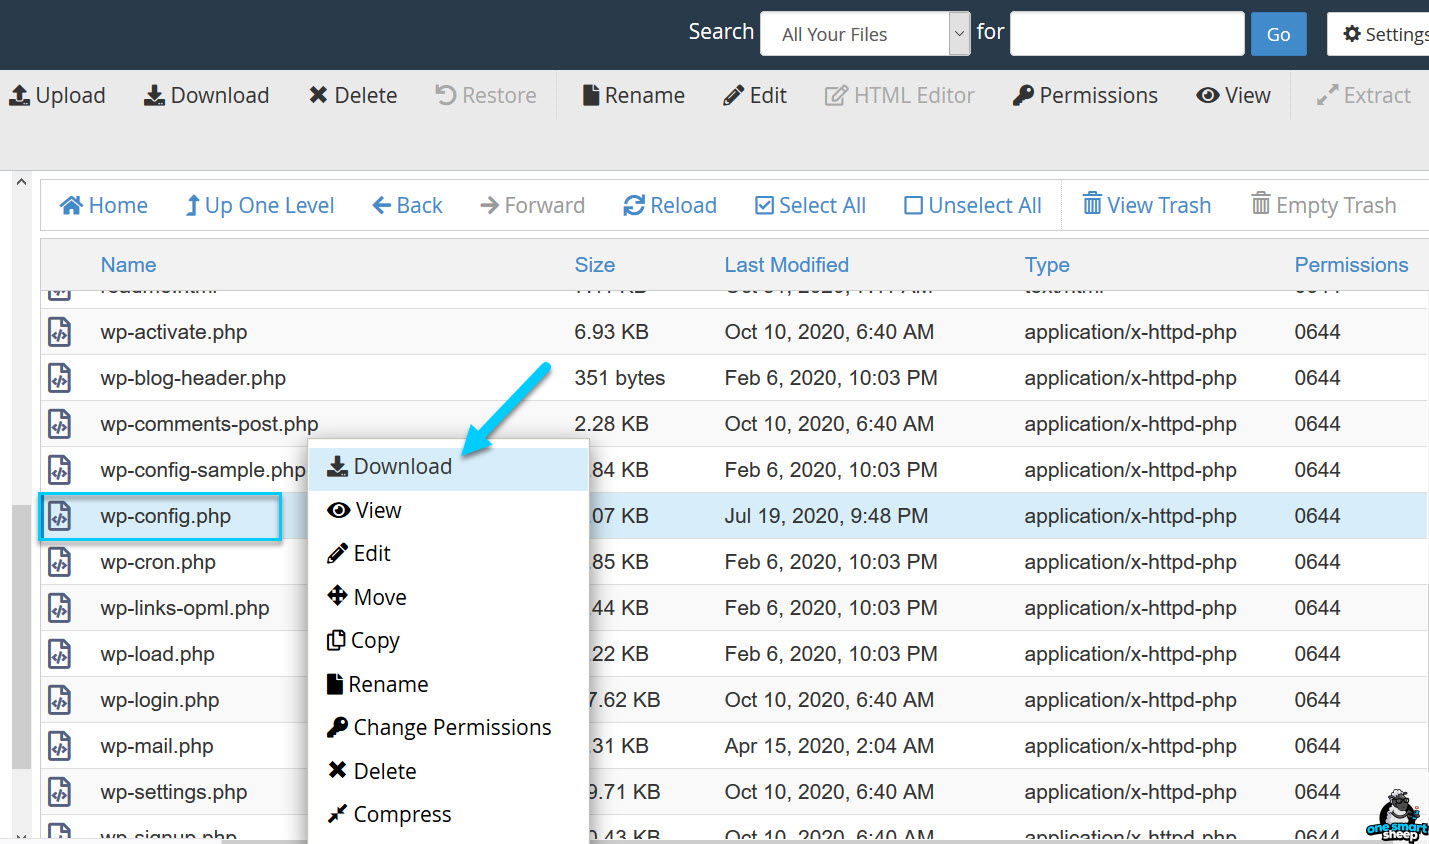
You might be wondering what the file has?
Have you downloaded the wp-config.php file on your local computer? Great.
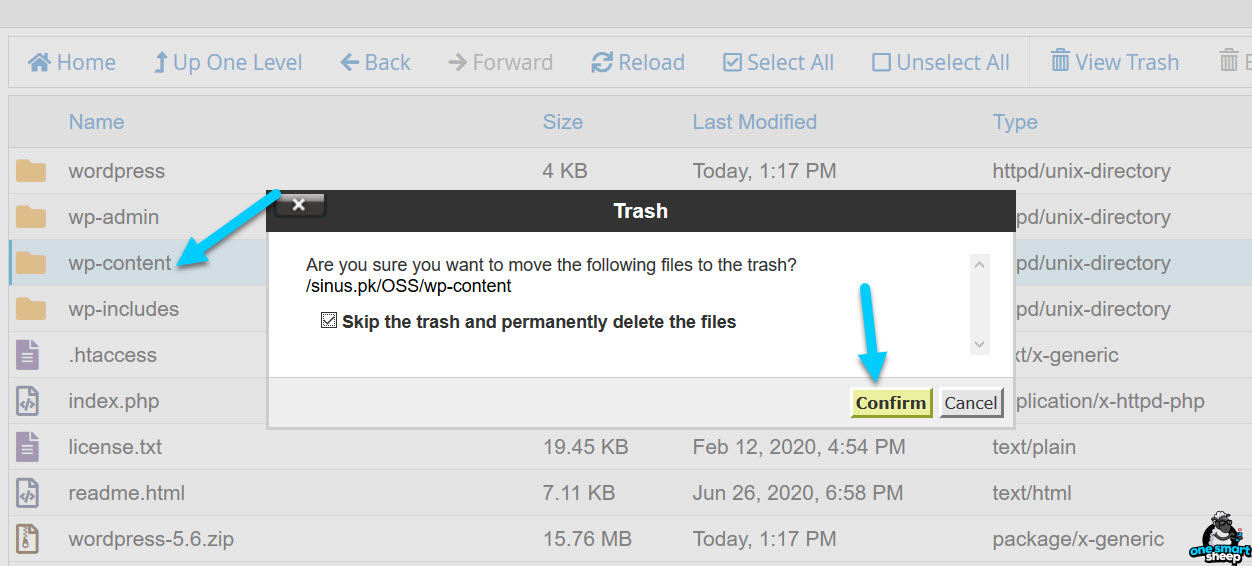
It’s time to delete everything.

Go back to the folder where your website was installed. Click Select All and hit Delete.
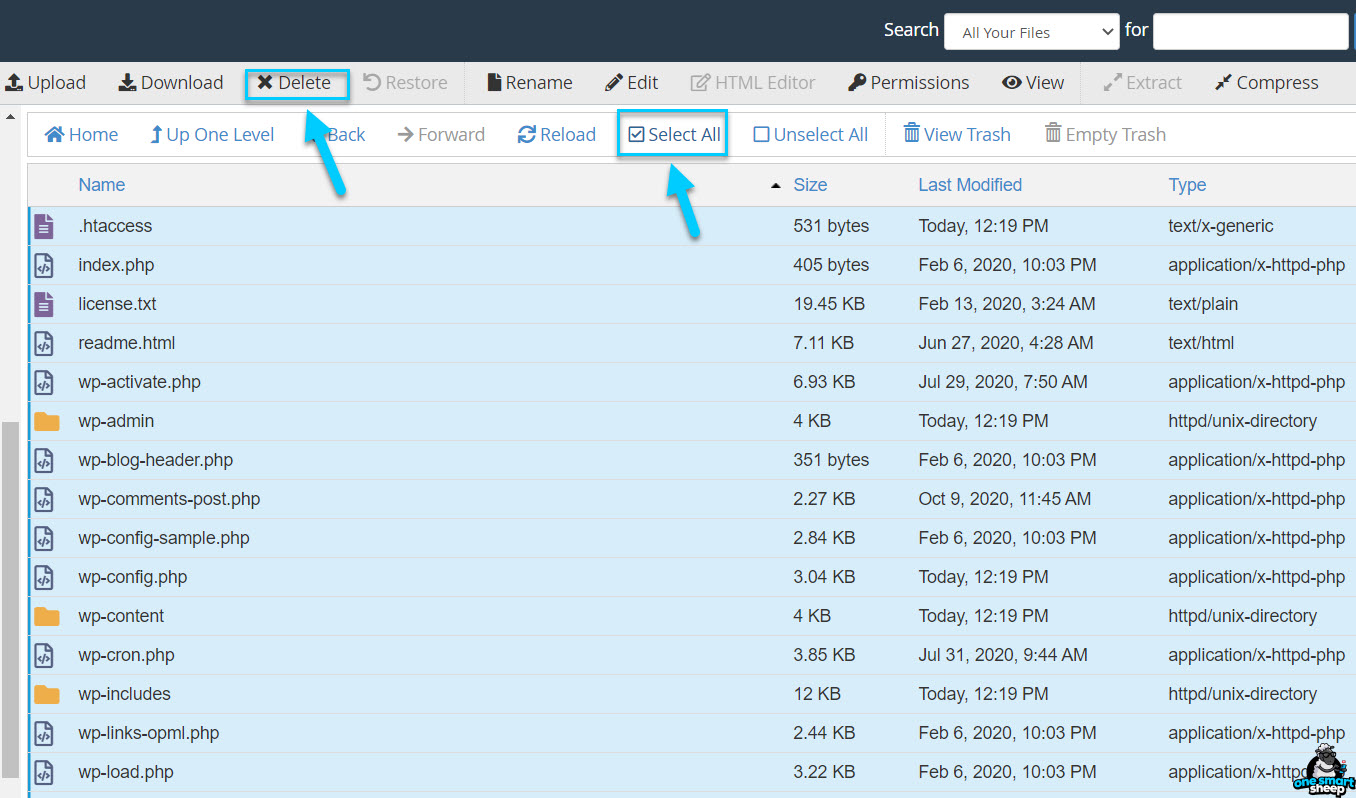
Within a few seconds, you’ll get a message “This directory is empty.”
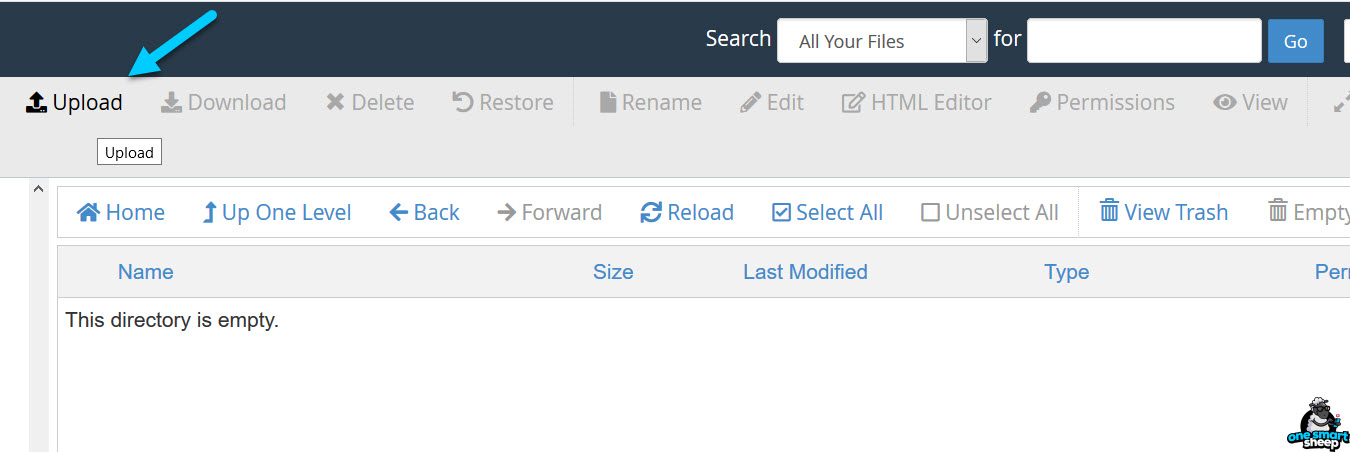
Now download the latest version of WordPress from the official website.

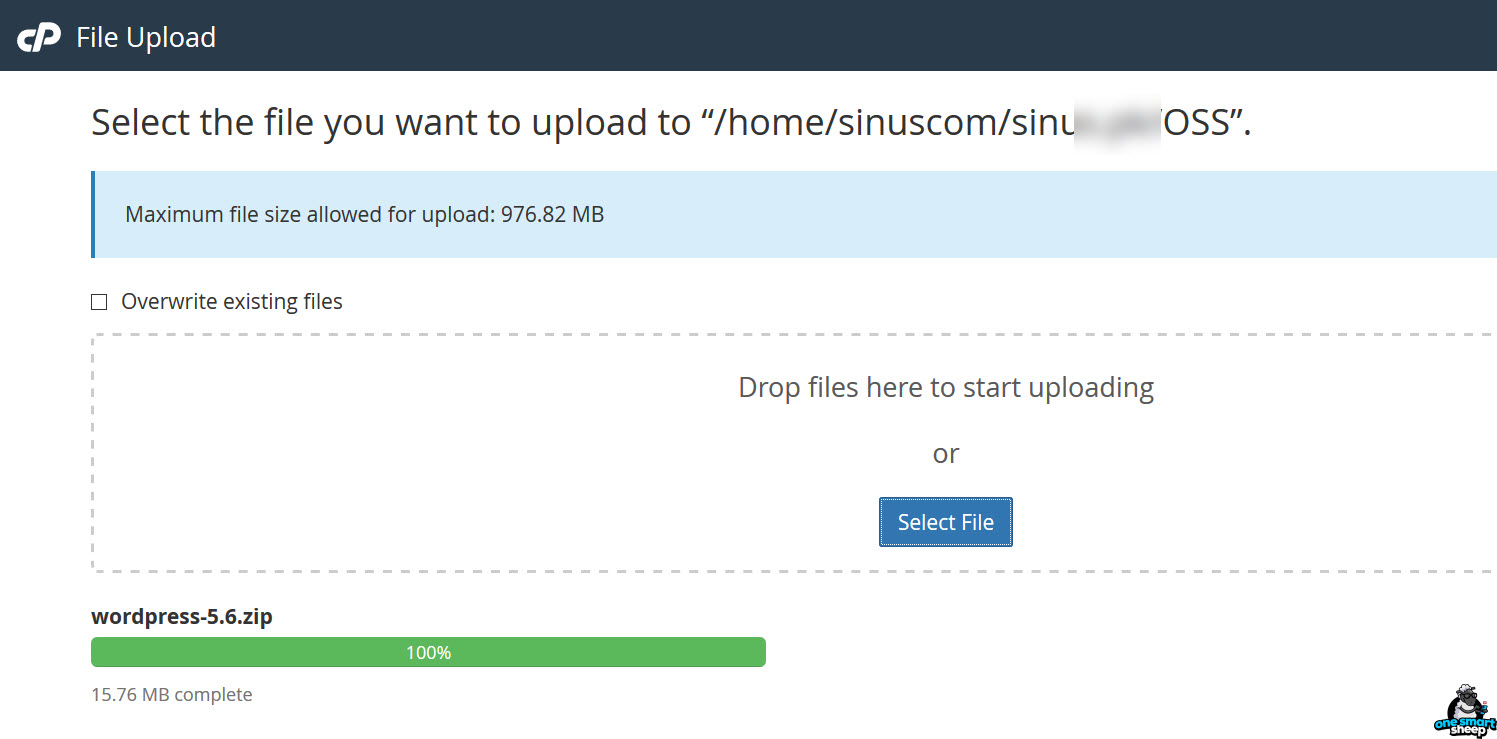
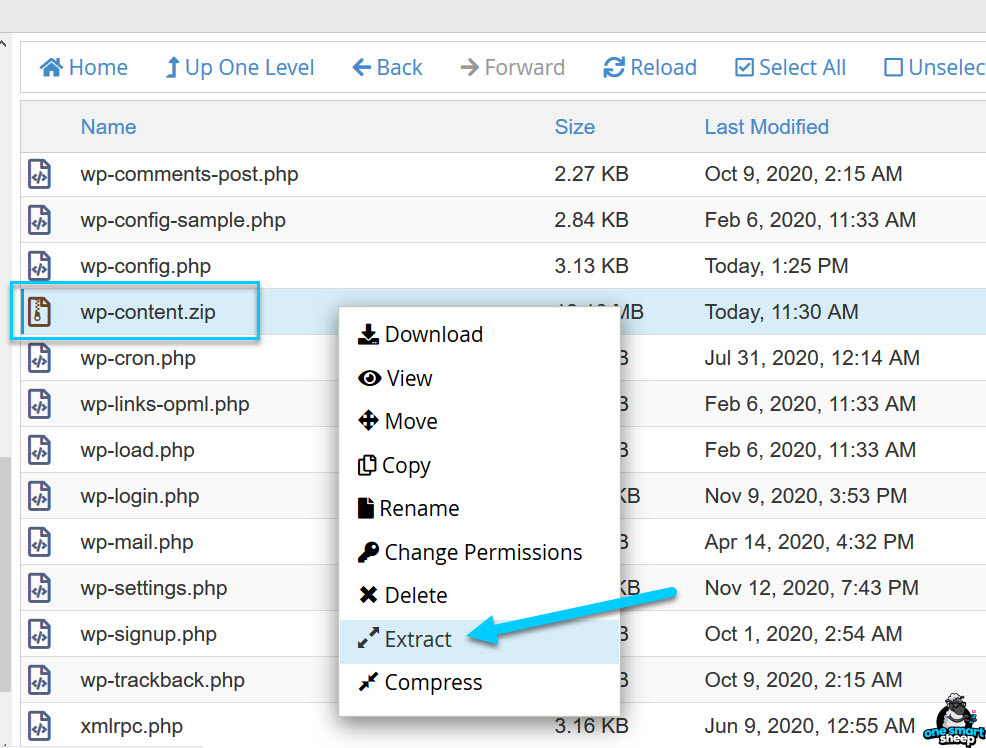
You need to upload the zip file into the empty folder.
Wait until you get a green signal.
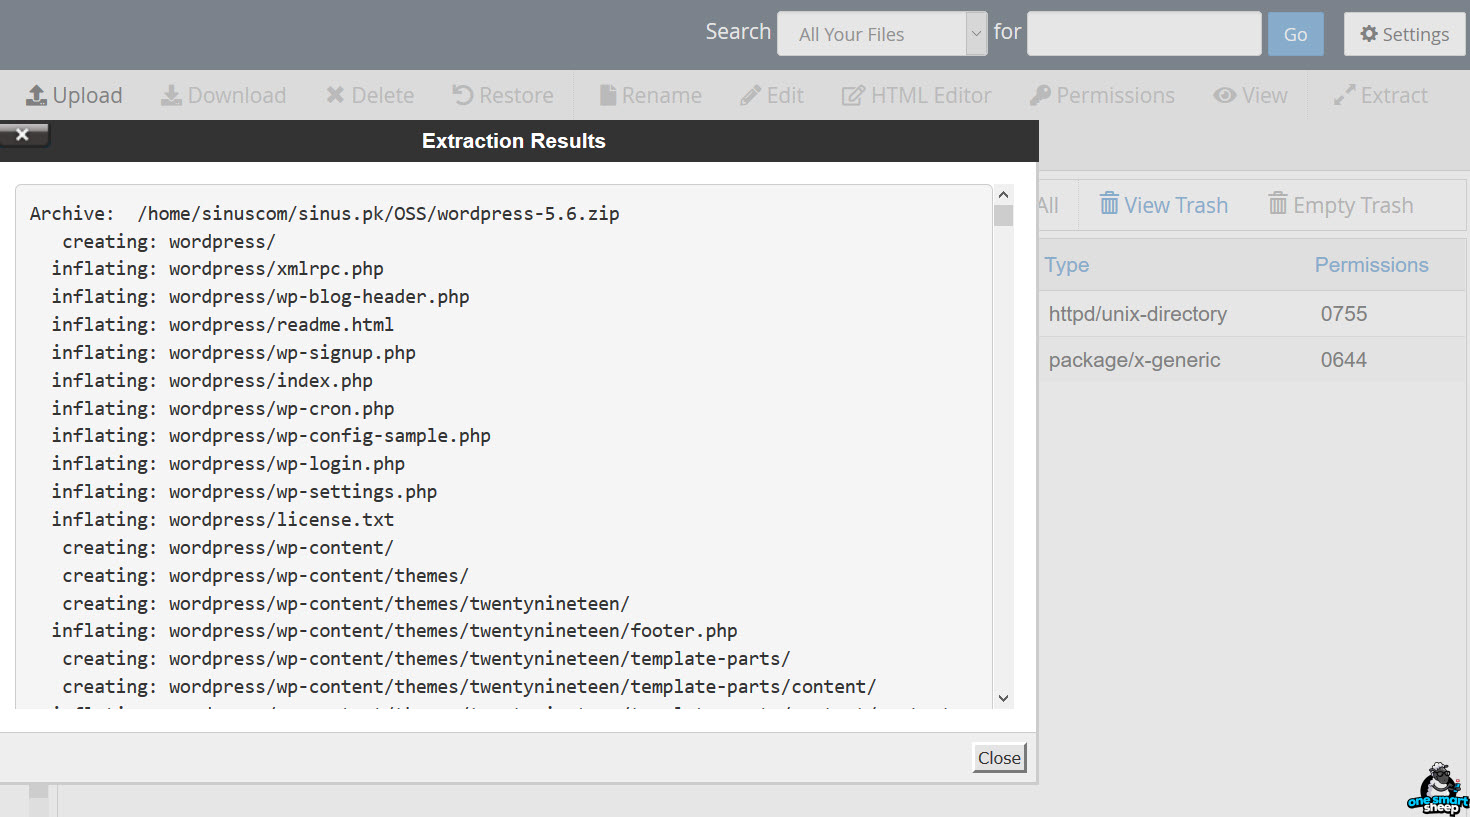
It’s time to unzip the file.
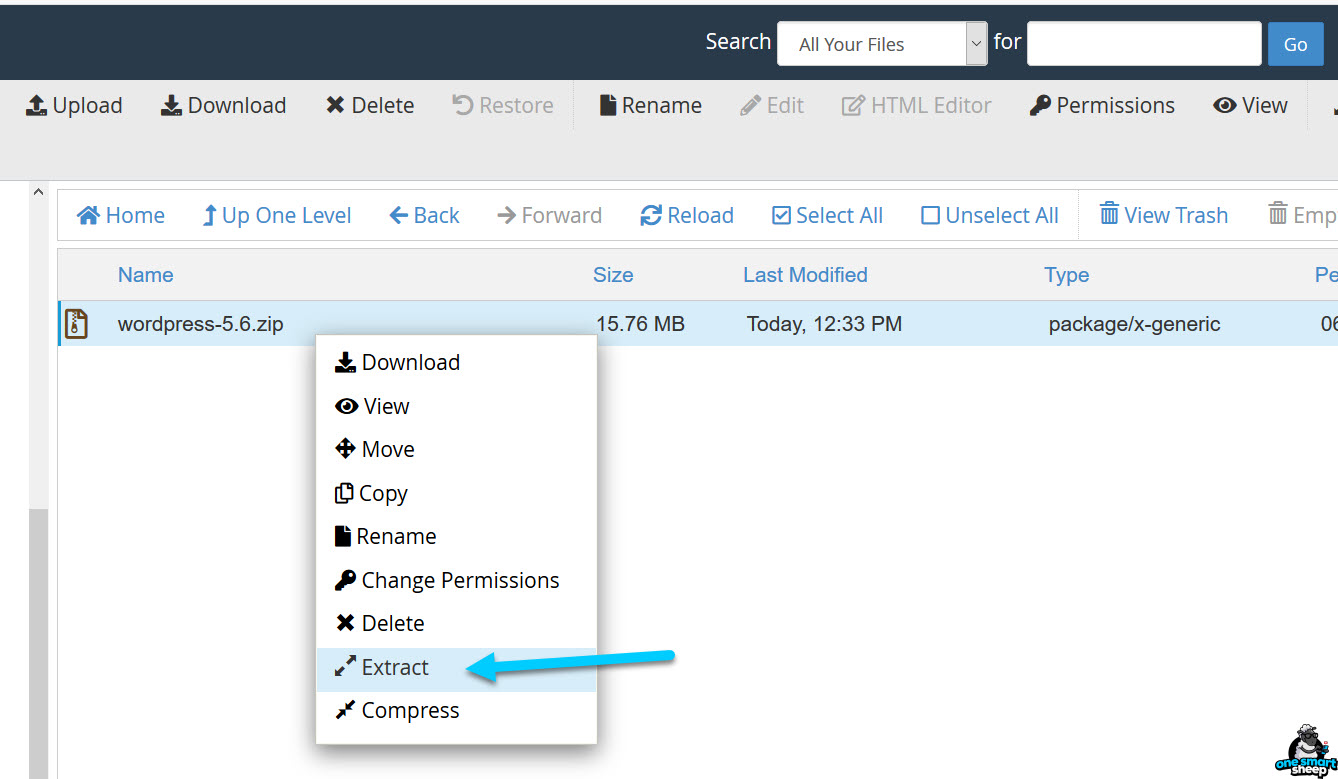
You’ll get this window once the extract is completed.
If you try to open your website, you’ll get a 404 error.
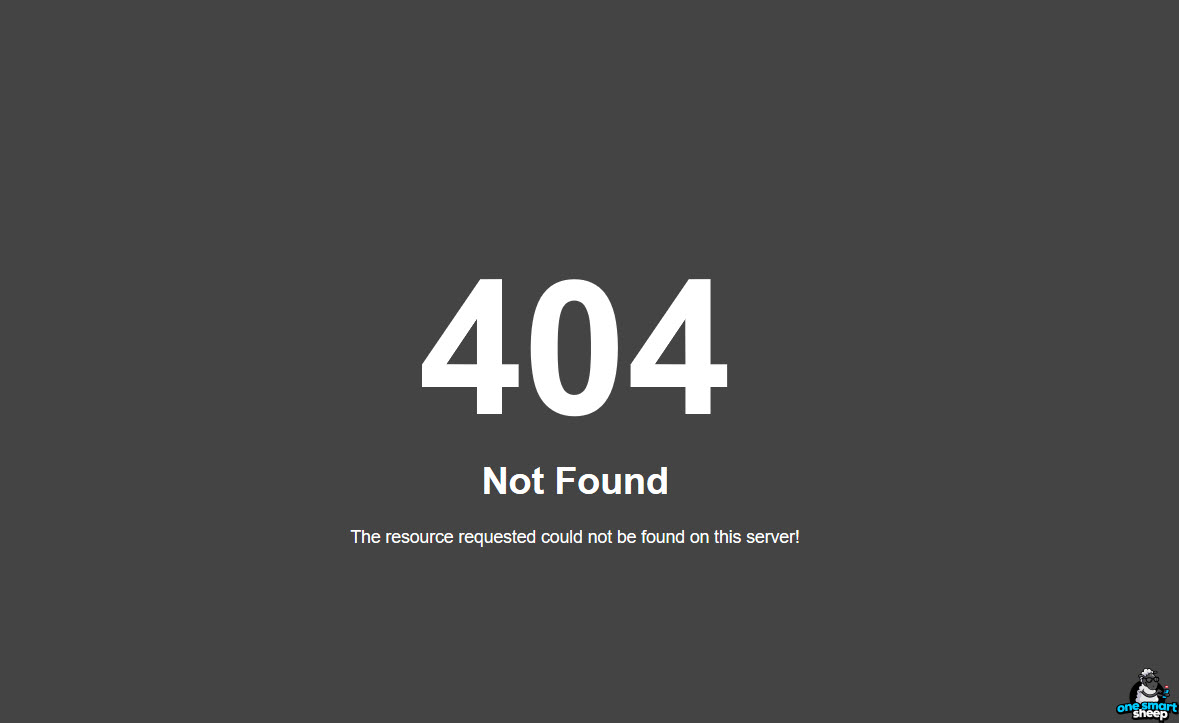
It happens as the WordPress unzip creates a folder named “wordpress.” You need to move out all the files into the main directory.

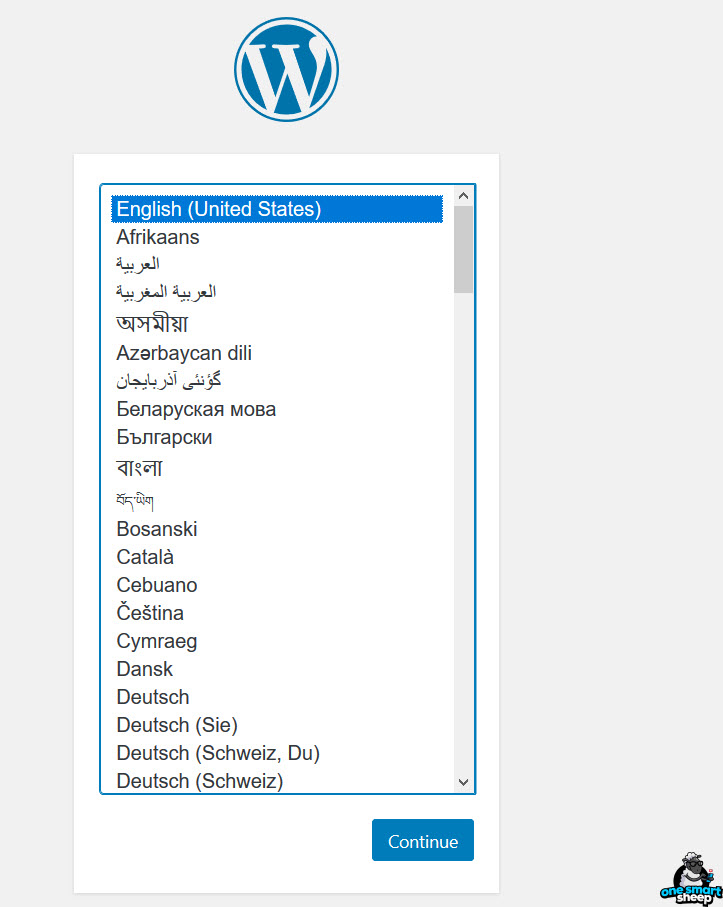
If you refresh the page, now you can install WordPress.
Now comes the most horrible part — creating a database.
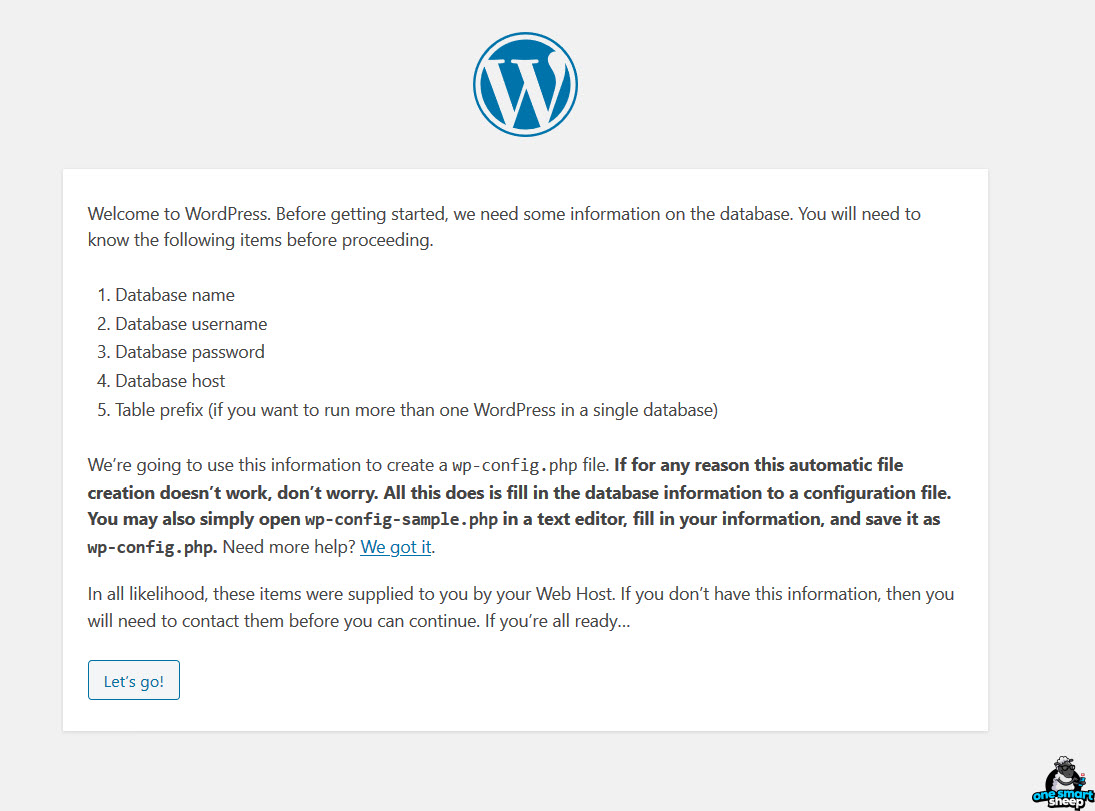
But don’t worry, I’ll guide you. You’ll get the below interface when you click, Let’s go.
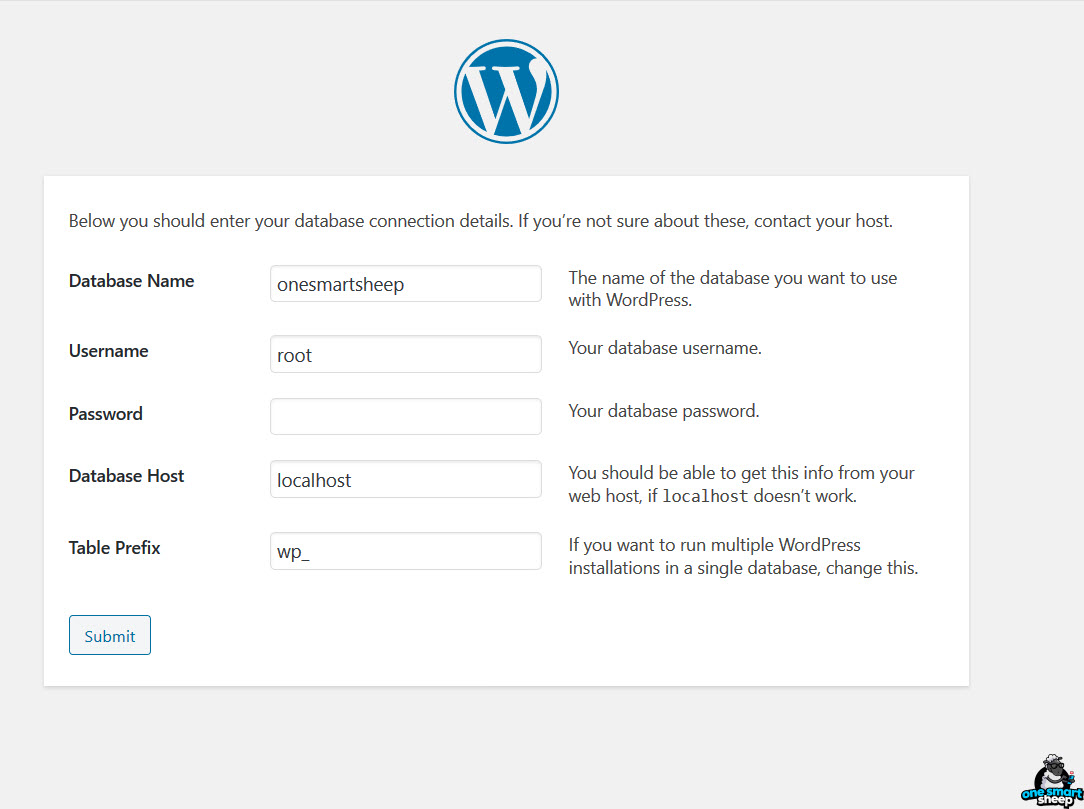
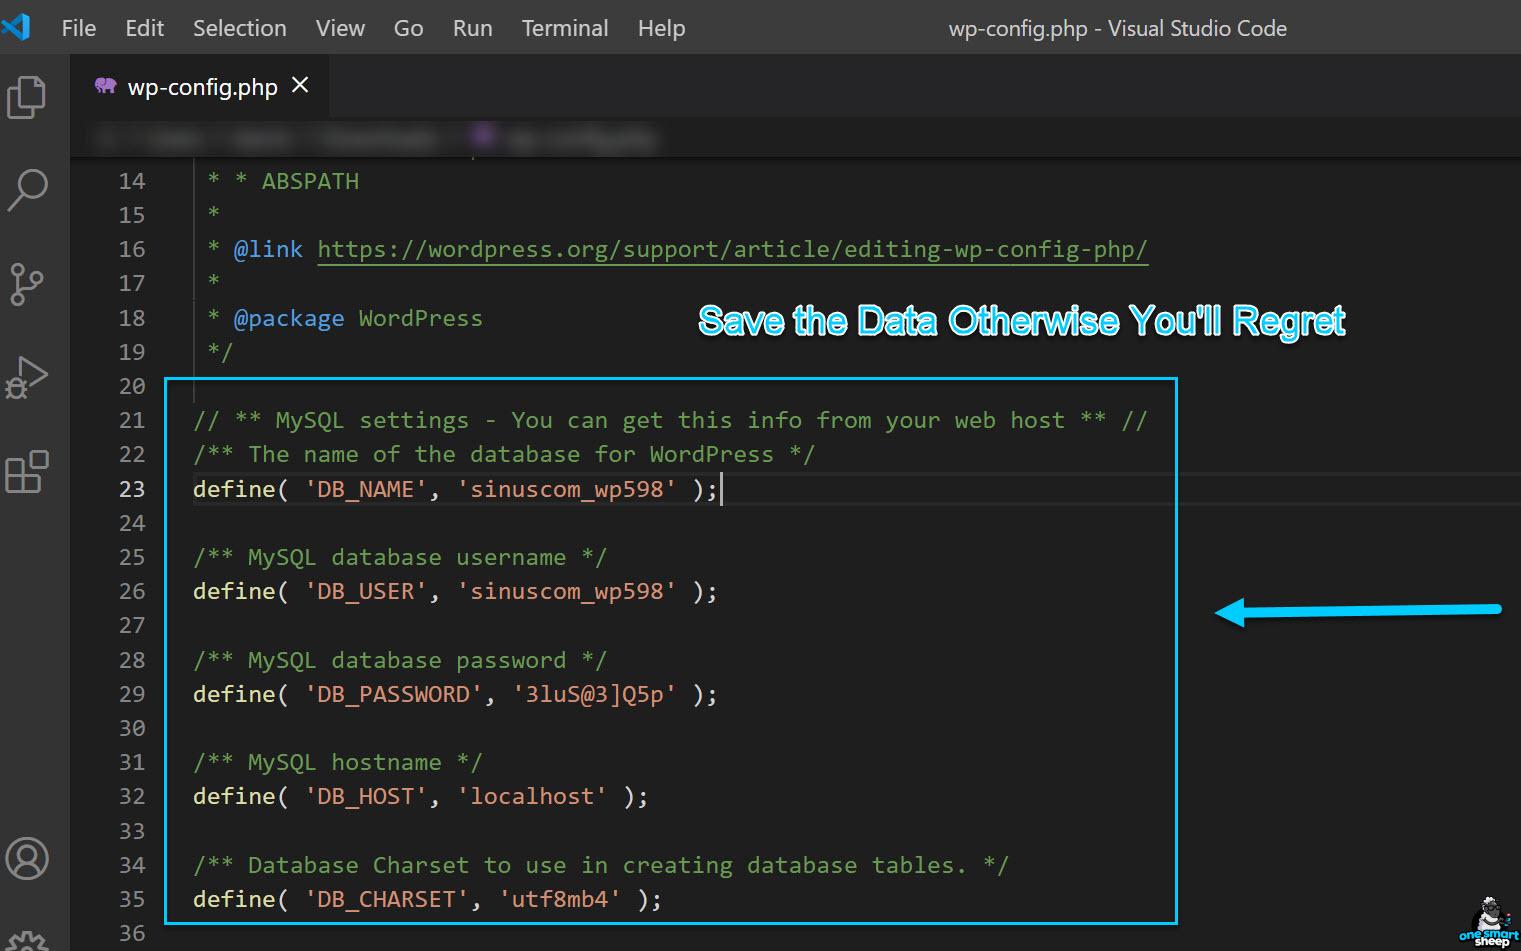
Database Name: You need to connect your previous database. Did I tell you to note down the confidentiality of your databases from your wp-config.php file? Copy as exactly from wp-config.php
Username: Copy as exactly from wp-config.php
Password: Copy as exactly from wp-config.php
Table Prefix: Copy as exactly from wp-config.php
Once done, you’ll get a success message.

Fill in the essential information.
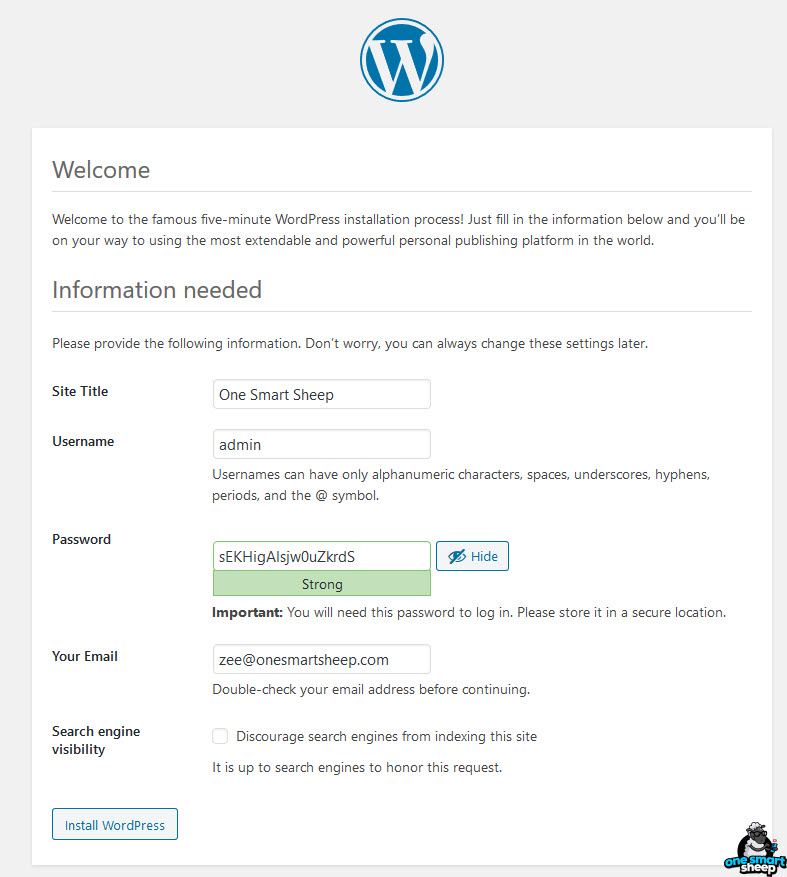
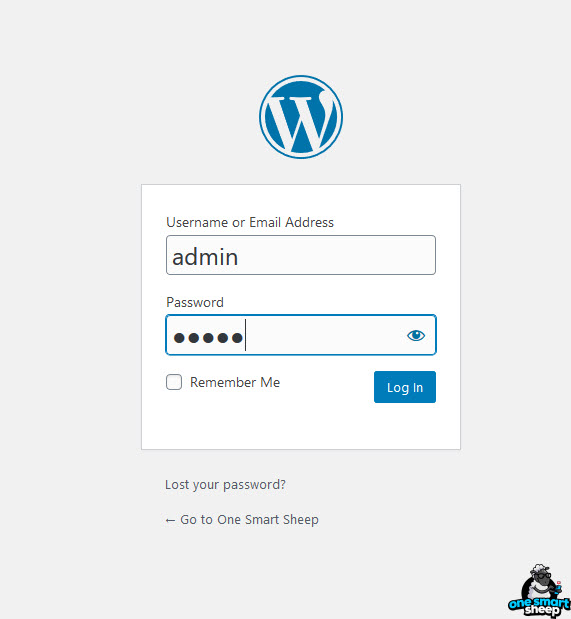
Now you need to log in with the username and password provided above.
Bravo! You have done the most challenging job.
Now it’s time to import the content you exported.
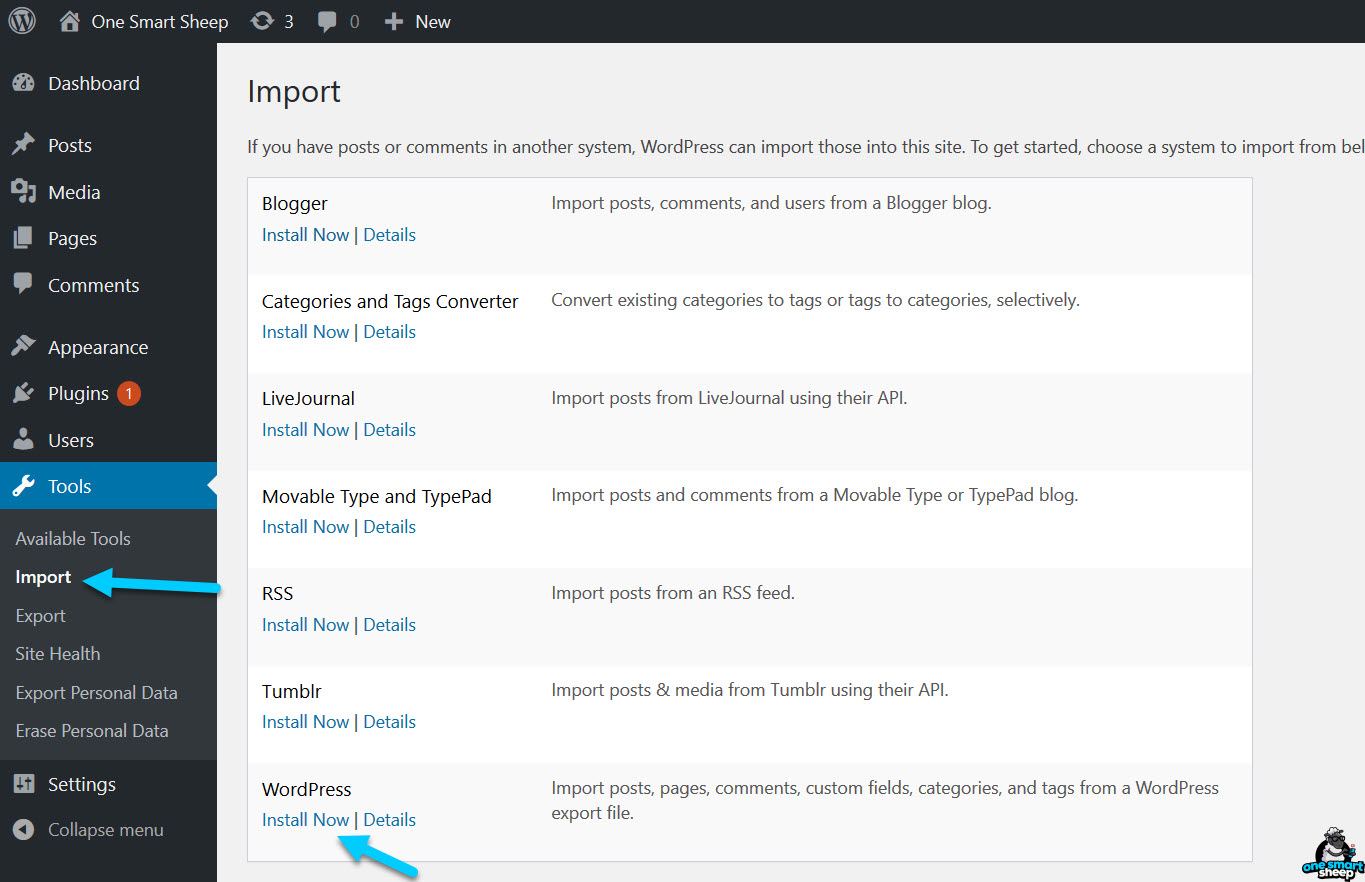
Go to Tools > Import > Install WordPress > Run Importer.
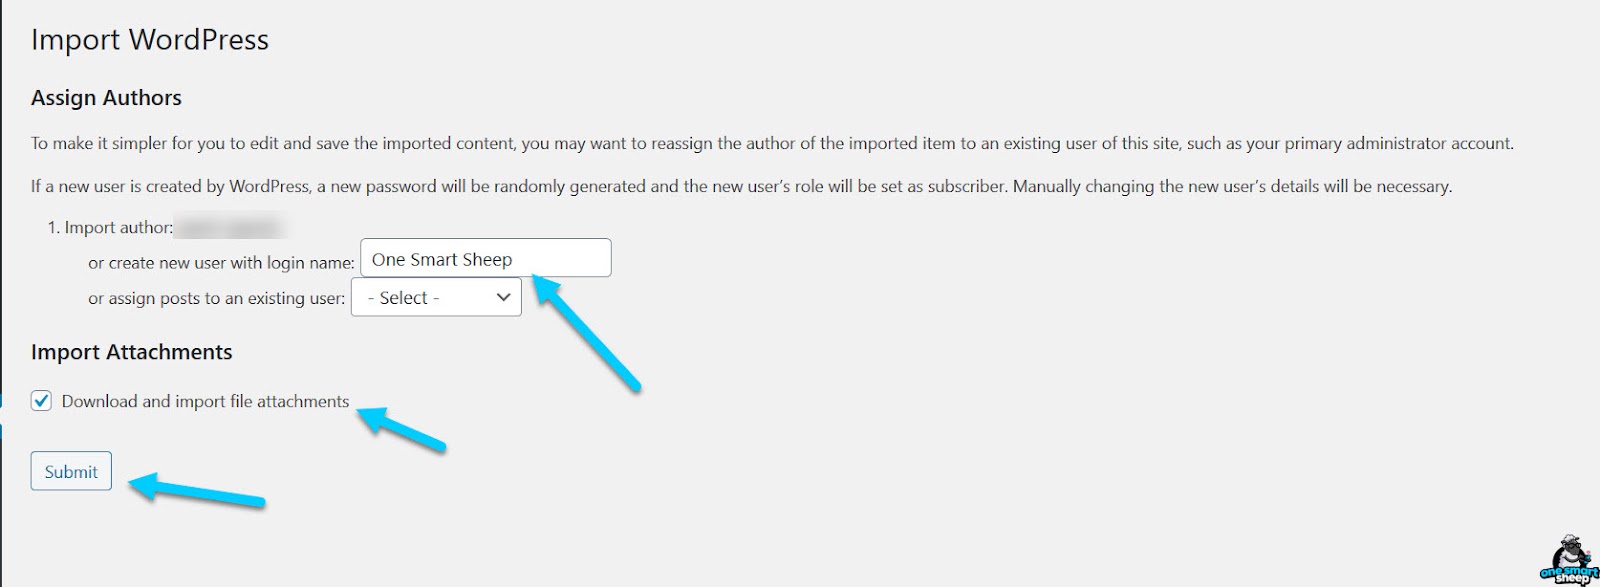
Now import the XML file that you downloaded during the Export process on your WordPress site.

When you click it, you can create a new user or select from existing users as specified in your XML file.
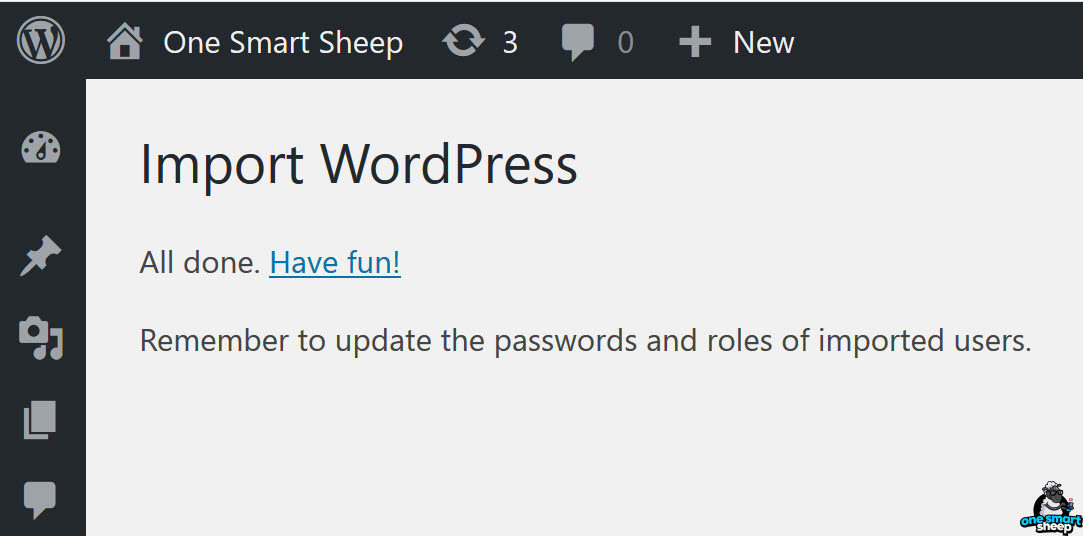
You’ll get a Have Fun message.
But the fun is not over yet.
You need to unzip the wp-upload content to include the images in your content.
You need to delete the wp-content folder that contains:
- Media content like images, videos, GIFs
- Plugins
- Themes
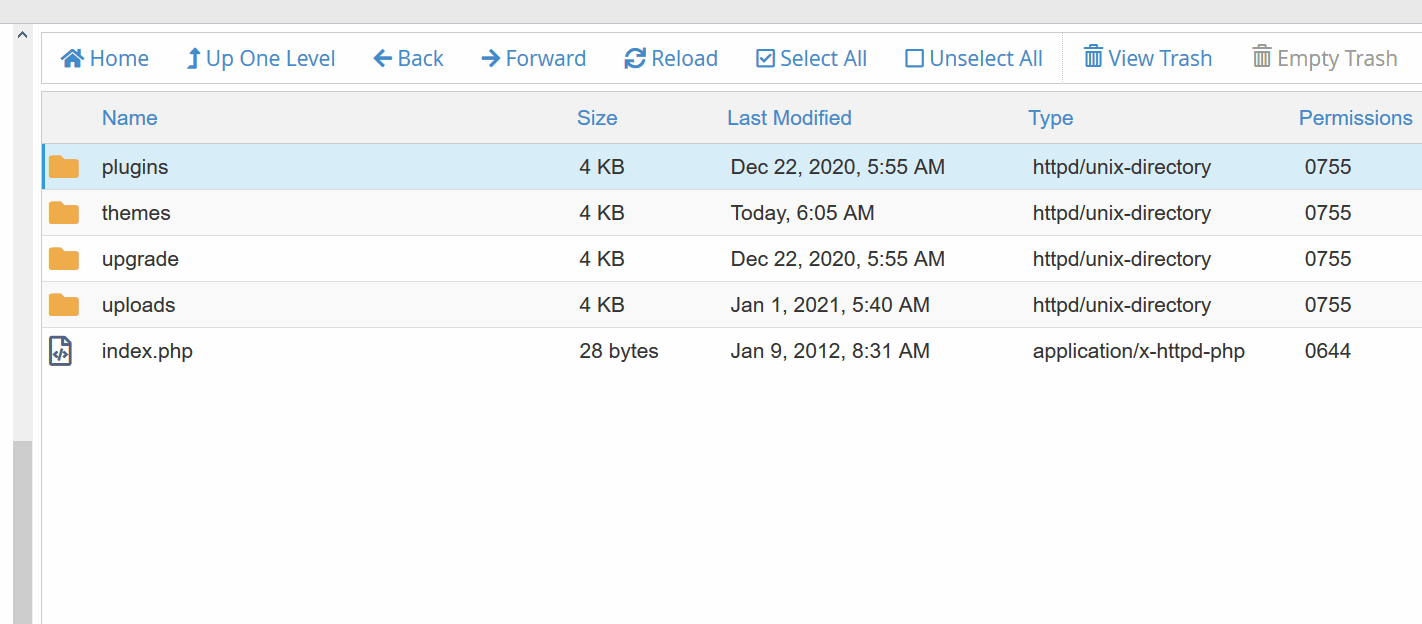
Now it’s time to move the wp-content.zip file into the folder where you newly installed the WordPress site.
Now extract the wp-content.zip into the same directory.
You can delete any plugin or theme from the wp-content.zip after the extraction is completed.
Congratulations! You have successfully reinstalled WordPress without losing any of your data, including images, posts, and comments.
Wrapping Up
WordPress is a great content management system, but sometimes you need to take some extreme steps to solve a specific problem, especially when your website is hacked where malware affects your whole website.
Three ways are useful enough to solve your issues related to reinstalling WordPress without losing your content.
The first two ways to solve your most problems are resetting your WordPress and updating WordPress.
The last way can take a long time, but it’s worth doing it. Don’t forget to download the wp-config.php before you delete content from your site and take a backup of your wp-content that has your essential data.


.svg)
.svg)
.svg)

