


Hey there! Today I'm going to show you EXACTLY how to migrate from Weebly to WordPress. This isn't some vague overview – I'm talking step-by-step instructions that anyone can follow (even if you're not tech-savvy). Let's dive in!
Table of Contents:
- Why Migrate From Weebly to WordPress?
- Phase 1: Preparing for WordPress Migration
- Phase 2: Exporting Your Content from Weebly
- Phase 3: Importing Your Content into WordPress
- Phase 4: Rebuilding Your Website's Appearance
- Phase 5: Essential Post-Migration Configuration
- Phase 6: Testing and Launching Your New WordPress Site
- Troubleshooting Common Migration Issues
Why You NEED to Migrate From Weebly to WordPress
Let's be real:
Weebly is great for beginners. Its drag-and-drop builder makes creating a basic website super simple.
But as your website grows, you'll quickly hit Weebly's ceiling.
Here's the truth: WordPress powers over 43% of ALL websites online. There's a reason for that dominance.
When I work with clients who migrate from Weebly to WordPress, they ALL say the same thing:
"I wish I'd done this sooner!"
Here's why people migrate from Weebly to WordPress:
- Greater control and flexibility – WordPress gives you complete control over EVERY aspect of your site
- Superior SEO capabilities – WordPress is built for SEO from the ground up
- Massive plugin ecosystem – 59,000+ plugins to add any feature you can imagine
- Better e-commerce solutions – WooCommerce is light-years ahead of Weebly's store
- Lower long-term costs – No more monthly subscription fees

Ready to make the switch? Let's break down the process into manageable steps.
Phase 1: Preparing for Your WordPress Migration
1A Choose a Reliable Hosting Provider
The #1 mistake I see people make when they migrate from Weebly to WordPress?
Choosing cheap, low-quality hosting.
Here's the deal: WordPress.org is self-hosted. That means YOU need to find a home for your website files.
Quick note: This guide focuses on WordPress.org (self-hosted), NOT WordPress.com (which is a hosted service with limitations).
When selecting a hosting provider, look for:
- Reliable uptime (99.9%+)
- Fast server response times
- Generous storage and bandwidth
- 24/7 customer support
- One-click WordPress installation
- PHP 8.0+ support
- Free SSL certificate
I personally recommend hosting providers that specialize in WordPress, like WP Engine, SiteGround, or Bluehost.

1B Register or Transfer Your Domain Name
Your domain name is your website's address on the internet. You have two scenarios:
- If you're using a free Weebly subdomain (yourbusiness.weebly.com): You'll need to purchase a new domain name.
- If you already have a custom domain: You can either keep it with your current registrar or transfer it.
Important: Transferring a domain can take 5-7 days and may cause temporary downtime if not done correctly. Plan accordingly!
I recommend using a dedicated domain registrar (like Namecheap or Google Domains) rather than your hosting company. This gives you more flexibility if you change hosts later.
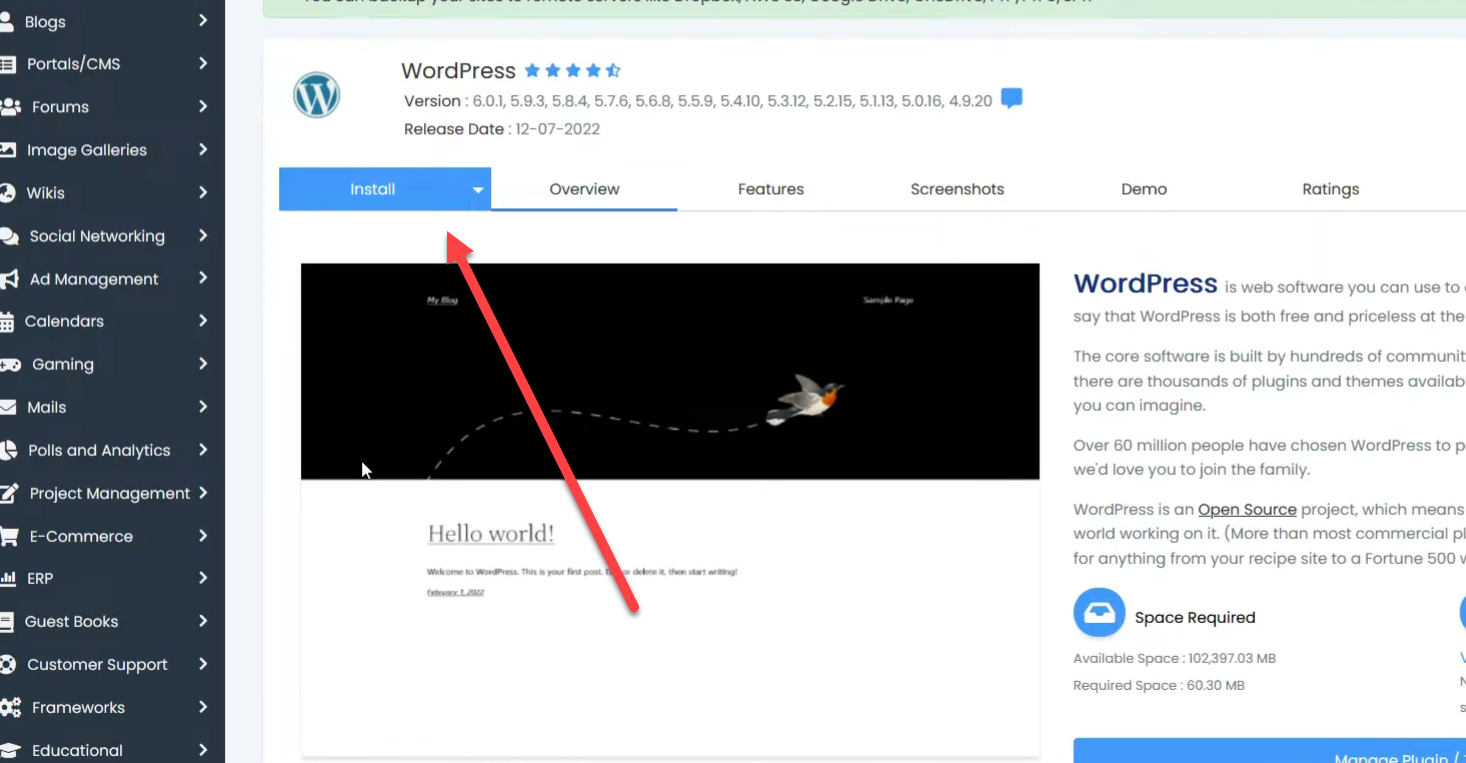
1C Install WordPress
Now for the fun part – installing WordPress!
Most quality hosting providers offer a one-click WordPress installer. Here's how to use it:
- Log into your hosting account's control panel (usually cPanel)
- Look for the WordPress or "One-Click Installs" icon
- Click "Install WordPress"
- Enter your site details (site name, admin username, password, email)
- Click "Install"
Pro tip: Create a STRONG password for your WordPress admin account. This is your first line of defense against hackers.
If you prefer manual installation (or your host doesn't offer one-click install), here's the process:
// 1. Download WordPress from wordpress.org
// 2. Create a database on your hosting account
// 3. Edit the wp-config.php file with your database details
// 4. Upload the WordPress files to your server
// 5. Run the installation script by visiting your domain
Phase 2: Exporting Your Content from Weebly
2A Understanding Weebly's Export Limitations
Let's face it: Weebly doesn't make it easy to migrate from Weebly to WordPress.
Weebly has some MAJOR limitations when it comes to exporting your content:
- No direct, built-in export function for WordPress
- Blog posts and store pages aren't included in the standard site archive
- Weebly themes are NOT compatible with WordPress
But don't worry! I've helped hundreds of people migrate from Weebly to WordPress, and I've developed workarounds for all these issues.
2B Manual Content Export Methods
For smaller websites, the manual approach works well:
- Open each page in your Weebly editor
- Copy all the text content
- Save images from your Weebly site (right-click → Save Image As)
- Create a document to organize all your content
The upside: Manual migration gives you complete control over what gets moved and how it's formatted in WordPress.

2C Automated Content Export Methods
For larger sites, you'll want to use these automated methods:
2C.1 Using the Weebly to WordPress Importer Tool
WPBeginner created a free tool that makes the migration process WAY easier:
- Visit https://weeblytowp.com/
- Enter your Weebly site URL, name, and email
- Choose WXR (WordPress Extended RSS) format
- Check the option to include pages
- Download the generated XML file
Alternative method: You can also try accessing your Weebly blog's RSS feed directly by adding /1/feed or /rss to your Weebly domain.

2C.2 Exporting E-commerce Data
If you have a Weebly store, you'll need to export your products separately:
- Login to your Weebly dashboard
- Go to "Store" → "Products"
- Click the ellipsis (...) menu
- Select "Export Products"
- Choose CSV format
- Download the file
For orders and customers:
- Go to "Store" → "Orders" or "Customers"
- Look for the "Export" button
- Download the CSV file
2C.3 Exporting Other Data (Forms, etc.)
For form submissions and other app data:
- Go to the specific app in Weebly
- Look for export options in the app settings
- Download data in available formats (usually CSV)
Phase 3: Importing Your Content into WordPress
3A Importing Content Using the WordPress Importer
Now it's time to get your content into WordPress:
- Log in to your WordPress admin dashboard
- Go to "Tools" → "Import"
- Find "WordPress" in the list and click "Install Now"
- After installation, click "Run Importer"
- Click "Choose File" and select your Weebly export file (.xml)
- Click "Upload file and import"
- Assign authors (or create new ones)
- IMPORTANT: Check the box for "Download and import file attachments"
- Click "Submit"
Crucial step: After importing, go to "Posts," "Pages," and "Media Library" to verify that everything transferred correctly.
Here's the JavaScript that runs behind the scenes during the import process:
// This is simplified pseudocode representing what WordPress does
function importWordPressXML(file) {
// Parse the XML file
const xmlContent = parseXML(file);
// Extract and create categories/tags
xmlContent.categories.forEach(category => {
createCategory(category.name, category.slug);
});
// Create posts and pages
xmlContent.posts.forEach(post => {
createPost({
title: post.title,
content: post.content,
date: post.date,
status: post.status,
categories: post.categories,
tags: post.tags
});
});
// Import media files
if (shouldImportAttachments) {
xmlContent.attachments.forEach(attachment => {
downloadAndImportMedia(attachment.url, attachment.metadata);
});
}
}
3B Importing E-commerce Data into WooCommerce
If you had a store on Weebly, you'll need to set up WooCommerce:
- Install and activate the WooCommerce plugin
- Complete the WooCommerce setup wizard
- Go to "WooCommerce" → "Products" → "Import"
- Upload your Weebly product CSV file
- Map the CSV columns to WooCommerce fields
- Run the import
For importing orders and customers:
- Install a WooCommerce CSV importer plugin (like "Customer/Order/Coupon CSV Import Suite")
- Go to the plugin's import section
- Upload your orders and customers CSV files
- Map the fields and complete the import
3C Manual Content Import
For content that doesn't import correctly, you'll need to add it manually:
- Go to "Pages" → "Add New" or "Posts" → "Add New"
- Copy and paste content from your Weebly site
- Upload and insert images
- Format content using the WordPress block editor
While this method takes longer, it gives you complete control over how your content appears in WordPress.
Phase 4: Rebuilding Your Website's Appearance
4A Understanding Theme Incompatibility
Here's a harsh truth:
Your Weebly theme cannot be transferred to WordPress.
These platforms use completely different technologies and theme structures. But don't worry – WordPress has THOUSANDS of beautiful themes to choose from.
4B Choosing the Perfect WordPress Theme
When selecting a WordPress theme to replace your Weebly design, consider:
- Purpose: Is it for a blog, business, portfolio, store?
- Design aesthetic: Modern, minimalist, bold, traditional?
- Required features: E-commerce, portfolio layouts, mega menus?
- Page builder compatibility: Works with Elementor, Beaver Builder, etc.?
- Responsiveness: Looks good on all devices?
- Loading speed: Lightweight and optimized code?
- Support and updates: Actively maintained?
You can find themes in three main places:
- WordPress.org Theme Directory: Free, quality-checked themes
- Premium Theme Marketplaces: ThemeForest, StudioPress, etc.
- Independent Theme Developers: Astra, GeneratePress, etc.
4C Customizing Your WordPress Theme
Once you've chosen a theme, it's time to make it your own:
- Install and activate your theme ("Appearance" → "Themes" → "Add New")
- Use the theme customizer ("Appearance" → "Customize") to adjust:
- Colors and fonts
- Header and footer layouts
- Widget areas
- Homepage settings
- Create and customize menus ("Appearance" → "Menus")
- Add widgets to sidebars and footers ("Appearance" → "Widgets")
For more advanced customization:
- Install a page builder plugin (Elementor, Beaver Builder, Divi)
- Create custom page layouts
- Use custom CSS for fine-tuned styling
/* Custom CSS example for WordPress theme customization */
/* Make header sticky */
.site-header {
position: sticky;
top: 0;
z-index: 100;
background-color: #ffffff;
box-shadow: 0 2px 5px rgba(0,0,0,0.1);
}
/* Style main navigation links */
.main-navigation a {
font-weight: 600;
text-transform: uppercase;
letter-spacing: 1px;
padding: 15px 20px;
transition: all 0.3s ease;
}
/* Style buttons */
.wp-block-button__link {
border-radius: 5px;
padding: 12px 24px;
font-weight: 600;
}
Phase 5: Essential Post-Migration Configuration
5A Setting Up SEO-Friendly Permalinks
Permalinks are the permanent URLs for your posts and pages. Getting them right is CRUCIAL for SEO.
- Go to "Settings" → "Permalinks"
- Select "Post name" structure (recommended for SEO)
- Click "Save Changes"
If your Weebly site used .html extensions (like yourdomain.com/page.html), you can replicate this:
- Install the "Add Any Extension to Pages" plugin
- Configure it to add .html to your pages
5B Implementing 301 Redirects (The SEO Secret Weapon)
WARNING: Skip this step and you'll lose your hard-earned search rankings!
301 redirects tell search engines your content has permanently moved to a new URL. This preserves your SEO juice.
- Install a redirection plugin (like "Redirection" or "301 Redirects")
- Go to the plugin's settings page
- Add each old Weebly URL and its corresponding new WordPress URL
Here's an example of what your redirects might look like:
// Old Weebly URLs → New WordPress URLs
/about.html → /about/
/services.html → /services/
/blog/post-name.html → /blog/post-name/
/contact.html → /contact/
For Weebly subdomains, add this meta refresh code to your old site's header:
<meta http-equiv="refresh" content="0; URL='https://yournewdomain.com'" />
5C Configuring DNS Settings
Now it's time to point your domain to your new WordPress site:
- Log in to your domain registrar's control panel
- Find the DNS management section
- Update the nameservers to those provided by your WordPress hosting
- Save the changes
Important: DNS changes can take up to 48 hours to propagate worldwide. Be patient!
Typical nameserver format:
ns1.yourhost.com
ns2.yourhost.com
5D Installing Essential WordPress Plugins
These plugins will supercharge your WordPress site:
- SEO plugin: Yoast SEO or Rank Math
- Security plugin: Wordfence or Sucuri Security
- Backup plugin: UpdraftPlus or Jetpack
- Caching plugin: WP Rocket or W3 Total Cache
- Form plugin: WPForms or Contact Form 7
- Image optimization: Smush or ShortPixel
To install a plugin:
- Go to "Plugins" → "Add New"
- Search for the plugin by name
- Click "Install Now"
- After installation, click "Activate"
- Configure the plugin settings as needed
Phase 6: Testing and Launching Your New WordPress Site
6A Thorough Testing Before Launch
NEVER skip testing! Here's my pre-launch checklist:
- Check that your site loads properly in all major browsers (Chrome, Firefox, Safari, Edge)
- Test on multiple devices (desktop, tablet, smartphone)
- Verify all internal and external links work
- Test all forms and ensure submissions are received
- Check e-commerce functionality (if applicable)
- Test user registration and login (if applicable)
- Verify all images and media display correctly
- Check responsive design at various screen sizes
- Run speed tests using Google PageSpeed Insights
- Verify SEO elements (meta titles, descriptions, headings)
Use a staging environment for these tests if possible. Many WordPress hosting providers offer staging functionality.
6B Launching Your New WordPress Website
The big moment has arrived! Here's how to launch:
- Double-check your DNS settings are pointing to your new host
- Ensure all 301 redirects are in place
- Remove any "Coming Soon" or maintenance mode plugins
- Do a final check of your live site
- Announce your new site on social media and to your email list
- Submit your new sitemap to Google Search Console
Pro tip: Schedule your launch during off-peak hours to minimize disruption for your visitors.
Troubleshooting Common Weebly to WordPress Migration Issues
Even with careful planning, you might run into a few hiccups. Here are solutions to the most common problems:
Missing Content After Import
Try re-importing your export file. The WordPress importer skips duplicate content, so it won't create duplicates.
Broken Links
Use a plugin like "Broken Link Checker" to find and fix broken links. Most broken links occur because of path differences between Weebly and WordPress.
404 Errors for Pages
Check your permalink structure and ensure your 301 redirects are correctly set up. Flush permalinks by going to Settings → Permalinks and clicking "Save Changes" (without making any changes).
Can't Log In to WordPress
Use the password reset function at your wp-login.php URL. If that doesn't work, you may need to reset your password via phpMyAdmin in your hosting control panel.
Images Not Displaying
This is usually a URL issue. Install "Better Search Replace" plugin and replace your old Weebly URL with your new WordPress URL in the database.
Plugin Conflicts
Deactivate all plugins, then reactivate them one by one to identify the problematic plugin.
ALWAYS keep backups! Make a complete backup of both your Weebly site and your WordPress site before and during the migration process.
Conclusion: Why You'll LOVE WordPress After Migrating From Weebly
Congratulations! You've successfully completed your migration from Weebly to WordPress.
Let's recap what we've covered in this guide:
- Why migrating from Weebly to WordPress makes sense for growing websites
- Preparing for migration (hosting, domain, WordPress installation)
- Exporting content from Weebly despite its limitations
- Importing content into WordPress efficiently
- Rebuilding your website's appearance with WordPress themes
- Configuring essential settings for SEO and functionality
- Testing and launching your new WordPress site
- Troubleshooting common migration issues
You've now unlocked a WORLD of possibilities with WordPress. The platform's flexibility, extensive plugin ecosystem, and superior SEO capabilities will help take your website to new heights.
Remember that migrating from Weebly to WordPress is just the beginning of your WordPress journey. As you become more comfortable with the platform, you'll discover even more ways to enhance your website and grow your online presence.
If you're looking for more amazing guides like this one, be sure to check out One Smart Sheep. They offer comprehensive resources on everything from website migration to advanced WordPress techniques, SEO strategies, and more. Their expert team can even handle the entire migration process for you if you'd prefer a hands-off approach.


.svg)