


Do you know? Failure to install WordPress Google Tag Manager could result in a number of negative consequences, including reduced visibility into WordPress website performance and user behavior, difficulty implementing and managing marketing campaigns, and compliance issues.
If you're eager to dive into this acclaimed tool, follow along in this blog as I walk you through the installation, complete with detailed screenshots.
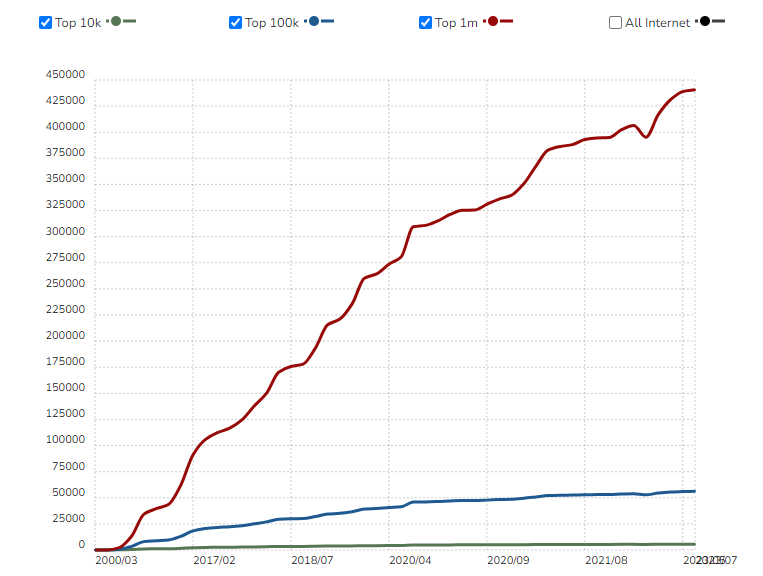
Source: Builtwith Trends
This data set appears to capture the evolving landscape of Google tag manager usage for websites across different timeframes and tiers of internet popularity. The numerical values indicate website counts or rankings, and they range from 0 to 450,000.
In this article, you will learn:
- What Google Tag Manager is and what you need to know about it.
- How to set up Google Tag Manager on a WordPress website.
- The pros and features of Google Tag Manager.
- The different industry verticals that use Google Tag Manager.
- Which tags you need and where to deploy them.
By the end of this guide, you will have successfully integrated Google Tag Manager with your WordPress website and be ready to leverage its powerful features to optimize your site’s performance.
So, let’s dive in and unlock the potential of Google Tag Manager for your WordPress website. Let’s get started.
Things to Know About WordPress Google Tag Manager
Google Tag Manager is a valuable tool that helps you manage and organize the tracking codes, which are also known as tags, on your website. These tags are crucial for collecting data on user interactions, website performance, and other important metrics.
With Google Tag Manager, you can efficiently deploy and manage these tags without having to manually edit your website's code each time you want to make changes. It offers a user-friendly web-based interface that simplifies the process.
Historical Trends
It has been determined that a substantial 50.8% of the websites under our purview do not employ any of the tag managers within the scope of our monitoring.
Notably, Google Tag Manager emerges as the predominant choice among website operators, boasting an impressive adoption rate of 49.1% across all surveyed websites. This remarkable prevalence translates to a commanding tag manager market share of 99.6%.

Source : W3 Techs
Steps to Install & Connect Google Tag Manager to WordPress

Connecting Google Tag Manager to WordPress is crucial for streamlined tracking and management of website tags.
It allows for easy integration of scripts, analytics, and other vital functionalities without delving into code, enhancing site performance and user insights.
Now, let's delve into the process of integrating Google Tag Manager with WordPress. We'll outline each step visually for clarity.
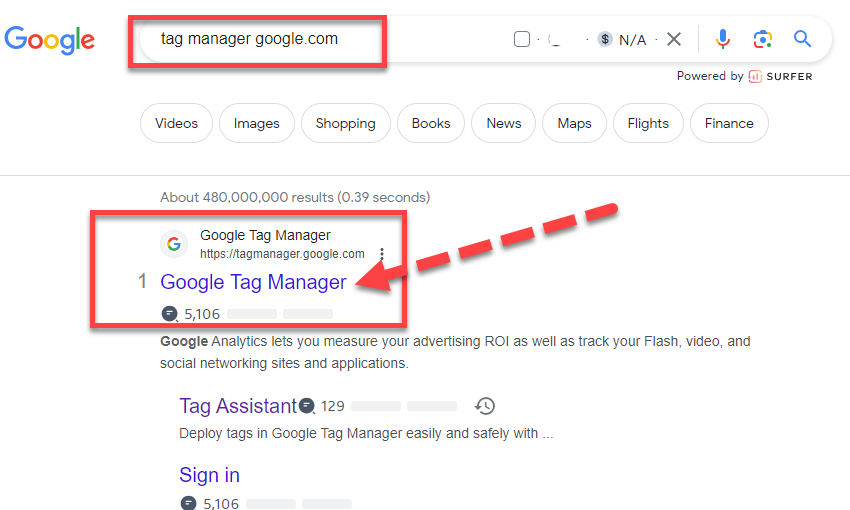
Step 1. Visit Google Tag Manager Website

To begin, enter "Tag Manager," "Google Tag Manager," or use the URL "tagmanager.google.com" as I've done. This will lead you to the search results page. Select the official Google Tag Manager link from the results.
Utilizing this tool allows you to gauge the return on investment (ROI) for your advertising efforts and monitor metrics across Flash, video, and various social platforms and apps.
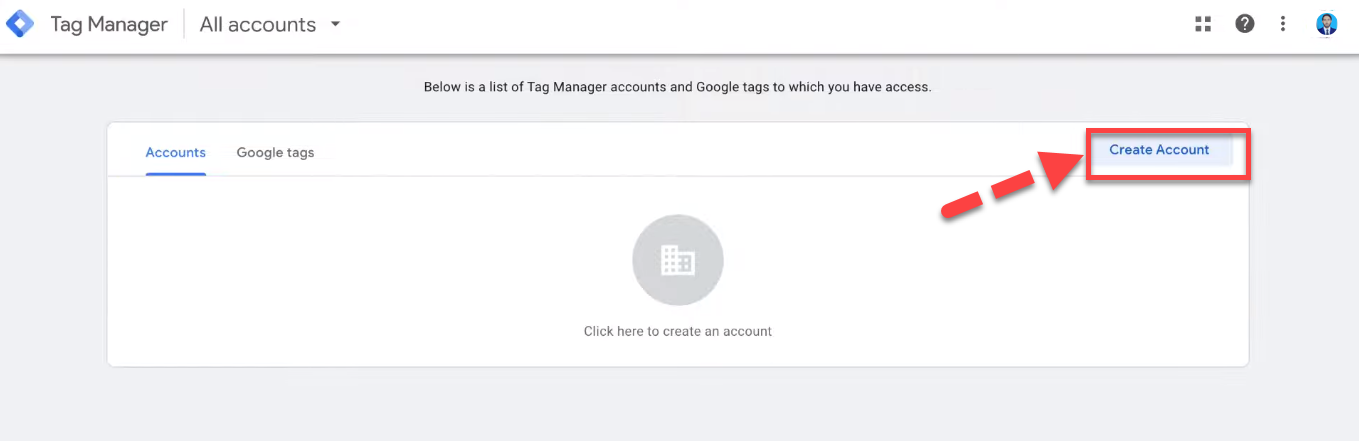
Step 2. Create New Tag Manager Account
You'll now see Tag Manager accounts displayed on your monitor that are associated with your primary account. Ensure you're signed in using your professional email address.

However, since our objective is to establish a new account for our WordPress site, select the 'Create a New Account' option. This will later be linked to our website. Proceed by clicking on 'Create Account.'
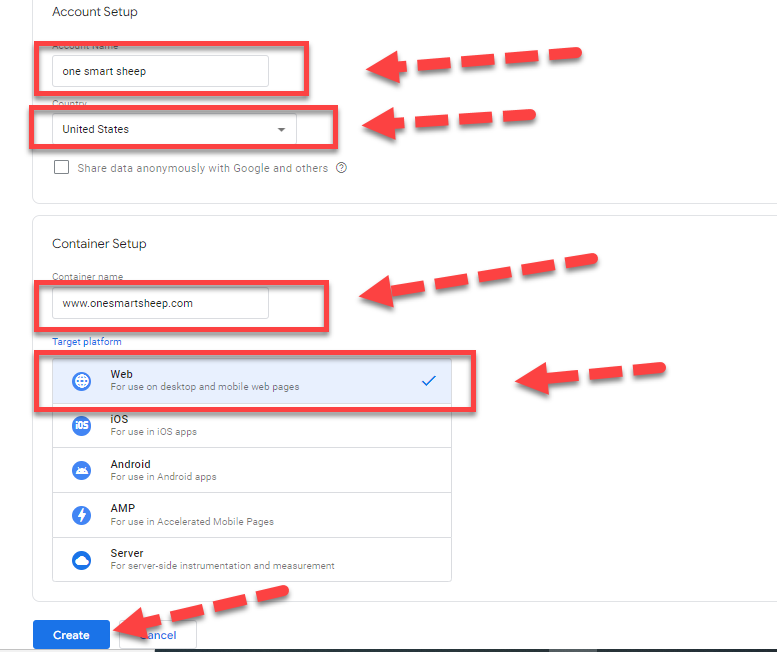
In the account creation process, several specific details are required. Begin by inputting your company's name, followed by your website or business location.
For the container setup, ensure your target is set to 'Web.' This is a crucial step. Once all information is filled in, hit the 'Create' button situated at the page's end.
Upon selecting 'Create,' you'll be presented with a user agreement page. This is the Google Tag Manager's User Policy, which you'll need to consent to. Scroll through and check the box indicating acceptance of the data processing terms.
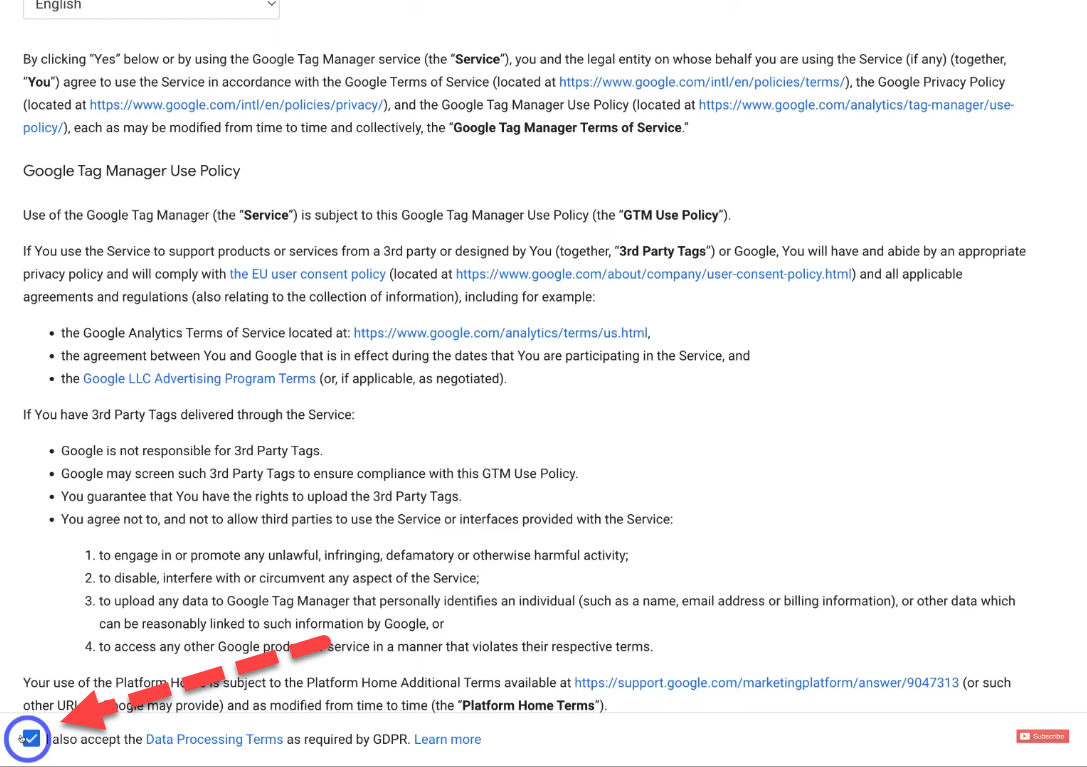
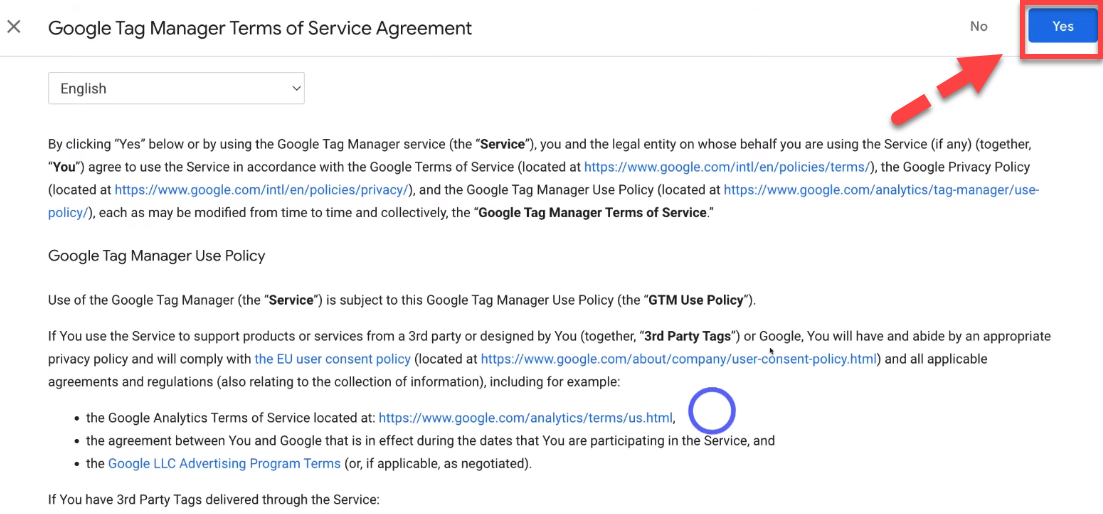
With the agreement marked, you'll notice a 'Yes' or 'No' option in the top-right corner, in accordance with Google Tag Manager's Terms of Service. Simply press the 'Yes' option to confirm.
After consenting to Google Tag Manager's policies, a snippet or code will appear on your screen. This code facilitates the linkage between the Tag Manager account and your WordPress site. Your WordPress backend should have header and footer sections where you can paste this code.
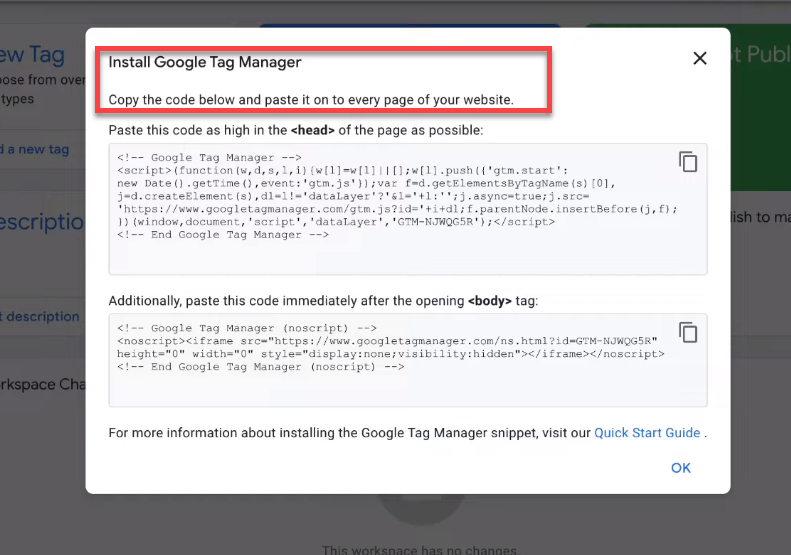
Step 3. Copy HTML Snippet Code to Install Tag Manager
Upon observing your screen, you'll notice two distinct codes. The first code appears above the tag <head>. It's essential that you copy this code. To do so, please click on the corresponding copy icon.

Step 4. Install HFCM Plugin
Next, input the copied code into the backend of your WordPress site. For ease of integration, please install the Header Footer Code Manager (HFCM) plugin. To accomplish this, navigate to the 'Plugins' section within your dashboard and select 'Add New' when prompted.
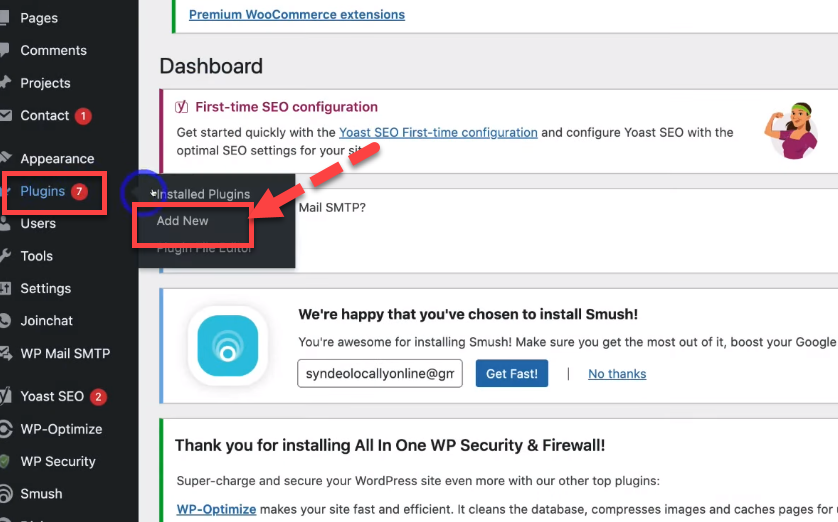
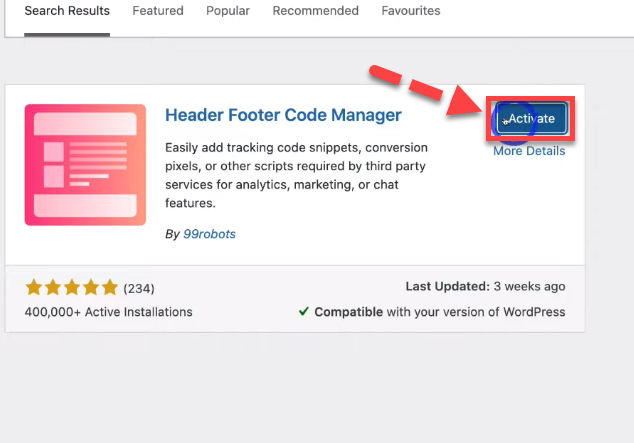
Once you select 'Add New,' utilize the search feature by typing in 'HFCM.' After pressing the 'Enter' key, you'll see the plugin developed by 99 Robots. To proceed, click the 'Install Now' button.

Having installed the HFCM plugin (how to install the accordion plugin), the next step involves its activation. Click 'Activate' to enable its capabilities.
Step 5. Paste HTML Copied Snippet / Code
With the HFCM plugin activated, you're ready to input the code provided by the Google Tag Manager during account setup.
To begin, select 'HFCM' from your dashboard. A prompt will appear; please choose 'Add New' from the available options.

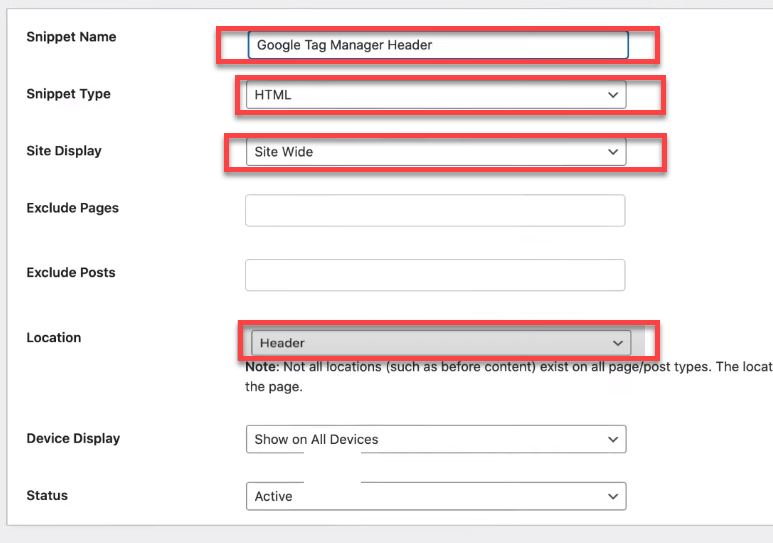
Given that we have received two distinct codes from Google Tag Manager, certain specific details are required at this juncture. For the 'Snippet Name,' choose a title that aids in future reference.
The 'Snippet Type' should be designated as 'HTML,' given the format of our code. Lastly, ensure you set the location to 'header' for the upper code provided on the Google Tag Manager page.
After configuring the above settings:
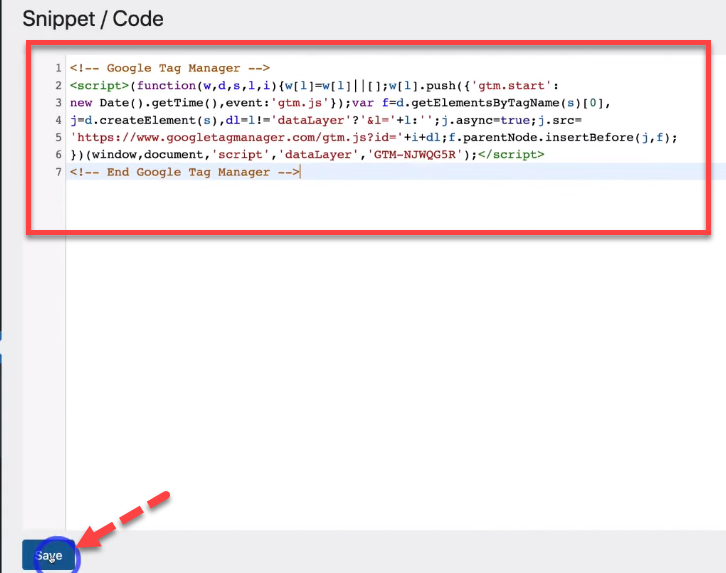
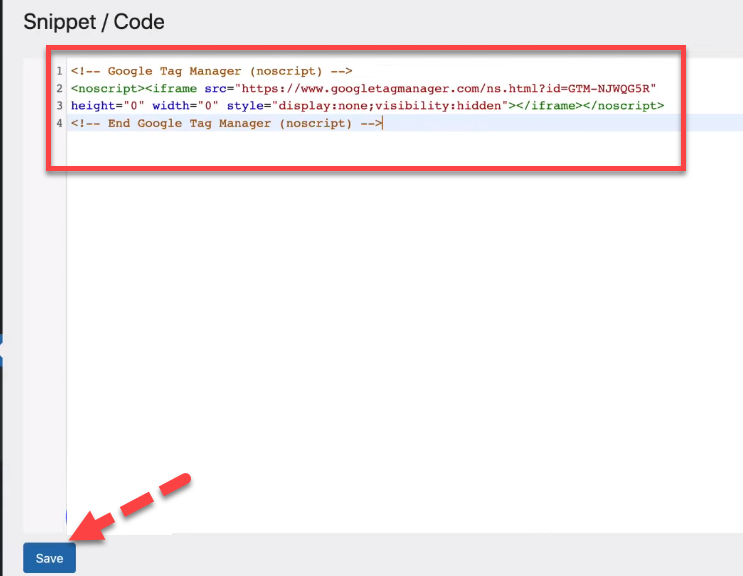
- Scroll to locate the section designated for the snippet/code.
- Paste the code previously copied from the Google Tag Manager for the header.
- Once pasted, finalize the process by clicking the 'Save' button.
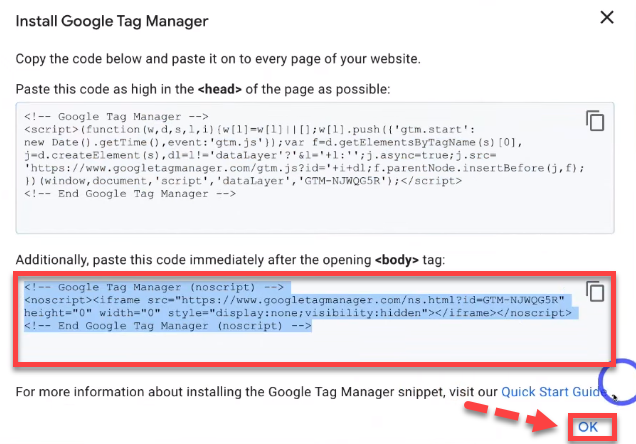
Step 6. Paste HTML Tag Manager Body Code in Footer
Navigate to the HFCM once more and select 'Add New.' For this snippet, label it as 'Google Tag Manager Body.' Ensure that the location is set to 'Footer.' This second code from the Tag Manager acts as the body link, bridging the Tag Manager to your WordPress website.

Retrieve the second code provided by the Tag Manager intended for website integration. To copy it, click on the associated copy icon, followed by confirming with the 'OK' button.
Return to your WordPress interface, scrolling down until you've set the location to 'Footer.' Within the designated section for snippet/code, paste the recently copied code. Finalize your action by pressing the 'Save' button.
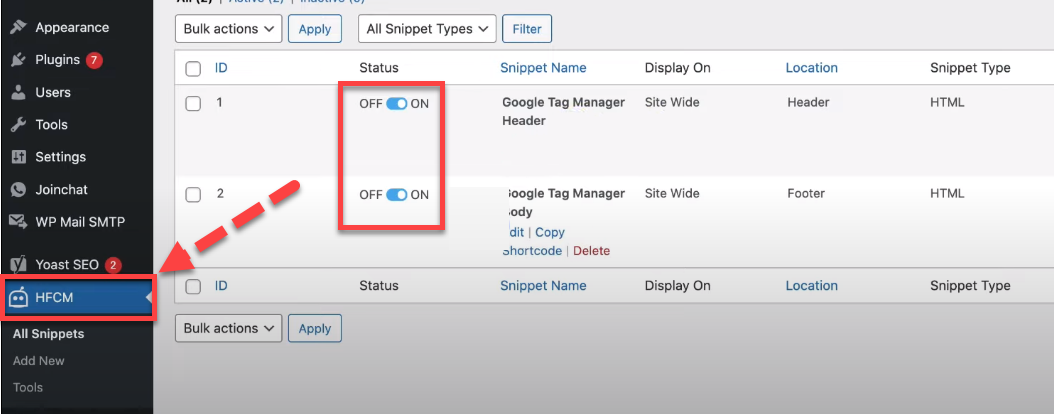
Step 7. Check the Status of Codes
Access HFCM from your dashboard and then choose 'All Snippets.' Snippets will be presented on a page that displays all stored codes after selecting 'All Snippets' in the pop-up.
This is an opportunity to review the status of the embedded codes within your WordPress backend. Note that the newly added codes are set to 'ON,' confirming their active status.
Step 8. Tracking: Check Is Google Tag Manager is Connected to Website
To validate the functionality of the embedded codes and ascertain the connection between your WordPress site and the Tag Manager, it's recommended to install the 'Google Tag Assistant' extension.
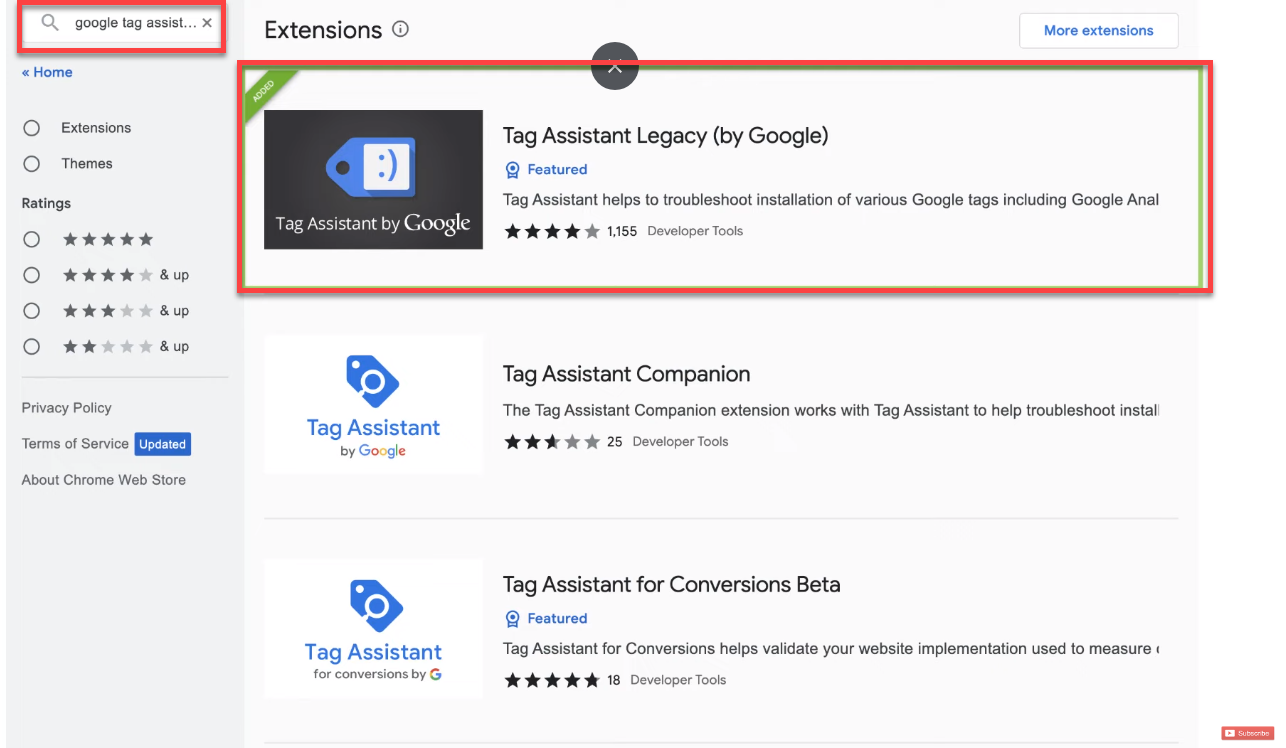
Simply search for the 'Google Tag Assistant' extension using a search engine, and proceed to install the suggested extension.

Post installation, locate and click on the extension's icon, which can be typically found at the top of your browser. Upon selection, a pop-up will appear, indicating the connection status to the Tag Manager.
The message will typically read: 'Tag Assistant Legacy (by Google) identified one tag with access to this site.'

Difference between Google Tag Manager and Google Analytics
Wrapping Up
In the ever-evolving landscape of website optimization and analytics, tools like Google Tag Manager (GTM) have emerged as indispensable assets for web administrators.
By streamlining tag deployment, offering robust features, and ensuring seamless integration, GTM enhances site performance and fosters informed decision-making.
As highlighted in this guide, adopting GTM for your WordPress site, regardless of your industry vertical, paves the way for comprehensive and efficient website management.
By understanding its potential and utilizing it effectively, one can undoubtedly unlock superior website performance and gain valuable insights into user interactions. Dive into the world of GTM and harness the power of data-driven improvements for your website.
FAQs
What is the cost of using Google Tag Manager?
Google Tag Manager offers its primary features for free, catering to most website needs. For enterprises requiring advanced features or dedicated support, there's a paid version, GTM 360, with its pricing tailored to specific needs.
Is Google Tag Manager good for SEO?
Google Tag Manager itself doesn't directly boost SEO. However, streamlining tag implementation ensures faster website performance and allows efficient deployment of SEO-related tags, indirectly aiding SEO efforts.
Is Google Tag Manager the same as server-side tagging?
No, Google Tag Manager facilitates client-side tagging. However, GTM does provide server-side tagging options, a recent addition allowing tags to be processed server-side, improving site performance and data security.
Is Google Tag Manager still being used?
Absolutely, Google Tag Manager remains a popular tool for many businesses and webmasters. Its ability to centralize tag management, integrate with multiple platforms, and facilitate efficient deployment ensures its continued relevance.
Can I use Google Tag Manager on WordPress?
Yes, you can use Google Tag Manager (GTM) on WordPress. It can be integrated either by using a plugin specifically designed for GTM integration or by manually inserting the GTM code into your WordPress theme files.
How to add Google Tag Manager to WordPress without a plugin?
To add Google Tag Manager to WordPress without using a plugin, you can manually insert the GTM code snippets into your theme's header and body tag. This involves editing your theme's header.php file to insert the GTM code just after the <body> tag and possibly the footer.php file or directly before the closing </body> tag, depending on the GTM instructions provided.
What is the best plugin for WordPress Tag Manager?
One of the best and most widely recommended plugins for integrating Google Tag Manager with WordPress is "DuracellTomi's Google Tag Manager for WordPress" (GTM4WP). It offers a comprehensive and user-friendly way to manage your GTM integration, including support for various data layers and Woo Commerce integration for e-commerce sites.


.svg)