


Have you ever encountered the dreaded WordPress white screen of death? It's a frustrating experience that can leave you feeling helpless and locked out of your own website. You're not alone in this struggle, as countless WordPress users have faced this common error at some point.
Whether it's just your admin area or the entire site, this blank screen effectively halts all your digital progress.
The wordpress white screen of death occurs due to errors in your website's PHP files or database. Instead of your usual content, you'll encounter a blank white screen. This error can impact either your entire website or specific sections, depending on its origin.
In this blog post, we'll dive deep into the causes of this error and provide you with a step-by-step guide to troubleshoot and resolve the issue in 13 proven ways.
Whether you're a seasoned WordPress veteran or a newcomer to the platform, understanding how to tackle the white screen of death is crucial.
We'll explore various scenarios, such as when the error affects only specific parts of your website, like the admin area or a particular post.
Throughout this article, we'll arm you with the knowledge and tools necessary to take control of your WordPress site and bid farewell to the white screen of death once and for all.
So, if you're ready to reclaim your website and restore it to its former glory, keep reading as we embark on this troubleshooting journey together.
13 Proven Ways to Fix the WordPress White Screen of Death Error
The WordPress white screen of death may also arise from a theme or plugin that is not coded properly, or there could be a problem with your web hosting server.
Given that the white screen error can stem from various sources, it necessitates systematic troubleshooting to resolve it. Now let’s delve and solve the issue.
Way 1. Resolve Syntax Errors or Restore a Backup
The WordPress White Screen of Death (WSOD) is a common, yet highly frustrating error that displays a blank white screen when you try to load a page. This issue can affect both your website and the WordPress admin area, making it completely inaccessible.
One of the methods we can follow to resolve this wordpress white screen of death error is to restore a backup of the file and your wordpress site. Let’s delve into how you can restore the database to resolve the wordpress white screen of death error.
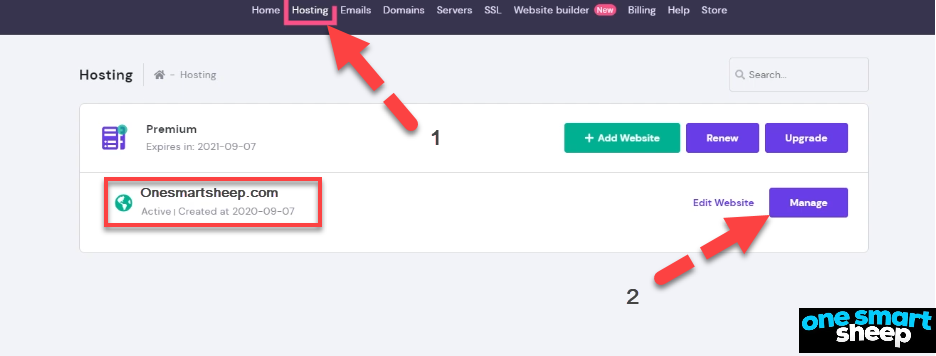
Step 1: Access Your Hosting Account
First, log in to your hosting account and navigate to the hosting section. Select the specific website you wish to restore. In your website’s management area, find and click on "Manage."
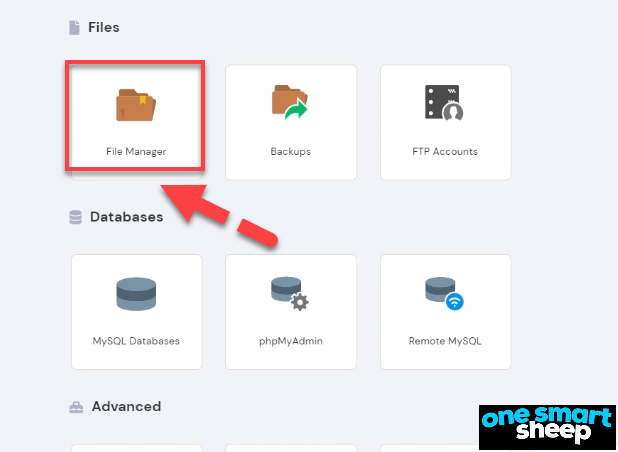
Step 2: Locate the Database Name
Navigate to the File Manager from the dashboard.
If you have multiple sites hosted, go to the domain section and open the folder of the site you're restoring.
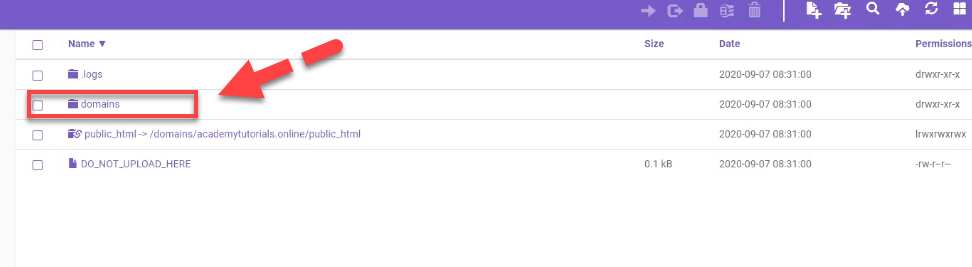
Inside this folder, find and click on public_html.
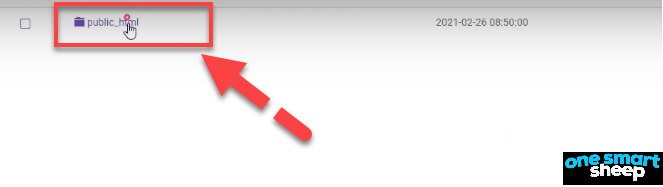
Scroll to locate the wp-config.php file, right-click it, and select "Edit."
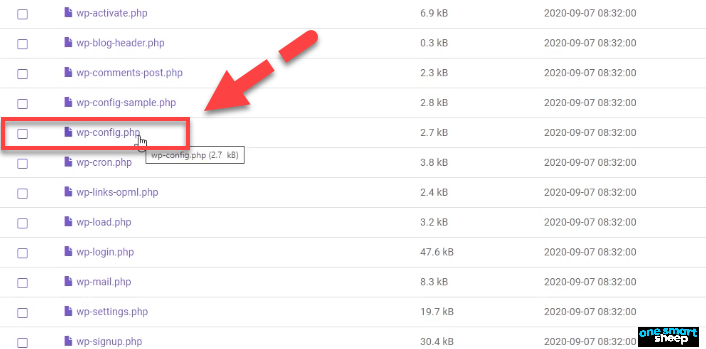
In this file, scroll to find the database name, note it down, or copy it. This information is crucial for later steps.

Step 3: Restore Files
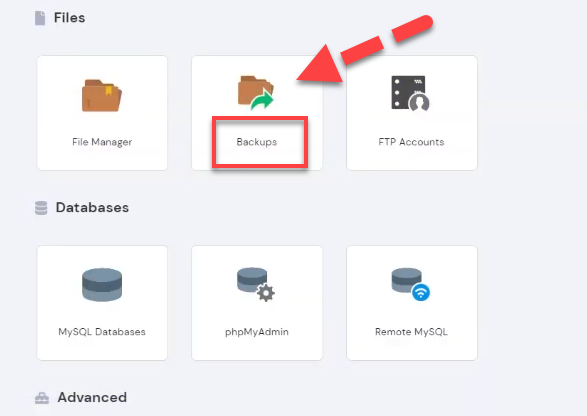
Go back to the main dashboard of your hosting account and select "Backups." To restore your site, you need to recover both files and the database.
Start with the files: click "Select,"
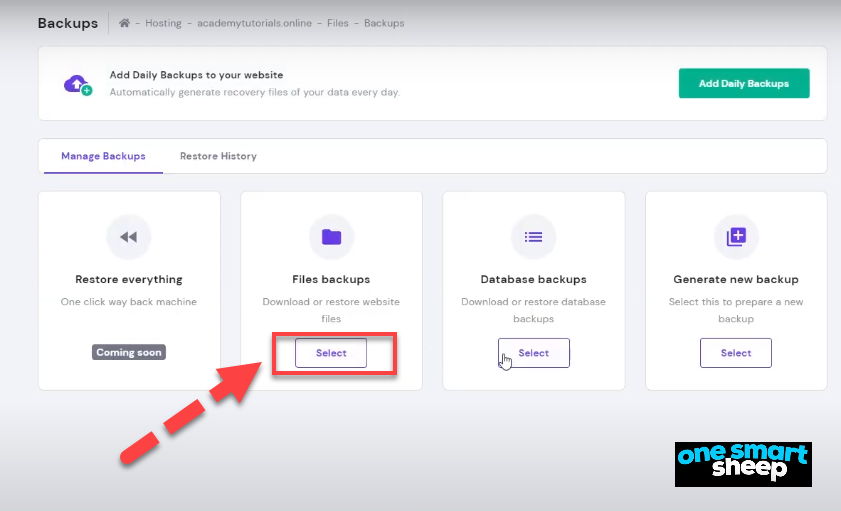
Choose the appropriate backup date (preferably the most recent one), and then select "Show files."

Choose the correct folder for your site, then click "Restore Files." Confirm the restoration and wait for the process to complete.

Step 4: Restore the Database
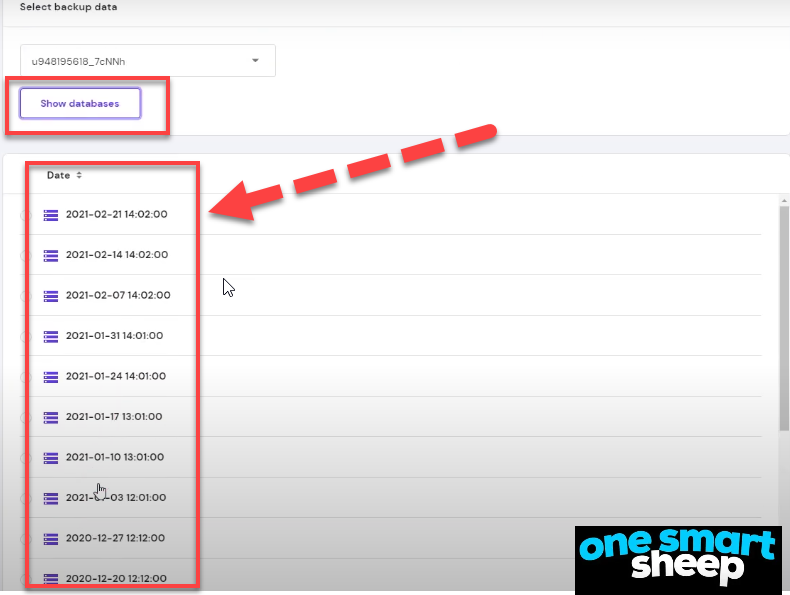
After restoring the files, proceed to restore the database. Go back to the backups section and select "Database Backups."

Remember the database name you noted earlier? Use that to select the correct database from the list if you manage multiple sites.

Just as with the files, select the most recent backup date for the database.
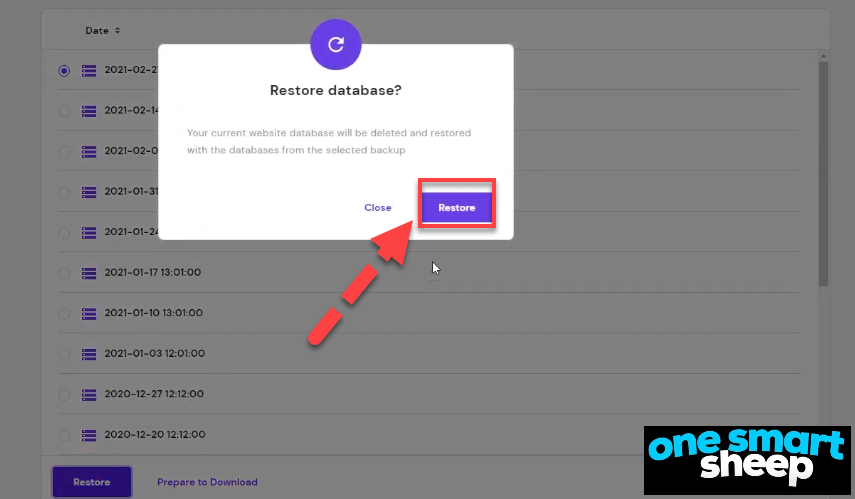
Then click "Restore." Confirm the restoration.
Step 5: Verify Your Site
Once both the files and database have been restored, visit your website and refresh the page to ensure everything is functioning correctly. Your site should now be restored to its previous state.
Restoring your WordPress site can seem daunting, but by following these clear steps, you can efficiently resolve issues and get your site back online.
Way 2. Fix the White Screen Error by Disabling All Plugins
Now we'll guide you through the process of disabling WordPress plugins directly from your cPanel. This method can be particularly useful if you cannot access your WordPress site due to WordPress white screen of death error.
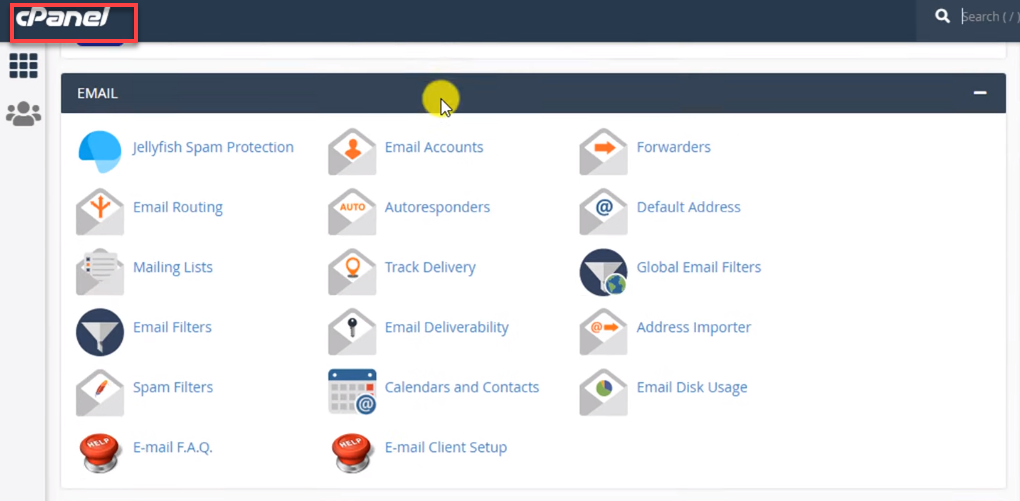
Step 1: Access cPanel
First, log into your cPanel. You can typically do this by appending "/cpanel" to your website’s URL or by accessing it through your hosting provider's dashboard.
Step 2: Open File Manager
Once logged in, use the search bar to find the "File Manager" and open it. This tool allows you to manage all the files related to your website.

Step 3: Navigate to the WordPress Directory
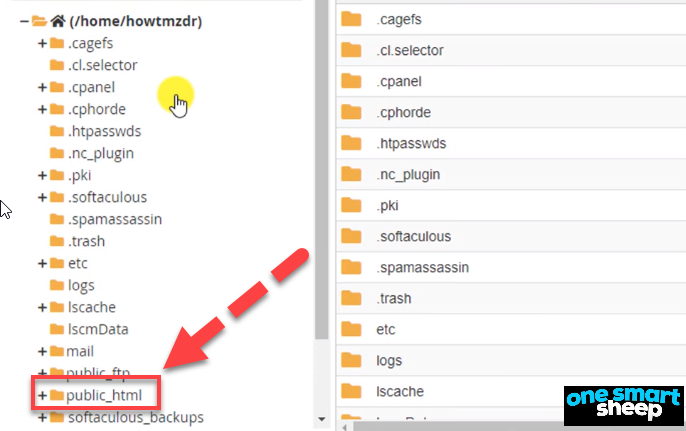
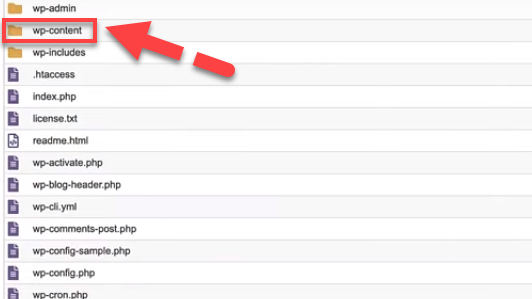
In the File Manager, locate and open your root directory, which is usually named public_html.
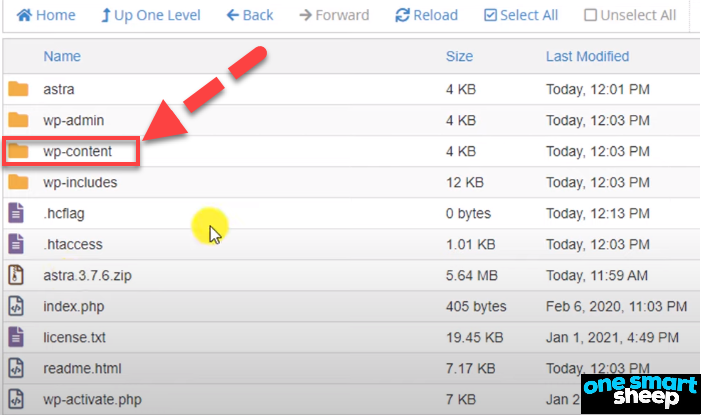
Step 4: Access the WP Content Folder
Inside the public_html directory, find and open the wp-content folder. This folder contains your themes, plugins, and media files.
Step 5: Disable All Plugins
If you need to disable all plugins:
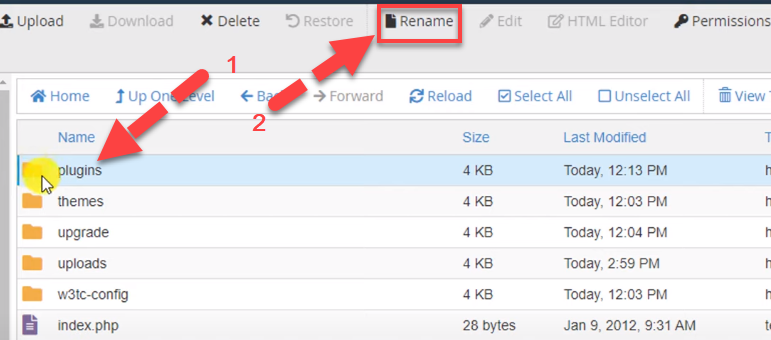
- Locate and select the plugins folder within the wp-content directory.
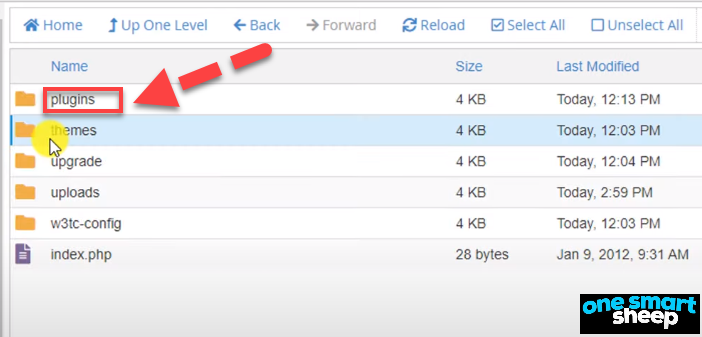
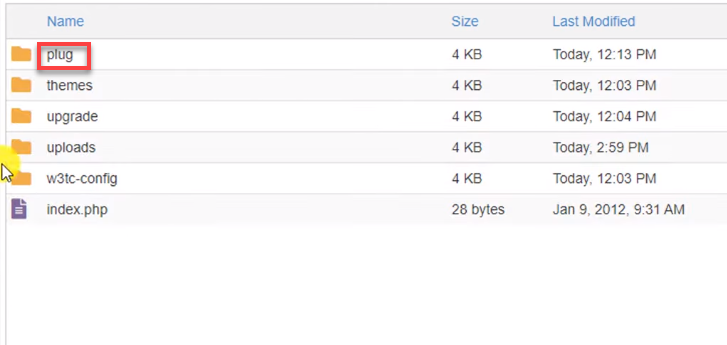
- Click on "Rename" and change the folder's name (for example, from "plugins" to "plug_disabled"). This action will disable all plugins because WordPress can no longer locate the folder.
Step 6: Disable a Specific Plugin
If you only want to disable a specific plugin:
- Open the newly renamed plugins folder.
- Find the folder corresponding to the plugin you wish to disable.
- Select and rename this folder (for example, change from "pluginname" to "pluginname_disabled").
- This will disable the specific plugin without affecting others.
Way 3. Activate the Default Theme
If deactivating plugins didn’t resolve your issue, the next troubleshooting step is to replace your current WordPress theme with a default theme. This guide will walk you through the process using your website's File Manager.
Step 1: Access File Manager
Log into your hosting account and open the File Manager. This tool allows you to navigate and manage the files associated with your website directly.
Step 2: Navigate to the Theme Folder
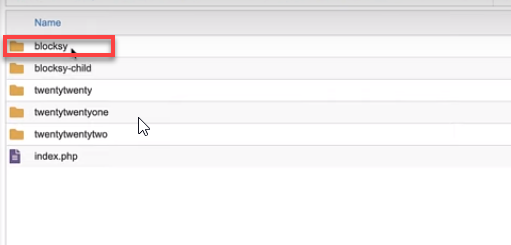
In the File Manager, locate and double-click on the wp-content folder. Inside this folder, you will find another folder named themes. Double-click to open it.
Step 3: Backup Your Current Theme
Before deleting your current theme, it's crucial to create a backup:
- Locate the folder of the theme you are currently using (e.g., "bloxy").
- Right-click on the theme folder and select "Compress". Choose your preferred archive format and compress the file.

- After compressing, refresh the File Manager (you may need to click "Reload") to see the new compressed file.
- Right-click on the compressed file and select "Download" to save a backup of your theme locally.

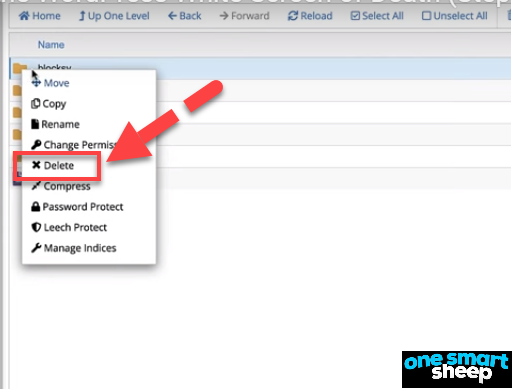
Step 4: Delete the Current Theme
- With the backup saved, you can now safely delete the theme folder:
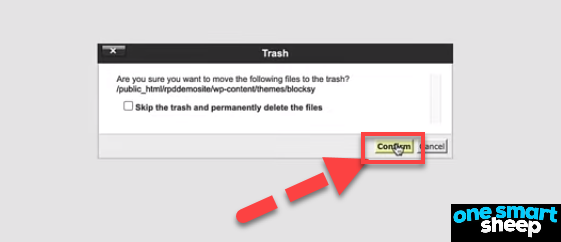
Right-click on the theme folder and select "Delete". Confirm the deletion to remove the folder.
Confirm by clicking on the confirm button in the popup.
Step 5: Revert to a Default Theme
Once the folder is deleted, WordPress will automatically revert to one of the default themes (like Twenty Twenty-One or Twenty Twenty-Two):
- Go to your WordPress dashboard and navigate to Appearance > Themes.
- You should see that a default theme is now active.
Step 6: Check Your Website
After switching to the default theme, revisit your site to see if the White Screen of Death has been resolved. If the site is working, the issue was likely with the previous theme.
Way 4. Check Whether the Problem Happens on Your Other Sites
When troubleshooting the WordPress White Screen of Death, it's important to determine if the issue is isolated or affecting multiple sites on the same hosting account. Start by checking other WordPress installations you have under the same hosting.
If they're also experiencing problems, this is a likely indication of a broader issue with the hosting service itself, possibly a temporary outage or server problem. In this case, contact your hosting provider's support team for assistance.
If the white screen appears only on one site or a specific part of a site, this narrows down the issue to something specific with that website. Knowing this helps you focus your troubleshooting efforts on individual site configurations, themes, or plugins.
Way 5. Increase the PHP Text Processing Capability
Increasing the PHP memory limit can help improve your WordPress site's performance, especially if you're experiencing memory exhaustion issues.
Here's a quick guide on how to increase the PHP memory limit directly from your WordPress dashboard using a plugin.
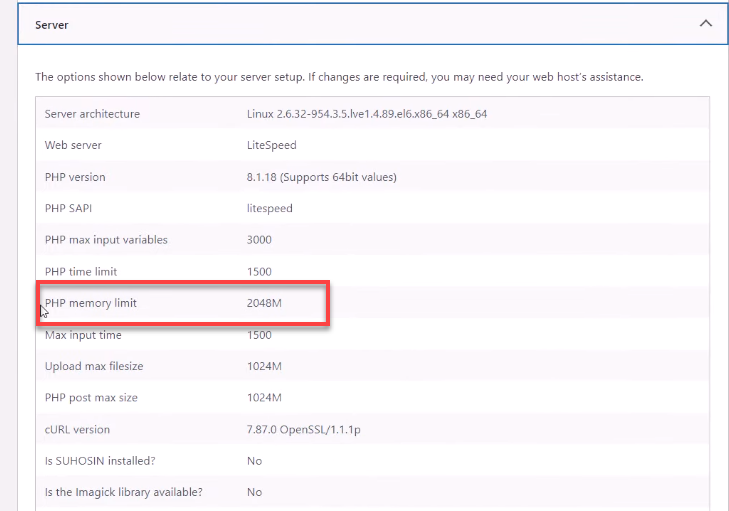
Step 1: Check Current PHP Memory Limit
- Log into your WordPress dashboard.
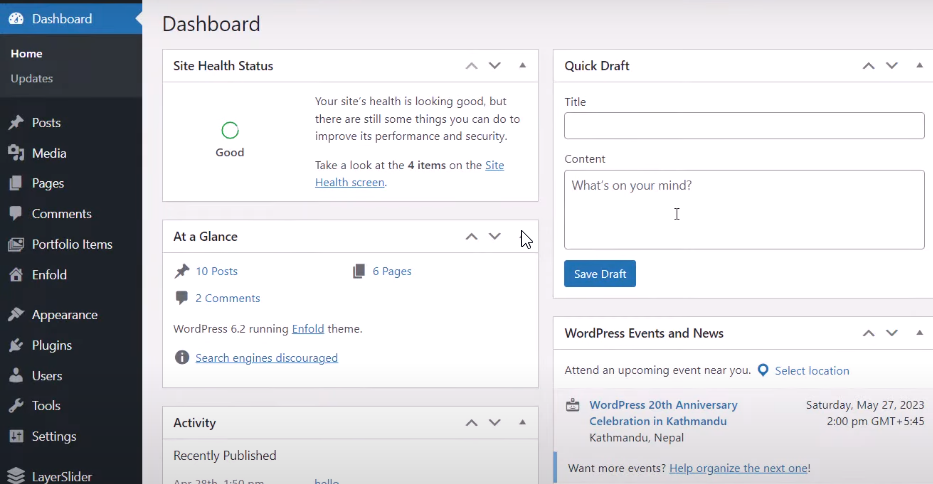
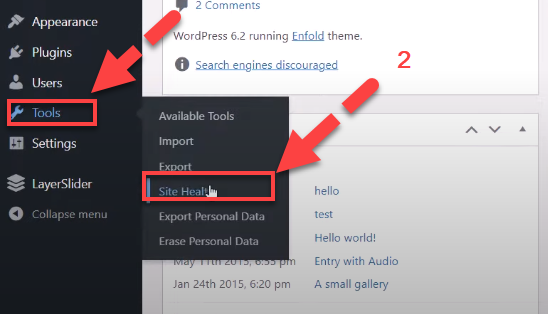
- Navigate to Tools > Site Health > Info.
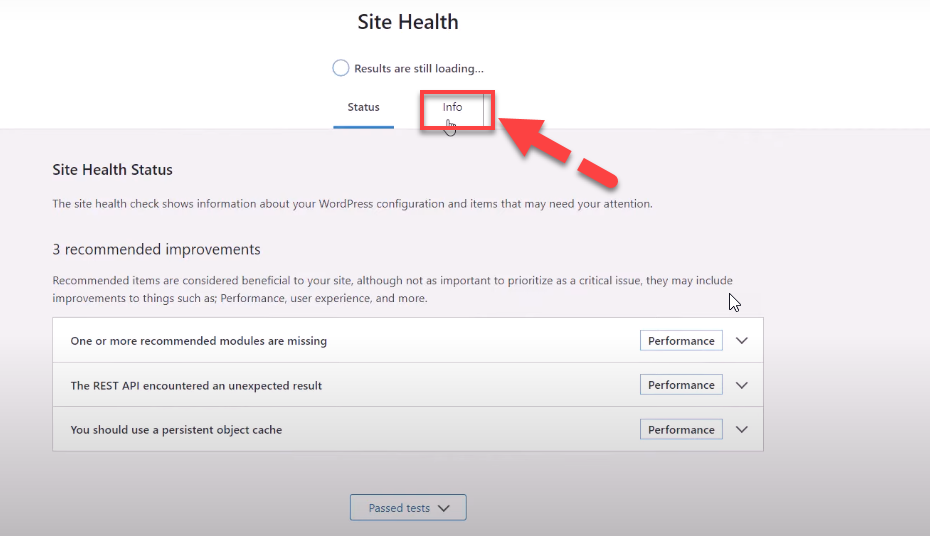
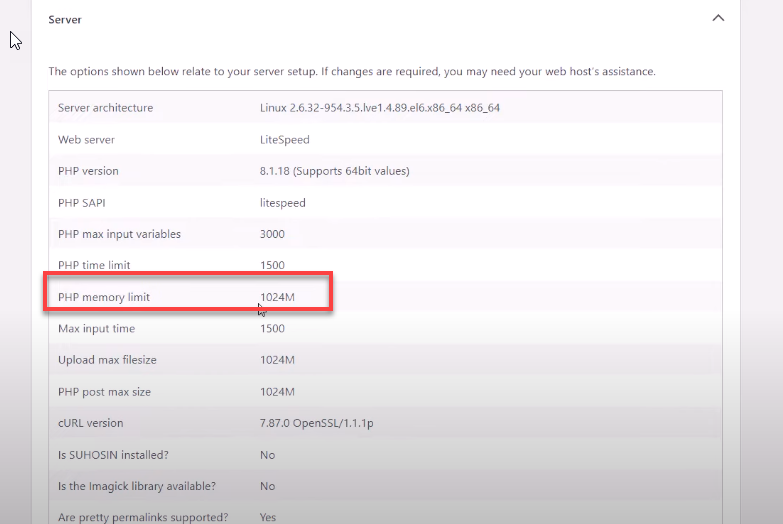
- Click on the Server tab to view the current PHP memory limit, which might be set at 1024 MB as an example.
Step 2: Install File Manager Plugin
To change the PHP memory limit, you can use a File Manager plugin, which allows you to edit files directly from your dashboard:
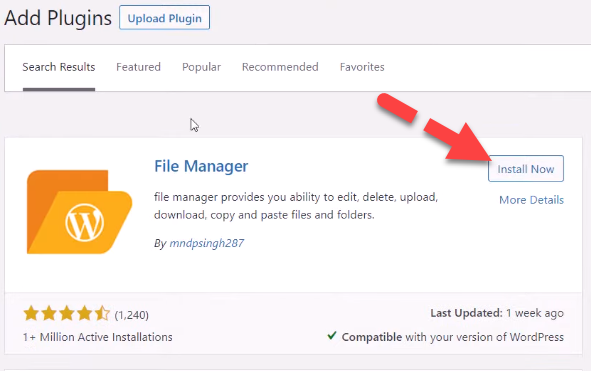
- Go to Plugins > Add New.
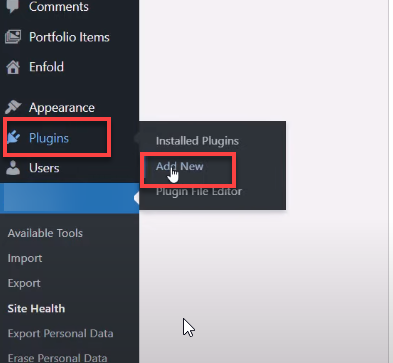
- Search for "File Manager."
- Install and activate the File Manager plugin.
Step 3: Access and Edit the wp-config.php File
With the File Manager plugin activated:
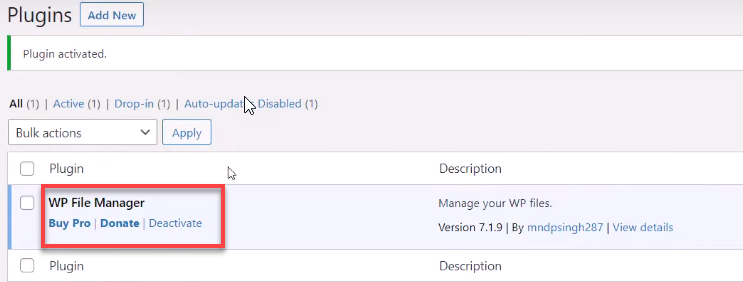
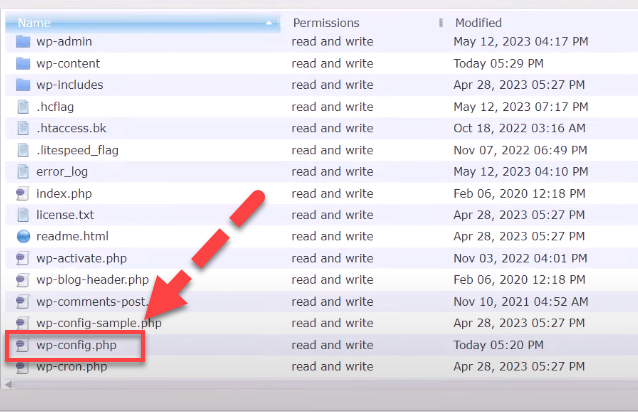
- Click on the File Manager from your dashboard to access your website's files.
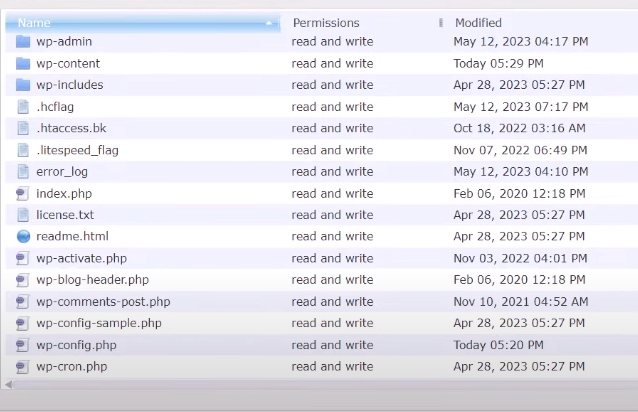
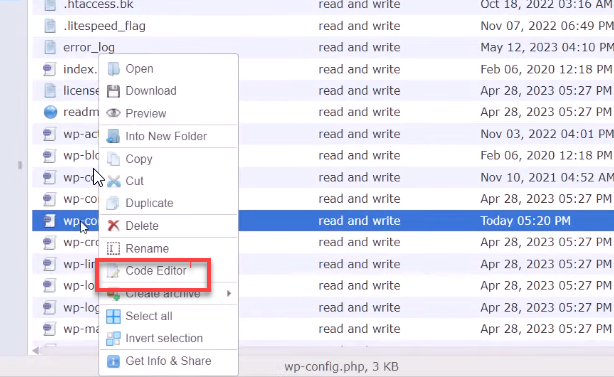
- Locate the wp-config.php file, right-click on it, and select Code Editor.
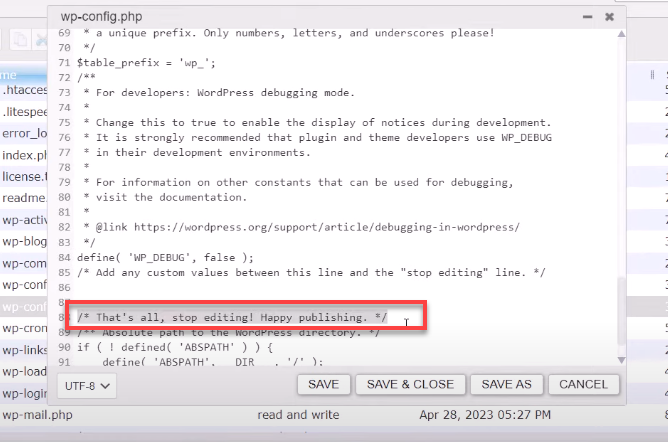
- In the editor, scroll down to the line that says /* That's all, stop editing! Happy publishing. */.
Step 4: Increase PHP Memory Limit
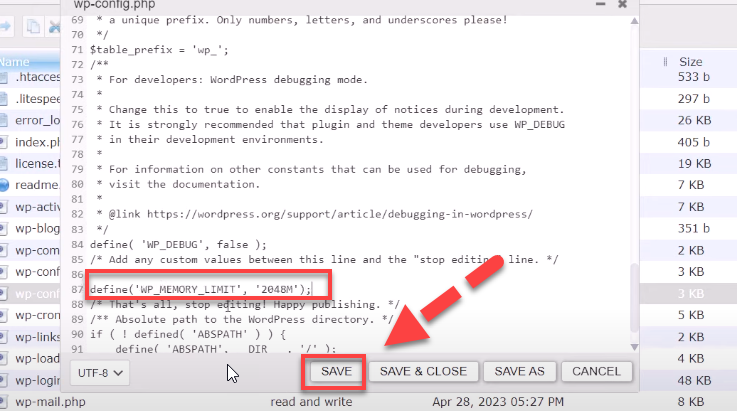
Directly above the /* That's all, stop editing! Happy publishing. */ line, add the following line of code to increase the memory limit:
define('WP_MEMORY_LIMIT', '2048M');
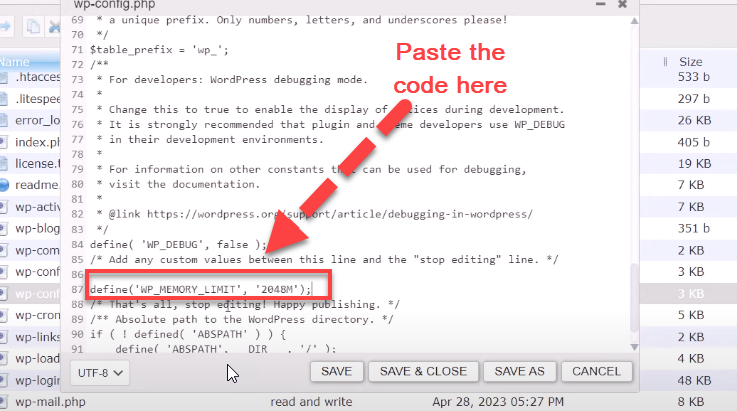
You can adjust the '2048M' to a different number based on your requirements.

- Save the changes to the wp-config.php file.
Step 5: Verify the New Memory Limit
To confirm the change:
- Go back to Tools > Site Health > Info.
- Click on the Server tab again to check if the PHP memory limit has increased to the new value, such as 2048 MB.
Step 6: Deactivate and Delete the File Manager Plugin
Once you've successfully updated the PHP memory limit, you can deactivate and uninstall the File Manager plugin if it's no longer needed:
- Go to Plugins, find the File Manager plugin, deactivate it, and then delete it.
Way 6. Check for Server Availability
To efficiently diagnose and resolve issues with website accessibility, it's essential to first confirm whether your server is operational.
This can be quickly determined using an online status checker like "Is This Website Down?" which helps identify if the problem is related to server downtime, issues with browser caching, or IP conflicts.
If the tool indicates that your server is down, the immediate next step is to contact your hosting provider. Providers, especially those offering managed cloud hosting services like Cloudways, are equipped to handle such issues promptly and can help get your server back online as quickly as possible.
Additionally, consider setting up ongoing monitoring through a comprehensive service to receive real-time alerts about your site's status, allowing for rapid response to future downtimes.
This proactive approach not only minimizes disruptions but also enhances the reliability of your website.
Way 7. Fix the White Screen Error With WordPress Recovery Mode
When your WordPress site encounters a White screen of death error such as during a plugin update or after installing an incompatible plugin, it can leave you unable to access both your homepage and the WP admin.
Fortunately, WordPress has a built-in safety mechanism called "Recovery Mode" that helps you regain control and resolve the issue.
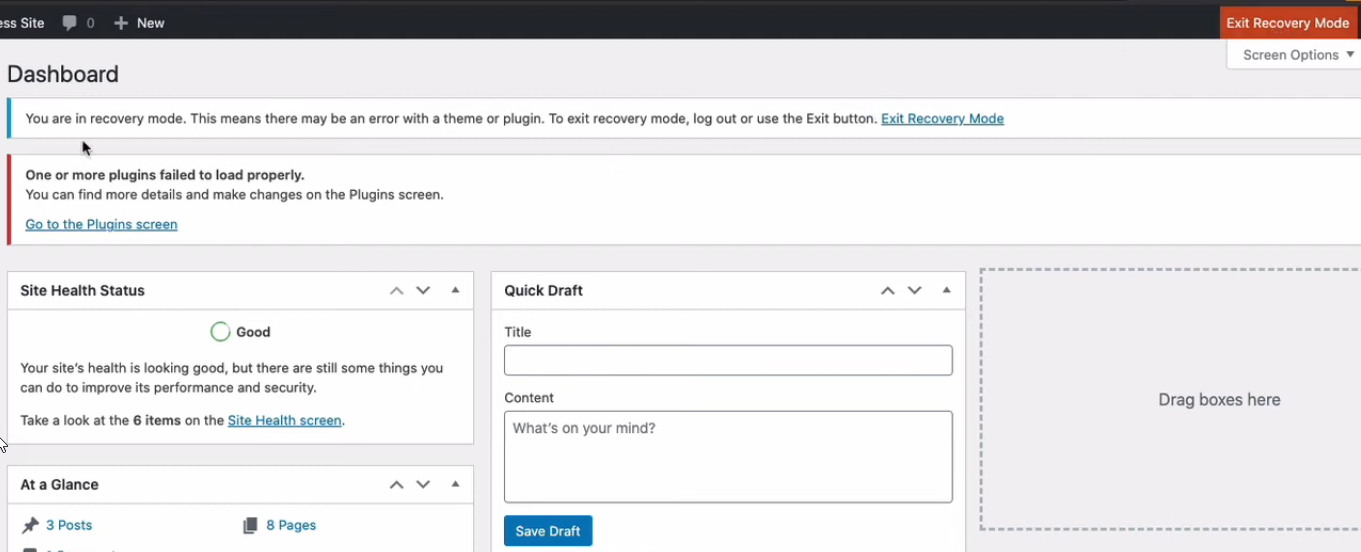
Accessing Recovery Mode
When a white screen of death error occurs, WordPress will typically display an error message with a link to enter Recovery Mode. This feature was introduced in WordPress 5.2 to enhance site management during errors. Check the admin email associated with your site, as WordPress sends a link to this email that allows you to enter Recovery Mode.
Steps to Resolve the Critical Error
- Check Your Admin Email: Open your admin email to find the recovery link sent by WordPress.
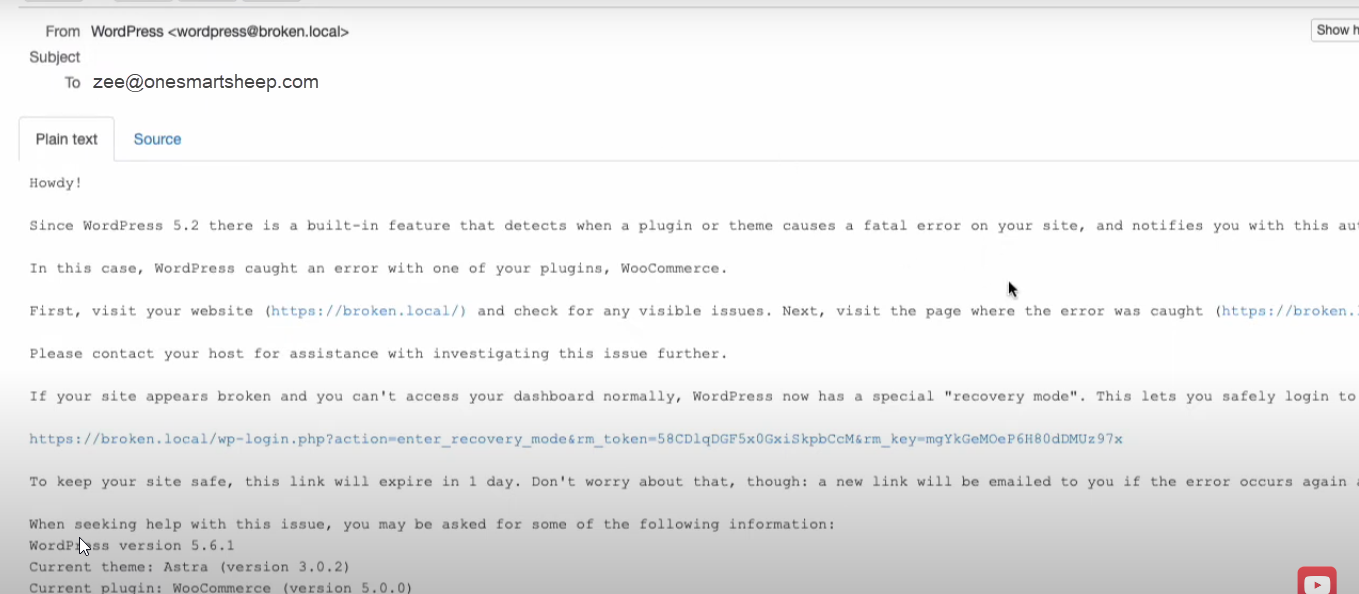
This link is crucial as it lets you access your site in Recovery Mode but is only active for 24 hours. If expired, trigger a new email by attempting to access your admin panel again.
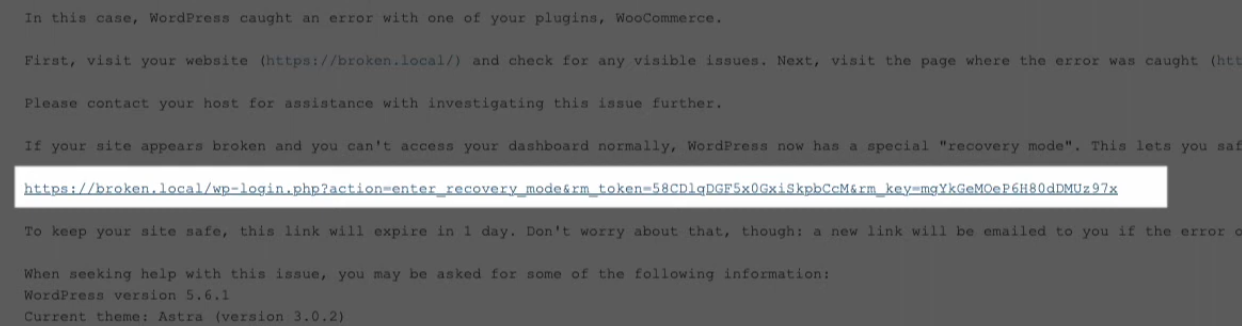
- Enter Recovery Mode: Click the recovery link to log into your site. Once logged in, you'll see notifications indicating that you are in Recovery Mode. This mode temporarily disables the problematic plugin, allowing you to access the backend without the site breaking down.
- Identify and Deactivate the Problematic Plugin: In Recovery Mode, navigate to the plugin page where the issue originated.
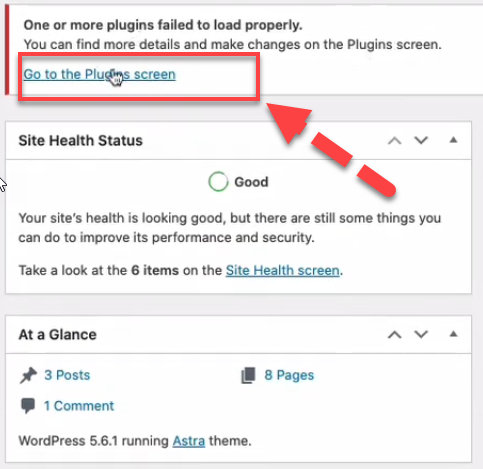
WordPress will highlight the problematic plugin in red and provide details about the specific error.
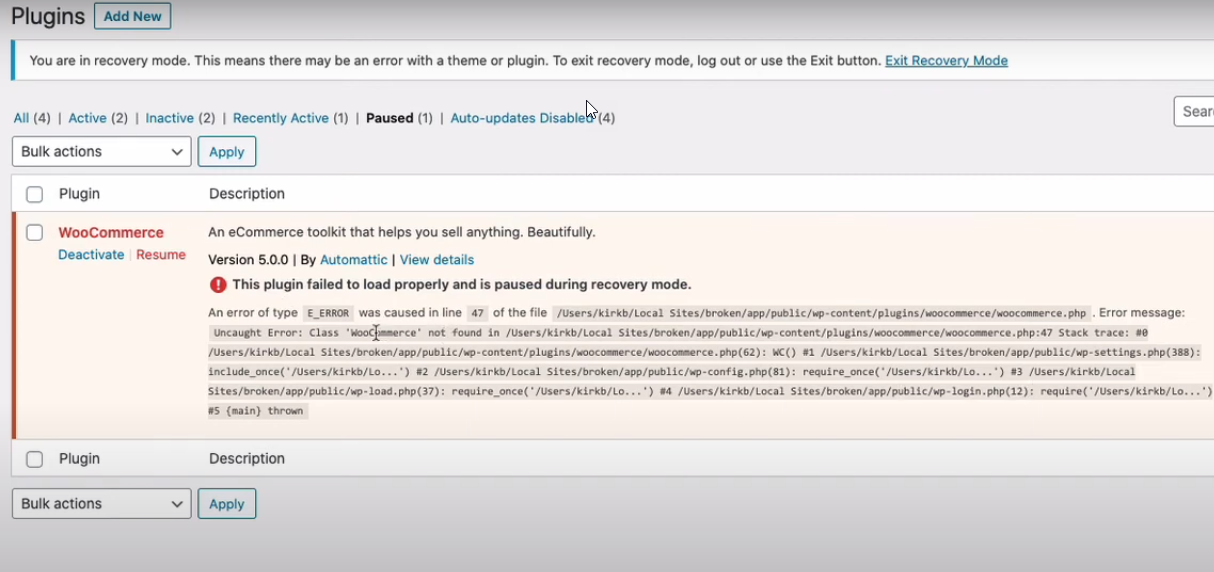
You have the option to either deactivate the problematic plugin or attempt to reactivate it (which might not resolve the issue if the plugin is still incompatible).
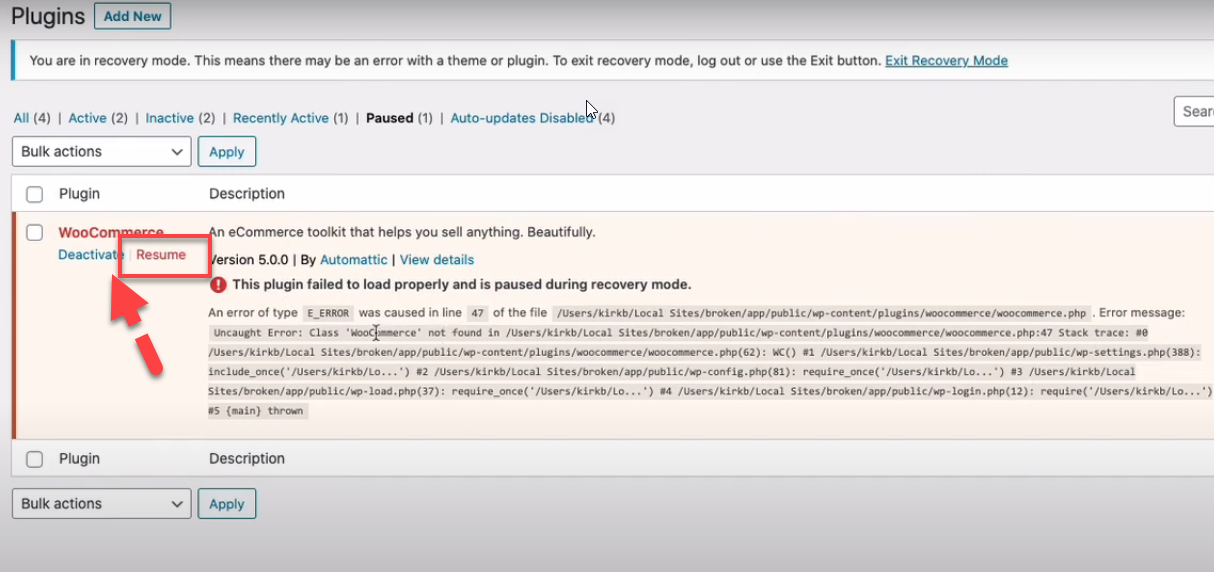
- Restore Site Functionality: After deactivating the problematic plugin, your site should return to normal functionality. If the plugin was essential (like WooCommerce in our example), you'll need to either resolve the issue with the plugin or find an alternative solution to avoid future disruptions.
- Exit Recovery Mode: Once the issue is resolved, you can exit Recovery Mode by clicking the link at the top of your admin dashboard. This returns your site to its normal operational state.

Way 8. Get in Touch with Your Hosting Provider
If the WordPress White Screen of Death persists, reaching out to your hosting provider is a critical next step.
The hosting support team has deep insights into the server's operation and can identify issues beyond your access scope.
They can check for recent updates or changes that may have affected your site's functionality. If the problem originates from their side, they have the necessary tools and authority to rectify it, ensuring your site is restored promptly.
Engaging your hosting provider can quickly resolve issues that are otherwise out of reach, minimizing downtime and restoring normal operations.
Way 9. Enable Debug Mode to Catch Errors in WordPress
If all previous attempts have failed to resolve the issue, the next advisable step is to enable debugging in WordPress. This process will generate error logs that provide insights into the types of errors occurring.
To enable debugging, insert the following lines into your wp-config.php file:

With these settings activated, instead of a blank screen, WordPress will display errors, warnings, and notices that can help you pinpoint the underlying problem.
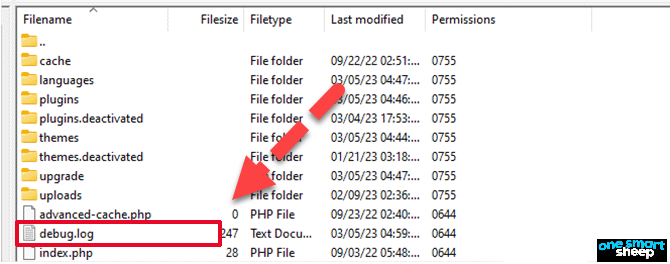
If no errors appear on the screen, it's still wise to check the debug log. Access the wp-content directory of your website via an FTP client to locate the newly created debug.log file.
This file will contain detailed records of all errors, notices, and warnings, aiding in further troubleshooting.
Way 10. Check File Permission Issues
Ownership and permission settings on your server can sometimes lead to the White Screen of Death (WSoD) in WordPress.
Adjusting these settings can resolve the issue, but caution is advised because incorrect permissions can expose your site to security risks.
For safe WordPress file management, adhere to these permission guidelines:
- Files: Set permissions to 664 or 644, ensuring that files are writable by your user account and readable by everyone else.
- Folders: Use 775 or 755 permissions, which allow the server to execute files within these directories.
- wp-config.php: This crucial file should be more restricted, with permissions set to 660, 600, or 644 to safeguard sensitive information.
If you have SSH access and are comfortable with command-line operations, you can apply these settings directly. Navigate to the root directory of your WordPress installation and run the following commands:
Set file permissions:
sudo find . -type f -exec chmod 664 {} +

Set directory permissions:
sudo find . -type d -exec chmod 775 {} +

Secure wp-config.php:
sudo chmod 660 wp-config.php

Way 11. Check for Failed Auto-Update Issues
WordPress occasionally encounters update-related issues, such as server timeouts, which can sometimes resolve themselves.
However, there are instances where these complications result in the WordPress White Screen of Death (WSoD). To tackle this, you should first check for lingering issues in your site's root directory.
To address potential update issues causing the WSoD, follow these steps: Check for a .maintenance file in your WordPress root directory; it may be hidden.
Delete it if found, then reload the site. If issues persist, assess the update status; if incomplete, WordPress might retry automatically.
If the problem persists, you might need to perform a manual update of WordPress.
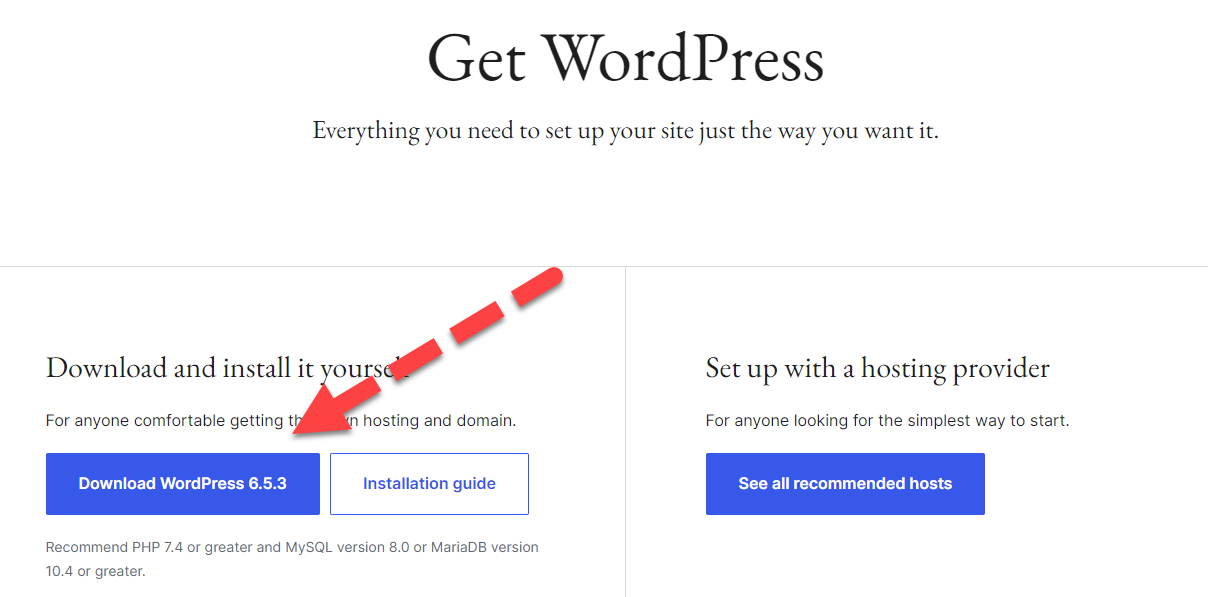
This involves downloading the latest version of WordPress from the official site, and using FTP to manually update the core files. This step should ideally correct any discrepancies caused by the failed update.
Way 12. Restore Any Recently Edited File to Its Initial Version
Occasionally, making direct changes to your website's code without preliminary testing on a development or staging environment can lead to the dreaded White Screen of Death. This issue often arises when critical files such as wp-config.php or .htaccess are modified improperly.
To resolve this, if you find yourself without a backup of the original files, you will need to obtain fresh copies.
Start by downloading the latest version of WordPress from the official website, WordPress.org. Once you download the WordPress package, unzip the folder to extract the needed file(s).
After securing the fresh files, connect to your website using an FTP client or the File Manager provided by your hosting service.
Navigate to the directory containing the problematic file. It's advisable to remove or rename the existing file (as a backup measure) before uploading the fresh copy.
By replacing the corrupted or incorrectly modified file with a new one, you should be able to restore your site's functionality.
Always remember, for future modifications, utilize a staging environment to prevent such issues from impacting your live website.
Way 13. Clear the WordPress Cache
I'll show you how to clear the cache in your WordPress site to ensure it runs smoothly and efficiently. This will be helpful if no method from above is working. Let’s delve into the step by step guide.
Step 1: Install a Cache Plugin
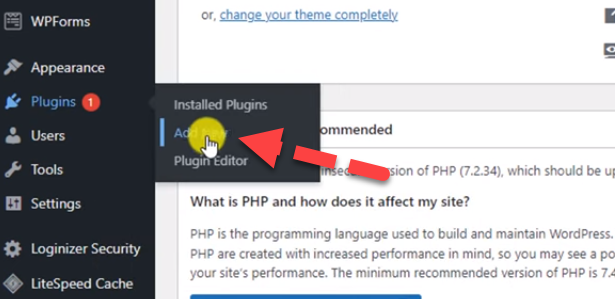
Start by logging into your WordPress dashboard. From the sidebar, hover over Plugins and click on Add New.
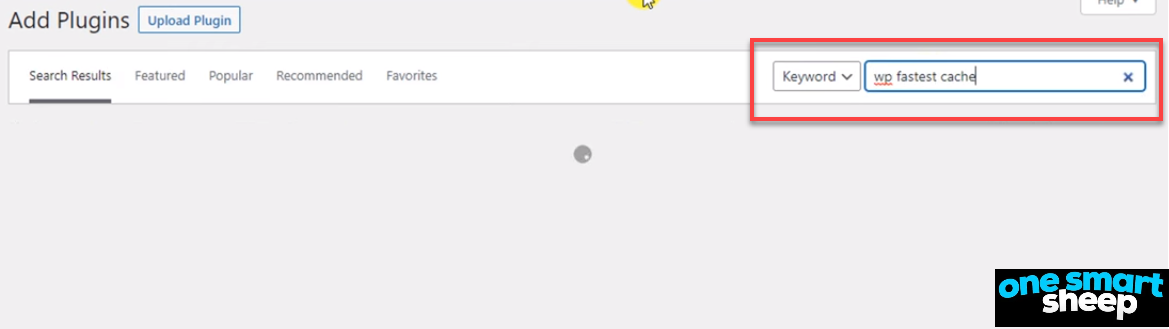
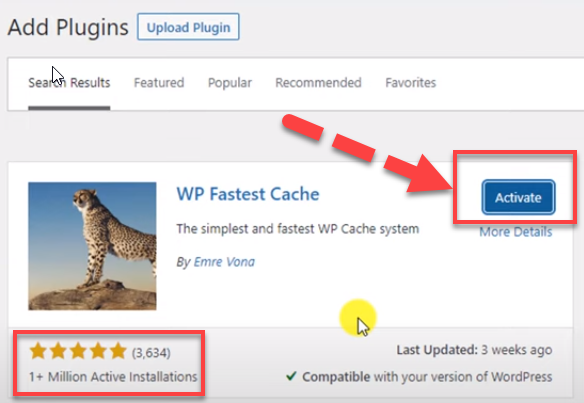
In the search bar, type in “WP Fastest Cache” and hit enter.
Step 2: Activate the Plugin
Once you find the WP Fastest Cache plugin, click Install and then Activate to enable it on your WordPress site.
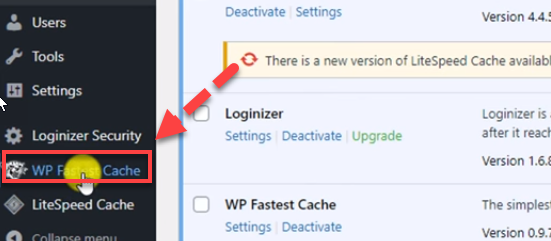
Step 3: Access the Plugin Settings
After activation, you’ll notice a new menu option in your dashboard labeled WP Fastest Cache. Click on this to access the plugin’s settings.
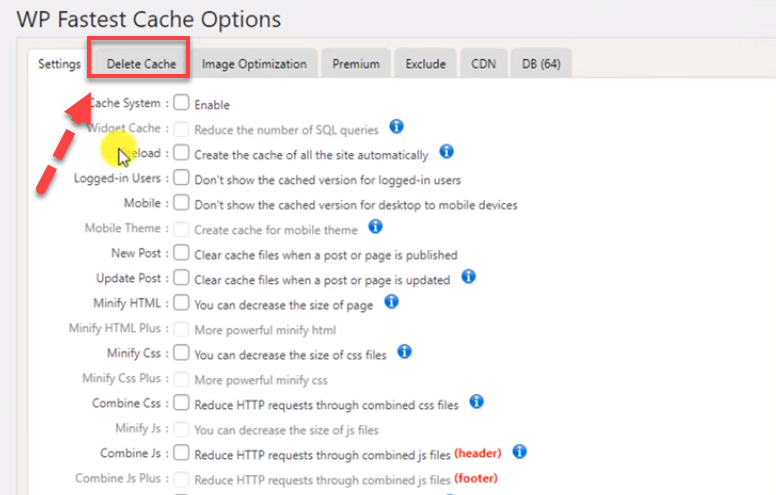
Step 4: Clear the Cache
Inside the WP Fastest Cache settings, look for the Delete Cache tab. Click on it, and you will see an option to Clear All Cache. Click this button to clear all cached data.
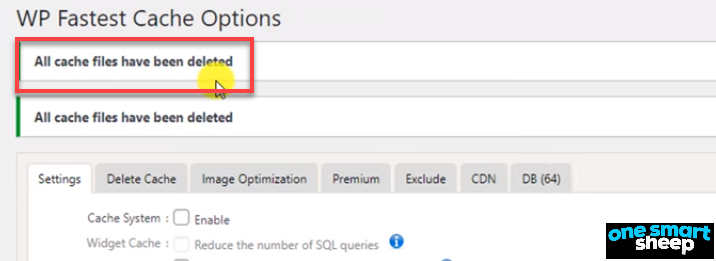
Step 5: Confirm Cache Deletion
After clicking, the system will process your request, and all cached data will be deleted.

You should see a confirmation that the cache has been successfully deleted.
Wrapping Up
The WordPress White Screen of Death may seem daunting, but it is not insurmountable. With the step-by-step guidance provided, from resolving plugin and theme issues to checking server availability and increasing PHP memory limits, you're well-equipped to tackle this problem.
Each method discussed offers a pathway to regain control of your WordPress site, ensuring it runs smoothly and remains accessible.
Whether you're a seasoned developer or a WordPress novice, these strategies empower you to restore your site's functionality and ensure a robust digital presence.
So, take a deep breath, choose your troubleshooting approach, and start reclaiming your website from the white screen of death.
With persistence and the right techniques, you'll have your site back up and running in no time.


.svg)