


If you want to make a unique silo structure you need to know how to make your own url for blog. This helps you to share the customized URL easily.
For example, One Smart Sheep uses php.in for their customized branded short URLs. Or you can create URLs according to your silo structure. A plugin named “Permalink Manager Lite” I used many times for creating customized urls.
In this guide we will walk through the simple visual steps on how to create customized urls for blog posts. We will discuss the two methods below: one is the usage of Bitly and second we will create a url using a plugin.
Let’s get started for better SEO results with custom short urls.
2 Methods: How to Create Customized Short URL for Blog
We can create URLs for our blog that align with our intended meaning. There are two methods to achieve this. The first approach involves using a plugin, while the second method utilizes Bitly, allowing us to generate custom URLs according to our preferences.
By using custom URLs, we can optimize our blog for better SEO. It makes the URLs memorable and relevant, helping search engines better understand the content. Simple and precise URLs can improve search rankings.
Let’s discuss the methods one by one.
Method 1: Use “Permalink Manager Lite” Plugin to Create Own URL for Blog (Recommended)
Whenever I need to create a customized url for a blog , I always use the permalink manager lite Wordpress plugin, the most recommended. Let’s discuss how we can use this plugin.
Step 1. Install and Activate Plugin
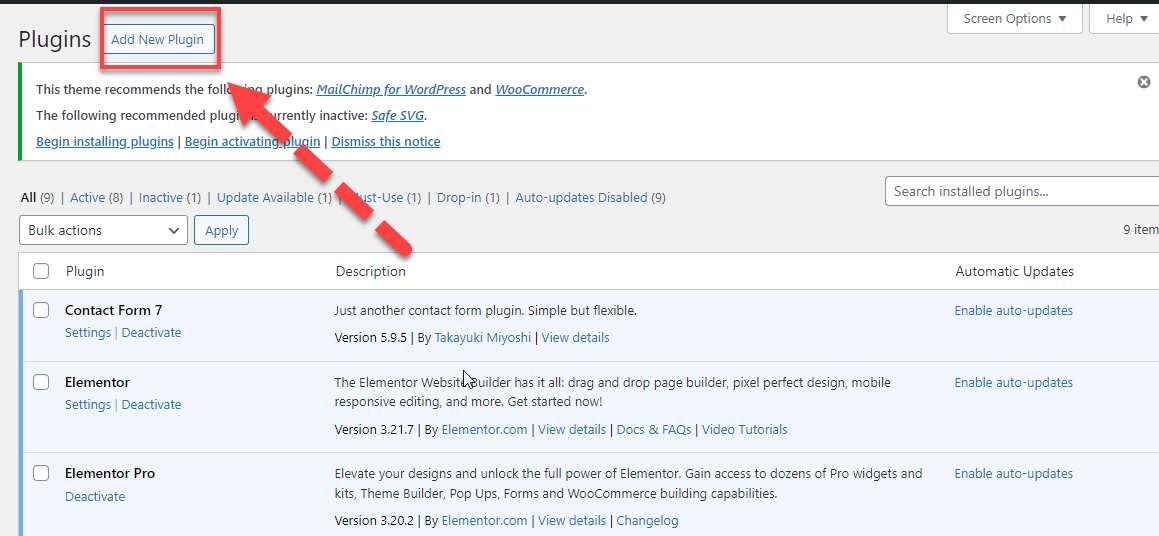
In order to install the plugin you need to visit the Wordpress dashboard, then navigate for the appearance. Below the appearance, there will be a “plugin” option. Click on it.

Then click on the “Add New Plugin” button at the top left corner of this page.
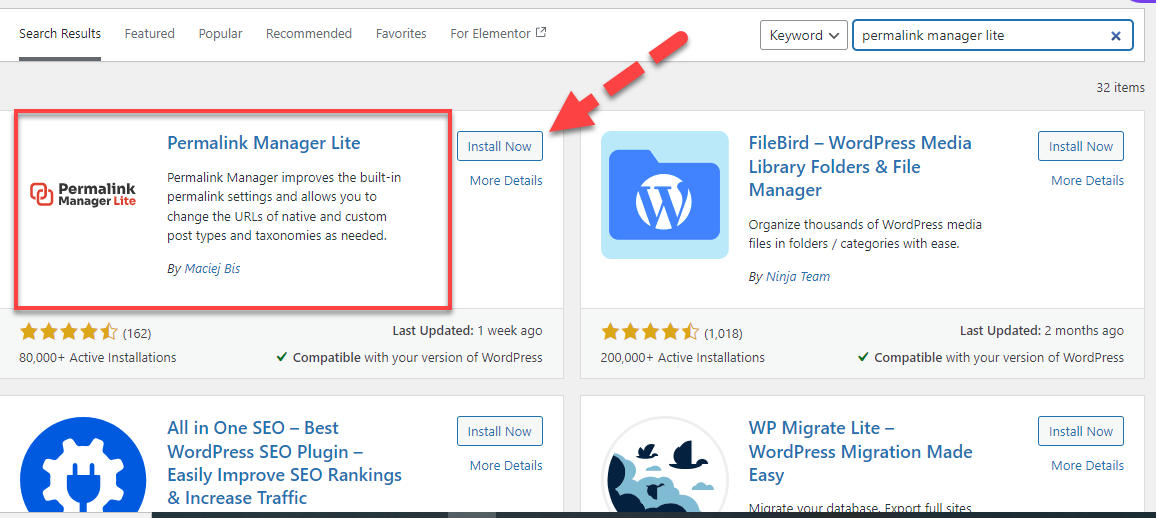
Write the “permalink manager lite” in the search bar. Our desired plugin will be at the top left side. Install it by clicking the “Install Now” button.
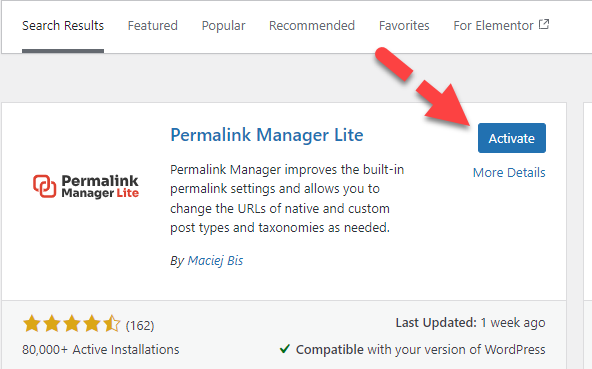
After the installation is done, now for the final step click on the blue “Active” button.
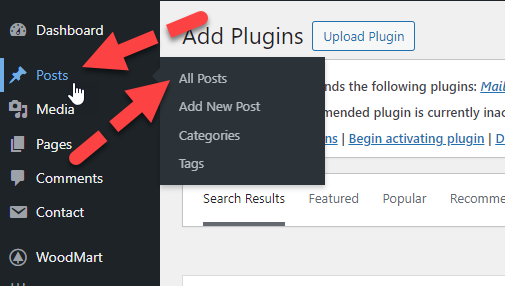
Step 2. Open Posts from the Dashboard
Now from the dashboard, you will find posts at the very top of the dashboard left sidebar. Give it a click. Then a side bar will open containing options in which there will be “All Posts” at top. Click on it.
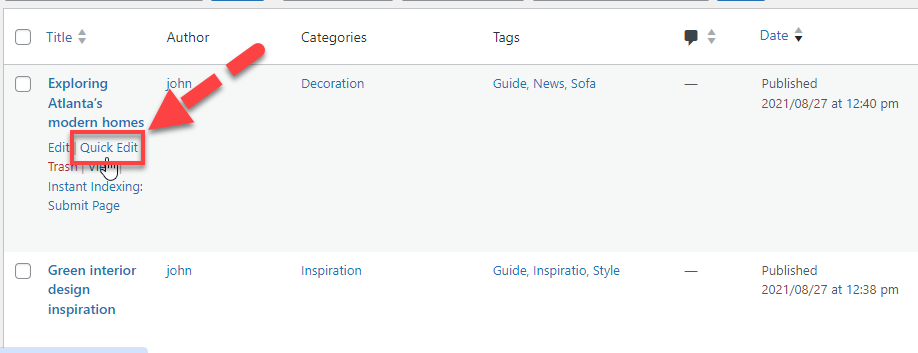
Step 3. Click on Quick Edit
Now navigate for the posts whose link you want to customize. Then click on the “Quick Edit” after moving the cursor on it.
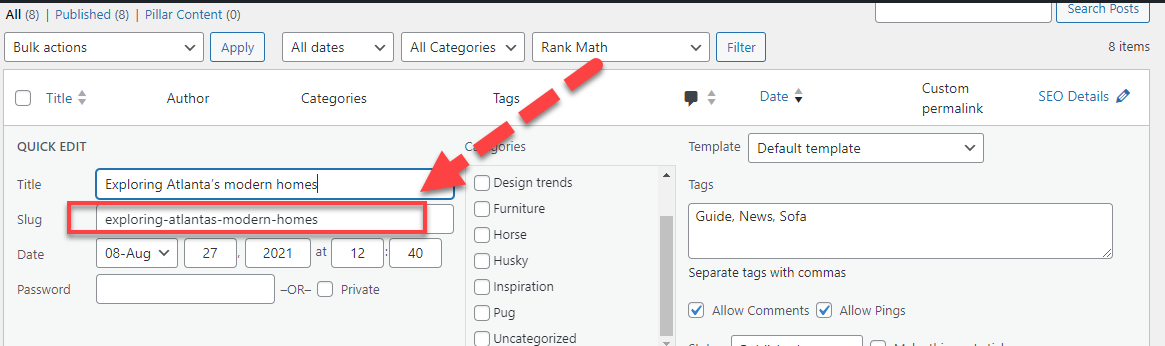
Step 4. Change Slug According to Keyword
You may change the slug. But the title will be your slug. You change according to your needs. Date of publication may also be changed.
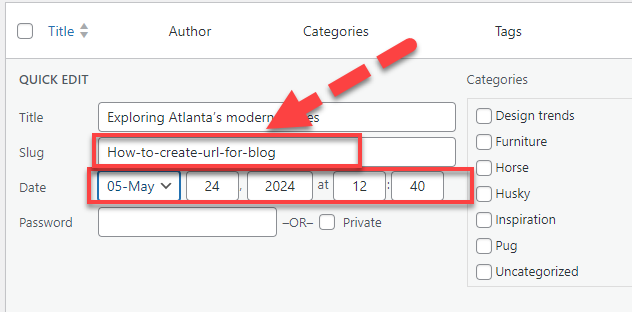
Have a look at the changed slug according to our keyword. “How-to-create-url-for-blog”.
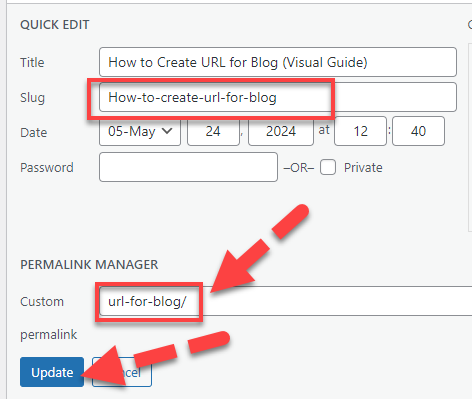
Step 5. Set Up the Desired URL
Now I customize the url for the blog. I am using the main keyword “url for the blog” after the domain in the keyword. When you are done with the customized short url you can click below the “Update” button.
Step 6. Click on View to Check URL
Now in order to confirm that the url has changed or not, you need to click on the “View” button.
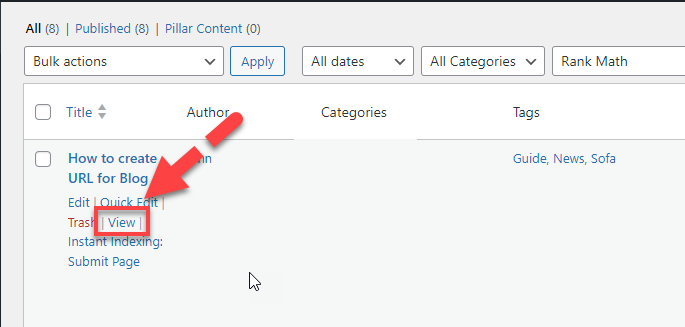
Now look at the url we have created above. Congrats! The URL has been customized and shorten successfully.

Method 2: How to Create Customized URL by Using Bitly
Creating customized URLs using Bitly is a great way to make your links shorter, cleaner, and more professional. Bitly is an excellent tool for shortening and customizing URLs for free. It’s easy to use and provides valuable link analysis.

Follow these simple steps to shorten and customize your URLs with Bitly.
Step 1: Create a Free Bitly Account
1. Sign Up: Go to the Bitly website and sign up for a free account.
With the free account, you can create up to 50 custom backlinks and 1,000 links with unlimited clicks.

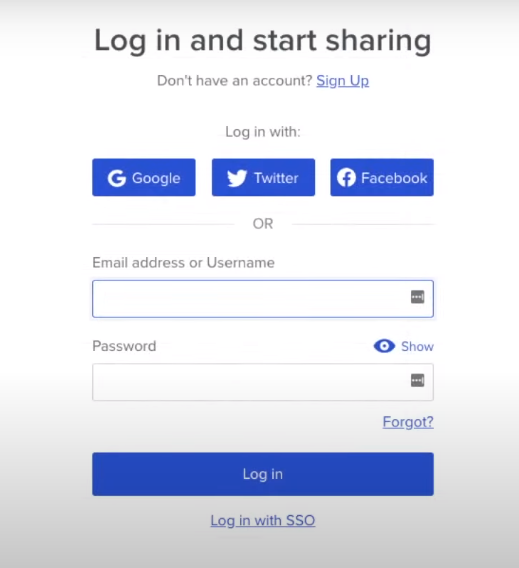
2. Log In: After creating your account, log in to the Bitly dashboard.

Step 2: Access the Dashboard
1. Navigate to Dashboard: Once logged in, you will see your dashboard with all your links displayed on the left-hand side.

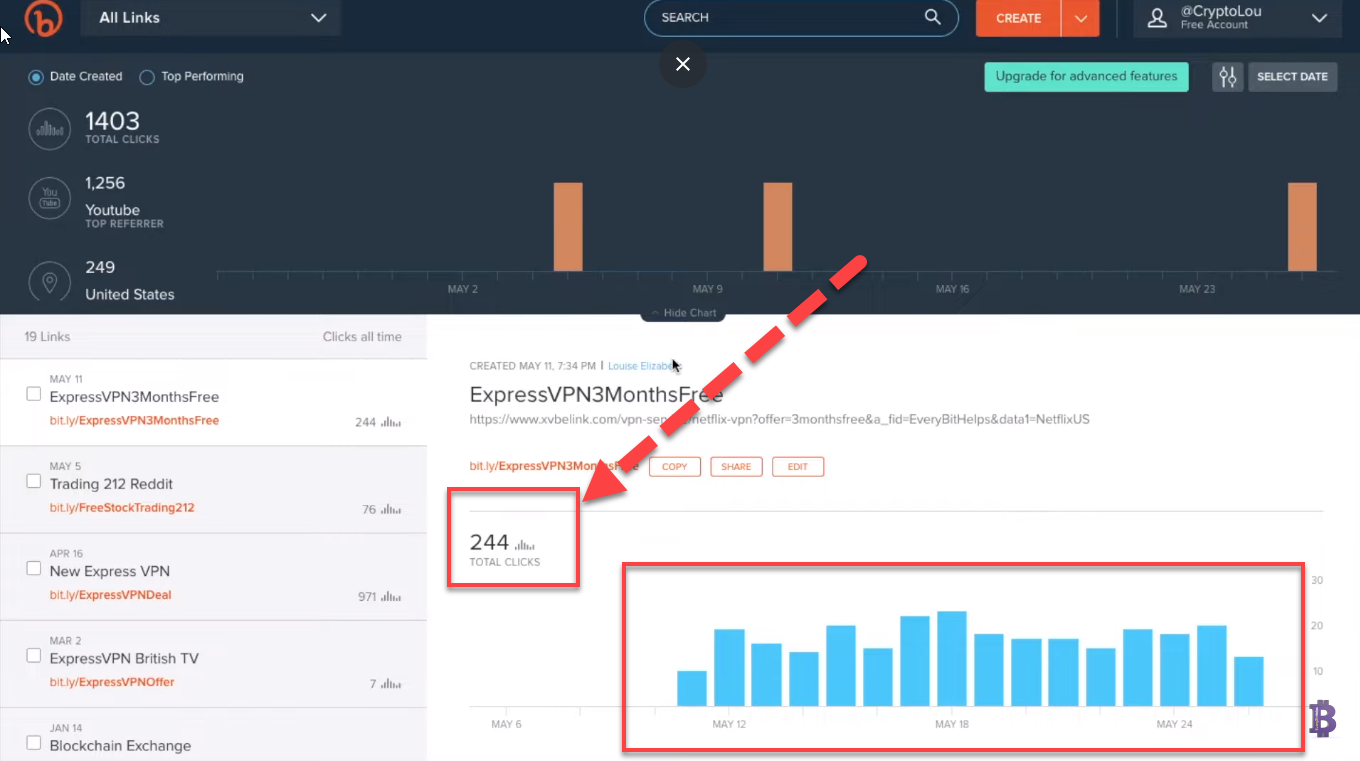
2. Link Analysis: At the top of the dashboard, you can view the analysis of your links, including the number of clicks and other metrics.
Step 3: Shorten a Long URL
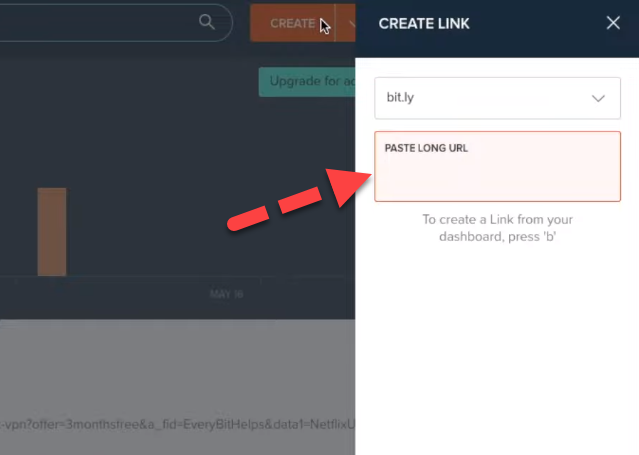
1. Create a New Link: Click on the orange "Create" button on the dashboard.

2. Paste Your URL: A window will appear asking you to paste your long URL. Copy the URL you want to shorten (e.g., One Smart Sheep blog link) and paste it into the provided field.
Step 4: Customize Your Link
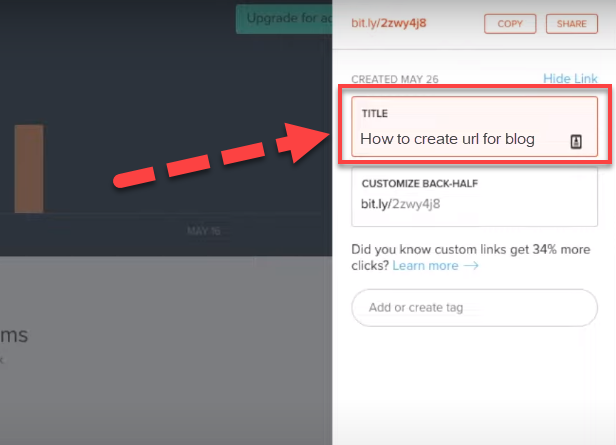
1. Enter a Title: After pasting the URL, you can enter a descriptive title for your link.
2. Automatic Shortening: Bitly will automatically generate a shorter link composed of random letters and numbers.
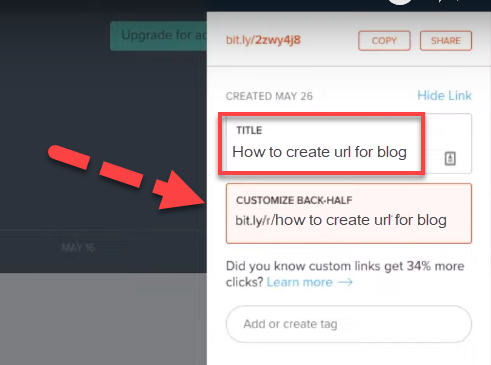
3. Customize Back-Half: To make the link more descriptive, customize the back-half of the URL. Ensure it is unique; if it’s already taken, Bitly will notify you.
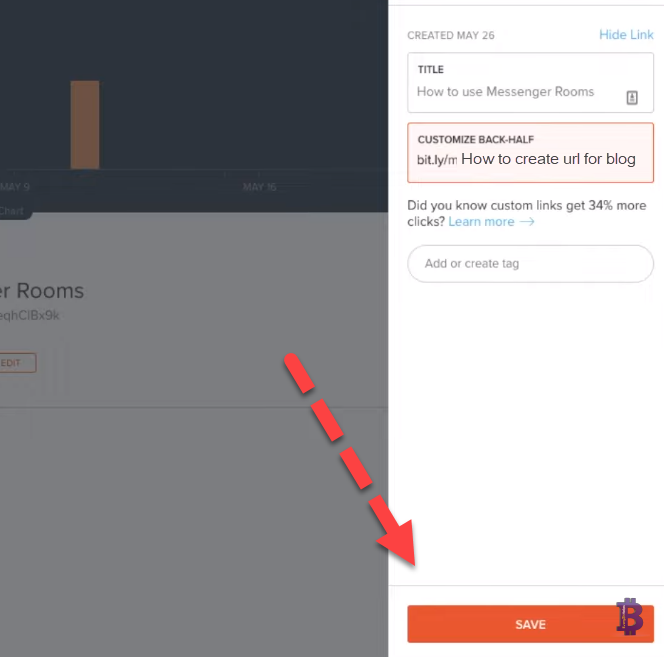
4. Save Your Link: Once satisfied with the customization, click "Save".
Step 5: Share Your Customized Link
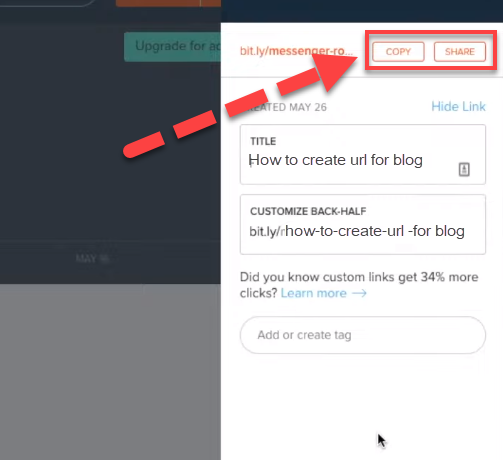
1. Copy or Share: After saving, you can either copy the shortened link to your clipboard or directly share it via social media platforms like Twitter or Facebook.
2. Save and Exit: Once done, save your changes and exit the customization window.
Step 6: Analyze Your Link Performance
1. View Link Analysis: Back on the dashboard, you can analyze the performance of your shortened links. Bitly provides insights into the number of clicks, referral sources, and geographical locations of the clicks.

2. Monitor Performance: Regularly check the analysis to understand where your traffic is coming from and how your links are performing.

Additional Tips
- Free Account Limitations: With a free Bitly account, you cannot edit the destination URL once it is set. If you need this functionality, consider upgrading to a paid plan.
- Professional Appearance: Bitly is widely recognized, so don’t worry about users being wary.
Why Do We Need to Customize the URL for Blog?
- Enhanced Readability:
Customized URLs are shorter and cleaner, making them easier to read and remember.
- Professional Appearance:
Customized URLs look more professional, which can improve the perception of your brand or content.
- Improved Click-Through Rates:
Users are more likely to click on a URL that looks trustworthy and relevant to the content they are interested in.
- Better Branding:
Including keywords or brand names in your URLs helps reinforce your brand identity.
- Easier Sharing:
Short and customized URLs are easier to share across different platforms, including social media and emails.
- Trackable Metrics:
Customized URLs can be tracked more effectively, providing better insights into link performance and user behavior.
- Avoids Broken Links:
Shortened URLs are less likely to break when copied and pasted, ensuring that your links remain functional.
- SEO Benefits:
Although URL shortening itself doesn't directly impact SEO, having a clean and descriptive URL can improve user experience, which indirectly benefits SEO efforts.
Wrapping Up
If you want to Create customized URLs for your blog it is essential for enhancing readability, improving your professional appearance, and boosting click-through rates.
By following the two methods outlined—using the "Permalink Manager Lite" plugin or Bitly—you can create short, memorable, and trackable URLs that align with your branding and SEO strategies.
These custom URLs are easier to share, avoid broken links, and provide valuable insights into link performance.
Whether you choose to use a plugin or Bitly, customizing your URLs can significantly improve your blog’s user experience and search engine optimization.


.svg)