


How often have you pondered how to change the font color in WordPress, ensuring your text communicates and captivates? Let’s take a simple stroll through the world of color.
Interestingly, studies by Joe Hallock and Colorcom show a whopping 42% of folks picking calm and cool blue as their top color. Seems like people everywhere just can’t get enough of peaceful, easy-on-the-eyes shades.

You will learn four ways to change the font color in WordPress:
- Change font color in WordPress with CSS code
- Customize theme to alter font color
- Adjust font color using Classic Editor
- Modify font color in Elementor Page Builder
We will provide step-by-step guide with screenshots, and we will also show you how to find color codes online and use them in WordPress in the second method.
By the end of this guide, you will be able to change the font color on your WordPress site with confidence, using the best method for your needs.
Method #1: How to Change the Font Color in WordPress Using CSS Code

Altering the font color in WordPress using CSS code enhances website aesthetics, ensures readability, and can strategically draw visitor attention to key content. A well-chosen color scheme not only elevates design but also improves user experience and, potentially, conversion rates.
Let's delve into a straightforward 5-step guide, complete with clear screenshots, to explore how you can utilize Additional CSS codes to modify the font color in WordPress.
Step #1: Visit Your WordPress Dashboard
To effectively manage your WordPress site without losing data, it is essential to access your dashboard. This is your primary gateway to all backend tasks, providing you with insights and control over your site's content, appearance, and functionality.
To reach your dashboard, navigate to the WordPress Administration Section by adding "/wp-admin" to your site's URL. For example, if your site is named "example.com," you would go to "example.com/wp-admin."
Once you land on this page, you will be presented with a login screen. Enter your assigned username and password carefully to avoid login errors.
After entering your credentials, click the "Login" button. A successful login will take you directly to your dashboard.
Now, you are ready to explore the rich array of features and customization options that WordPress offers, enabling comprehensive site management and personalization.

After clicking the login button, you'll gain access to your WordPress site's dashboard. Here, you can make and customize changes, which will be visible on your site once updated.

Step #2: Select the Post For Changing Its Font Color
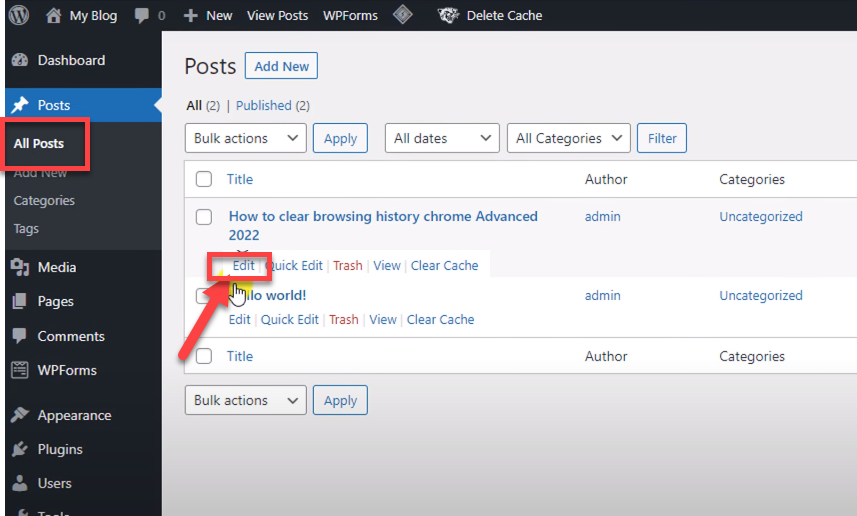
From the dashboard, head to 'Posts' and select 'All Posts.' Upon clicking, you'll view all published and draft posts on your website.
Choose the post with the font you wish to alter and click the 'Edit' button below the chosen post.

Step #3: Visit the W3school Website for Picking Color Code
Now, select your desired color code to alter your WordPress website's font color. This code changes the original font color chosen during website installation without impacting speed and performance of WordPress.
To obtain a color code, visit the W3Schools website, copy your chosen color code, and utilize it as needed.
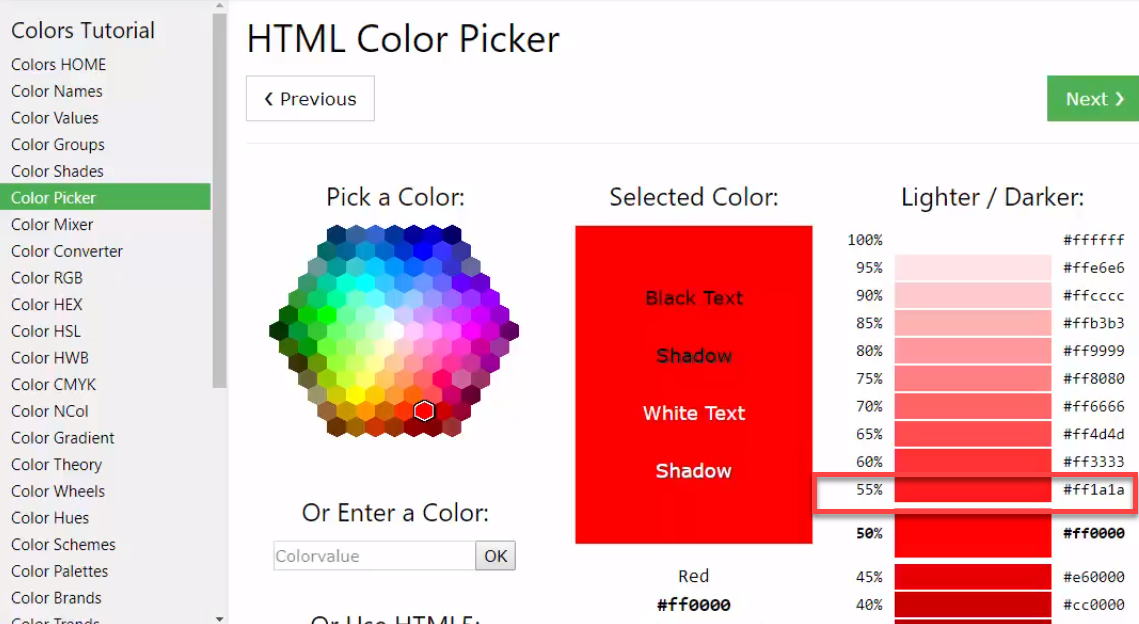
Each color is associated with a specific code. You can either memorize this brief code or, to avoid any critical error, opt to copy it.

Step #4: Paste the Color Code in Additional CSS
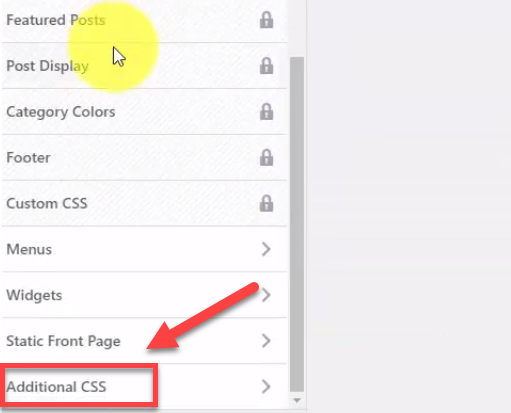
To apply the color code copied from W3School, insert it into your CSS code. Navigate to 'Appearance' on the dashboard, which is typically situated mid-way on the left side of your screen.

Upon selecting 'Appearance,' a popup window with various options like theme, widget, header, customize, and editor will appear. Your next step is to click on 'Customize.’

Clicking on 'Customize' brings you to a new page where you can modify posts and display settings. As we're focusing on changing font color in WordPress, you need to locate the 'Additional CSS' option.
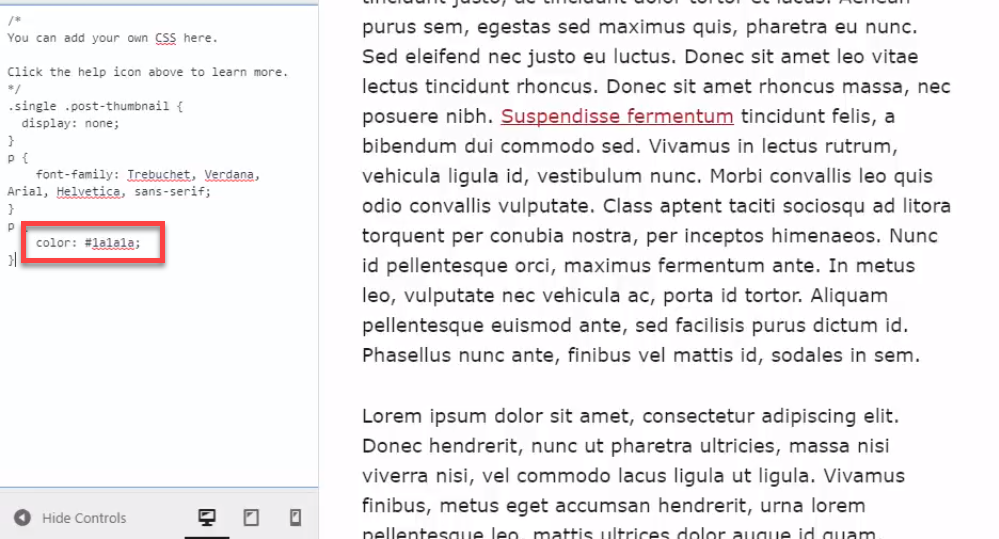
Selecting 'Additional CSS' will reveal a sidebar related to your chosen post. Here, insert the copied color code into the CSS code body as follows:

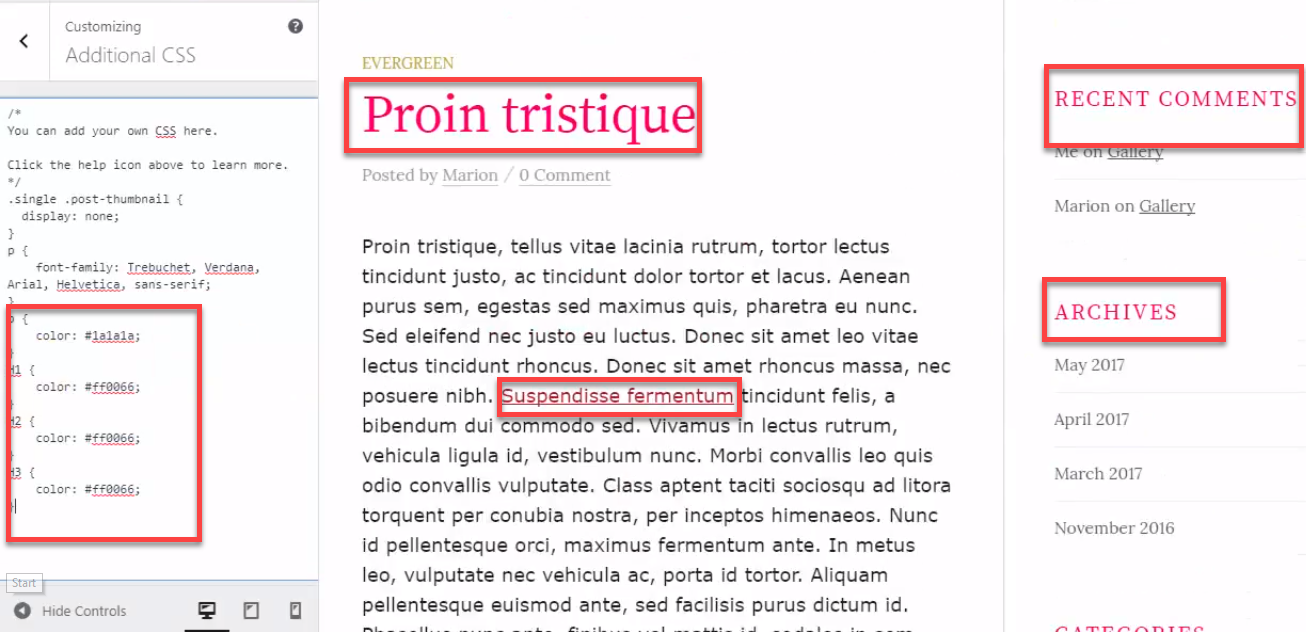
Step #5: Examine the Font Color Changes
To visualize the impending changes, paste the color code for H1, H2, and H3 as well. Observe the font color change to pink as the code is input.
Method #2: How to Change the Font Color in WordPress Using Customize Theme
Changing the font color in WordPress using the Customize Theme option ensures that your website maintains a coherent and brand-aligned visual aesthetic. User experience and readability directly influence user engagement and time spent on your site.
Embark on a simple journey with a 5-step guide, enriched with concise screenshots, to learn how you can adeptly employ the Customize blog Theme feature to alter font colors in WordPress.
Step # 1: Click on Appearance and then Customize
In this phase, your task is to direct your attention to the 'Appearance' option within the dashboard. Once you click on it, a pop-up materializes.
Your focus should then shift to the 'Customize' option within the pop-up. Engaging with 'Customize' will initiate your journey through the personalization and adjustment of various visual aspects of your WordPress site.

Step # 2: Click on Typography
Upon selecting the 'Customize' option, a fresh page is unveiled before you.
Your next step involves seeking out the 'Typography' option, a task requiring some navigation through the platform.
Upon locating it, a simple click brings you into a space where textual aesthetics can be altered.

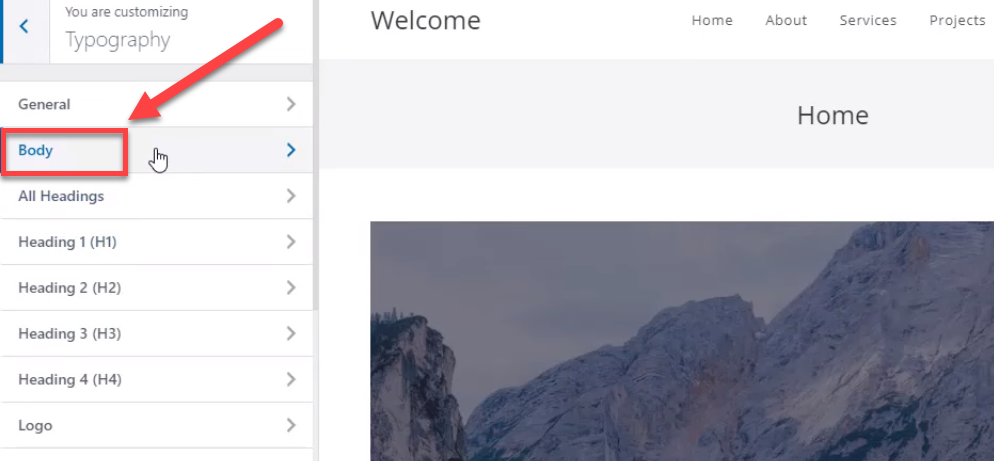
Step # 3: Click on Body
Clicking on 'Typography' unfolds a sidebar, presenting numerous choices like 'Body,' 'All Headings,' 'Heading 1 (H1)', and 'Logo.'
To modify the font across the entirety of the page, opt for 'Body.' But if specific headings or logo text need adjustment, those respective options are your go-to.
Step #4: Select the Color and See the Affect
You're now presented with a suite of options to refine the body text's appearance. Shifting the font style from the default, performing text transformations, and resizing the font are all plausible here.
Since the focal point is altering the font color in WordPress, navigating to and clicking on 'Select Color' (found at the sidebar based on scrolling) becomes the pivotal step.
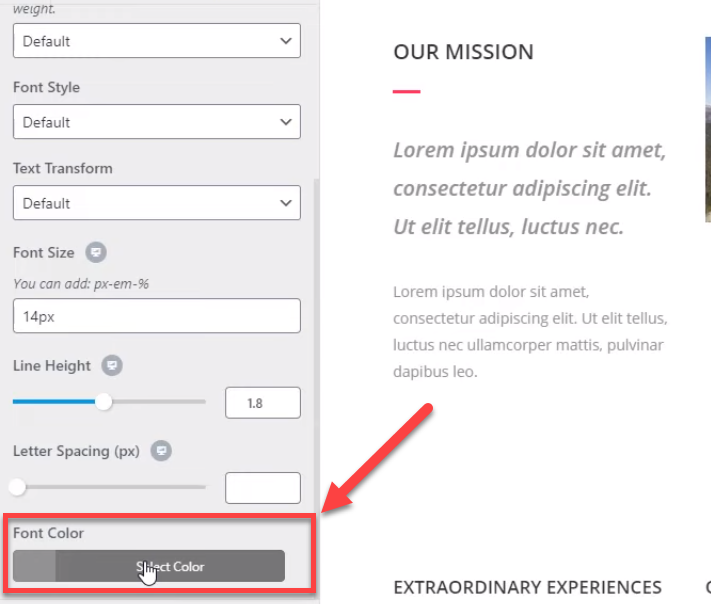
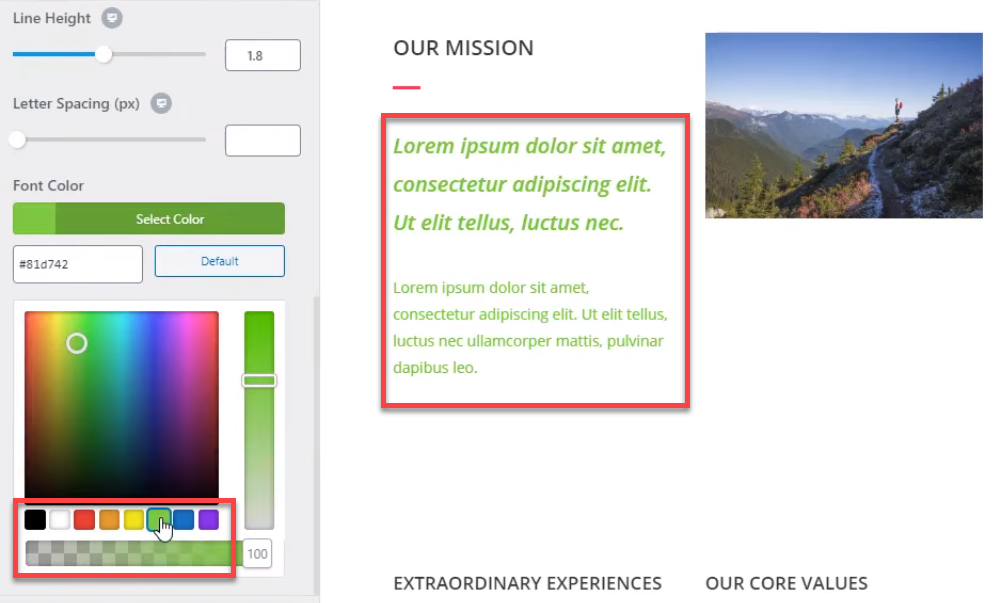
With a click on 'Select Color,' a palette is at your disposal, or an input field for your specific color code, ensuring your website resonates with your desired hue.
Any color selected or code input will reflect on the adjacent preview, allowing you to visualize the change dynamically.
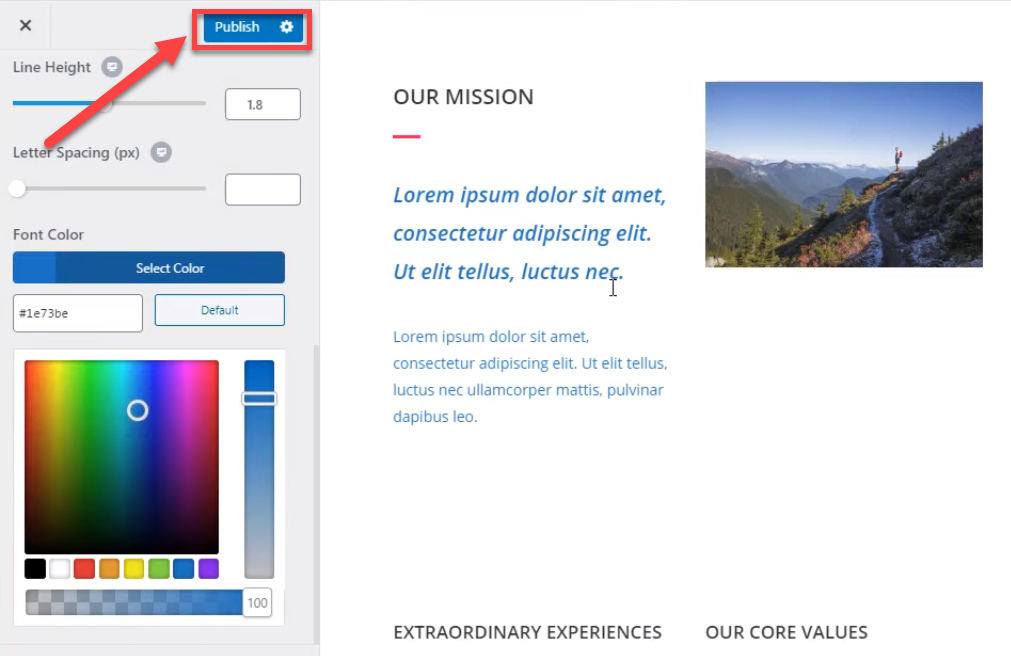
Step #5: Click on the Publish When Color is Selected
Choosing, for instance, a blue hue showcases a real-time preview of how your text will appear post-update.
Should this alteration align with your vision, finalizing the change is as straightforward as clicking on 'Publish.’
Method #3: How to Change the Font Color in WordPress With the Classic Editor
Adjusting font color in WordPress using the Classic Editor enhances website aesthetics and readability, ensuring a user-friendly experience.
Tailoring text hues helps in visually segregating content, emphasizing key points, and aligning with brand identity, thereby improving visitor engagement. Let's discuss the steps using the classical editor.
Step #1: Click on Edit Post
To modify font color using the classic editor, first identify the post you wish to tweak. Navigate to your Dashboard, select 'All Posts,' and then pinpoint the post you're aiming to adjust by clicking 'Edit.'
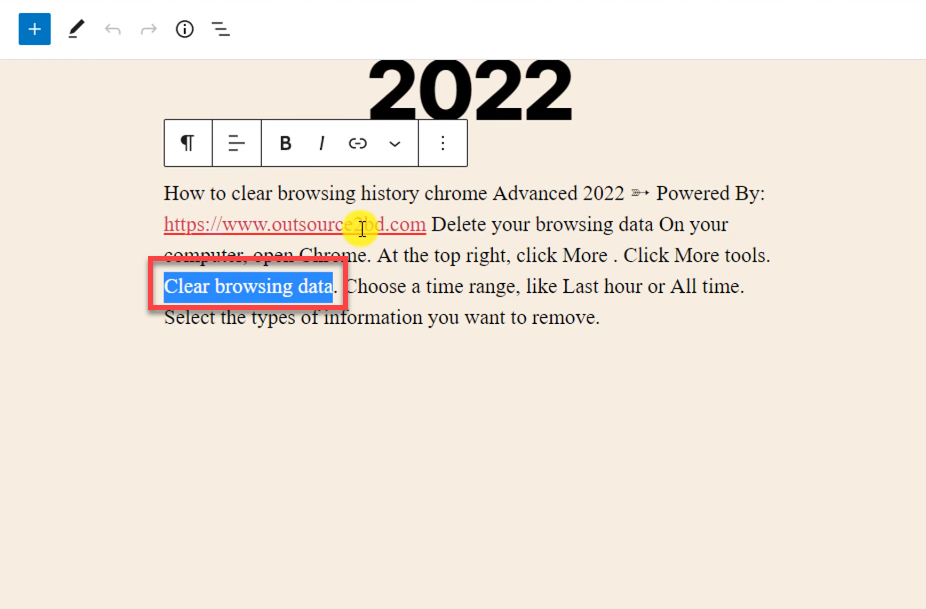
Step # 2: Select the Text
Highlight the text you wish to alter by dragging your cursor across it. In the classical editor, a toolbar appears above your text.
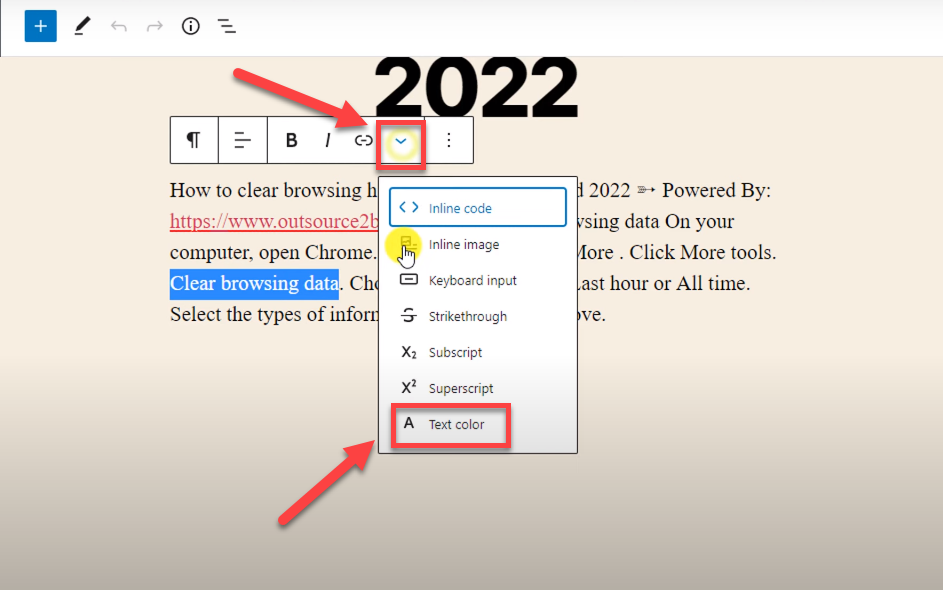
Within this toolbar, locate and click on the dropdown option, which serves as a gateway to more text formatting settings.
Upon clicking the dropdown sign, a popup presents itself, providing various options like adding subscript or inline code.
Within this popup, a 'Text Color' option patiently waits at the bottom, offering the key to further text customization.
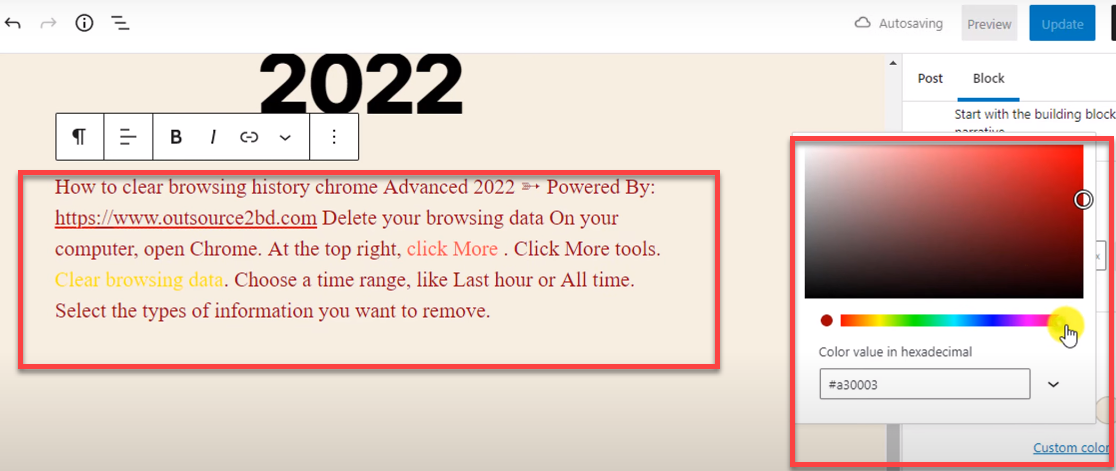
Step # 3: Change the Font Color
Clicking on 'Text Color' opens a concise window within the same screen, presenting numerous color options.
A selection can be made here, with the additional ability to lighten or darken the hue by maneuvering the circular selector. Be sure to click on 'Custom Color.'

As the color morphs, you'll notice the selected text adapting to your chosen hue in real time. For example, selecting a sunny yellow transforms the text into a vibrant, warm tone instantaneously.

Step # 4: Select the Block to Change Whole Text
To adjust the font color for an entire text block, simply click on the desired text to select the block, establishing it as the focal point for your upcoming adjustments.

Step # 5:Click on Block at the Top Right Corner
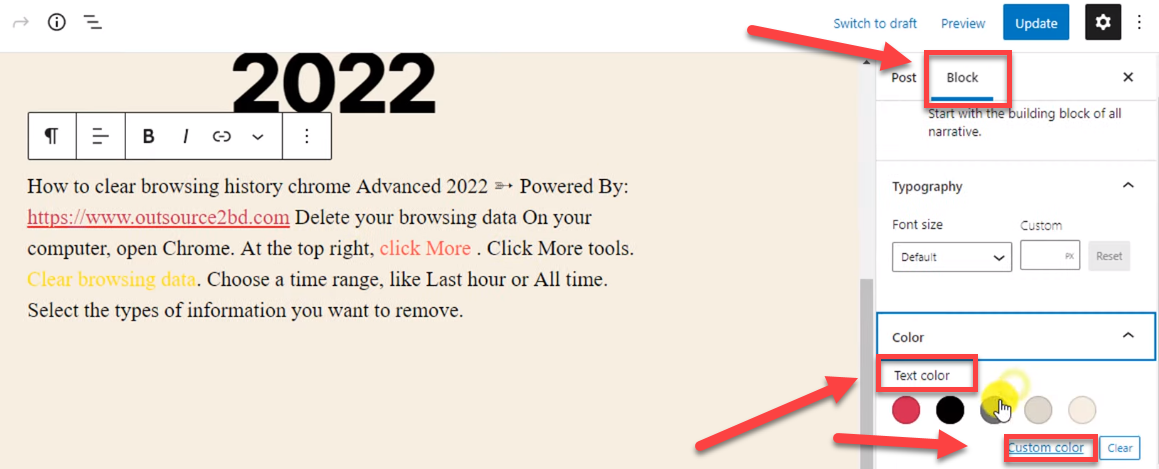
Once the block is selected, direct your attention to the right side of your screen. Click on the 'Block' option, which then unfurls a plethora of choices. Your next click lands on 'Text Color,' followed by a click on 'Custom Color.'
Step # 6: View the Font Color is Changed
Customizing the color of all text within your chosen block can now commence.
Adjusting the color allows you to actively observe the changes, aiding in determining the most aesthetically pleasing option.
Once satisfied, finalize your changes by clicking the blue 'Update' button.
Method #4: How to Change the Font Color in WordPress With Elementor Using Page Builder
Utilizing Elementor in WordPress to alter font colors is pivotal, enabling a match between textual tones and brand identity.
This isn’t simply a visual play; it’s about ensuring textual content is both readable and visually coherent.
With Elementor’s user-friendly interface, modifying text hues becomes not only an effortless task but also an essential step toward enhancing website aesthetics and user engagement. Let’s walk through the visual five steps..
Step # 1: Login to Your Dashboard
Commencing any backend adjustments to your WordPress website mandates an initial visit to your dashboard.
This crucial step ensures that any modifications, when done following the precise steps, maintain the WordPress security of your site without unintentionally triggering vulnerabilities.

Step # 2: Click on Edit with Elementor
Once logged into your dashboard, simultaneously open your website in a new tab. Notably, a bar appears at the very top of the webpage, positioned beneath the Google search bar, designed specifically for interfacing with WordPress's Elementor tool.

Hovering your cursor over the 'Edit with Elementor' option at the website's top will trigger a popup. However, there's no necessity to navigate through the popup options; directly clicking on 'Edit with Elementor' will suffice.

Step # 3: Select the Text
With the 'Edit with Elementor' engaged, your website transitions into a mode that enables edits directly on the homepage.
Since our focal point is modifying font color, first, identify the text slated for a color change by either dragging across it or simply clicking on it.

Step # 4:Select the Color for Text You Selected
Having selected the text, your next move involves navigating to the left sidebar on the same page. Here, select the 'Style' option, which offers a gateway to adjusting text color directly or inputting a specific color code at the sidebar's base.

Step # 5: View the Font Color is Changed
As soon as a color is chosen from the 'Style' option, a visible change in the text color confirms the functionality.
Should the color meet your expectations and you wish to implement it on the website, solidify the adjustment by clicking the 'Update' option located at the page's bottom.

Wrapping Up
The meticulous process of changing font color in WordPress emerges not merely as a technical task but as a multifaceted strategic approach towards optimizing user experience and elevating visual coherence.
The exploration of diverse methodologies, encompassing CSS Code alteration, Customize Theme functionality, Classic Editor adjustments, and the robust capabilities of the Elementor Page Builder, highlights WordPress's versatility in facilitating nuanced personalization of textual content.
Consequently, this transcends mere aesthetic augmentation, seamlessly intertwining with brand resonance and user engagement.
The applicability of each method is subject to individual preference and requisite, underscoring the importance of selecting a pathway that synergizes with your technical acumen and website's intrinsic needs.
FAQs
Can I change the font style in WordPress?
Absolutely. In WordPress, you can change the font style using customizers in many theme plugins or by adding custom CSS. If your theme doesn't have font options, plugins like "Easy Google Fonts" can assist.
What is the default theme font in WordPress?
WordPress doesn't have a universal default font. Instead, the default font is determined by the active theme. Popular themes like "Twenty Twenty" or "Twenty Nineteen" have their specific default fonts.
Is there a shortcut to change the font color?
Yes, in many software or editors, there are shortcuts. For instance, in Microsoft Word, you can use the shortcut "Ctrl + D" to open the font color dialog. The exact shortcut may vary depending on the program.
Why do we change font color?
Changing font color can enhance readability, emphasize important content, evoke emotions, or match a specific design aesthetic. It's a tool to make content visually appealing and more effective.
How do I change font size and color in HTML?
In HTML, you can use inline styles: <p style=" color: blue; font-size:16px;">Your text here</p>. Alternatively, you can utilize CSS in the style section or an external stylesheet for broader applications.


.svg)