


Want to add meta tags to your WordPress site without installing yet another plugin? You're in the right place. In today's guide, I'm going to show you exactly how to add meta tags to WordPress without plugins — step-by-step.
The best part? You don't need to be a coding genius to follow along.
Let's dive right in.
What You'll Learn
- 3 proven methods to add meta tags (with code examples you can copy/paste)
- Why meta tags are critical for your SEO success
- How to avoid common mistakes that can break your site
With that said, let’s go over the process to learn how to add meta tags to WordPress without plugins.
Why Meta Tags Matter for Your WordPress Site
Here's the truth:
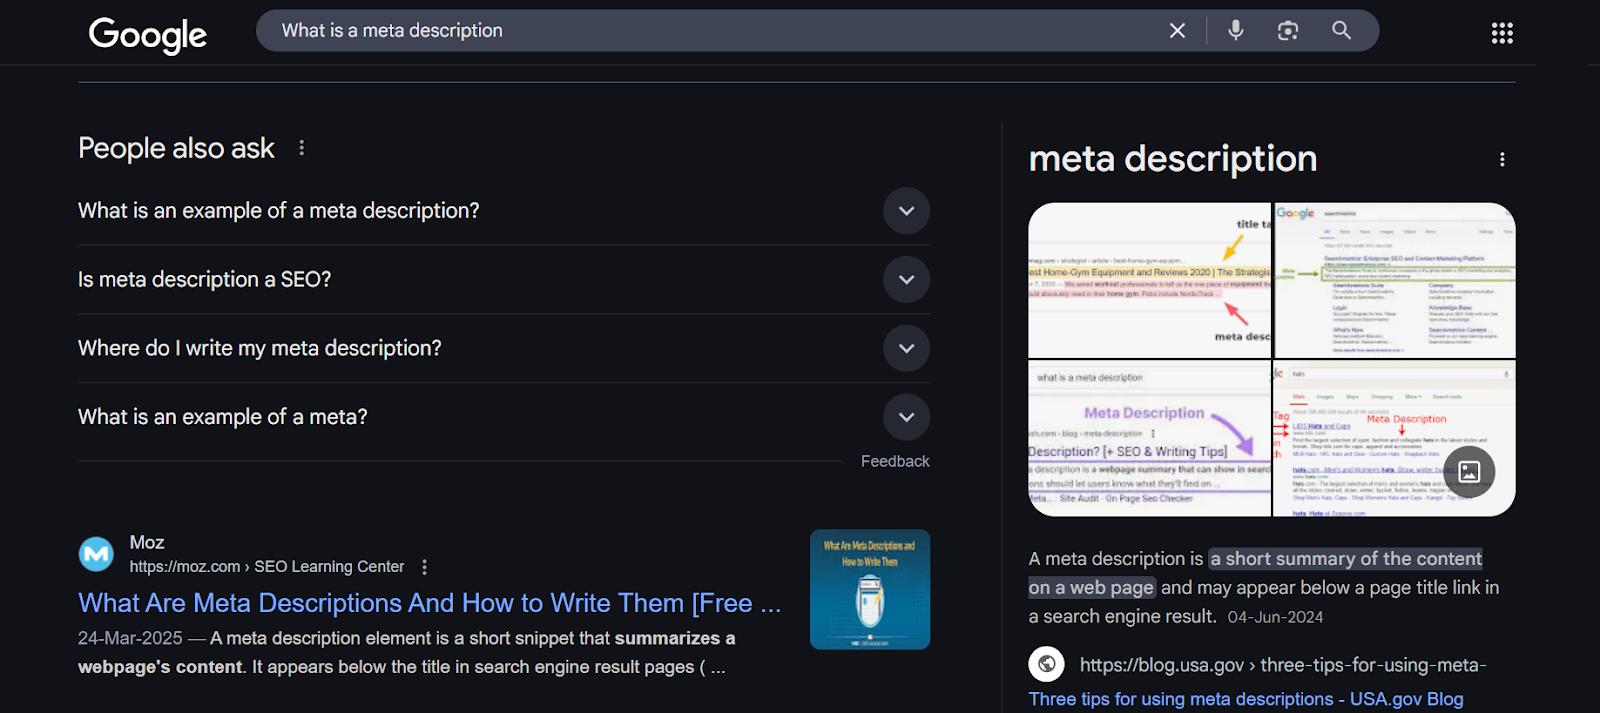
Meta tags are like little pieces of code that tell search engines what your page is about. And they're SUPER important for SEO.
While they might not directly boost your rankings (with the exception of the title tag), meta tags:
- Improve click-through rates by giving users a preview of your content in search results
- Help search engines understand your content better
- Make your content look awesome when shared on social media
In fact, our analysis at Backlinko found that pages with optimized meta descriptions get approximately 5.8% more clicks than those without.
That's a significant traffic boost just from a few lines of code!
The WordPress Meta Tag Challenge
Here's the problem:
WordPress doesn't give you an easy way to add meta tags to your posts and pages out of the box.
Yes, WordPress does let you set your site title and tagline in the General Settings. But these aren't proper meta tags.
And while you could install one of the many SEO plugins available, adding another plugin can:
- Slow down your site
- Create potential conflicts with other plugins
- Add bloat to your WordPress installation
That's why I'm going to show you how to add these crucial meta tags manually.
Method #1: The Direct Approach (Editing header.php)
This is the most straightforward method, perfect if you just want to add site-wide meta tags. Here's how to do it:
Step 1: Access Your header.php File
You can do this in three ways:
- WordPress Theme Editor (if available)
- FTP Clients like FileZilla (recommended)
- Web Hosting File Manager
For FTP access (recommended approach):
- Connect to your server using your FTP credentials
- Navigate to /wp-content/themes/YOUR-ACTIVE-THEME/
- Download the header.php file

Step 2: Add Your Meta Tags
Open the header.php file in a text editor and locate the <head> tag near the top.
Then add your meta tags RIGHT AFTER the opening <head> tag:
html
<meta name="description" content="Your compelling website description goes here."/>
<meta name="keywords" content="your, keywords, here" />
PRO TIP: While Google doesn't use the keywords meta tag for ranking anymore, other search engines might still consider it.
Step 3: Get Dynamic With Conditional Tags
Want different meta descriptions for different pages? Here's the code to add:
php
<meta name="description" content="<?php
if (is_single()) {
single_post_title('', true);
} else {
bloginfo('name');
echo " - ";
bloginfo('description');
}
?>" />
This code shows:
- The post title as the meta description on single posts
- Your site name and tagline everywhere else

Step 4: Save and Upload
Save your changes and upload the modified header.php file back to your server. IMPORTANT: Always back up your original file before making any changes!
Method #2: The Power User Approach (Using functions.php)
This method gives you more flexibility and keeps your code better organized.
Step 1: Access Your functions.php File
Access your functions.php file through FTP or your hosting file manager, just like we did for header.php.
TIP: If you're using a child theme (which you should be!), edit the functions.php file in your child theme.
Step 2: Add Your Meta Tag Functions
Here's a simple function to add a description meta tag:
php
function add_meta_description() {
// For single posts and pages
if (is_single() || is_page()) {
global $post;
$excerpt = strip_tags($post->post_content);
$excerpt = str_replace(array("\n", "\r", "\t"), ' ', $excerpt);
$excerpt = substr($excerpt, 0, 160);
echo '<meta name="description" content="' . esc_attr($excerpt) . '" />';
}
// For homepage
elseif (is_home() || is_front_page()) {
echo '<meta name="description" content="' . esc_attr(get_bloginfo('description')) . '" />';
}
// For category archives
elseif (is_category()) {
$category_description = strip_tags(category_description());
echo '<meta name="description" content="' . esc_attr($category_description) . '" />';
}
}
add_action('wp_head', 'add_meta_description');
This function:
- Creates a description from your post content for single posts
- Use your site tagline for the homepage
- Uses the category description for category pages
Step 3: Add More Meta Tags
You can add other meta tags like keywords or author info:
php
function add_meta_keywords() {
echo '<meta name="keywords" content="wordpress, seo, website, blog" />';
}
add_action('wp_head', 'add_meta_keywords');
function add_meta_author() {
echo '<meta name="author" content="Your Name" />';
}
add_action('wp_head', 'add_meta_author');
BONUS TIP: You can combine all these functions into one to keep your code cleaner!
Method #3: The Surgical Approach (Using Custom Fields)
Here’s another method to learn how to add meta tags to WordPress without plugins. This method gives you the most control over individual posts and pages.
Step 1: Enable Custom Fields
1. In your WordPress post editor, click on the "Screen Options" tab (Classic Editor) or go to Options > Preferences (Block Editor)
2. Make sure "Custom Fields" is checked

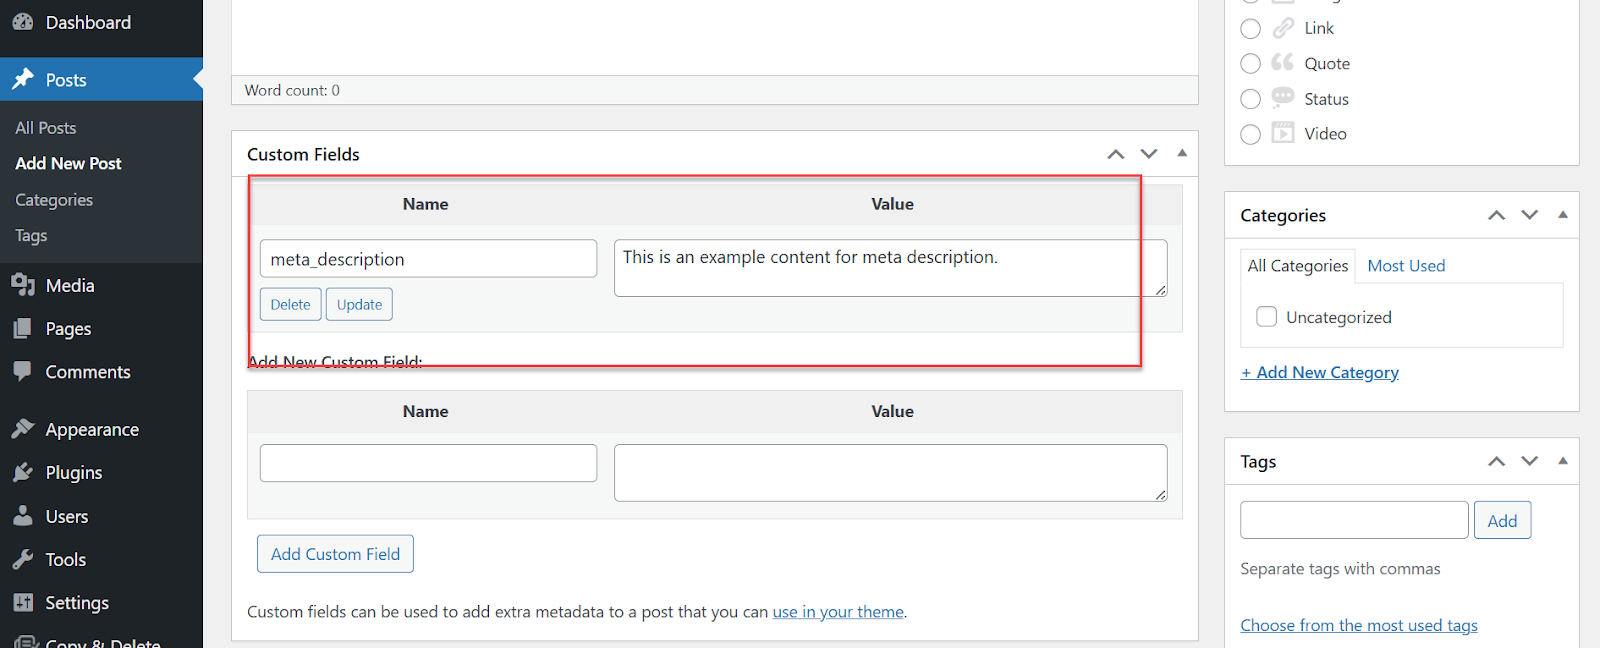
Step 2: Add Custom Field for Meta Description
When editing a post:
- Scroll down to the "Custom Fields" section
- Name it "meta_description"
- Enter your custom meta description in the value field
- Click "Add Custom Field"
Step 3: Add Code to Make Custom Fields Work as Meta Tags
Add this code to your functions.php file:
php
function custom_meta_description() {
if (is_singular()) {
global $post;
$custom_description = get_post_meta($post->ID, 'meta_description', true);
if ($custom_description) {
echo '<meta name="description" content="'. esc_attr($custom_description). '">';
}
}
}
add_action('wp_head', 'custom_meta_description');
Do the same for keywords:
php
function custom_meta_keywords() {
if (is_singular()) {
global $post;
$meta_keywords = get_post_meta($post->ID, 'keywords', true);
if ($meta_keywords) {
// Clean up any messy formatting of keywords
$meta_keywords = preg_replace('/\s*,\s*/', ', ', $meta_keywords);
echo '<meta name="keywords" content="' . esc_attr($meta_keywords) . '">';
}
}
}
add_action('wp_head', 'custom_meta_keywords');
RESULT: Now you can set unique meta descriptions and keywords for every post and page directly from the WordPress editor!
DANGER ZONE: How to Avoid Breaking Your Site
Listen:
When editing your theme files, one small mistake can break your entire site. Here's how to stay safe:
1. ALWAYS Use a Child Theme
A child theme preserves your changes when the parent theme updates.
2. Back Up Before You Begin
Always back up your entire WordPress site before making any changes.
3. Test in a Staging Environment First
If possible, test your changes on a staging site before implementing them on your live site.
4. Document Your Changes with Comments
Add comments to your code to remember what each piece does:
php
// Add meta description tag
function add_meta_description() {
// Code here
}
5. Verify Your Meta Tags Work
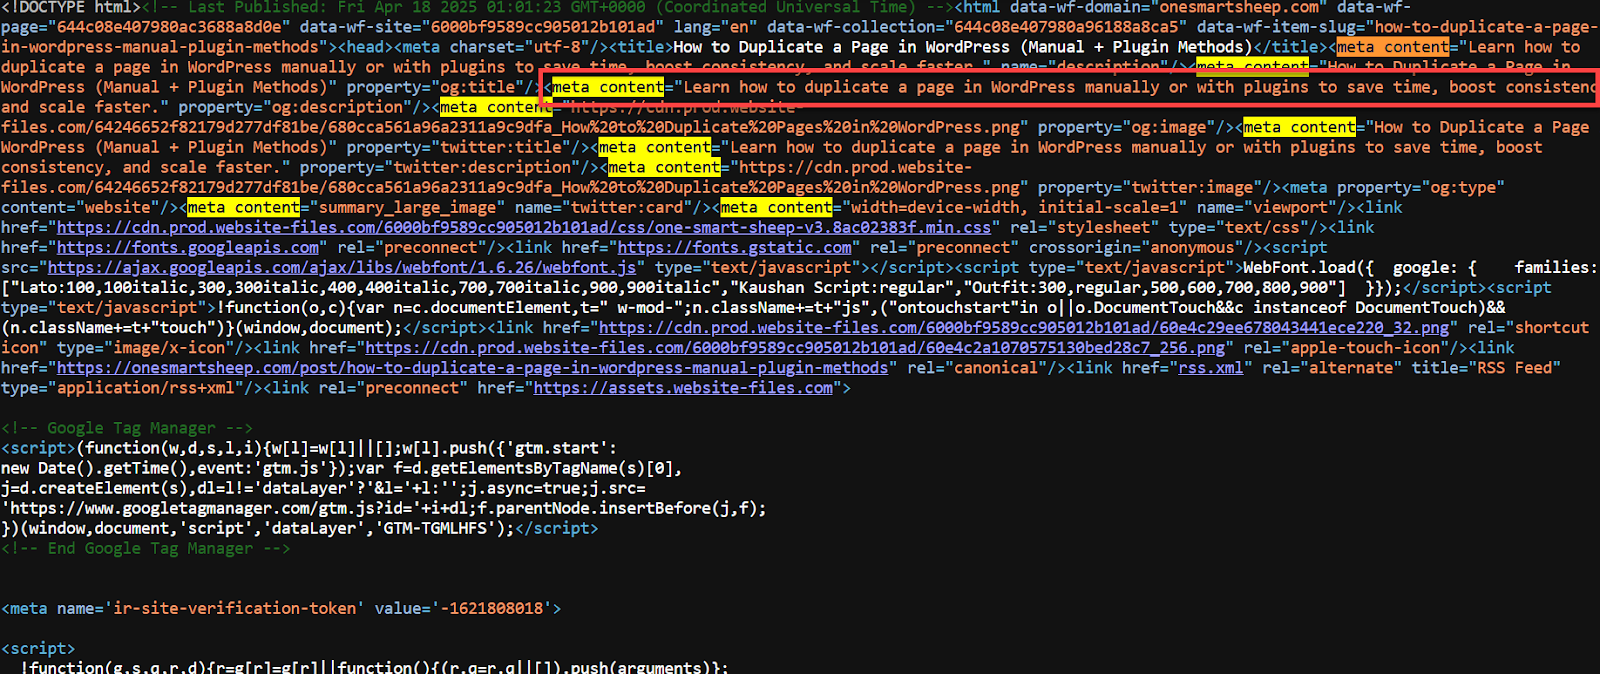
After implementing, check your page source code to confirm your meta tags are there.
Which Method Should You Choose?
Here's a quick comparison to help you decide:
Method Best For Complexity Control Level

Header.php Limited Functions.php Moderate Custom Fields Post-specific tags Intermediate High.
My recommendation:
- If you're just starting out: Use the header.php method
- If you want more flexibility: Use the functions.php method
- If you want complete control over each post: Use the custom fields method
Bringing It All Together
Meta tags might seem small, but they can make a BIG difference in your SEO and social media performance.
By implementing these techniques, you'll:
- Improve your click-through rates from search engines
- Make your content look professional on social media
- Have full control over how your site appears online
And the best part? You did it all without adding another plugin to your site.
Your Action Plan
All in all, these are some of the best days to learn how to add meta tags to WordPress without plugins. Here’s the action plan that you should follow.
- Back up your WordPress site
- Set up a child theme if you haven't already
- Choose the method that works best for your needs
- Implement the code snippets from this guide
- Test to make sure everything works correctly
Have you implemented meta tags on your WordPress site? Let me know in the comments! If you want to learn more interesting guides like how to duplicate a WordPress page, then check out the tutorial section of OneSmartSheep.


.svg)